.................................. Return to Sumner's Home Page....
Return to N Scale RR Main Menu.................. Return to Trackwork Menu
=========================================
...............Previous Page......................................Next Page If There Is One
=========================================
…..........................................................…--- “Gravity-Switcher” ---
....--- Weight/Gravity Operated 3D Printed Switch Machine ---
=========================================
You can find all the files to 3D print this object and others on my thingiverse.com account ( HERE ).
This is a manually operated switch machine that sits under the turnout very similar to the 3D printed one that uses a servo ( HERE ). I've thought about it for some time and finally got around to designing it and trying it out over the last couple days. It uses weight and gravity primarily to move and hold the turnout's points from side to side. There is no need for rods and such going from it to the side of the layout to operate it. One only needs to run a line (fishing line should work) from the machine to the side of the layout. Simple eye hooks will probably suffice and the route doesn't need to be in a straight line from the side of the layout to the switch machine.
Now that I feel good about the concept working I'll work on a single pulley wheel that will be above the weight on one side and a knob and/or a lever assembly that will go at the end of the control line on the side of the layout.
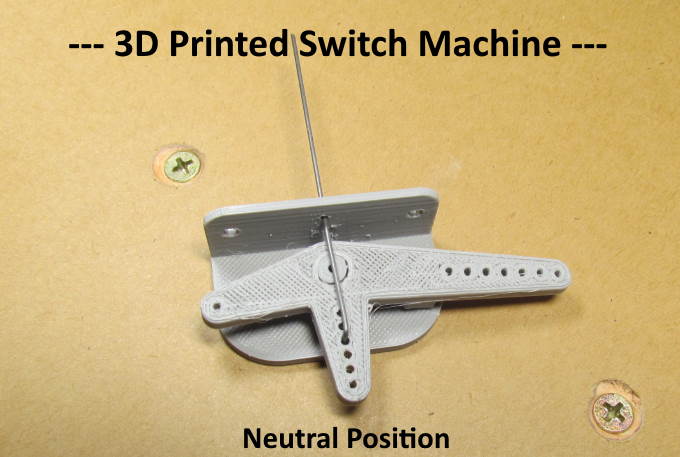
Above are the two main 3D printed parts, the body and the control arm.
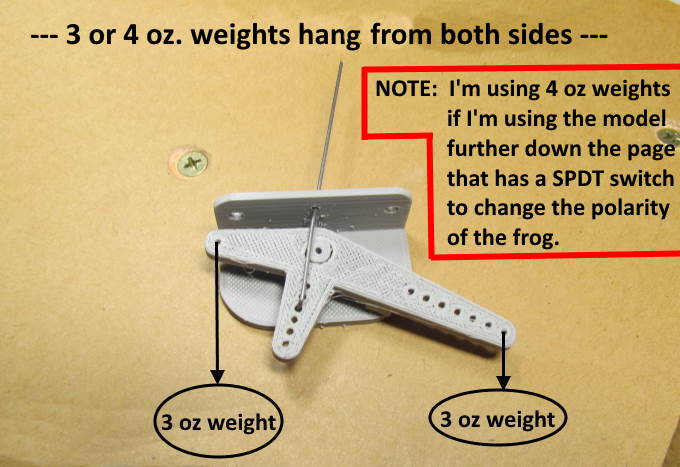
Equal weights are hung from both sides with a simple string. The one on the right will always pull the control rod down on that side since the lever arm to it is twice as long as the one to the weight on the left side.
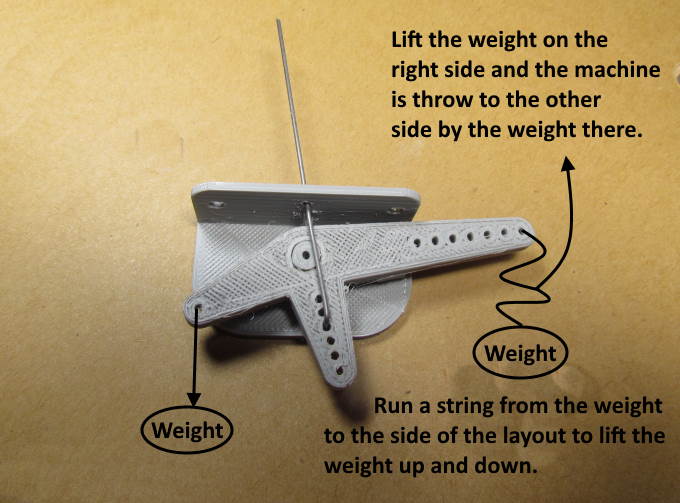
If the weight is lifted on the right side by the line going to the side of the layout the weight on the left side pulls the control arm down on that side throwing the turnout's points to the other side of the turnout.
You can control the throw distance and the pressure on the switch points by which hole you place the music wire in on the center arm. Of course how much the weights weigh also effects the pressure on the switch points also. I would setup a test stand and see what works best for your situation.
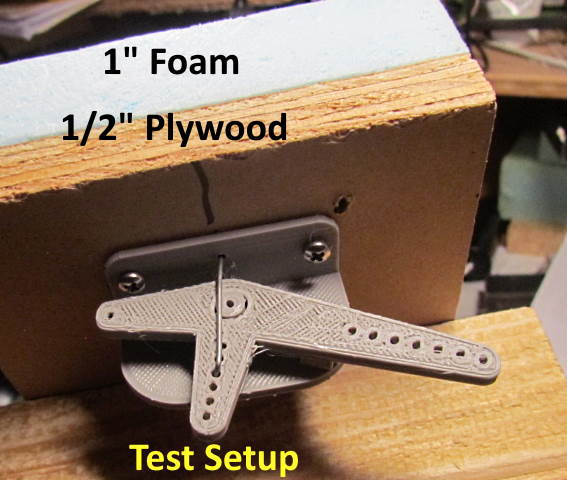
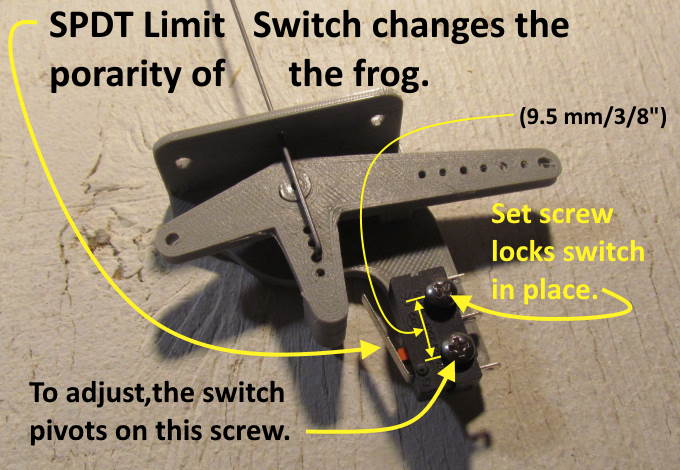
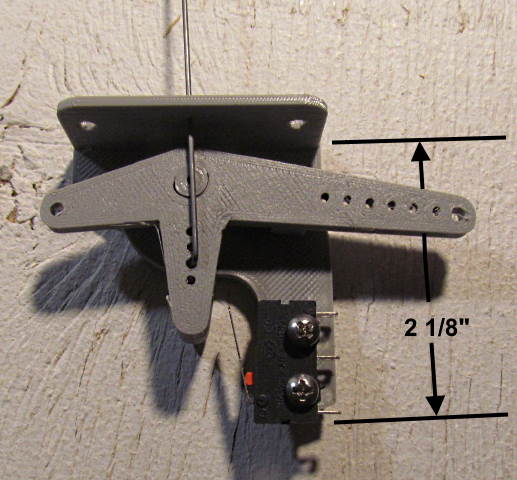
I installed the switch machine on the same test setup I use for the servo operated machine I made earlier this year ( HERE ). A mount is coming that will position a SPDT switch where when it is hit by the control arm it will change the frog polarity if that is needed.
With both weights hanging freely the machine throws the points to the right as shown above.
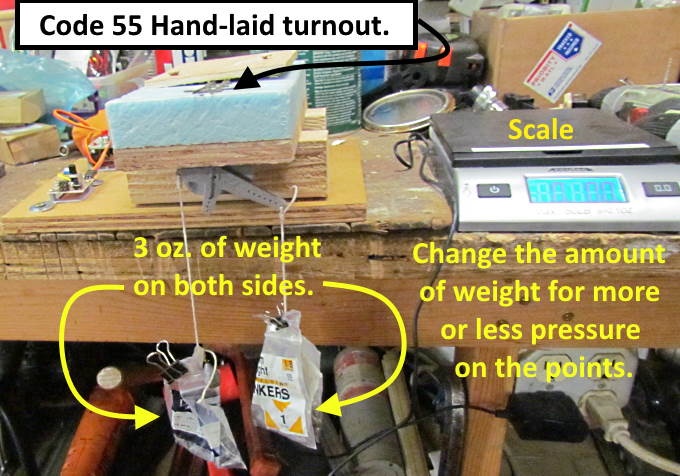
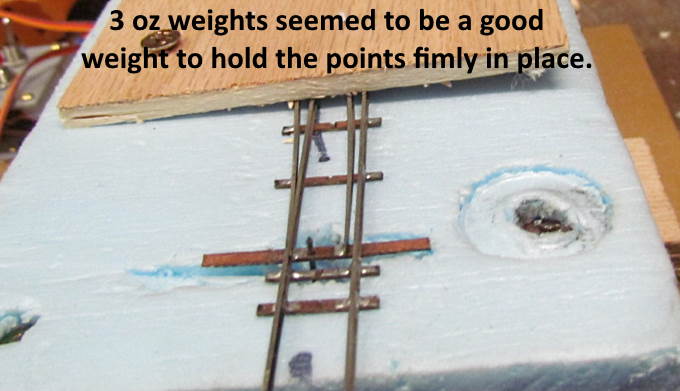
I tried some different weights and came to the conclusion that for the hand-laid turnout I was using 4 oz. on each side seemed to do a good job of holding the points in place very similar to how I setup a servo controlled turnout. One could try different weights for their situation.
I found a good source for 4 oz. and other size weights on the internet where if I bought 8 lbs. worth the cost per turnout would be about $1.50 (I see they are less when I write this 03-29-21). Not a bad price for turnout control as if you have a printer or access to one these switch machines would come in at under $2.00 each. Source for weights was Plum Bum Casting Co. and I bought 4 oz. 'egg weights' ( https://www.pbcastco.com/product-page/egg-sinkers-sold-by-the-pound )
With the 4 oz. weights I used when I pushed the throwbar with a finger it snapped right back into place. Adjust the weights for what you like.
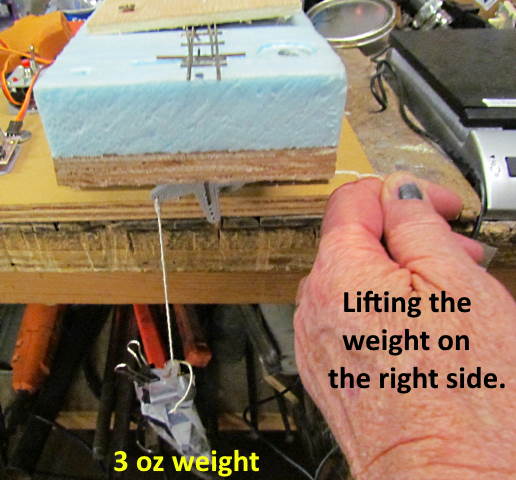
To throw the points lift the weight on the right side. Here I'm doing it by hand but it could be done with a simple line to the side of the layout. Pretty low-tech.
NOTE: On the following pages I'll introduce a couple different methods you could use to activate the switch machine. Remember, you only have to lift the one weight just enough for the other weight to pull down and switch the machine to the other position. You can lift it further with no harm being done. This means that whatever method you use to lift the weight and throw the machine doesn't have to be very complicated or accurate.
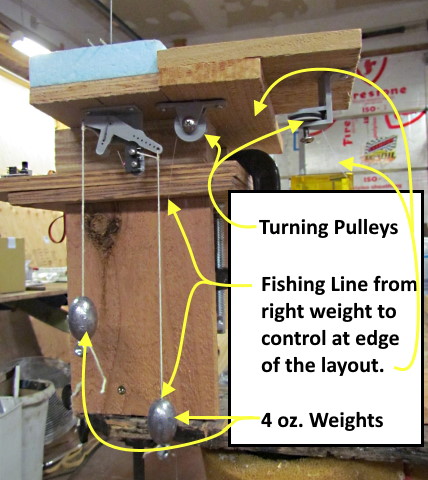
In the picture before the one directly above I was lifting the weight with my hand. In operation there will be a lifting line from the weight going to the side of the layout as shown above. At least one turning pulley will be required to change the direction of the line from vertical coming off the weight to a horizontal run to the side of the layout. Above you can see one of the two pulleys I was using with my test rig to redirect the line to the side of the layout. It is the upper right pulley in the picture. You could use a number of pulleys to get from the turnout to the side of the layout.
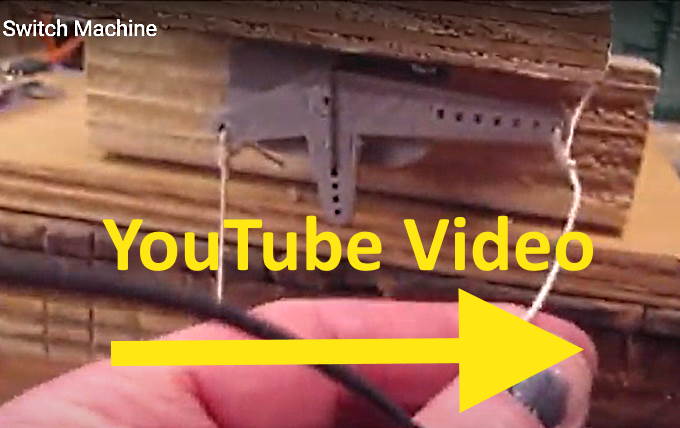
I've posted a short video on YouTube ( HERE ).
Above a mounting location for a SPDT switch has been added to the bottom of the switch machine. Using it allows you to change the polarity of the frog as the points move. I've found these limit switches from a number of places and as low as $.50 each are less. Look for ones with the 9.5mm/.374” center to center distance between the screw holes.
I've designed pulleys to route the control line from the weight up and over the first pulley and then to the side of the layout ( HERE ) but simple eye hooks might also work.
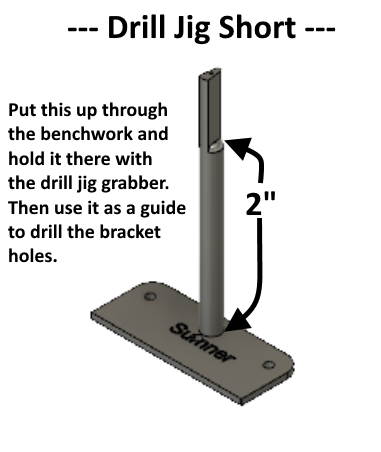
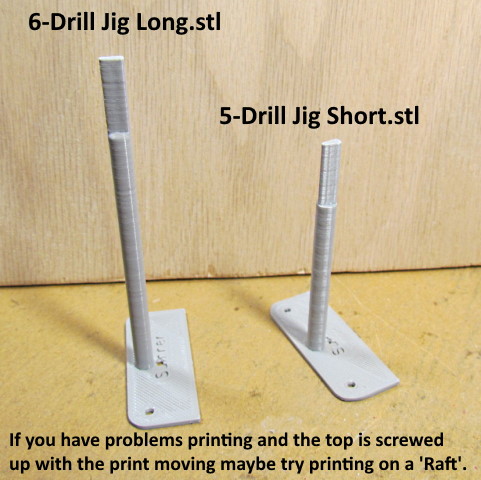
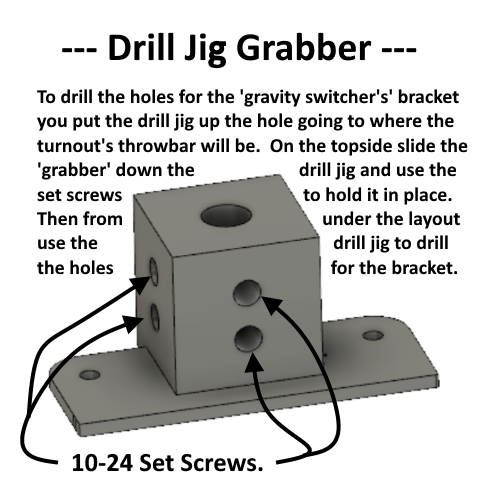
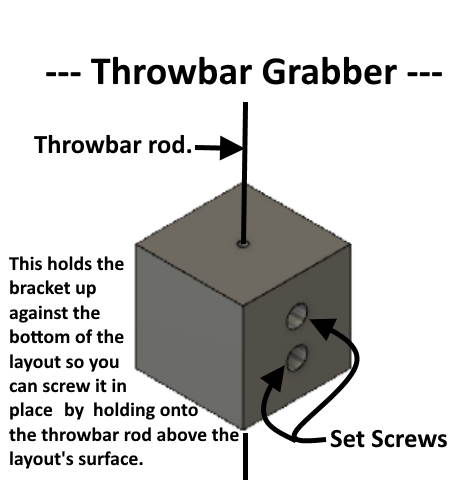
I've added some tools you can print to make installation easier.
.
.
.
.
.
You can find the files to print the items on this page only ( HERE ).
You can find all the files to 3D print this object and others on my thingiverse.com account ( HERE ).
=========================================
...........................On..............e.........Next Page If There Is One