.................................. Return to Sumner's Home Page....
Return to N Scale RR Main Menu........ Return Roundhouse Menu
=========================================
..............Previous Page..............................Next Page If There Is One
=========================================
.............--- Roof and End Walls ---
This page is a continuing overview of the roundhouse. I will go into more detail starting with the next page with a list of the printable files and descriptions of each.
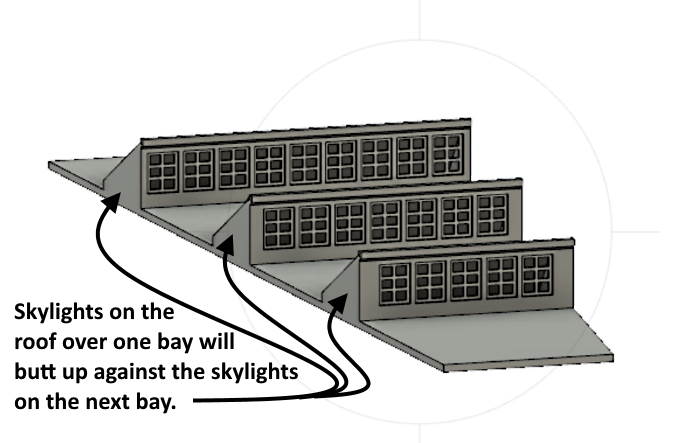
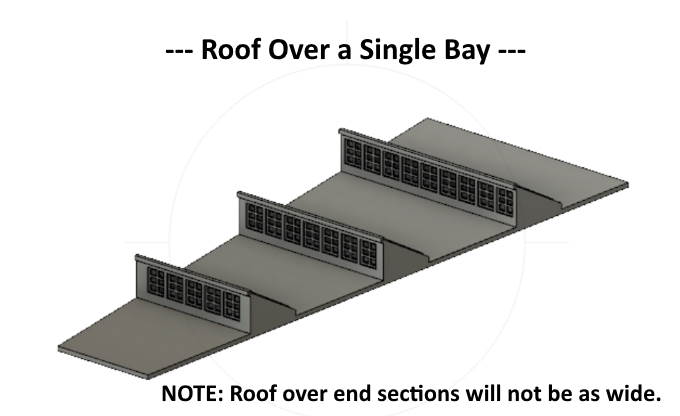
Above is a view of a roof section that would be over each of the bays. I have the skylights designed and have printed them. They can be glued to the roof which I hope to make with a single sheet of styrene. I still want to add smoke vent/smoke jacks that can be glued above each bay.
The finished skylights are slightly different than those above and there will be pictures on a following page. They are a variation of the ones I designed that can be added to any building and you can find those ( HERE ). The roundhouse skylights have angled ends so they butt up against the skylights on adjoining bays.
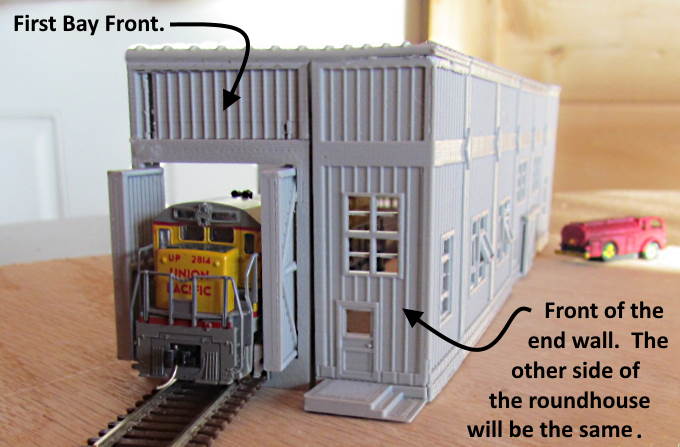
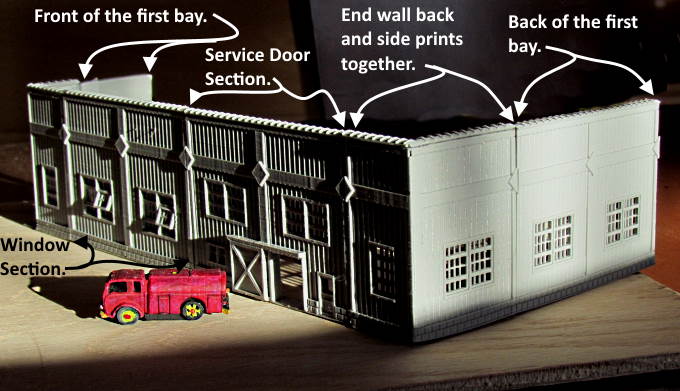
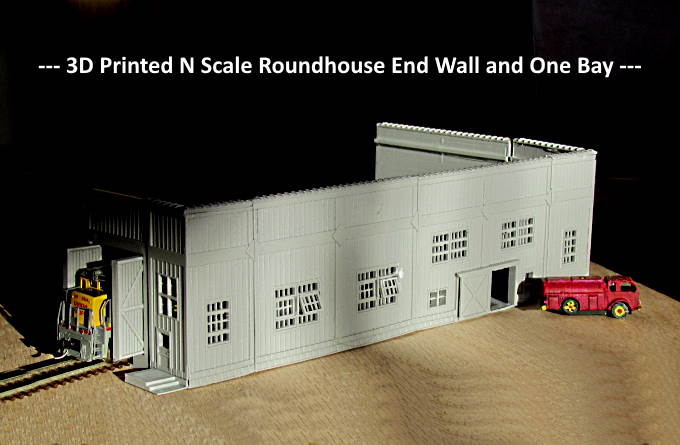
Above we can see one bay on the left and the front of the building with the end wall and an entrance door at the front. The two sections have not been glued together for the picture at this point.
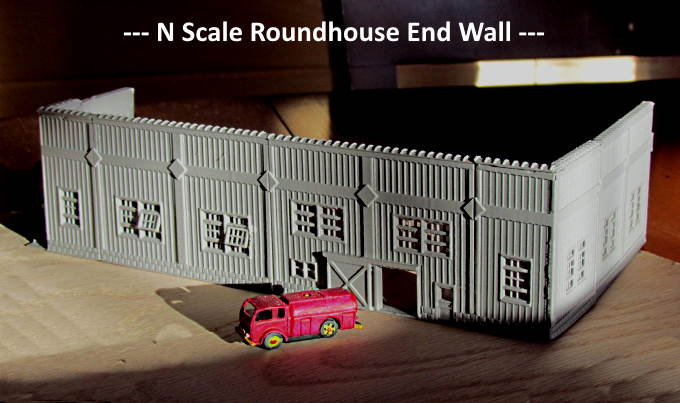
The end walls consist of four sections. In the middle of the wall are two sections that can be used interchangeably. One has windows that can either be all closed or you can use a print where some of the windows are printed individually and put in partially open.
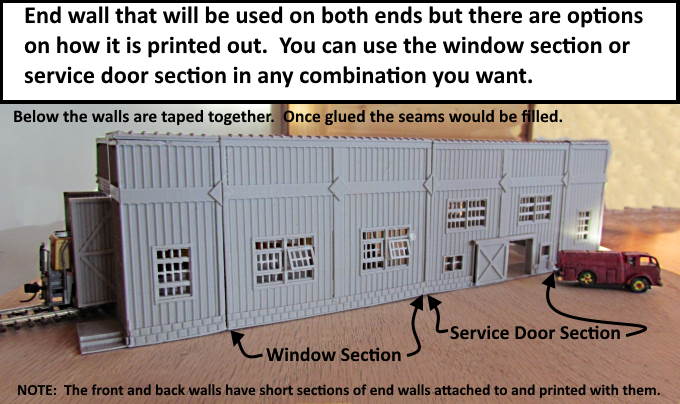
Another section has a service door where items can be dropped off at with an entrance door to the side of the service door. You could move this section to where the window section is if you wanted or you could use two window sections or two service door sections, your choice.
The front wall prints with a section of the end wall that goes back to where the window section is seen above. The back wall (not in view) prints along with a section behind the White truck that goes to the beginning of the service door section.
I've mirrored this wall so that you have the same options at the other end of the roundhouse.
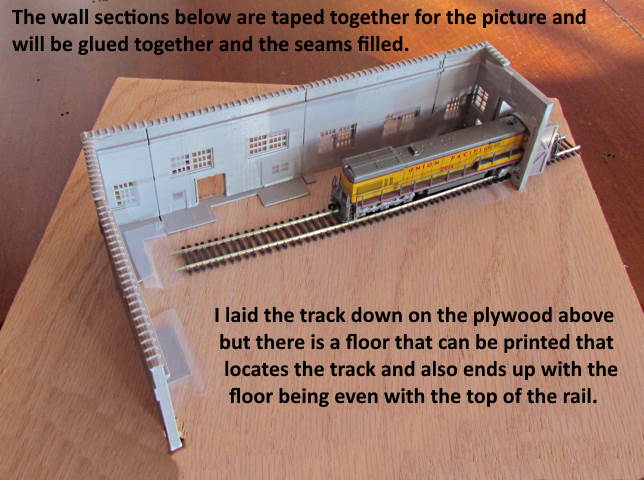
The wall prints in sections but then will be glued together and the glue seams filled.
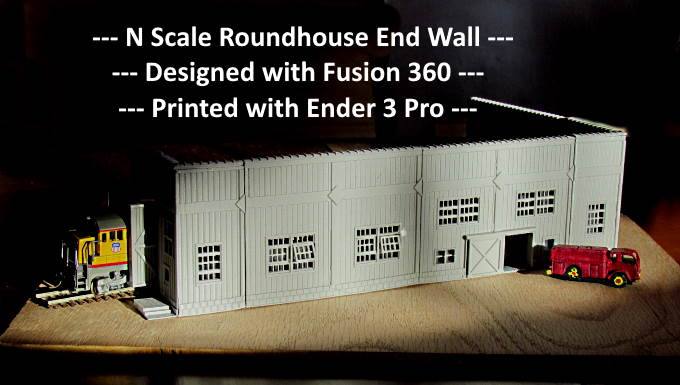
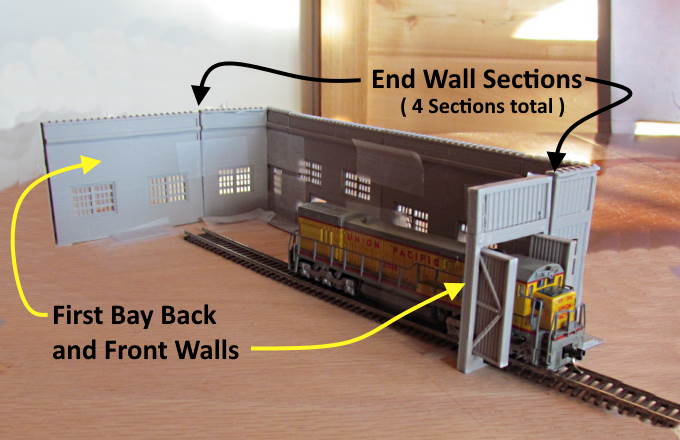
Above we can see the back wall that is also part of the print for the end wall. The front and backs attach to the first engine bay. You then use as many engine bay sections as you need with another end wall similar to or different that what is shown above.
Above we see the end wall sections with the first bay front and back walls.
I looked at printing the whole end wall with the front and back sections as a single print but didn't like that option. The steps at the front of the building made the print a little too long for the Ender 3 Pro's print table so I would have had to remove them. They could be a separate print but I also don't like to do real long 10+ hour prints which it would have been for a print with the four wall sections printed together. If the print fails, which sometimes they do, you would have to start all over again. If it fails on only one section you don't have as much time lost.
The downside to multiple prints is they need to be glued together and the seams filled. This doesn't take that long and you can also paint section one at a time. In all the pictures above I had the sections taped together for the pictures. They fit together better once glued and it isn't hard to fill the seams with CA or I also use Tamiya putty.
I'm happy with the results to this point but this is a big build with some long print times if you are going to have a number of bays.
The following pages will detail one part of the structure at a time and explain the print options.
=========================================
...........................On..............e.........Next Page If There Is One