.................................. Return to Sumner's Home Page....
Return to N Scale RR Main Menu........ Return TrackManager Menu
=========================================
..............Previous Page..............................Next Page If There Is One
=========================================
... --- 8 District DCC-EX TrackManager Component Build ---
====================================
To start ...
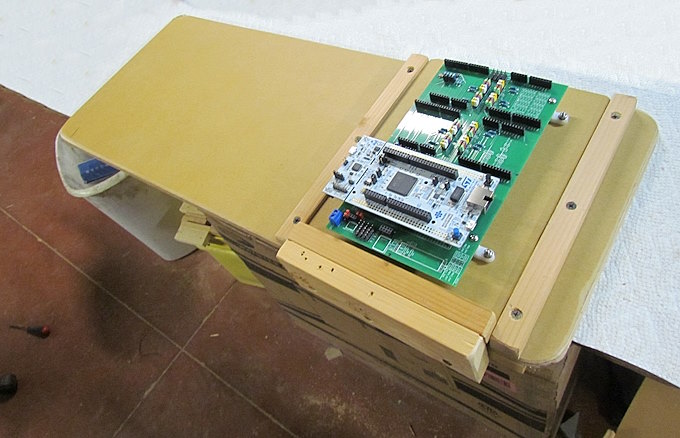
…. install the white feet to the bottom of the PCB as shown above. Leave the Nucleo board off the PCB at first until you have screwed the feet to something as it blocks you from getting to one of the feet.
After the feet were installed I then mounted the PCB onto a piece of ½” sign-board I had, you might want to mount things differently. That board with the PCB and Nucleo slides into a larger board in my case. I’ll have the power supplies for the motorshields and Nucleo and a power strip on the main board in the open area to the left. The large board will be screwed to the side of the layout. Your install might look different.
With the PCB mounted onto something carefully mount the Nucleo-F439ZI to the PCB. Go slow and make sure all the pins are going into the headers. Put the PCB/Nucleo aside for a bit.
If you would like to load software to the Nucleo at this point before finishing the physical build go ( HERE ).
Finishing the physical build of the 8 district command station:
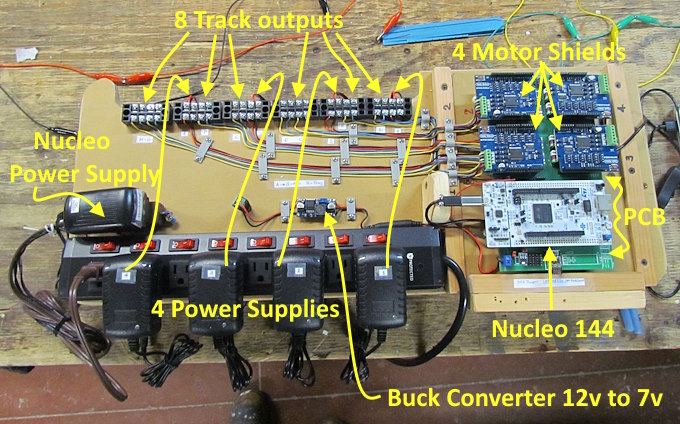
The following shows the rest of the components I used. There is no major wiring other than the wires from the motor shields to the 8 track outputs which I did in a little over an hour if I remember right and it is simple and repetitive. You could mount the components to suit your situation.
Since I was using Deek-Robot motor shields that are limited to 2 amps or less I used inexpensive 12v power supplies that plug into an Amazon power strip that has enough switched outlets that had the spacing needed to plug the power supplies in along with an extension cord that goes to the 12v power supply for the Nucleo. You can find the power strip ( HERE ) and it has worked fine.
If you need more track power and go with the DCC-EX 8874 motor shields good for up to 5 amps you will need to find power supplies that will meet those requirements. If you want and need a full 5 amps for each track output you will need a power supply capable of 10 amps of input power to the motor shields. That can be a lot of current so make sure your wiring is safe for that much current and whatever voltage you are also using.
I used 12v power supplies since I’m N scale for the larger scales I think, not sure, that you could go up to 14-16 volts to the Arduino/Deek-Robot motor shields but will still be limited to 1.5-1.8 amps of output.
-----------------------------------------------------------------------------------------------------------------
NOTE: If you are using Arduino or Deek-Robot motor shields like what is shown in this build you have to power the Nucleo with a separate power supply. That will be shown next. If you are using DCC-EX 8874 motor shields you can power the Nucleo from one of them so can skip this step and go to that option further down.
-----------------------------------------------------------------------------------------------------------------
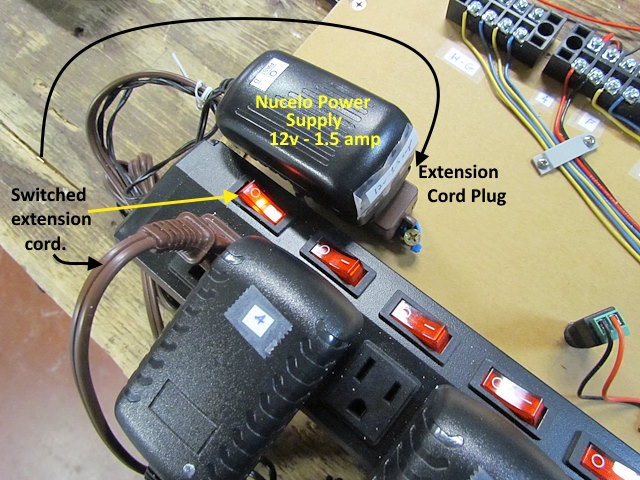
Due to the spacing situation the Nucelo Power supply couldn’t also plug into the strip but an extension cord could. I ziptied the outlet on the end of the extension cord to the main board. The 12v output goes under the board and a male connector was soldered to the end. A hole was drilled in the board and…..
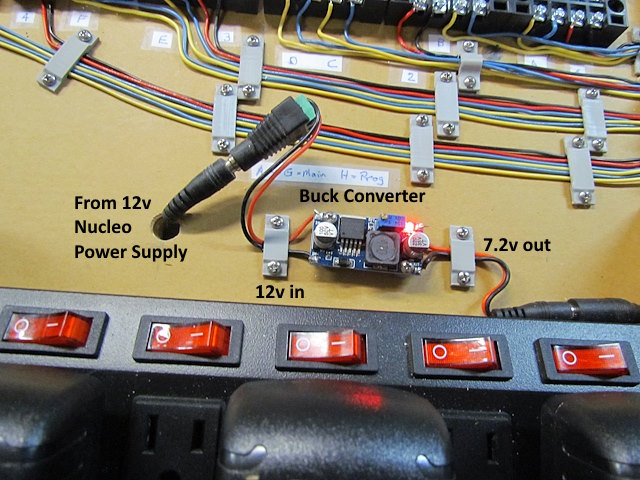
….. the plug can now come up from below and a female connector can be plugged in and it is connected to the input of the buck converter. There is another plug connected to the buck converters output.
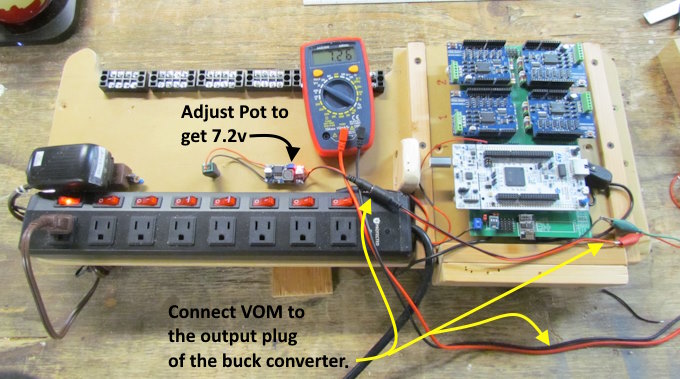
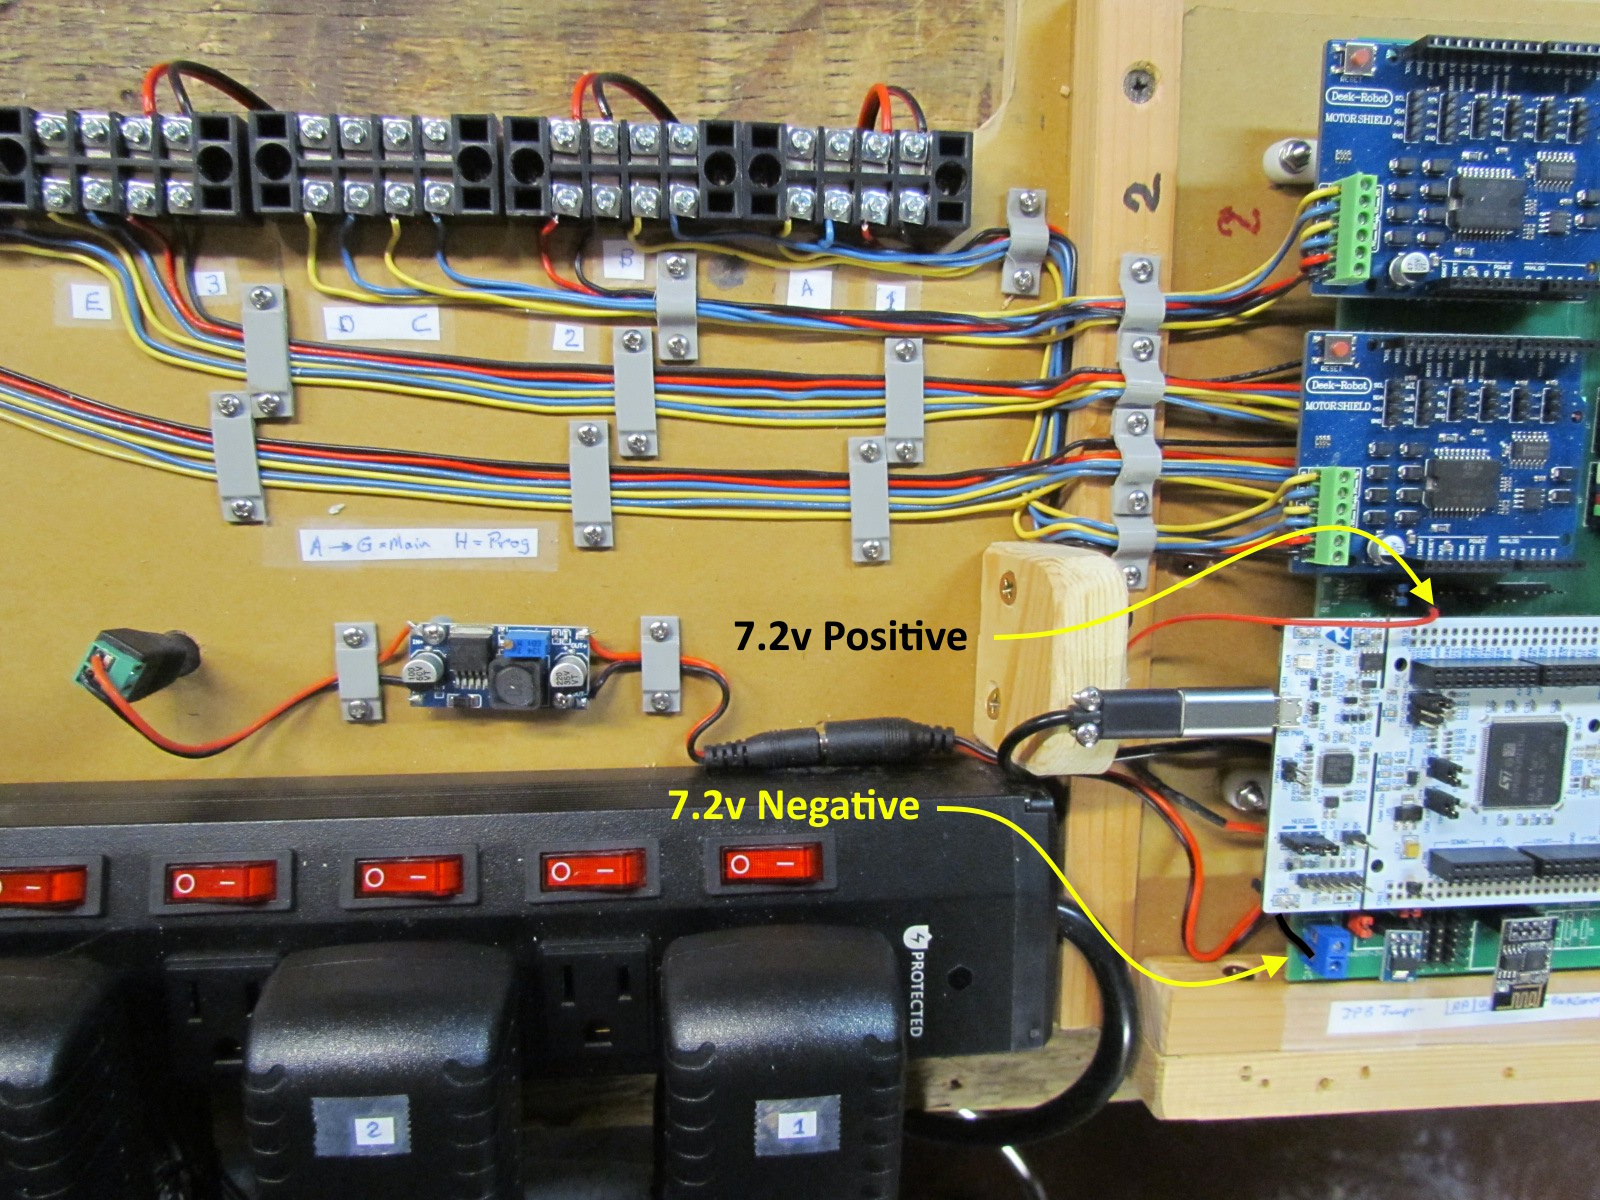
The buck converter is cheap at under $5 and easy to adjust. Plug another spare plug with leads into to the output plug and adjust the 12v down to approximately 7.2 volts, an ideal input voltage for the Nucleo. There is a screw on top of the buck converter that you turn.
Plug another plug into the output plug and take the black negative 7.2v wire to the ‘blue’ connector on the corner of the printed circuit board. Solder and shrink wrap the red 7.2v wire to a short Dupont connector wire and take it to the other side of the Nucleo and plug it into the VC1 connector that is closest to the Nucleo. NOTE: this is how to wire if you are using an Arduino motor shield or the Deek-Robot (clone) motor shield. Other shields might work but I’d recommend those two options.
Be sure that the jumper on JP3 is on the two pins on the right side.
-----------------------------------------------------------------------------------------------------------------
NOTE; Start here to power the Nucleo with one of the DCC-EX 8874 motor shields.
If you went with a DCC-EX motor shield powering the Nucleo is very simple. Use a jumper to jump the two VC1 pins on the VC1 connector between the motor shield and the Nucleo. Make sure that the jumper on JP3 is on the two pins on the right side.
-----------------------------------------------------------------------------------------------------------------
Continuing on after installing one type or another motor shield ….
-----------------------------------------------------------------------------------------------------------------
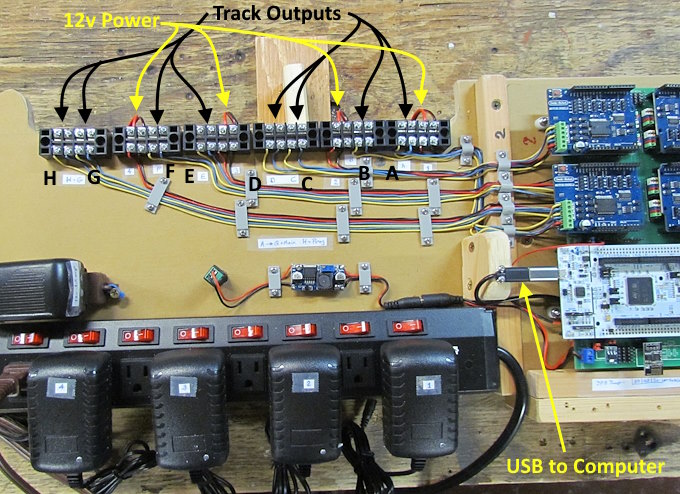
The AMS117 provides 3.3v to the pins just to the right of it. It and the WiFi board plug in as shown above.
The wiring to the terminal strips goes pretty fast (I think it was under 1.5 hours for me) It is repetitive. I used the same color sequence for all of the track and power in wires. The 4 power supplies at the bottom all have those plug type connectors on their outputs like what was used with the buck converter. They are under the mounting board and they each go to a terminal connection at the top (black/red wires) and on to the motor shields.
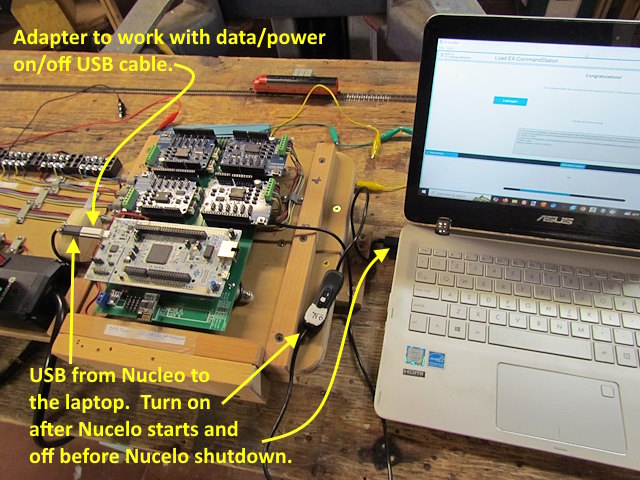
Don’t have a computer’s USB cable connected to the Nucleo while turning the Nucleo on/off. I have a USB cable permanently connected to the Nucleo (above left). I used an adapter there so I could us a USB cable with an on/off switch (shown above). If you are using your laptop to load software or something else have that on/off switch ‘off’ until the Nucleo boots up. Then turn it on and turn it off before turning the Nucleo off. If you don’t have an on/off switch do the same sequence by plugging/unplugging the USB cable in to the laptop or Nucleo.
=========================================
...........................On..............e.........Next Page If There Is One