.................................. Return to Sumner's Home Page....
Return to N Scale RR Main Menu........... Return to Building UP's Canyon Division Menu
=========================================
...............Previous Page.............................Next Page If There Is One
=========================================
…................... .--- Perimeter Buss Wiring Pt. 1 ---
============================================
Buss wiring. How many different ways has this been done? Lots and I'm sure someone else has done the following also. I'll be 79 in a couple weeks and can still get under the layout but hate to do so even thought I've designed it so there is a lot of room under there to move around and I can use the body creeper I made. Do I want to go under there and how much longer will I be able to is the question.
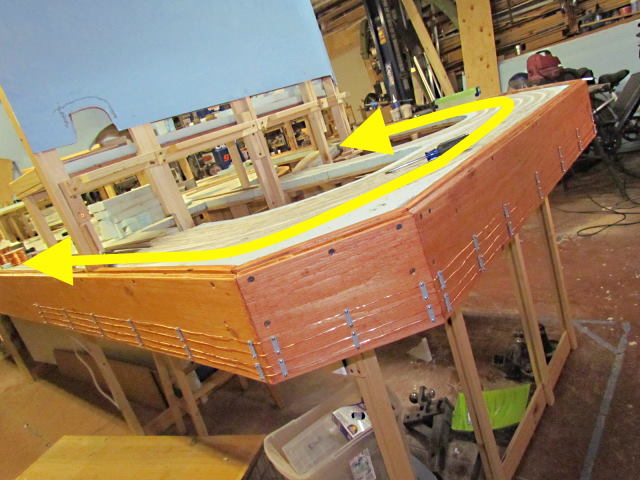
On my test layout where I got familiar with how I wanted to lay track and which switch machines I might use I also ran the main buss around the outside of the layout's fascia. Doesn't look as cool as if it is hidden but it sure made track wiring much easier to do. Most all of it was done standing or sitting in an office chair at the edge of the layout.
To wire track sections or frog I'd drill a hole or holes where I wanted a drop and another hole between the + & - buss wires. Put the 'drop' wire through the hole and a ways under the layout. Reach under the layout from the side and pull the wire over to the side and put it through the hole at the buss wire. Strip and solder it to the appropriate buss wire. Cut it back at the track and solder it to the track. Your done and you never went under the layout.
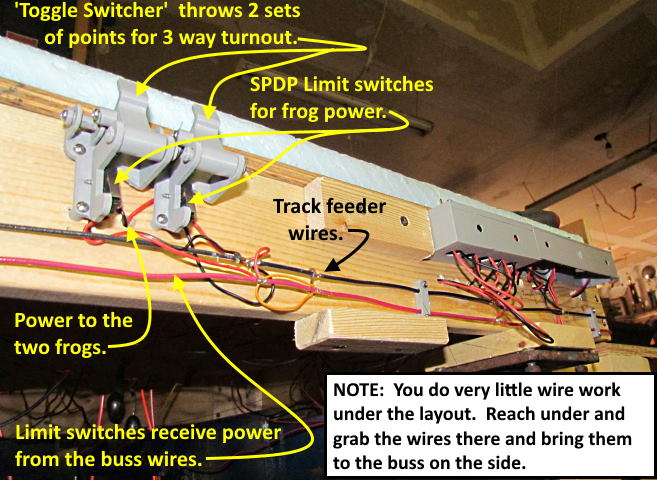
Above is a picture of the test track and I did the same for switch machines that are controlled at the side of the layout and that have a SPDT switch on them that can power the frog. Drop the frog lead and take it to the side and wire it to the SPDT switch and the switch to the buss. Above you can see the frog wiring and the track feeder wires attached to the buss. Also there I used insulated wires but decider to try uninsulated this time to avoid having to strip it although that wasn't that hard. I moved the wire clamps closer together and they are 3D printed. You can find them with other 3D printable clamps on my thingiverse account ( HERE ).
.
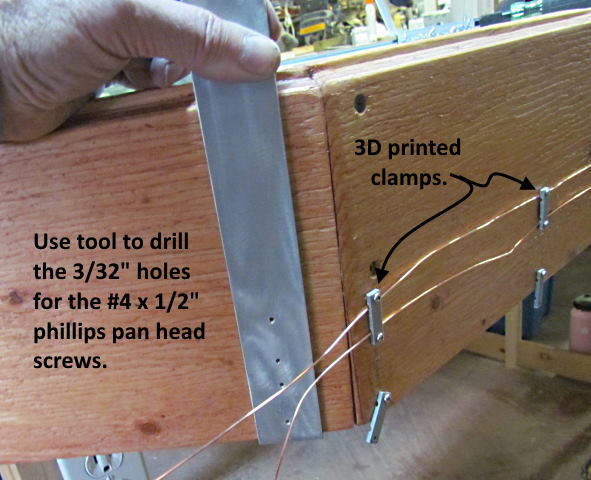
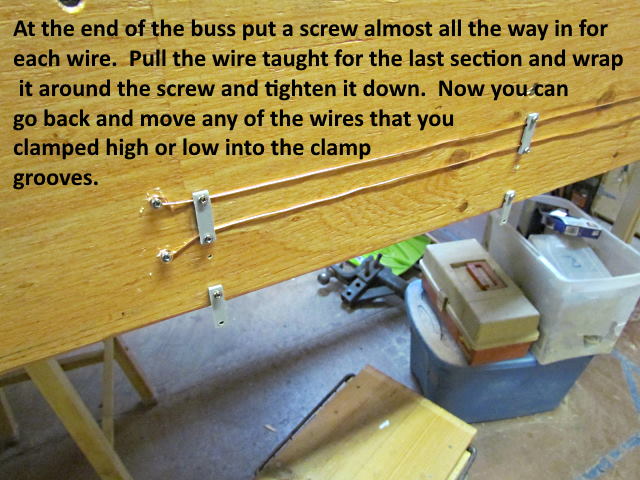
Spending 20 minutes making the tool above really speeded things up. I'd drill the four pilot holes. Use the length of the tool to go to the next four, drill them and move on. Could drill the holes for a 10 foot section in a couple minutes and they were perfectly spaced when I screwed the wire clamps to the fascia.
.
.
.
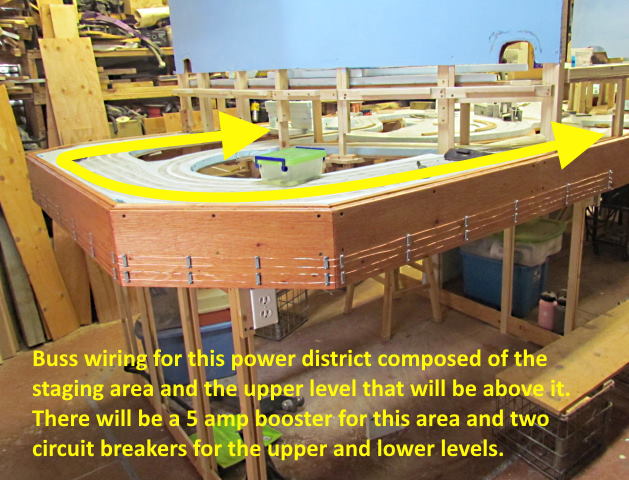
Next when I get my power district boosters and circuit breakers in I will come back and drill a hole between the two buss wires at some point and bring the wires from the circuit breaker and solder them to this section of buss wires. The layout is going to be divided into 8 districts so there will be 7 sections of buss wires like this around the perimeter and I'll put one underneath for the upper level tracks down the middle on both sides of the center backdrop/divider. So I will have to go underneath for the upper level tracks.
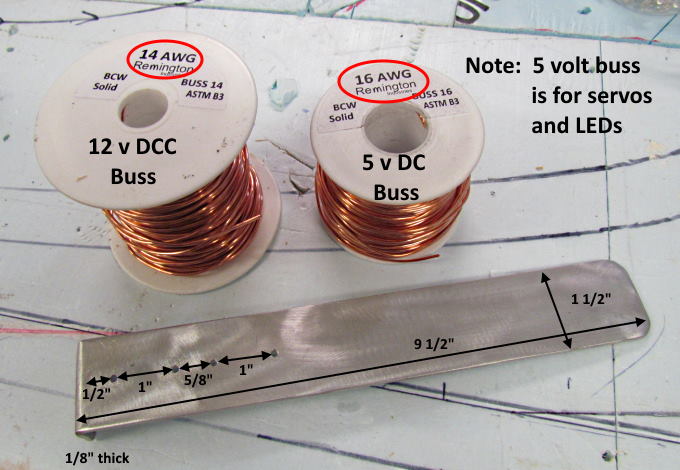
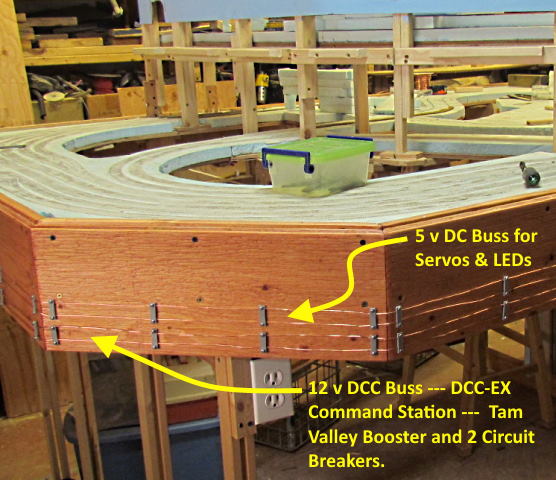
As you can see above the bottom two wires are #14 wire for the DCC buss and the upper two wires are #16 for the 5 volt buss that can be used for servo switch machines, LEDs and anything else that can run on 5 volts.
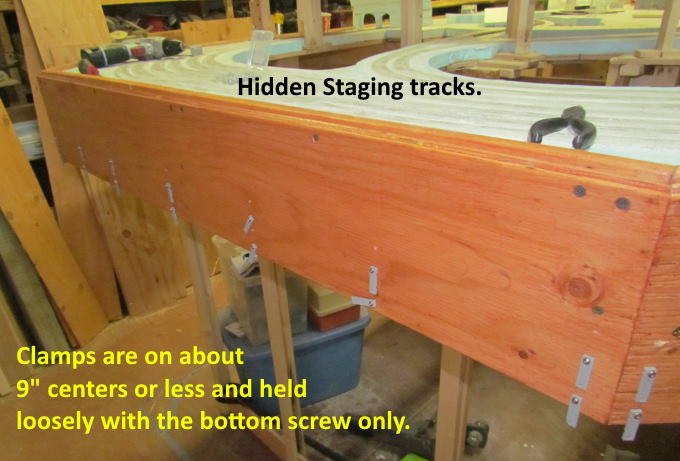
When I finish the track in this area (hidden staging) I'll replace the upper level that goes above it and there will be another buss there as that area is on a separate circuit breaker that this area. They both will be on the same booster.
I'm not trying to convince people to take this approach and probably wouldn't of myself if I was 20 years younger but I'm not and some of you might not be either. This might provide a way for you to continue enjoying the hobby if going under the layout has been a game changer for you.
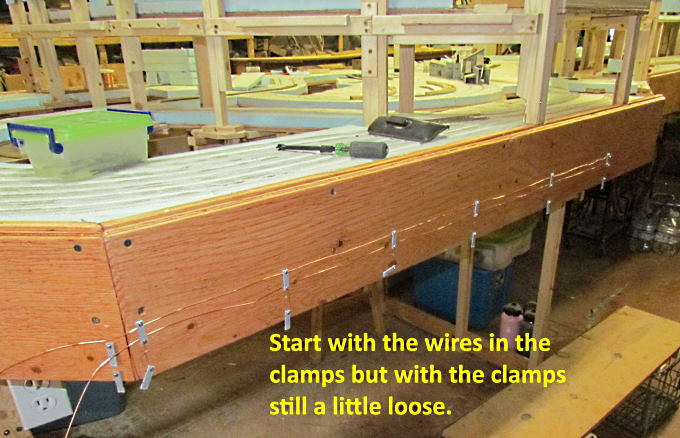
Super easy to run the track drops or other drops to the 5v and DCC buss. Drill a small hole next to the track. Run the drop down the hole, reach under and pull it over to the fascia, run it through the hole between the buss wires, strip and solder it to the buss. Back at the other end cut the wire and solder it to the track. Simple fast and no need to go under the layout.
.
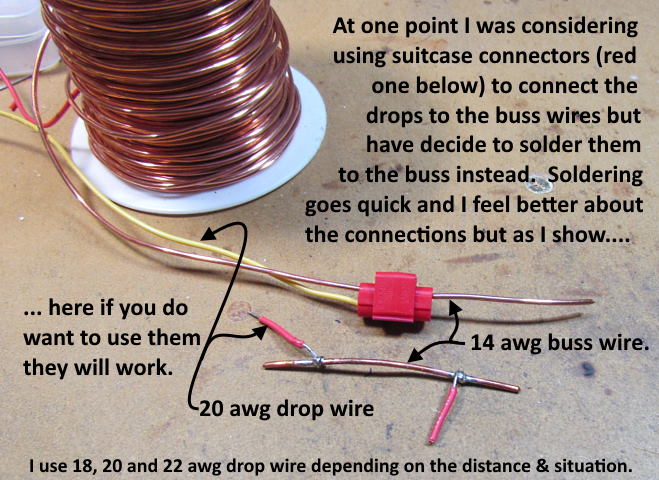
For those of you that like to use suitcase connectors ….
…. some info on them in the image above.
If you came into the build here you can find the main index for the build ( HERE ).
=========================================
...........................On..............e.........Next Page If There Is One