.................................. Return to Sumner's Home Page....
Return to N Scale RR Main Menu........... Return to Building UP's Canyon Division Menu
=========================================
...............Previous Page.............................Next Page If There Is One
=========================================
… …..........................................................…-- Side Supports ---
============================================
I was going to put in side supports where the layout extends out past the main framework a long time ago but the small 1 X 2's that are attached to the lower level plywood really stiffen the overhang up quite a bit. So I put it off but wanted to get it done before I started gluing the foam board down so did some on the one side and will finish by going around the whole layout.
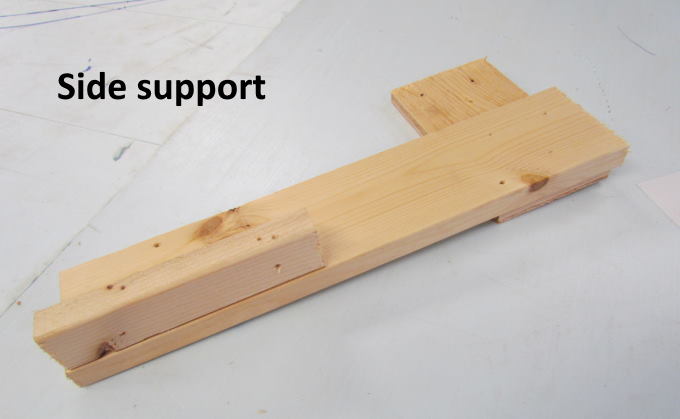
I'd envisioned something more elaborate than what I actually came up with but after putting one together and trying it out and seeing how well it worked went with the pretty simple design shown above.
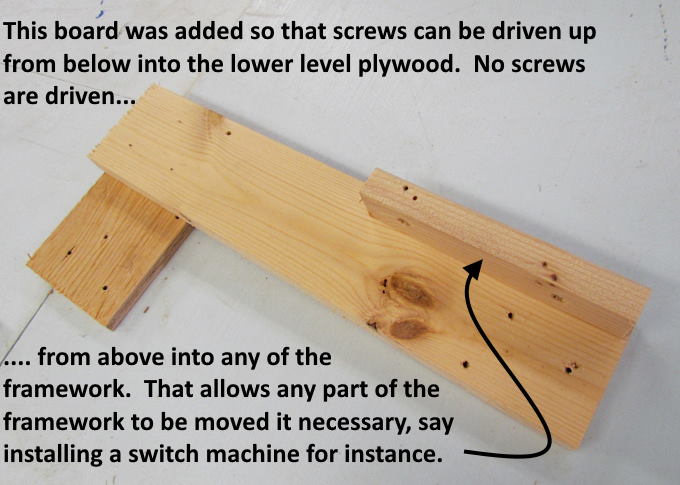
All the supports for the lower level (unless I forgot some) are all screwed into the lower level from below vs. the more traditional method of building the framework and then screwing the track surface into it. One drawback to that is you end up with something you want to put under the layout, such as a switch machine, and there ends up with a frame member in the way.
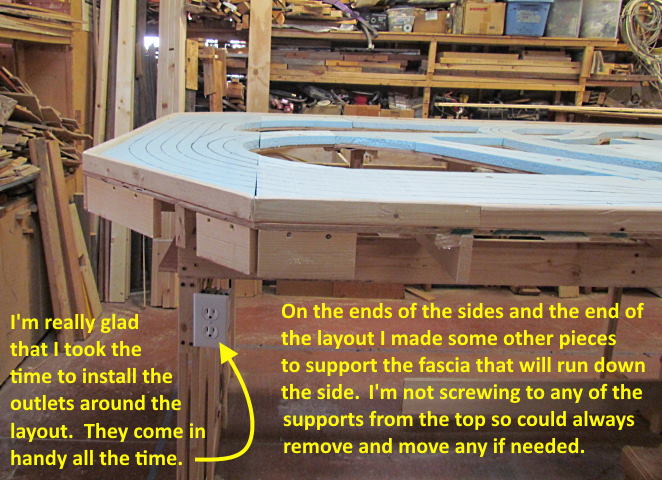
I used risers (see beginning of this build) that raise the lower level 3 inches above all the major framework. Then I used risers like above and ( HERE ) to support the layout's lower level. Since there are no screws into any of these from above if one is in the way I just unscrew it and move it a few inches to a new location.
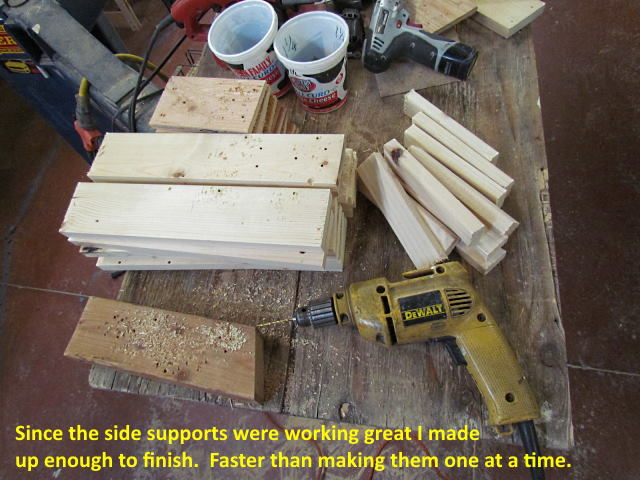
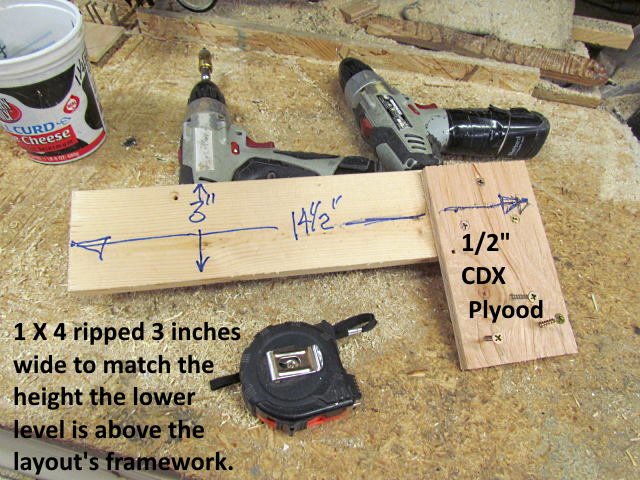
The side supports are simple and fast to make.
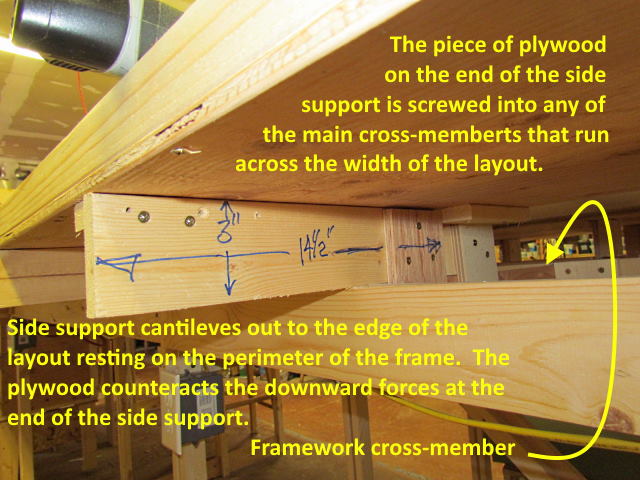
The reason these work so well and are so strong is the piece of plywood on the one end. Think of the side support as a see-saw with the main frameworks side members being the pivot point. The edge of the lay is trying to push the left end of the side support down. The plywood on the other end is very strong in tension and the side member is trying to pull it up but it is firmly attached to one of the frameworks main cross members. I swear you could sit on the edge of the layout and it wouldn't go anywhere.
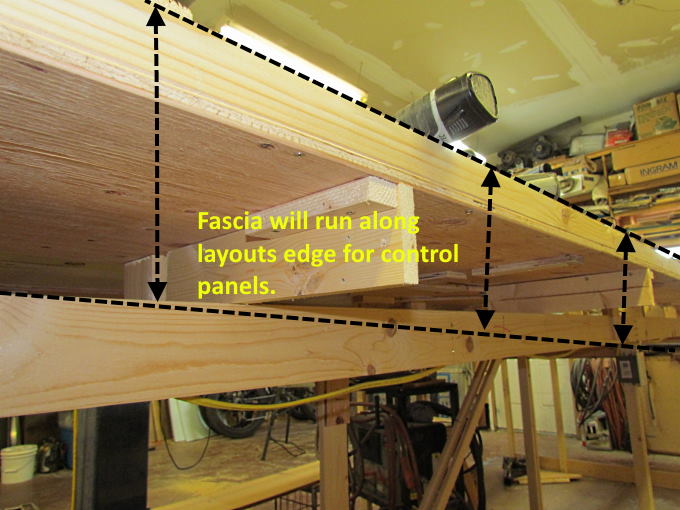
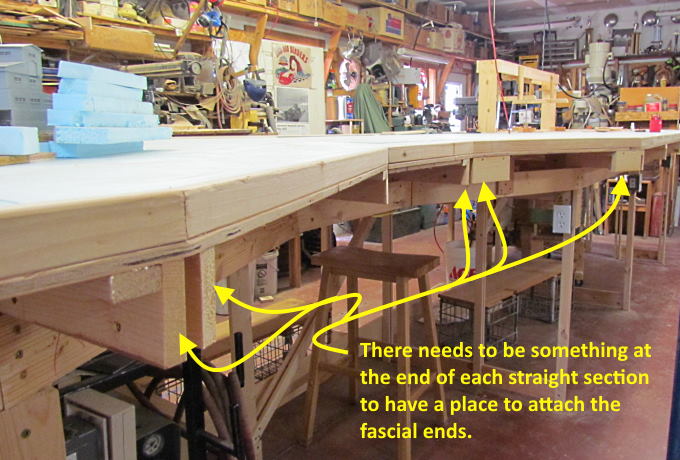
The side supports will also make it easy to run a fascia along the side as it will be attached to the 1 X 2 on the top of the plywood and these side supports.
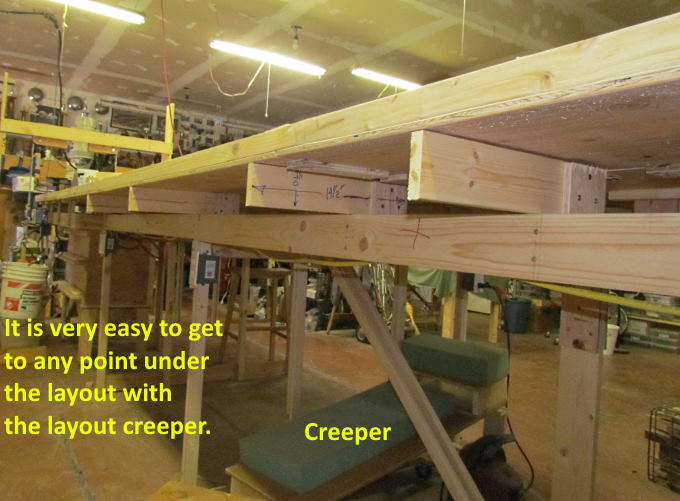
The layout is very open underneath and easy to get to about any place you would need to get to. I can lay on the creeper I made ( HERE ) or have found out I can sit on the lower left end as shown above and my head clears the bottom of the plywood surface above. It rolls easily to any location.
.
.
.
To be continued …..........
If you came into the build here you can find the main index for the build ( HERE ).
=========================================
...........................On..............e.........Next Page If There Is One