.................................. Return to Sumner's Home Page....
Return to N Scale RR Main Menu........... Return to Building UP's Canyon Division Menu
=========================================
..............Previous Page..............................Next Page If There Is One
=========================================
….......--- Build Track Elevator Part 5 ---
============================================
NOTE: More about the track elevator on the first page of the build ( HERE ). If you haven't read about it the following will make more sense if you go back and take a couple minutes to see how I hope it works.
============================================
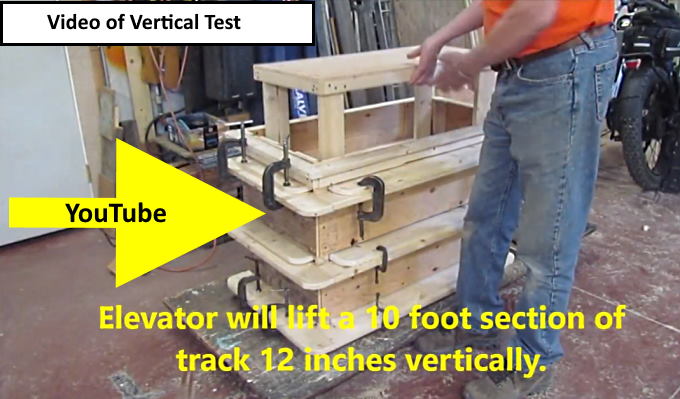
Time to put the elevator together and do a trial run to see if this has been a waste of time or if I feel it is worth continuing on.
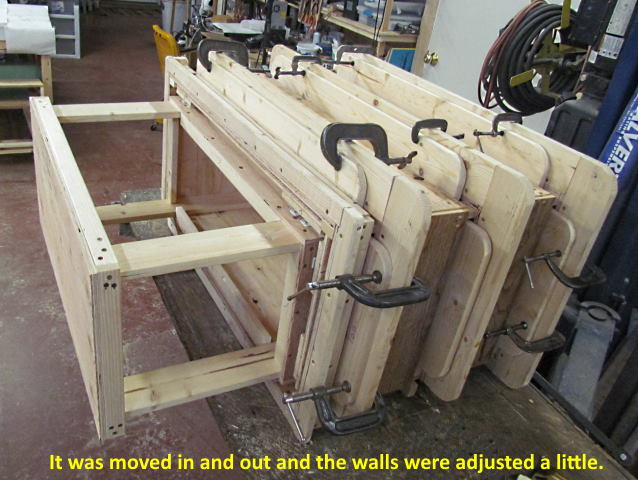
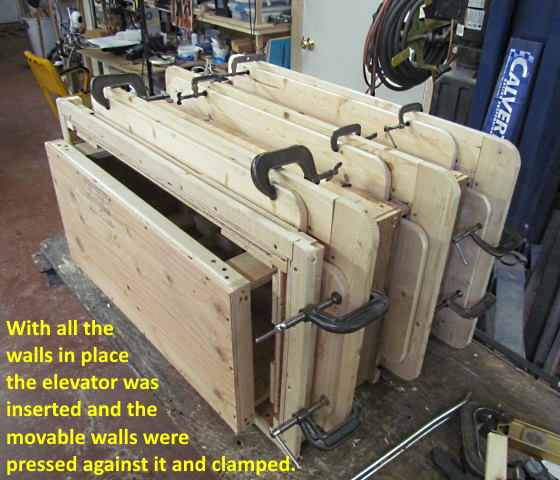
The enclosure/box was laid on its side and the elevator was installed. The elevator was moved over to where the rollers on its left end (as shown above) were against the fixed wall on that end. Then I move the movable wall on the right side snugly up against the elevator and clamped it in place temporarily with the 'C'-clamps.
The elevator was pushed in and out to test for fit and the wall adjusted slightly with the clamps on the top and bottom shelves. Then the movable wall on the top (as shown above) was dropped onto the elevator rollers on that side and clamped and then adjusted slightly.
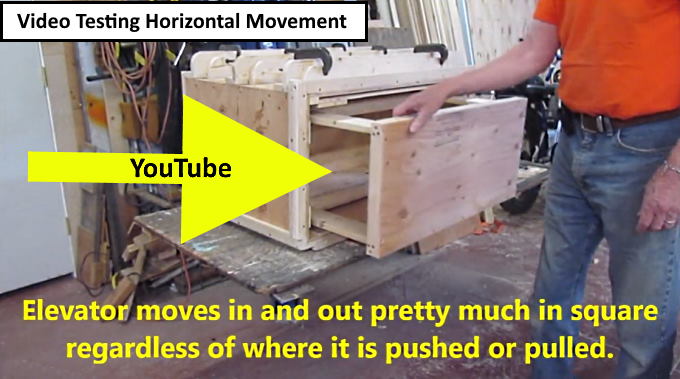
With the box and elevator in this position it was tested further as seen in the video above or ( HERE ). I wanted the elevator to move freely but without too much slop side to side or up and down.
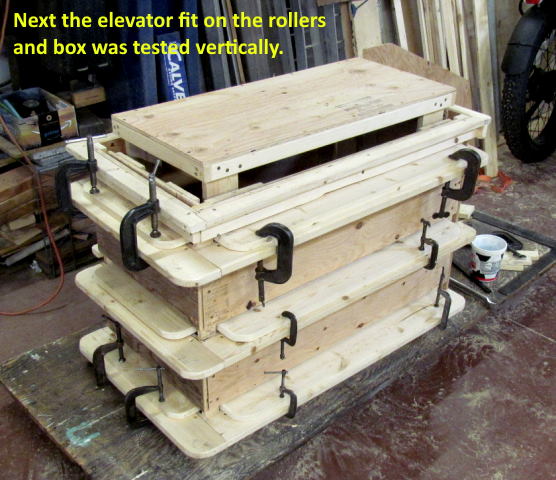
Next the box and elevator were rotated vertically into the position they will be in when all of this is installed in the layout.
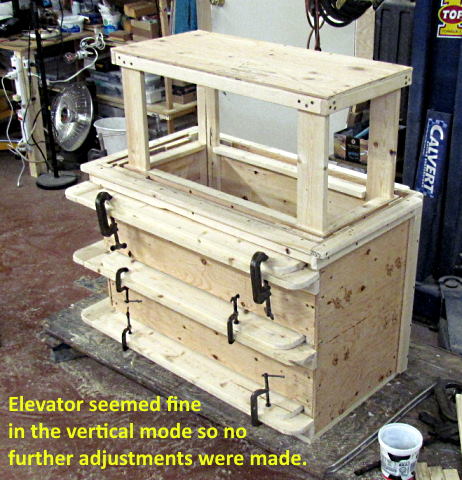
Again the elevator was tested up and down. I was happy with the fit so no further adjustments were made at this time. The clamps will be replaced with screws to hold the movable walls in place.
Above and ( HERE ) is a video of testing it this way.
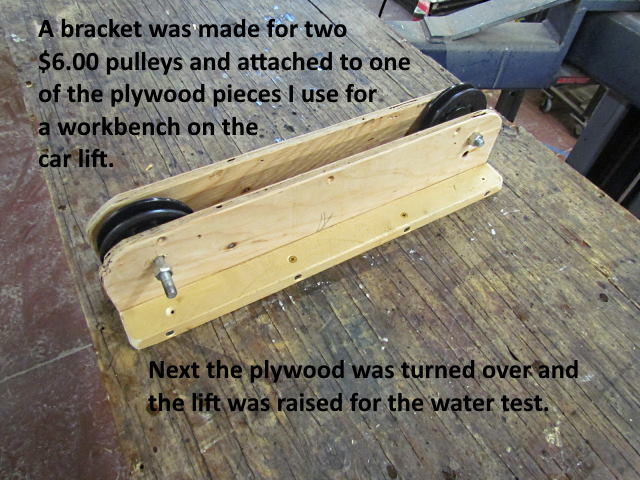
Up next was the 'water test'. I needed to build a bracket for two pulleys and it is show above attached to a piece of plywood I use as a work bench on the car lift. After it was completed I turned the plywood and bracket/pulleys over and raised them up above the box and elevator. On the layout this bracket with the pulleys will be located just above the elevator in its 'Up Position'. The elevator will either be exposed behind a backdrop or possibly disguised as a mountain or part of one.
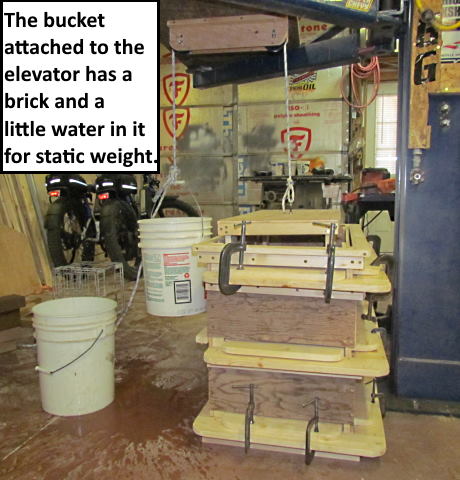
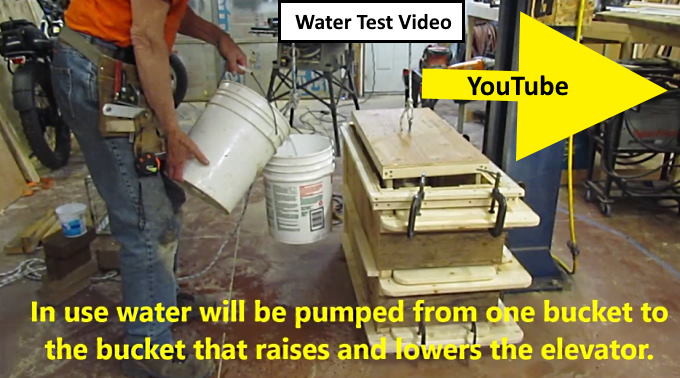
I spend a lot of time laying awake at 3 in the morning so considered a number of options to raise and lower the elevator during those 'think' periods. I wanted something that was low tech, reliable and easy to implement. I really like the way My 'Turnout Gravity Switchers' work so decided to try something similar. Basically the elevator is held in the down position by its weight. It is raised by a counterweight, in this case a bucket that has a brick and a gallon or so of water in at all times. Pump another couple gallons into the bucket and drops and raises the elevator. Pump that water out and the elevator lowers.
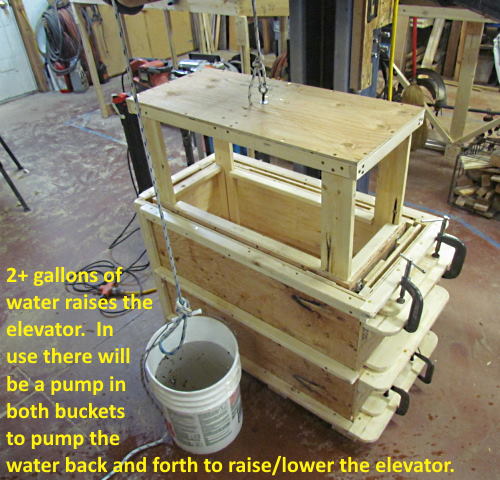
Above I dumped a couple gallons of water in the counterweight bucket and it went down and the elevator raised up to about where it will be after I install some stops.
Above or ( HERE ) you can see a video of the elevator being tested.
In use there will be a small pump in each bucket. Pump water into the counterweight bucket and it will descend and pull the elevator up. Pump water back into the stationary bucket and the elevator will descend. The stationary bucket for the test had one brick and a little over a gallon of water in it. Once the track is added to the top of the elevator more weight will be added.
The amount of weight in the bucket will determine how hard the elevator is against its bottom stop. Likewise the more water that is put in the bucket attached to the elevator will determine how hard it is against the top stop. How fast it raises or lowers will depend on how fast the water is pumped between one bucket and the other.
I had two 200 gph cheap fountain pumps on hand so tried one with the elevator and buckets setup as shown above. The fountain pump pumped water fast enough that it would raise or lower the elevator in 40-55 seconds. Not sure how fast I want to have it move between levels. I have a couple bilge pumps from my boat days that would probably cut the speed down to 6-10 seconds in either directionbut don't want it to be that fast. I'll wait to it is all installed and working before I make up my mind on the pumps now that I know it works at this stage.
It moves up and down without much side to side movement at all but I plan on having pins or some other means to locate it very accurately at both ends of the travel so that the in/out tracks line up well and might also use my '3D Rerailers'.
I have about 20 hours into the elevator to this point.
=========================================
...........................On..............e.........Next Page If There Is One