.................................. Return to Sumner's Home Page....
Return to N Scale RR Main Menu........... Return to Building UP's Canyon Division Menu
=========================================
..............Previous Page..............................Next Page If There Is One
=========================================
….......--- Build Track Elevator Part 6 ---
============================================
NOTE: More about the track elevator on the first page of the build ( HERE ). If you haven't read about it the following will make more sense if you go back and take a couple minutes to see how I hope it works.
============================================
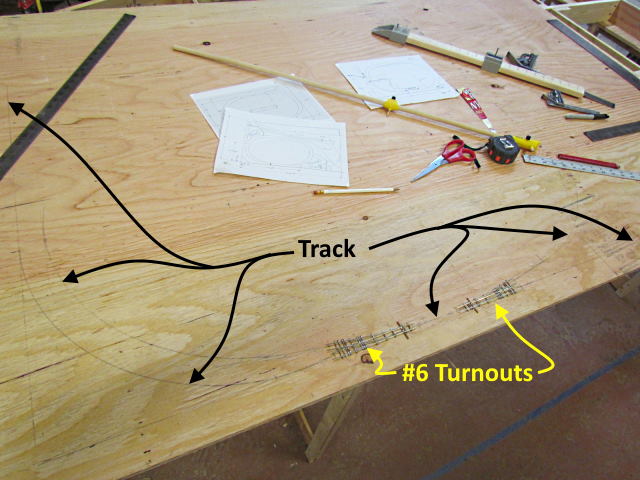
Here I'll mark a piece of 1/2” CDX plywood which will be use partly for the track on top of the elevator and also the approach track to the elevator and other nearby track. I won't cut it into 4 pieces until I get the rest of the framework up.
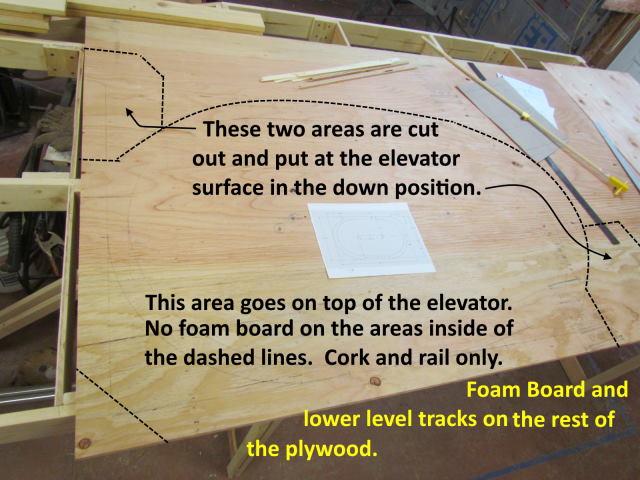
Eventually the approximately 4' X 6' piece of plywood will be cut into 4 sections. The bottom left, shown inside the red cuts will be on top of the elevator and the elevator track would will be on it. Cork will be glued directly to the plywood with the track on it. The two approach track sections on the lower level (blue boundaries) will also be bare plywood with cork and track on them. They will be positioned at the same height as the plywood on the elevator.
The rest of the plywood will be covered with 1” foam board and sit at the same height as the rest of the layout's lower level. The elevator plywood and track and the approach track will be set at the same height as the track on the foam board.
The black dashed lines above are the exit and approach tracks to the elevator on the upper level.
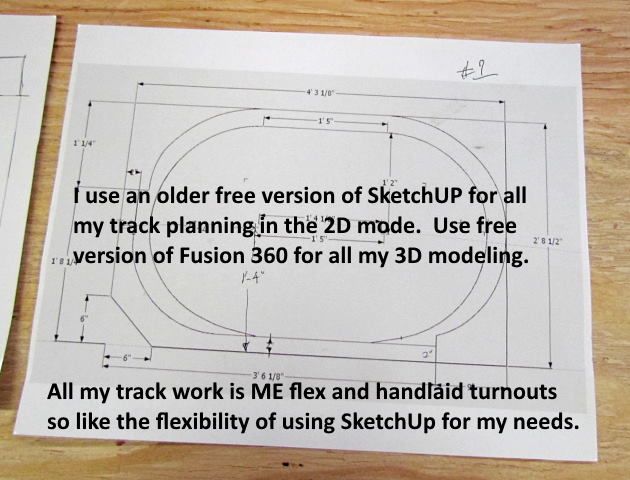
I started using a free version of SketchUp 5-6 years ago to design some projects. When I got back into model railroading I started using it to design potential track plans, the track plan for my test track and now for numerous iterations of the track plan for my main layout. I'll continue to use it as I make final adjustments to the track plan for the layout.
I like it since I'm free to do about anything I want with the track plan. This works well since I have a lot of flexibility using ME code 55 flex track and I build my turnouts. Most are #6's but can basically build a turnout to fit any situation. If one is using sectional track there are better options than SketchUp.
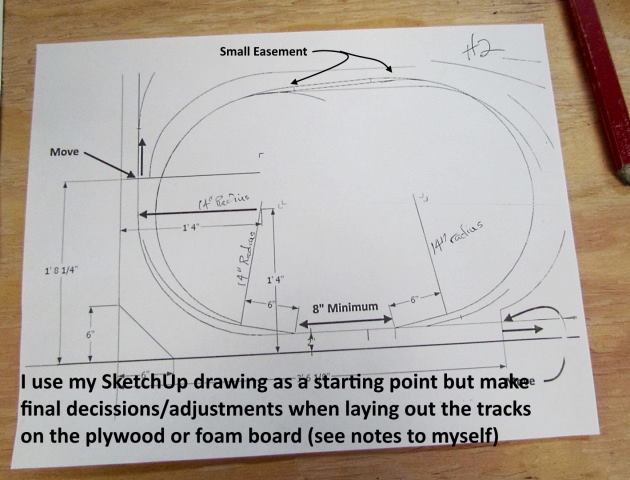
My drawings get me close to what I want but I leave myself the option to change the track plan as I lay it out on the layout's surface if something doesn't seem to be going in the right direction. I want the trackwork to be as functional as possible.
Above I have notes to myself about keeping the turnouts to a minimum distance between the frogs, putting in an easement on the ends of the straight track section at the top and moving where the cuts are made in the plywood for the section that goes on top of the elevator.
I have room on the plywood to move where the track oval ends up on the plywood and it ended up pretty close, within an inch or so of the drawing.
.
.
I won't make the cuts in this until I have the rest of the framework up in the area where the elevator is located and the nearby track. It will be easier to align all the surfaces and the elevator if it is in place before making the cuts.
To be continued.
=========================================
...........................On..............e.........Next Page If There Is One