.................................. Return to Sumner's Home Page....
Return to N Scale RR Main Menu........... Return to Building UP's Canyon Division Menu
=========================================
..............Previous Page..............................Next Page If There Is One
=========================================
….......--- Build Framework Part 1 ---
============================================
NOTE: I'll post this on multiple pages. We are all familiar with using risers on a layout for tracks on a grade or those at a higher elevation than the layout's base elevation. Usually the layout's main elevation is plywood, plywood and foam or another base that is set on the layout's frame work.
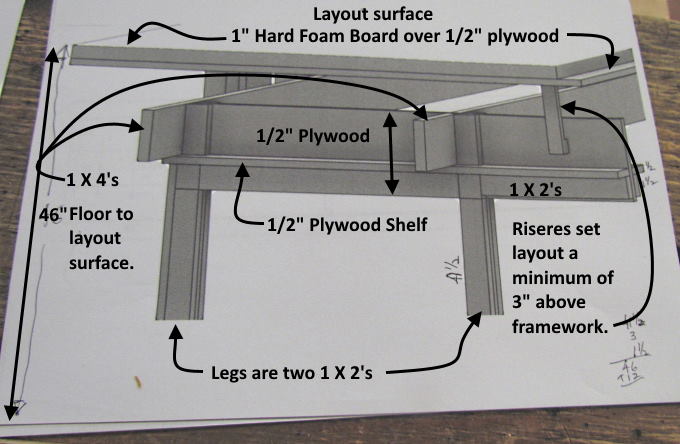
Here the framework is a grid where risers/uprights can be attached to it at about any point. My goal is that all of the main elevation of the layout will be held up by risers a minimum of 3 inches above this framework. This will allow switch machines, wiring or anything else that is less that three inches in depth to be place any place on the layout without fear that there is framework under it in the way. If you place something where there is a riser/upright under it put in a new riser nearby from under the layout and remove the one that is in the way.
============================================
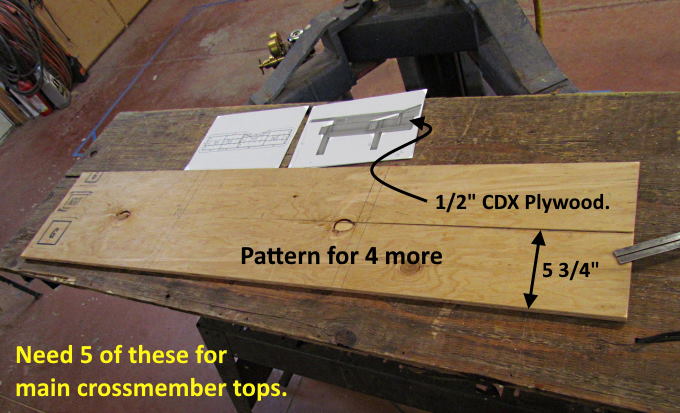
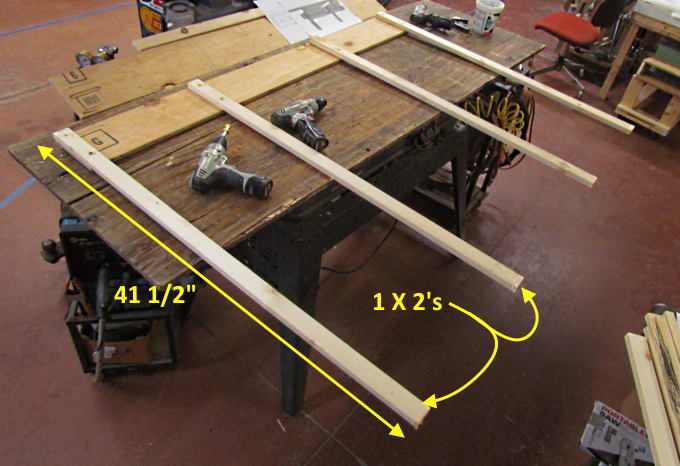
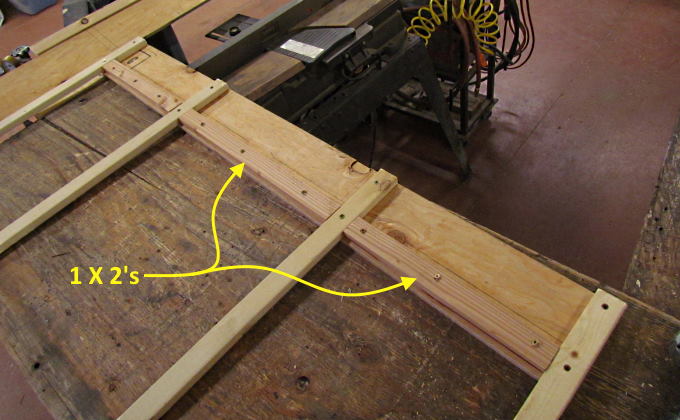
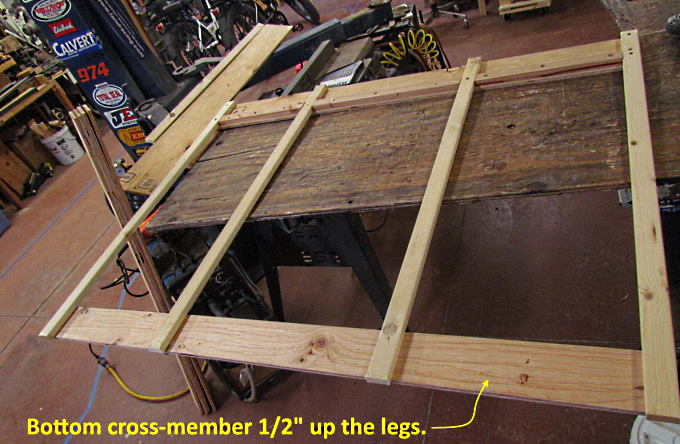
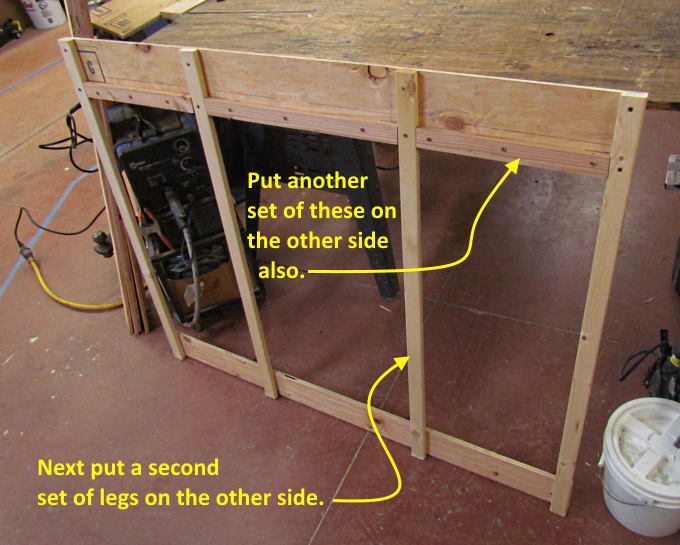
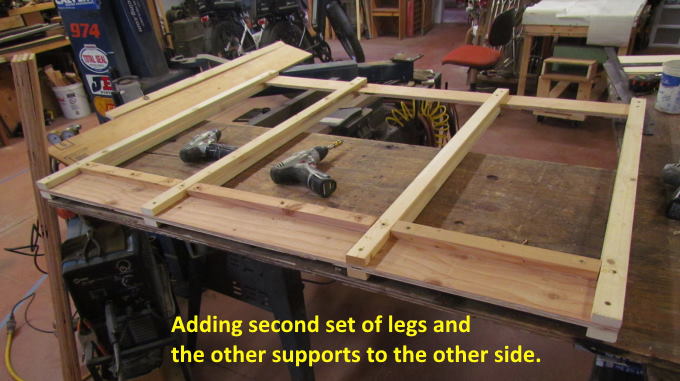
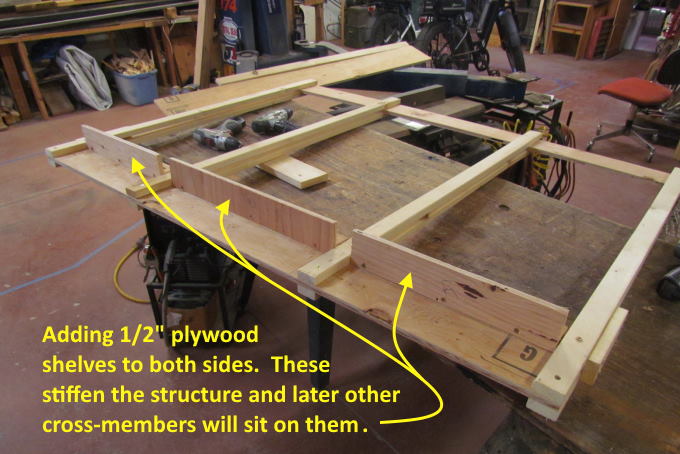
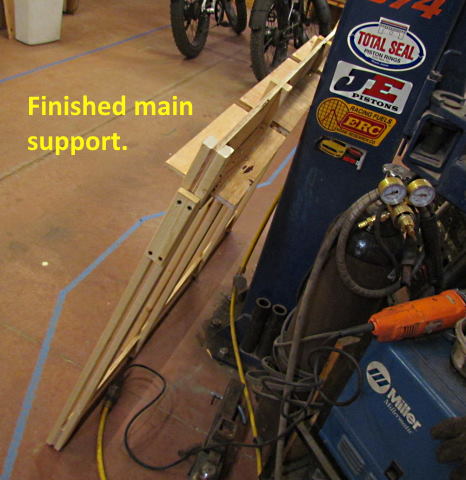
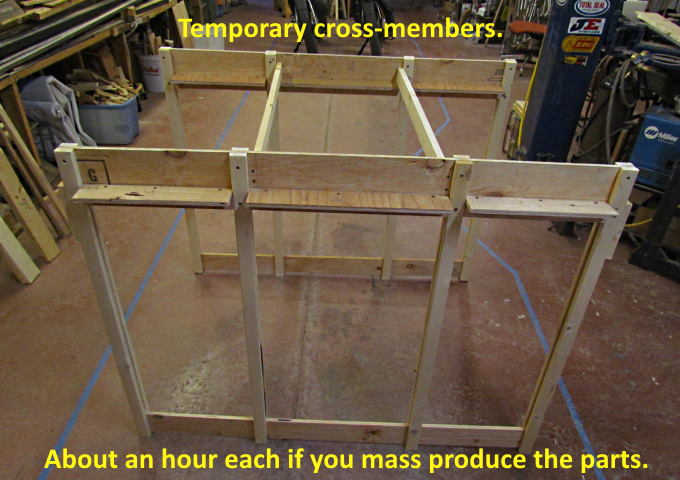
Part 1 of building the framework is the main cross-members/supports for the layout. I kept the cost down on these by using 1/2” CDX (rough framing plywood) and 1 X 2's. By cutting multiple pieces at the same time with the table saw and radial arm saw I was able to put these together in about an hour each. I built two to begin with to make sure I liked them. They came out quite strong and rigid so I proceeded on (see next page).
The pictures should pretty much tell the story here.
.
.
.
.
.
.
.
.
.
To be continued.......
=========================================
...........................On..............e.........Next Page If There Is One