.................................. Return to Sumner's Home Page....
Return to N Scale RR Main Menu........... Return to Building UP's Canyon Division Menu
=========================================
..............Previous Page..............................Next Page If There Is One
=========================================
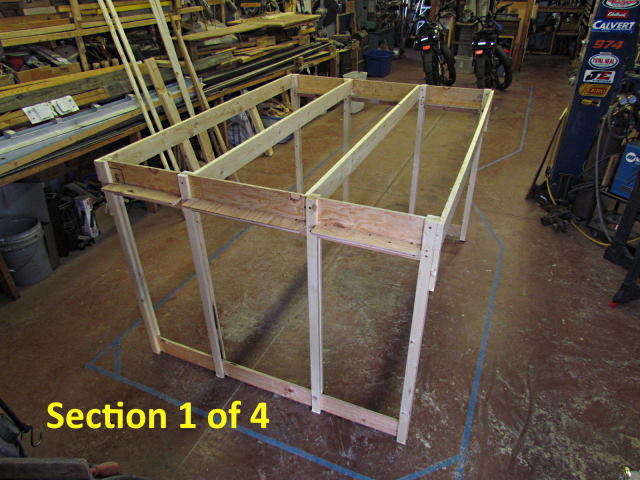
….......--- Build Framework Part 2 ---
============================================
NOTE: I'll post this on multiple pages.
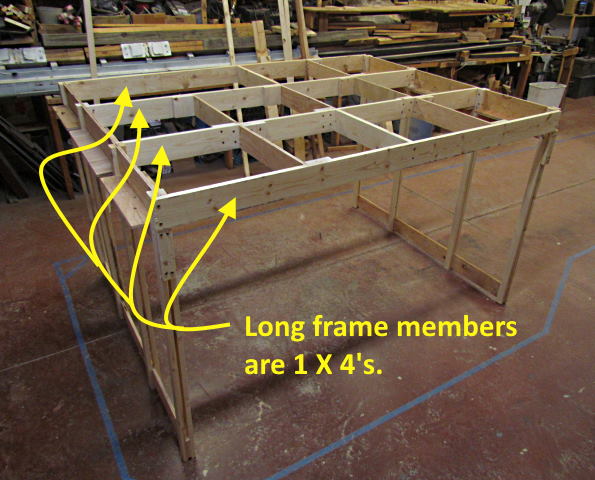
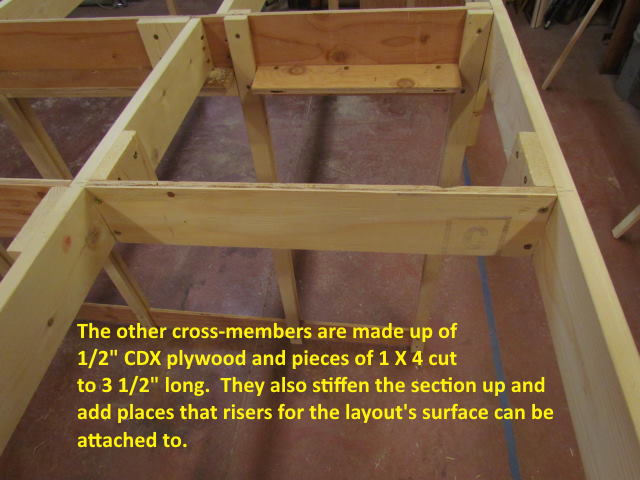
We are all familiar with using risers on a layout for tracks on a grade or those at a higher elevation than the layout's base elevation. Usually the layout's main elevation is plywood, plywood and foam or another base that is set on the layout's frame work.
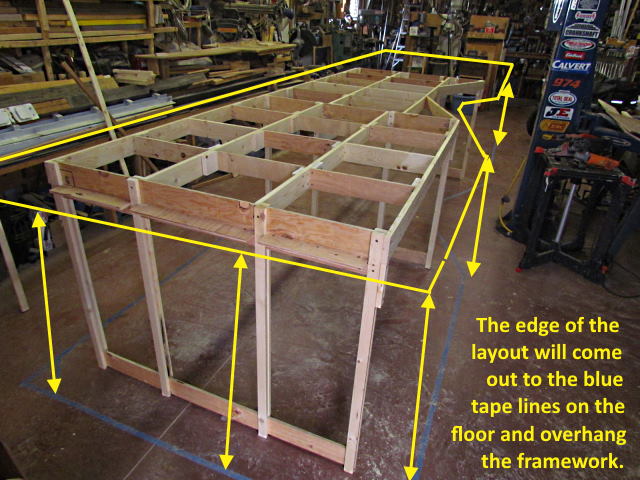
Here the framework is a grid where risers/uprights can be attached to it at about any point. My goal is that all of the main elevation of the layout will be held up by risers a minimum of 3 inches above this framework. This will allow switch machines, wiring or anything else that is less that three inches in depth to be place any place on the layout without fear that there is framework under it in the way. If you place something where there is a riser/upright under it put in a new riser nearby from under the layout and remove the one that is in the way.
============================================
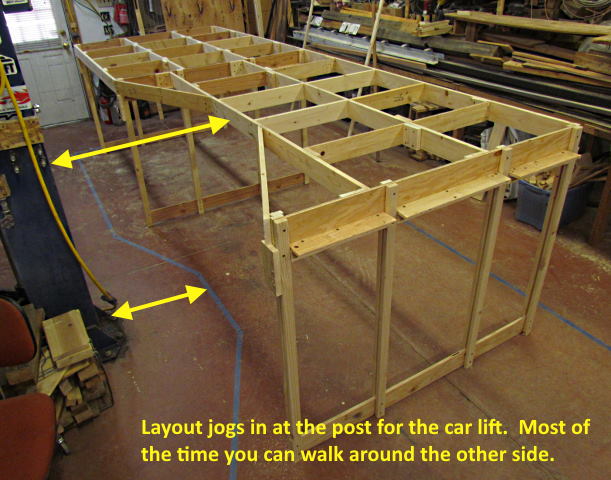
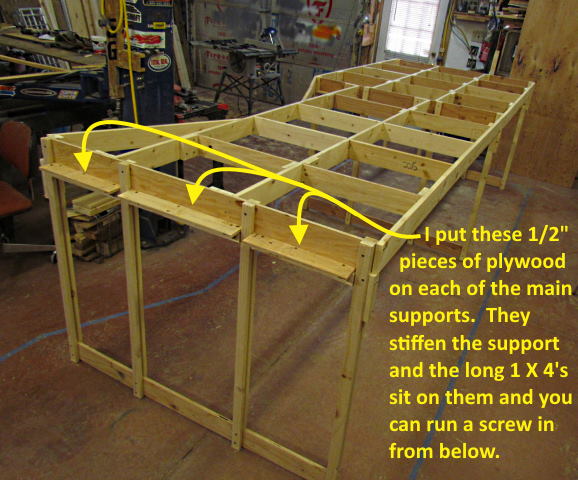
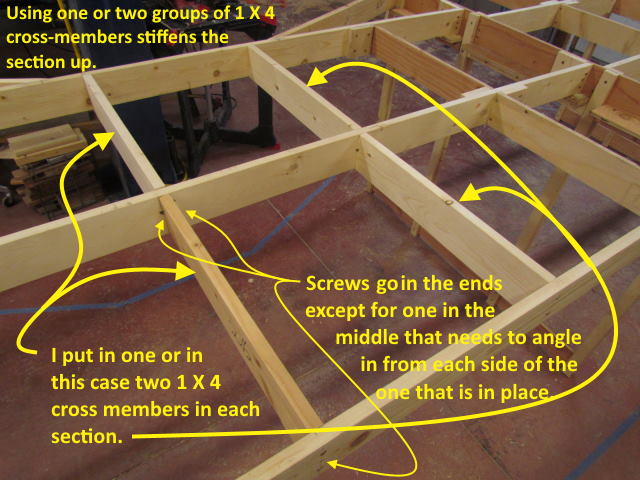
The following pictures should pretty much tell the story.
.
.
.
.
.
.
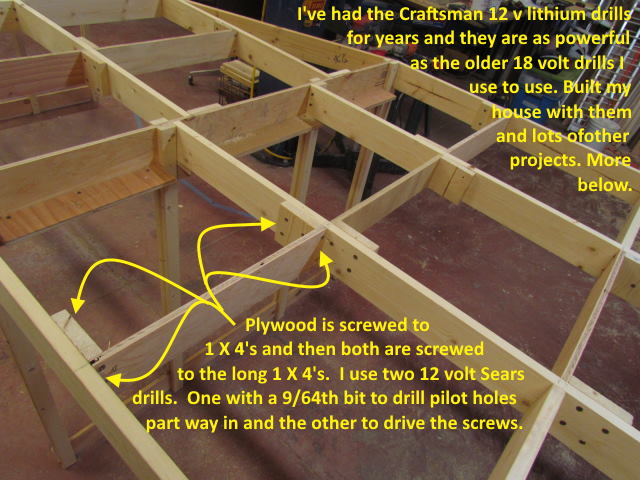
( HERE ) is a link to the Craftsman drills that I love. Don't be fooled by the fact they are 12 volts. I've screwed the entire metal roof on my home with these and many other projects (thousands of screws) and they will run in 2 to 3 inch 'grabber' screws no problem. I usually pre-drill the screw holes with a 9/64” bit if I think the wood might split by putting the screw in directly.
I still have the original three I bought. I have one to drill, another with a countersink bit in it if I need to do that and a final one with a driver bit in it to drive the screws home. This speeds up the work as I don't have to change bits all the time. I run the driver one on 'Low' and the other tow on 'High'. The batteries charge fast (20-30 minutes) and last a long time on a charge.
I've since bought a couple others off of eBay ($30 to $40) for other uses (all worked fine) and had to buy a couple batteries finally also off of Amazon. They have worked as well as the originals. I like that the drills are small and I can get into tight places but they still have the power do do anything I've needed them for. Don't have my higher voltage drills any more as they all finally quit working or couldn't get batteries. I do occasionally still use a 3/8” and two 1/2” 110v powered drills I have. The Craftsman drills will take up to a 3/8” bit but you aren't going to probably want to drill through steel with that size bit but for woodwork they will do anything.
.
.
I put up a YouTube video ( HERE ) showing the benchwork at this stage.
To be continued.......
=========================================
...........................On..............e.........Next Page If There Is One