.................................. Return to Sumner's Home Page....
Return to N Scale RR Main Menu.............. Return to Trackwork Menu
=========================================
..............Previous Page..............................Next Page If There Is One
=========================================
…...............................--- General Turnout Building Tips --- Servo for Turnout Control ---
=========================================
After building over 30 turnouts I've come up with some tips that might help you if you are just starting out building turnouts or want to look at other possible solutions. I started by using Fast Tracks build instructions and would still recommend that for someone new to this. Then look at what others and myself have done and see if you find a combination that works well for you. I'll probably end us still doing things a little different 50 turnouts from now as you keep finding ways to do it faster and better.
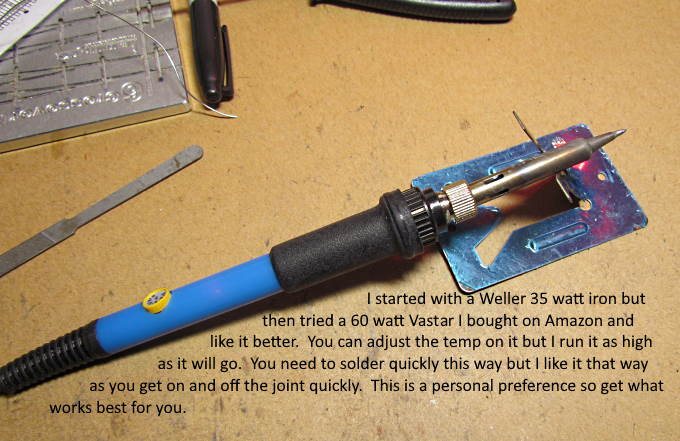
I started with an iron that I got from FastTracks and it is/was a good one and might be a good one for you to also use. I'm now using a cheaper iron that is also hotter and like it better for the way that I solder. Since it is hotter you need to get in and out faster, which is maybe not good if you haven't soldered much. If you are new to soldering a slower 35-40 watt iron might be better. The Vastar's heat is adjustable but I use it full up most of the time.
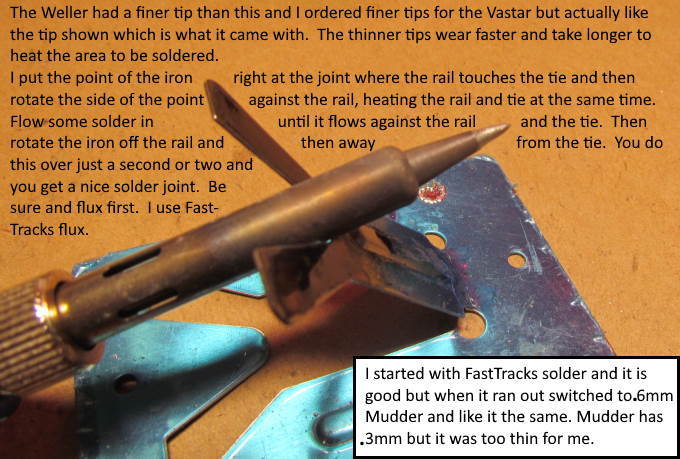
I also started with FastTracks solder and it is good but found out that I like Mudder's .6 mm solder the same and it is cheaper. It seems to be the same diameter as FastTracks. They also have .3 mm and I tried it but it is too thin. Probably great for printed circuit board work and I'll use it when soldering SMD resistors and LED's. I found the Mudder solder and the Vastar soldering iron on Amazon.
You can get finer pointed tips than shown above and I have them but now prefer to solder with the tip that came with the iron. It is a little larger but I like how quickly it heats the joint and it lasts longer than the fine tips. I'm still on my first one but did wear out a fine tip. Tips aren't that expensive so experiment and use the iron and tip that works best for you and maybe change later if it suits you to do so.
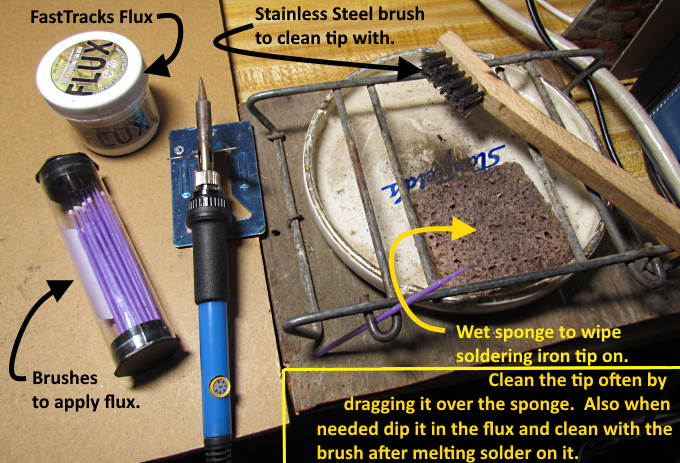
Make sure you keep the tip on the iron clean and tinned. For years I've used the wet sponge in the old ash tray and it works well but now also clean the brush with the stainless steel brush every so often. I also now and then as needed dip the hot iron in the flux and immediately melt solder on it then wipe it on the wet sponge and brush it down to get a fresh tin coat on it. If all of a sudden it is harder to heat the ties and rail to solder I'll bet your iron is dirty.
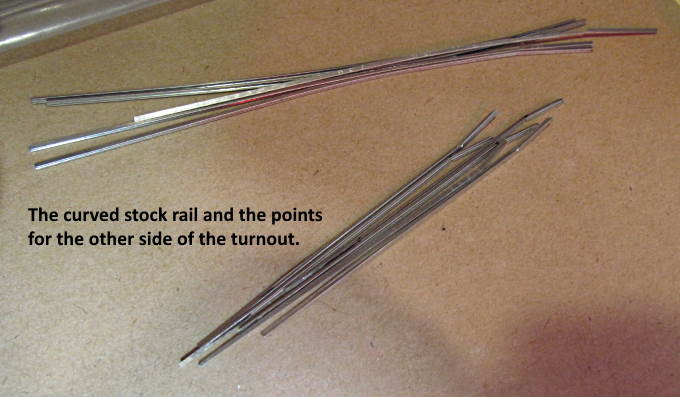
If you are building multiple turnouts mass producing the parts for them will save a lot of time. Cut the stock rails longer than needed and mark them for the notch for the point. Make the points and bend them using a paper template of the turnout. You can download full size ones on FastTracks.
Make the stock rails and point rails for both sides of the turnout and trial fit them in the fixture.
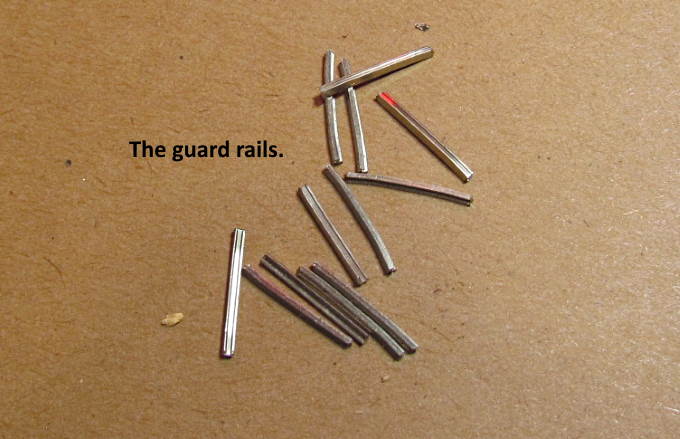
I also make up the guard rails ahead of time.
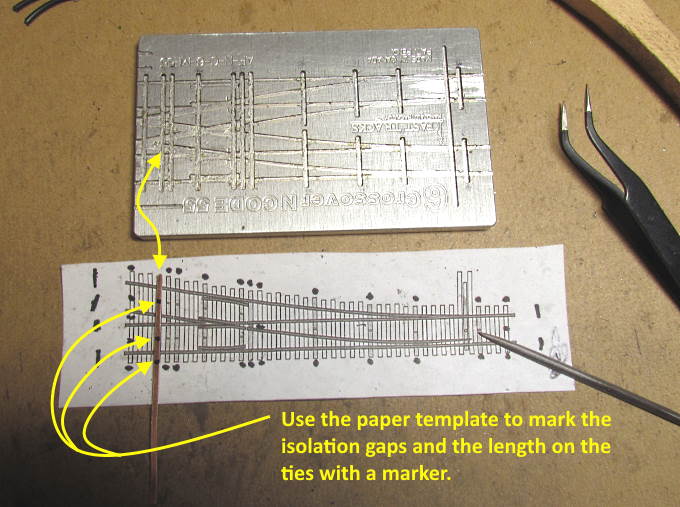
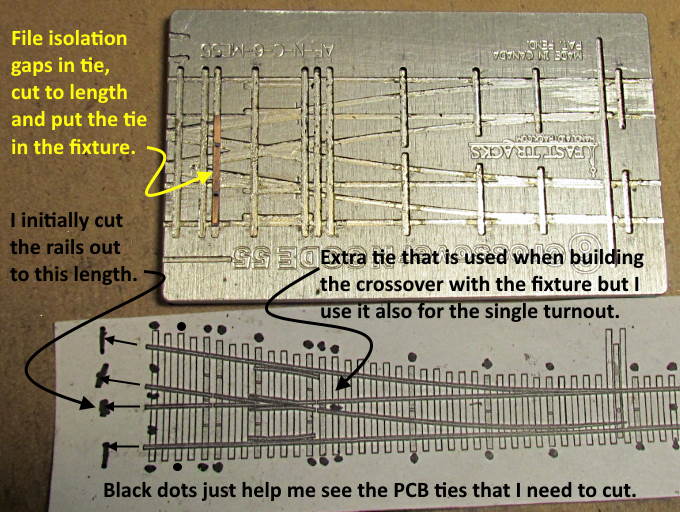
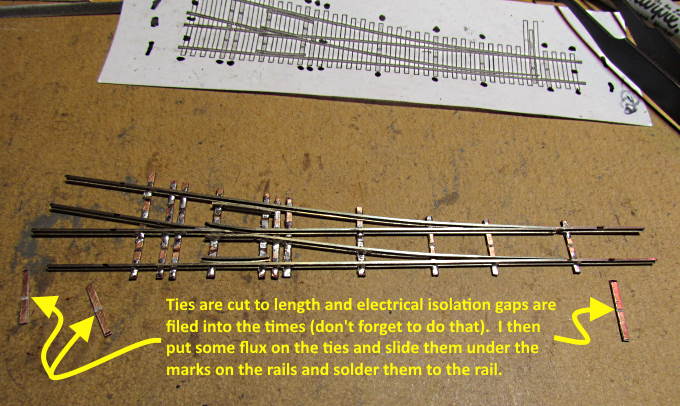
I now cut most of my ties from printed circuit board (Shown HERE ). I mark them using a paper turnout for length and also mark where the electrical isolation cuts have to be filed into the tie. FastTracks has ties that will fit the fixture without having to cut them out and they also have a tool that will help you cut them to length faster if you want to go that route. I started like that myself.
I cut the tie to length and place it in the fixture. I'll usually start on the left side and work to the right. If I cut a long one from the PCB tie I made and have an adequate length left over I'll then use the leftover tie where it fits best and re-mark it and file it and cut it to length and put it in the fixture.
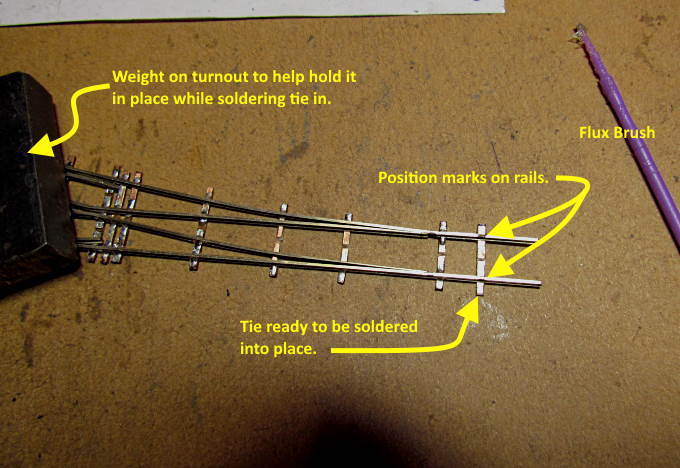
Above you can see on the right side where I have marks past the ends of the rails on the template. I have the same marks on the other end and initially cut the rails to these lengths and then can trim the turnout back to where I want it when it is installed.
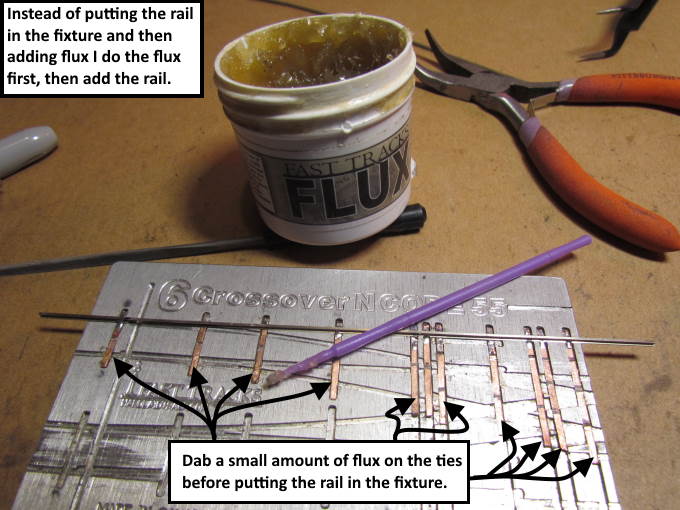
If you follow FastTracks instructions you will see that they put the rail in the fixture on top of the ties and then dab flux on each joint. I now do it a little different. I put the ties in and then flux them all at the same time on one side of the fixture. Then I put the rail on top of the ties and start soldering it in, usually starting near the middle and working both ways. I don't have flux on the rail doing it like this but the solder seems to flow onto the rail just fine and it is faster this way. Also having the flux on the tie on both sides of the rail helps to make it flow under the rail easier it seems.
I'll put the point of the iron where the rail contacts the tie and then rotate the side of the iron against the side of the rail and after a second or so flow the solder down into the tip area. It will flow onto the tie and the side of the rail. Once I see it flow I rotate the iron off the rail and pull it away from the tie. This all happens in about 2 seconds with the 60 watt iron I use. It is slower with a 35 watt iron.
I usually put the iron in, rotate it, touch the solder to the joint and rotate off the rail and pull it off the joint about as fast as you just read this sentence or faster. You will develop a method that works for you. Again go to FastTracks and see the soldering video and their other great videos on all of this.
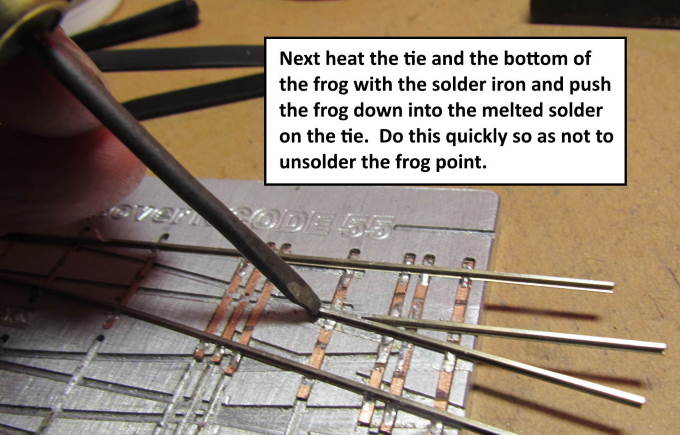
I've also started pre-tinning some of the ties before putting rail on them, such as, the area where the frog goes above. Tin the ties with a very thin layer after fluxing them. I make the tinning a little thick where the point of the frog will rest on a tie there (black arrow above).
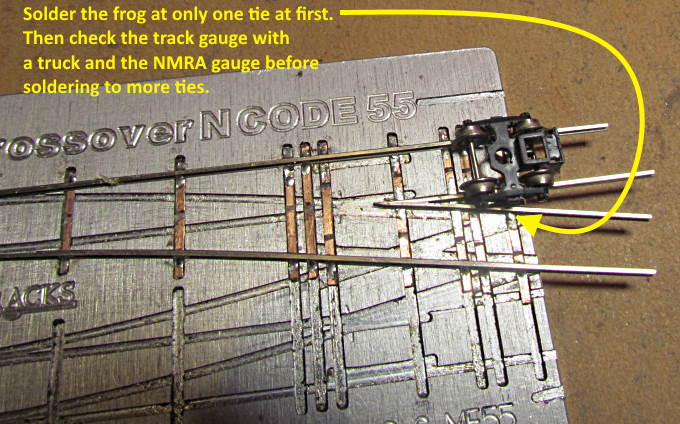
Start with the frog by just soldering it in only one place in case you need to move it. Check the track gauge with a truck that has been checked for gauge and also a NMRA gauge. Do this repetitively as you build the turnout.
If all is well I move next to the point of the frog and heat primarily the tie with more tin on it under the point. When that solder heats to melting I push the point into it with the tip of a small screwdriver as shown above. Do this quickly an don't keep the iron there so long that it heats the point of the frog to the point where that solder joint comes apart. You will see the joint heat and the solder in it start to flow. Get off quickly at that point. FastTracks doesn't do it this way buy I like how this really solders the point of the frog solid to the tie. Them do something similar when the turnout is finished.
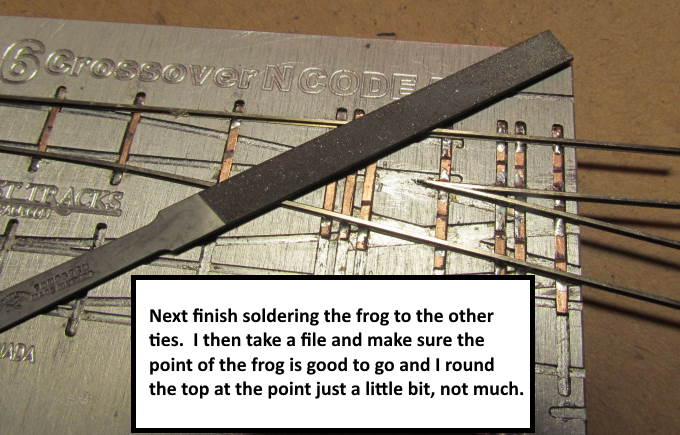
If the point needs to be cleaned up with a file do it now while you can still get to it.
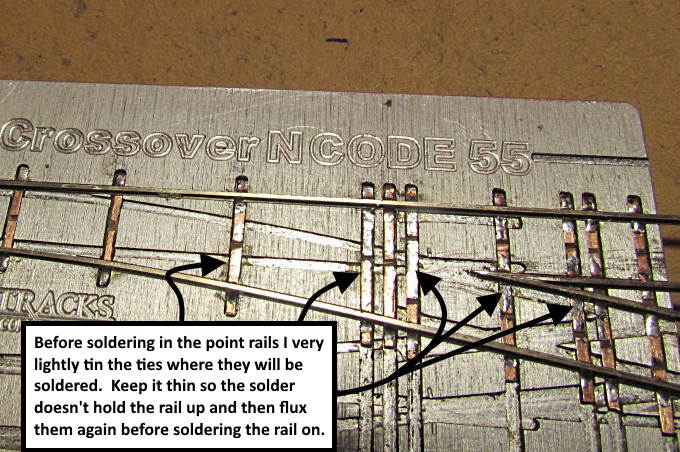
I also very lightly tin the ties that the point rails will sit on.
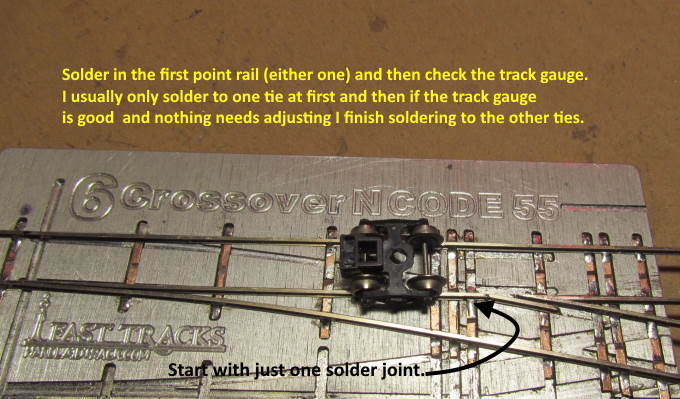
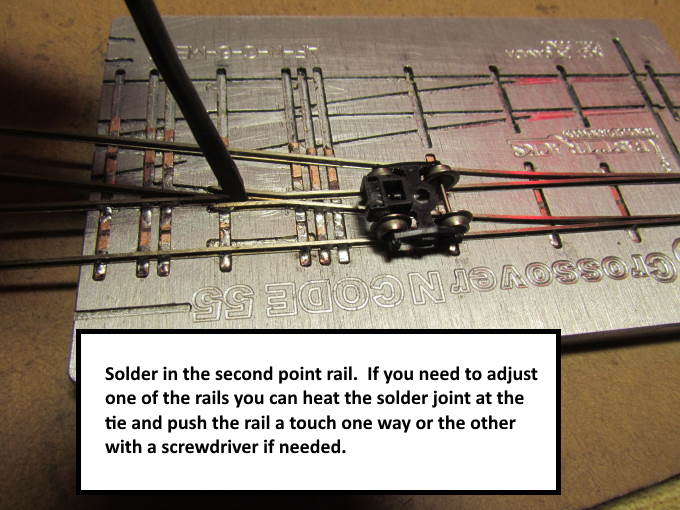
Solder one point rail in, doesn't seem to matter which one first, by soldering again only one point as shown above with the arrow.
If all is well with the first one after checking it with the truck then finish soldering it in and go to the other side of the turnout and repeat the same steps.
If you need to adjust the point rails do it now. Heat the ties and bend the rail one way or the other. I find a small screwdriver tip works great for this.
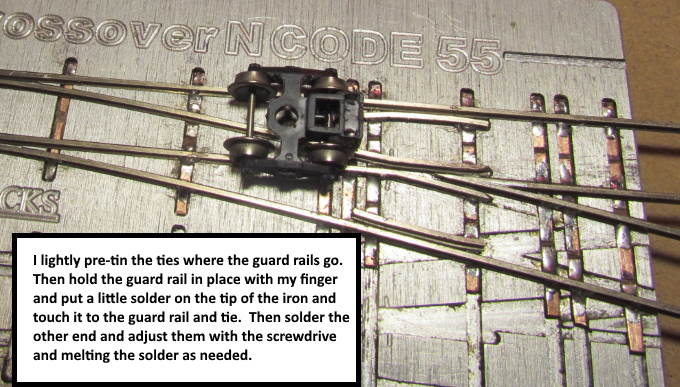
The guard rails are small with N scale. I pre-tin where they go. Again with a light tinning. Then I hold the rail with my finger about where it should be. Not real concerned if it is exactly the right distance from the adjoining rail. Take the iron and hold it against the end of the solder and melt a small ball onto the end of the iron. Touch that ball to the free end of the guard rail and pull the iron off as soon as the solder flows. Now the guard rail will stay put while you solder the other end. Run the truck through where the guard rail is. If it is too close or too far from the rail then heat one end at a time and push the rail one way or the other until you have it where you want it.
Then repeat with the other end of the guard rail if needed. You can do all of this faster than what it took to read the above.
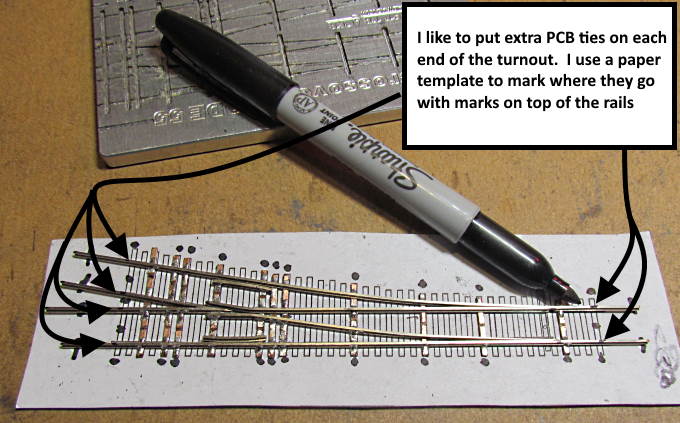
I like to add an extra PCB tie to the ends of the turnout. One on one end and two on the other end. You can't use the fixture for this but you are done with it at this point.
Remove the turnout from the fixture and place it on the paper template and mark the rails where these extra ties will go. This will space them to the right location. I just put dots on top of the rails with the marker.
Cut and notch the isolation joints in the needed ties and put some flux on them.
Slide them under the turnout where the dots are and I put a weight on the turnout then to hold it in position so I have both hands free to do the soldering. The tie or the fixture might want to slide around. I'll push the rail against the tie and have a round bead of solder on the iron and just touch it to the rail and tie. At this point just get the tie in position.
Then solder the other end and while the solder is hot push the rail down onto the tie with a screwdriver tip and let the joint cool. Now go back to the other side and heat it and push the rail there down onto the tie. Do the same to the other end of the turnout.
You might decide not to add the extra end ties but they give me peace of mind.
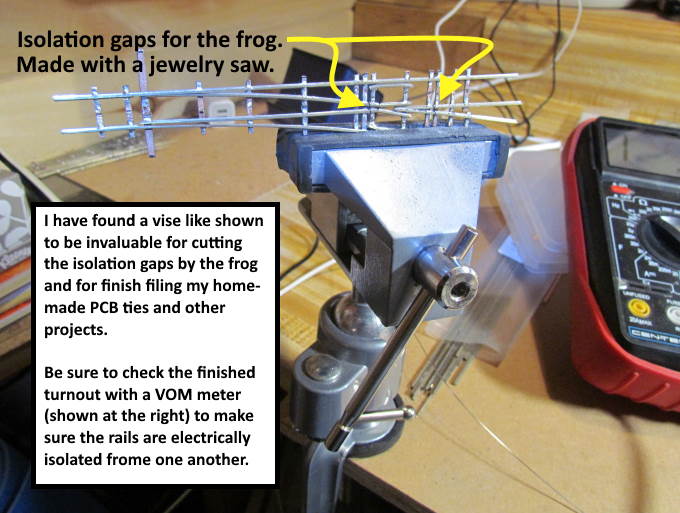
Last you need to cut isolation gaps on both sides of the frog with a very thin blade in a jeweler's saw. I started doing this with my workshop large vise but then started using the vise that is show above and really like it. It is a $15 Fasmov 3” swivel table vise that I got from Amazon ( HERE ) or search for “Fasmov 3” swivel table vise”. Love the vise and use it when making ties and for decoder installs when I have to mill the loco frame and numerous other things.
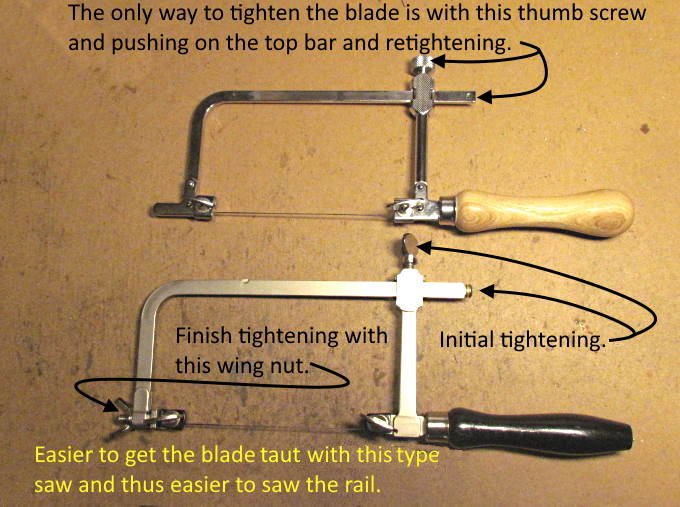
I started with the saw shown at the top in the picture above. It worked ok but I found that it is hard to really get the blade taut in the saw. If it is taut it is easier to cut the thin rails. Still at the end of the cuts you can only use a draw stroke and can't saw with a back and forth stroke. The bottom saw loads like the top one but you can also get it tighter by using the wing nut on the bottom left after the initial tightening. It takes a few times to load it as fast as the top one but once you get the hang of that you will probably like it better, at least I do. I found it on Amazon ( HERE ) or search for “Megacast GERMAN STYLE JEWELERS SAW FRAME”
.
After cutting the gaps use a VOM meter to check to make sure the rails are isolated from each other. Again FastTracks has good instructions on this and I love their fixture that is show in the pictures above. I spent a little more and got the one that will build a code 55 double crossover as you can also build a single crossover with it along with a 19 degree crossing and #6 right-hand and left-hand turnouts as shown above.
I've also build turnouts from templates alone but the fixture really speeds things up and I wouldn't build turnouts with either the fixture or via templates without their PointForm and StockAid tool which really speed up making the frogs, points and the stock rails. Great products and a good source for supplies such as the rails, ties and other items to build turnouts ( FastTracks )
Using the FastTracks fixture and making the turnout components up in quantities you can solder up a turnout very quickly.
I was recently asked how to put the bend in turnout rails when it is needed. This should help..
Put the bend into the rail over a length of the rail, not in one place. Bend, then check against the template or fixture and bend more or take some out as needed. Work the bend in using the thumb and fingers multiple times.
I'll try and add to this page as I think or learn of other things that might help one when building turnouts or other track work.
=========================================
...........................On..............e..........Next Page If There Is One