.................................. Return to Sumner's Home Page....
Return to N Scale RR Main Menu........ Return to 3D Printed Objects Menu
=========================================
..............Previous Page.......................................Next Page If There Is One
=========================================
…...--- Switch Machine Camouflage Objects ---
=========================================
You can find all the files to 3D print these on my thingiverse.com account ( HERE ).
On this page you will see some of the objects I've designed as of 04-06-20 that will sit on top of the switch machine described on the page before this one. I'll be adding to these in the future and hopefully I'll try and get them up on my thingiverse site ( HERE ) where you can print them out for your layout if interested if you have a 3D printer or access to one.
.
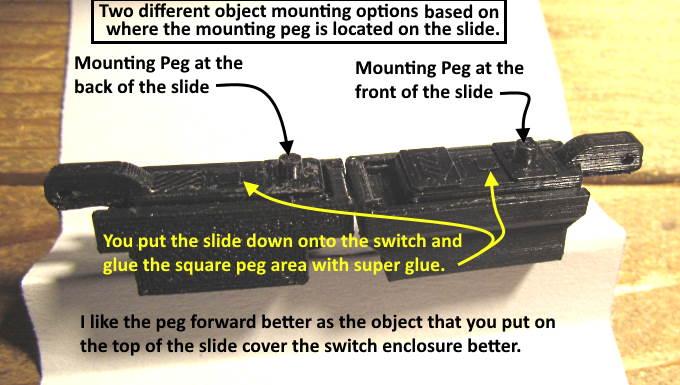
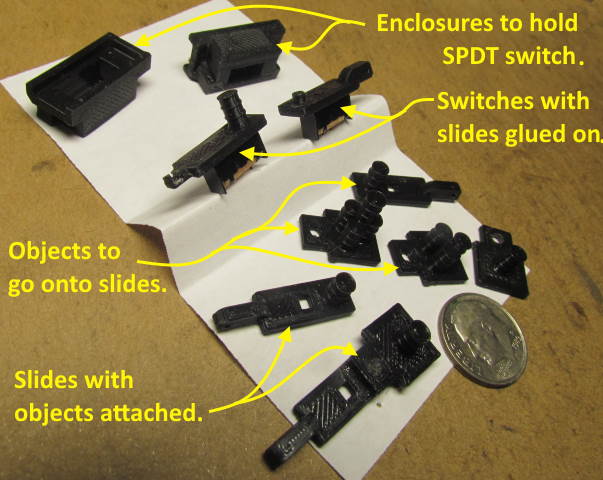
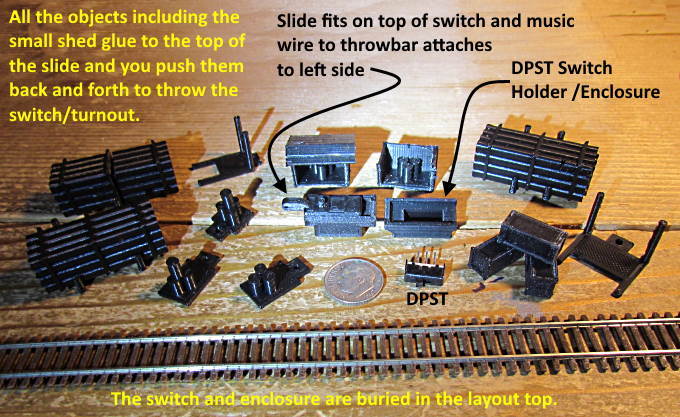
The slide is glued to the top of the SPDT slide switch with some super glue where the square hole is. Once the slide is glued on you can't remove it from the switch but you still can remove it and the switch from the enclosure. By ordering 100 of the SPDT slide switches I got them for 49 cents each from Jameco plus a couple bucks shipping.
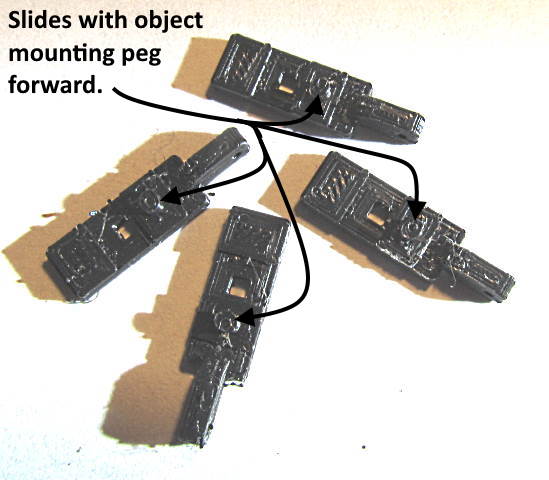
I pretty much came to the conclusion that for most situations having the peg to help locate the object chosen forward on the slide was best. This mounts the object on top of the switch and not behind it.
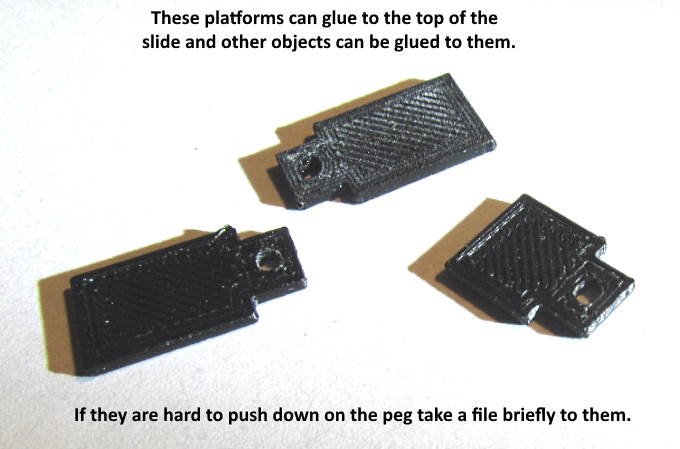
If one has problems pushing the object down over the round peg spend a minute or two enlarging the hole on the objects mount with a file.
I apply a small amount of super glue to the bottom of the object on the back side to that it is glued behind the square hole and a little glue at the forward peg location. The peg, not the glue, should take most of the force of pushing the switch back and forth.
.
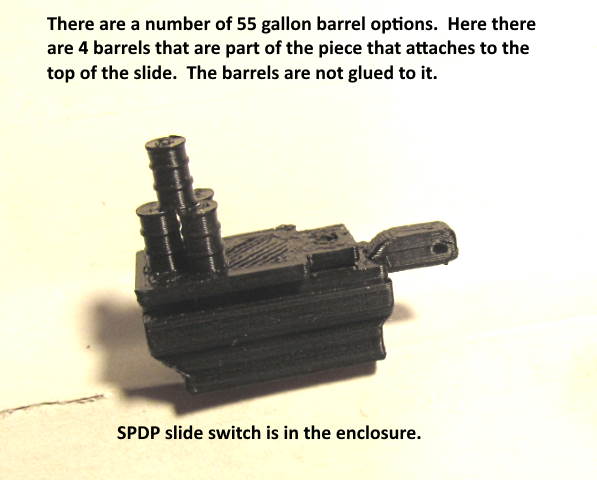
You have the option of gluing whatever you want to the tabs above and then glue them to the top of the slide using the hole to locate them.
I made up some tabs where the barrels are part of the tab, not glued to them, for more strength. I also have some of the slides with one or more barrels being part of the slide, again not glued to the slide.
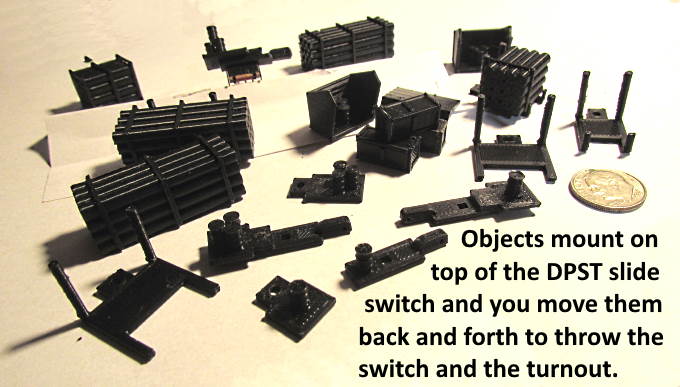
I also made some crates that are a scale 4 foot by 8 foot and some that are 4 foot by 4 foot (not shown). These can be glued in any configuration on the slides or used other places on the layout. These still need to be cleaned up a little but remember these are way smaller that what they appear in the picture above.
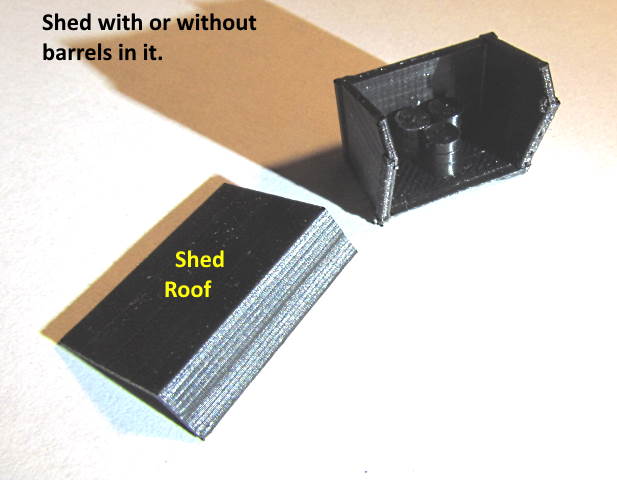
I also made up a shed with some barrels that are in it but they could be cut out and I'll make another where they aren't part of the build. The roof has to be glued on, the rest of what you see is all one part.
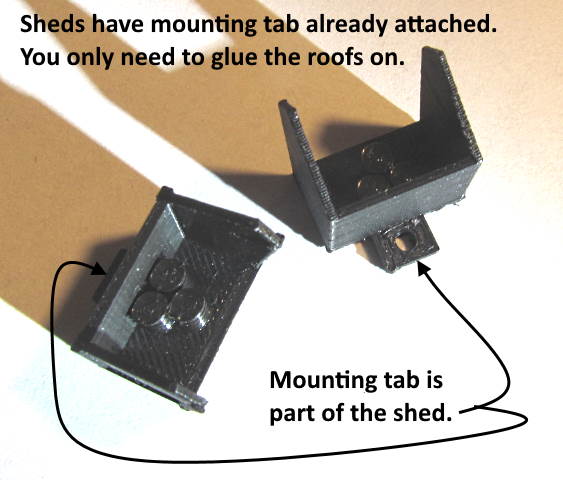
The sheds also are built in such a way that they have a mounting tab on the back side to help with mounting them on the slide on top of the switch. The tabs could be cut off if you wanted to use them other places on the layout.
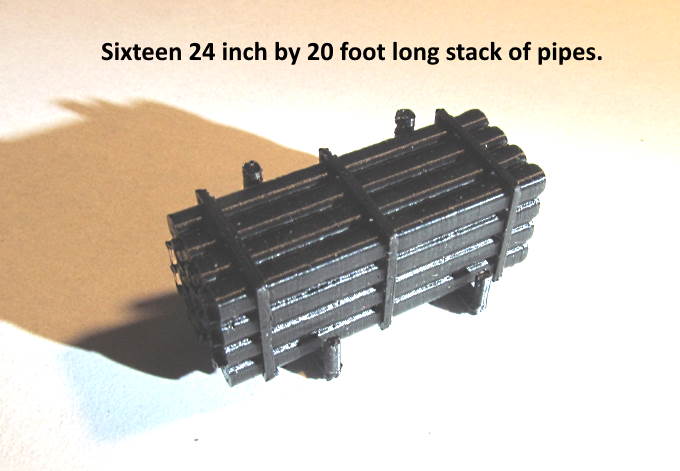
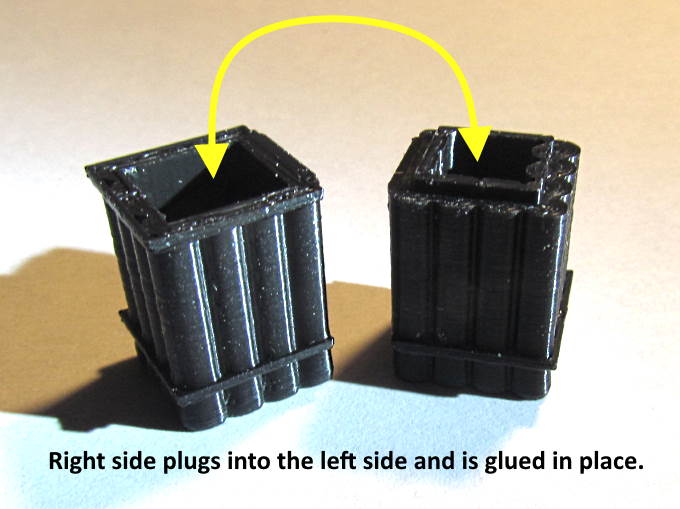
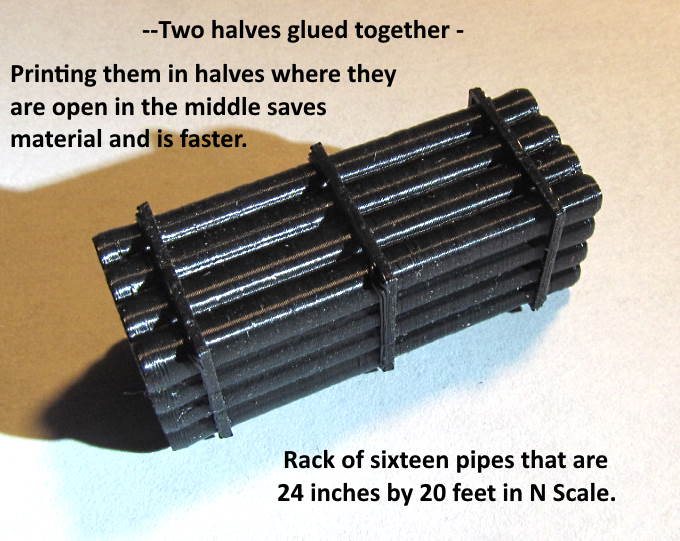
I made up a couple different stacks of pipe. Shown above is a stack of 24 inch diamter by 20 feet long pipes.
.
.
.
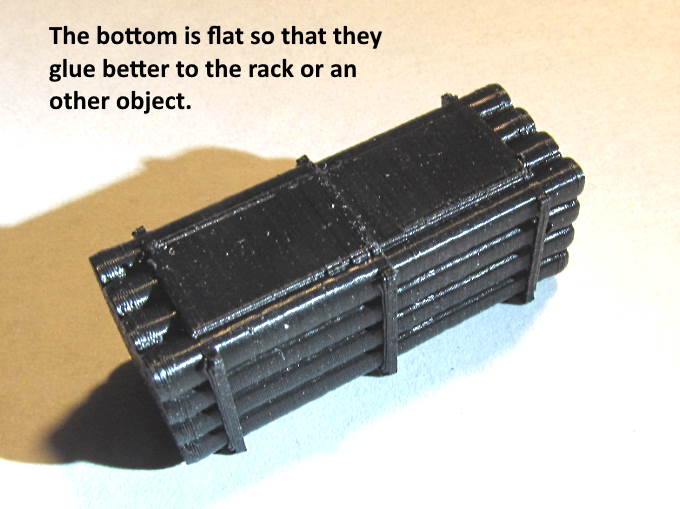
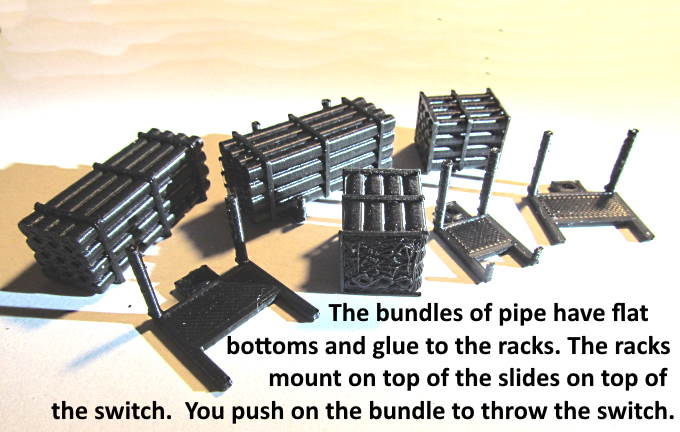
There are a couple different configurations of racks that the pipes can be glued to and the racks again are glued to the round pegs on top of the switch slides and with more glue under their bottoms.
Above we see some of the different objects that can be mounted on top of the switch and used to throw it and the turnout back and forth. More will be coming and I'll try and post the files for anyone's use on thingiverse ( HERE ).
You can find all the files to 3D print these on my thingiverse.com account ( HERE ).
=========================================
...........................On..............e.........Next Page If There Is One