.................................. Return to Sumner's Home Page....
Return to N Scale RR Main Menu........ Return to 3D Printed Objects Menu
=========================================
..............Previous Page.......................................Next Page If There Is One
=========================================
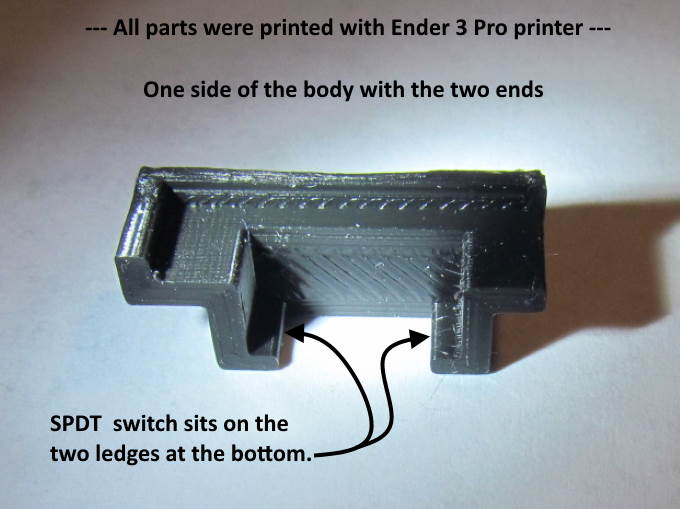
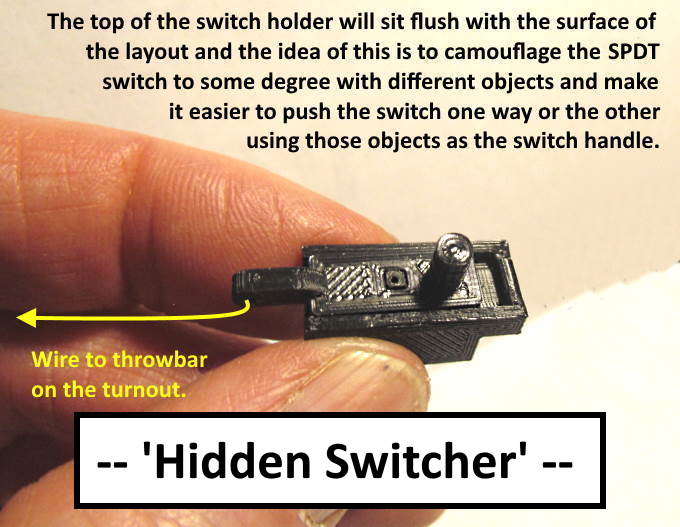
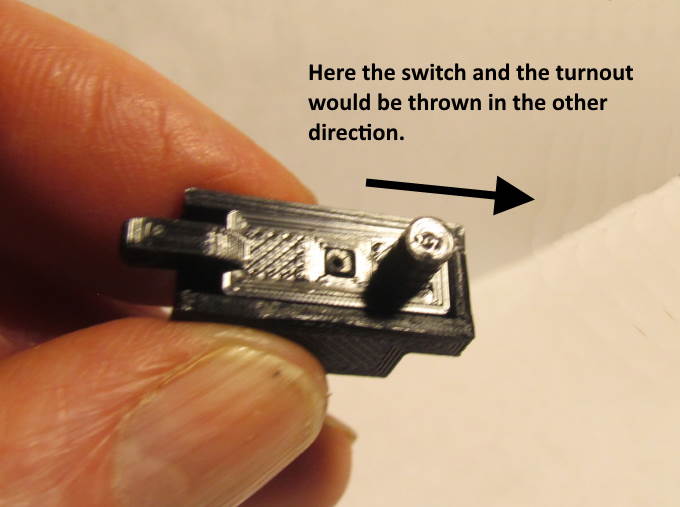
--- 'Hidden Switcher' - (the manual switch machine you don't see) ---
….........--- Switch Machine With Camouflage Objects ---
=========================================
You can find all the files to 3D print these on my thingiverse.com account ( HERE ).
I wanted to have a number of the turnouts on my layout manually operated. I'd seen a number of examples of doing this using a small SPDT slide switch. The switch is set down into a hole in the surface of the layout with the handle that you throw it with just above the layout's surface. You drill a hole in the switch's handle's side and use a length of music wire like what is used with a Tortoise switch machines between the switch and the throwbar on the turnout. I tried this setup on a piece of test track with the wire going to one of my N Scale handlaid turnouts and it worked great. The throw is actually a little too much but put some “Z” bends in the wire at the switch and that provides a spring like action to the pressure on the throwbar and points. You can find a number of examples of doing this on the internet ( HERE ).
Advantages to using a slide switch:
1. It gives you something to actually push to throw the turnout.
2. Due to the friction in the switch assembly it holds the points of the turnout against the stock rail once thrown in either direction.
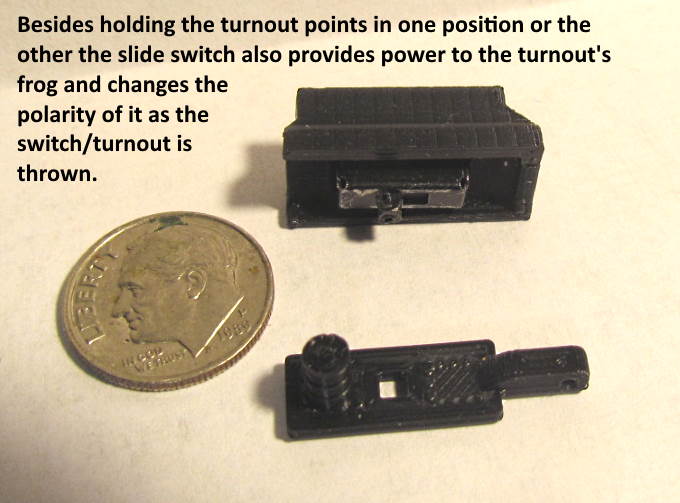
3. You can wire the SPDT switch to power the turnout's frog and change the polarity of the frog to match that of the route the turnout is switched to.
Disadvantages to using a slide switch:
1. The handle you push on top of the switch isn't very large.
2. The wire from the switch to the turnout doesn't look very prototypical. You might hide it with some form of scenery or maybe in something like a culvert.
3. The top of the switch with the handle that you push doesn't look prototypical either.
What follows is my attempt to fix item #3 by:
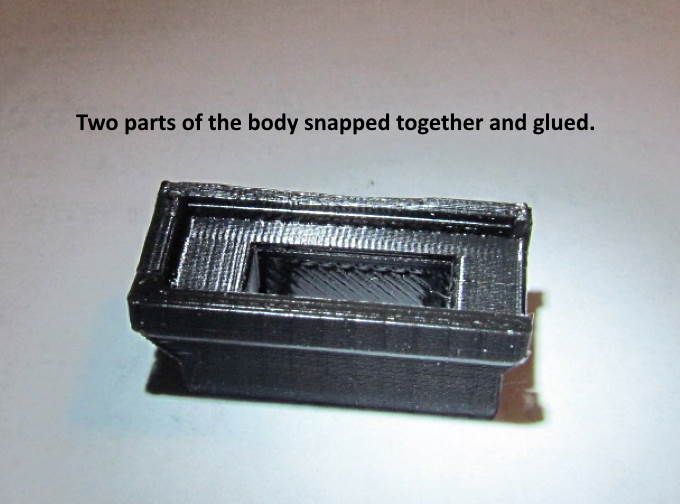
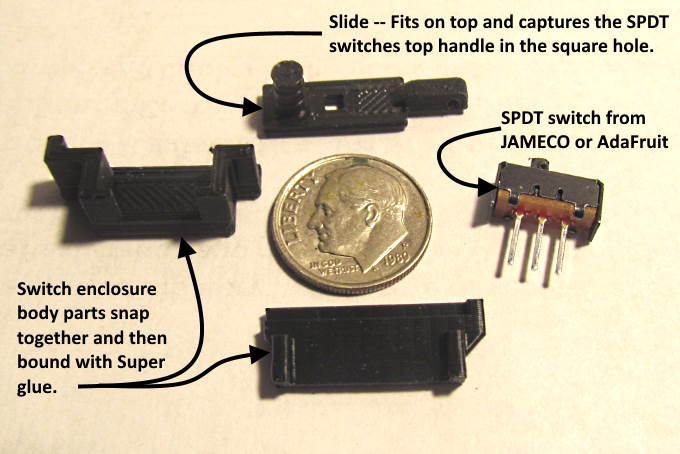
1. Use a 3D printed switch body enclosure that the switch can sit in and be sunk into the surface of the layout.
2. Cover up the switch's top handle with different objects that look like something that might be at trackside.
3. The objects will help to camouflage the top of the switch and give you something larger to push on.
=========================================
NOTE: I will try and get the files to 3D print the parts below up on my thingiverse account soon so that if you have a 3D printer or access to one you can print them ( GO HERE ).
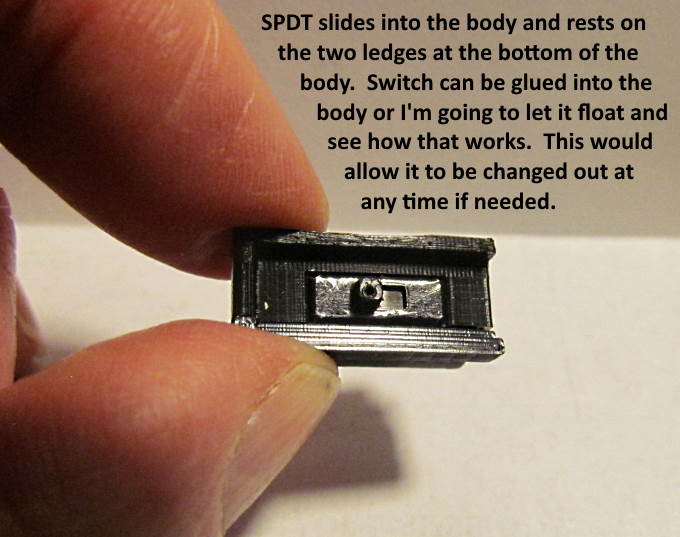
I found the SPDP slide switch that will work with the following at the following two sources on 04-01-20. Jameco part #2258831 and Adafruit Product ID: 805 I have bought from both places and the switches I bought were exactly the same.
=========================================
So lets begin.............
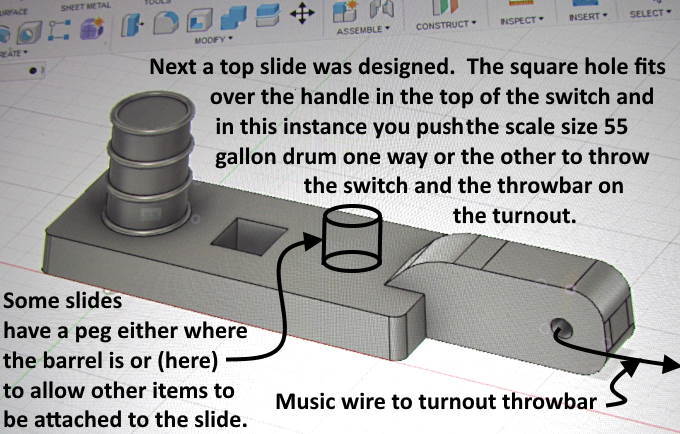
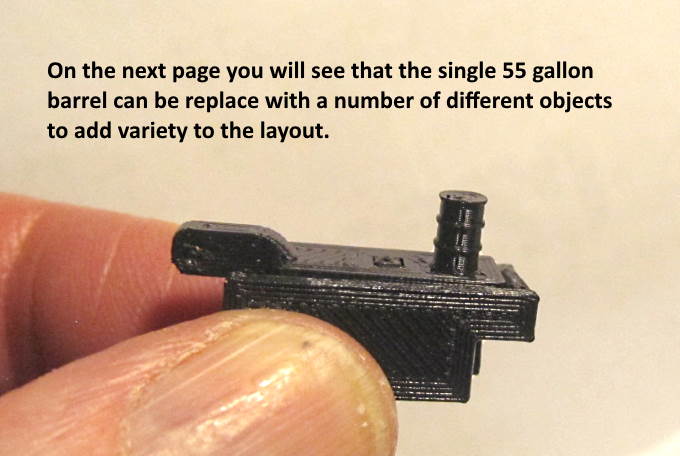
The slide shown above can be replaced with other ones that have different trackside objects on them.
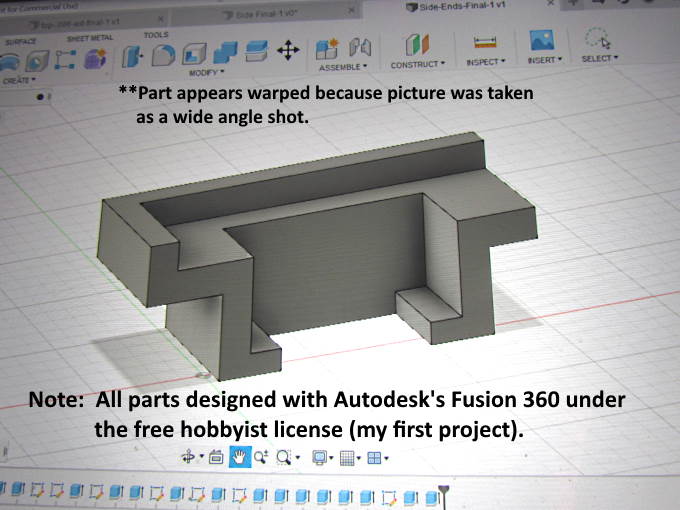
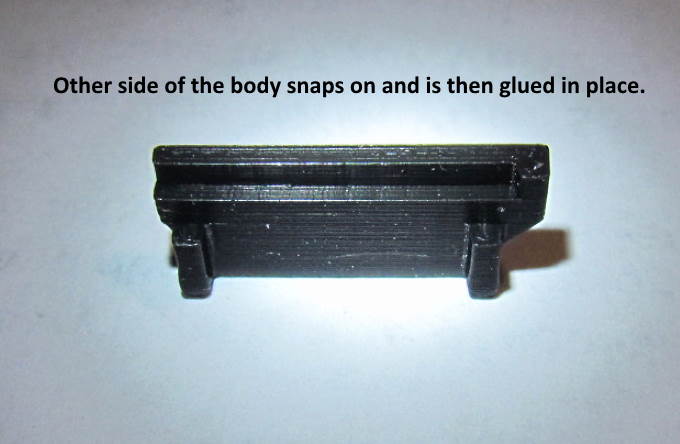
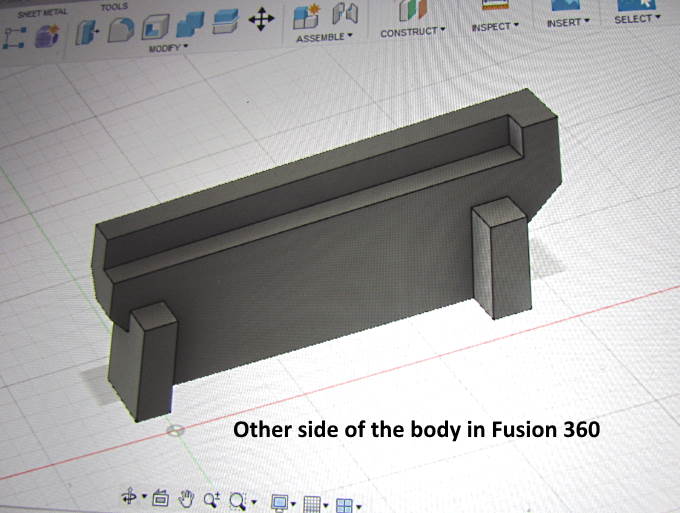
All the parts you see were printed on an Ender 3 Pro printer and this is my first basic project using it and Autodesk's Fusion 360 CAD program. I really like both.
.
.
.
.
.
.
.
.
.
.
At the time I'm writing this I've only used this on a test track I have as the layout is not ready for them yet.
You can find all the files to 3D print these on my thingiverse.com account ( HERE ).
=========================================
...........................On..............e.........Next Page If There Is One