.................................. Return to Sumner's Home Page....
Return to N Scale RR Main Menu........ Return to 3D Printed Objects Menu
=========================================
...................Previous Page.......................................Next Page If There Is One
=========================================
….....................--- Larger/Better Deck for Camouflage Objects ---
=========================================
NOTE: I now have a lot of the items on this page up on my thingiverse.com account where you can print them if you have a 3D printer or access to one ( HERE )
=========================================
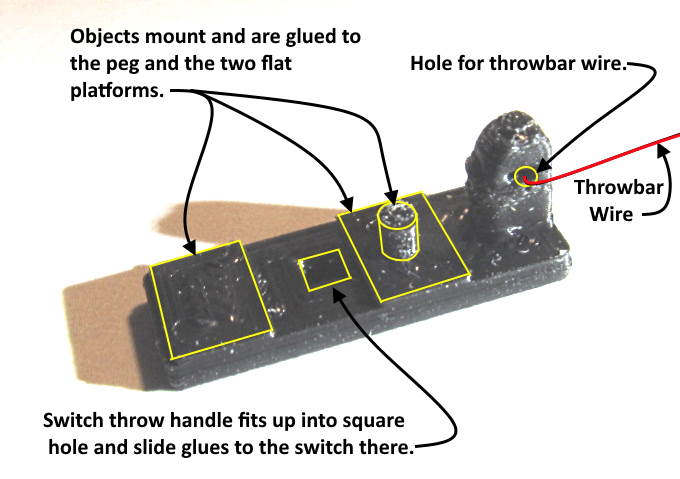
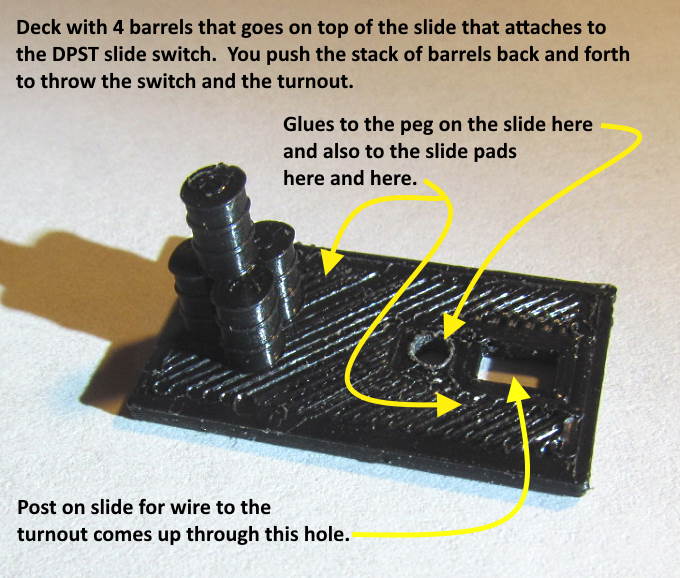
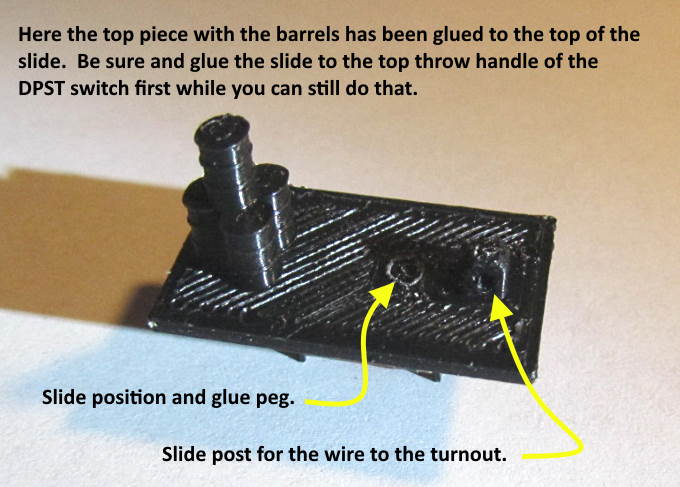
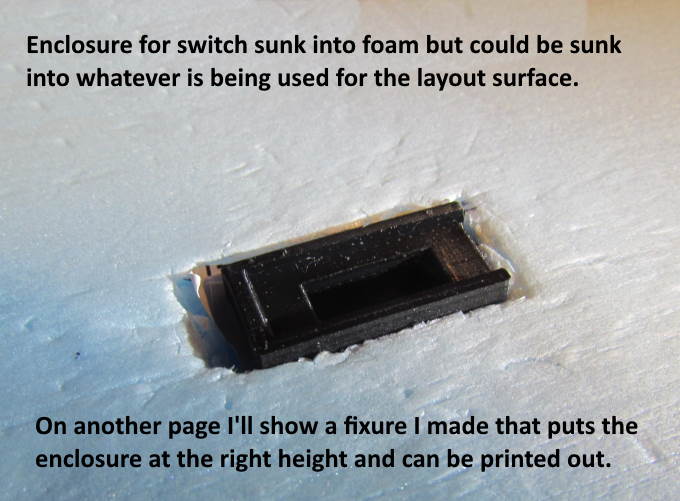
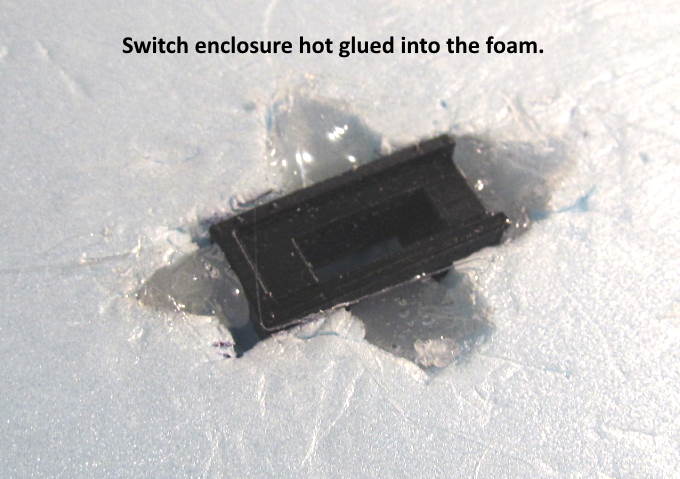
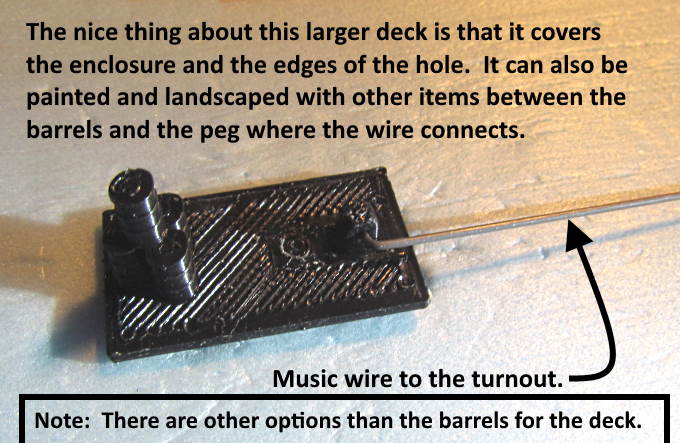
On this page we will find what I believe is an improvement to the looks of the switch machine assembly. I like the concept of how this switch machine works by hiding the DPST slide switch under some objects that look like they belong trackside and using them to throw the switch and turnout by pushing them back and forth. What I didn't like was it wasn't going to be so easy to landscape the edges of the switch enclosure and the edges of the object deck on top of the switch. Also the peg where the throwbar wire the goes to the turnout was more visible than what I liked.
I modified the top deck with the camouflage object and made it wider and designed it so that it would wrape around the peg for the turnout control wire. Now it extends past the switch enclosure side to side and front to back. This lets you apply ground cover up to the edges of the switch enclosure and then insert the switch-slide-deck with object into the switch enclosure and you have a much neater looking installation. You can also paint the deck and add some other small objects, people, plants or anything else to camouflage the whole assembly better.
The following pictures should pretty well give you the idea of what I've tried to accomplish with this modification. I'll be adding more objects such as a shed, other barrels, crates, pipe and more to the deck so that there will be a number of options as to what you may use to cover up the switch.
.
.
.
.
.
.
.
.
.
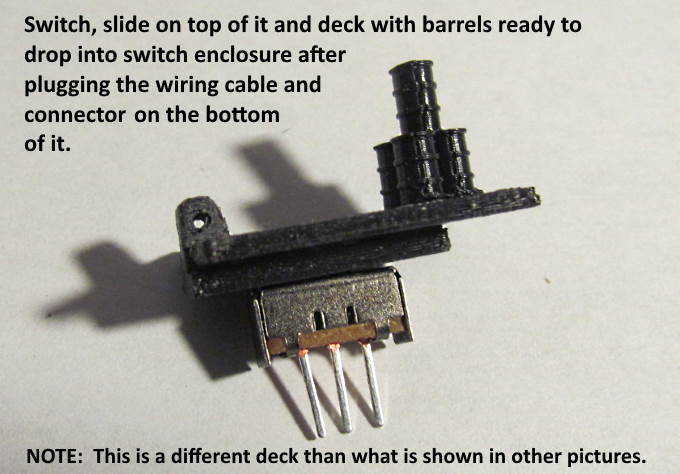
You can paint the deck and whatever object is on it before gluing it to the rest of the assembly. Also add other objects of interest to the deck, such as a person or some landscaping like a bush or two.
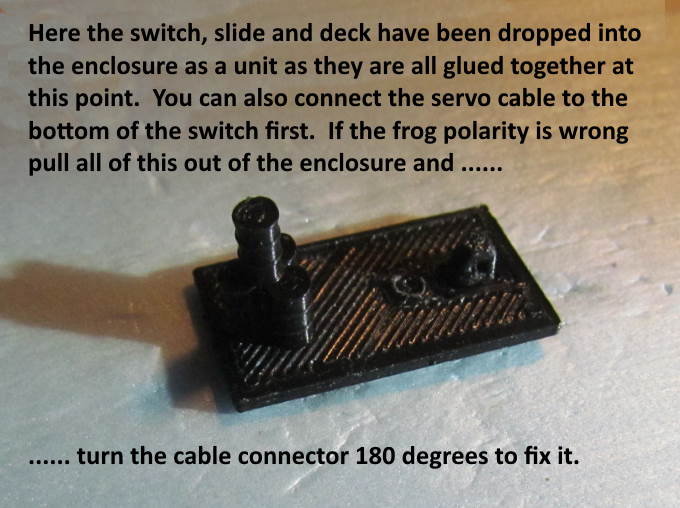
If for any reason you want to or need to you can remove the turnout control wire. Then pull the deck and the swich with it out of the switch enclosure. Pull the wires going to the frog off and replace all of it with a different assembly with a different object on the deck or a new switch if needed. No need to disturb the area around the switch.
NOTE: I now have a lot of the items on this page up on my thingiverse.com account where you can print them if you have a 3D printer or access to one ( HERE )
=========================================
...........................On..............e.........Next Page If There Is One