................................ Return to Sumner's Home Page....
Return to N Scale RR Main Menu.................. Return to Trackwork Menu
=========================================
...............Previous Page......................................Next Page If There Is One
=========================================
…..................--- Easy Side Mount Servo Bracket 2 Limit Switches ---
.... --- Mount servo bracket from side of the layout, not under it. ---
…..................--- Print files for the mount ( HERE ) ---
=========================================
This is an adaptation of the servo bracket that I have up ( HERE ) that you can mount two micro limit switches on if you need two. If you went to that link you would of seen that there are some tools you can print that make it easy to mount the servo bracket 'dead-center' under the hole in the throwbar.
======================================================================================================
These brackets with the servos and limit switches attached can usually be installed from the side of the layout, no need to go under it!!
=====================================================================================================
Since the bracket is 'self-centering' you don't need any other tools to install it other than a drill and screwdriver to easily/quickly mount the servo bracket with the servo in a couple minutes. Also the piano control wire up to the turnout will be perfectly centered the first time.
I designed these as I needed to mount servos under 17 turnouts for the sawmill tracks which are about 10 inches above the hidden staging tracks. I needed a way to mount the servo brackets and servos from the side of the layout without going under it and came up with this design.
It has proven to be so easy to install brackets/servos this way that I'll continue to use them even if I can get under the area I'm working on. So nice not having to crawl under the layout. There will be some cases where the turnouts are so far in that I'll have to go under. But these are a one trip under and you are done in a couple minutes.
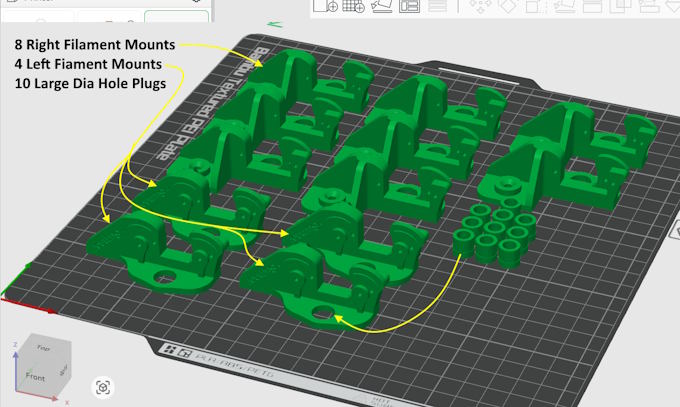
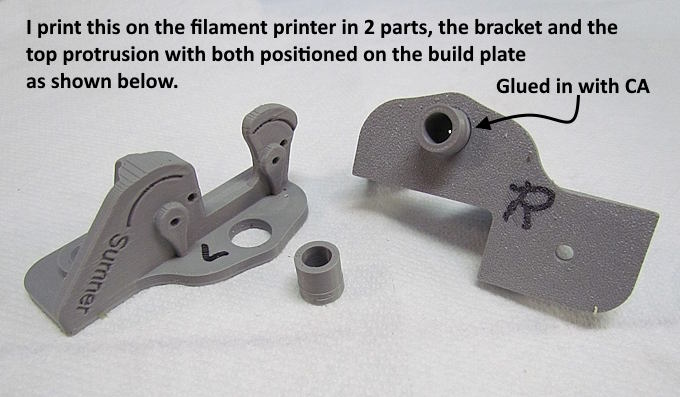
Above is the filament version of the bracket. Put the bracket and top protrusion on the printer's build plate as shown at the left. Then ....
..... glue the round protrusion in the top of the bracket as shown above. There are two versions one is about .005" smaller in diameter so might be easier to install depending on how your printer prints the main bracket hole.
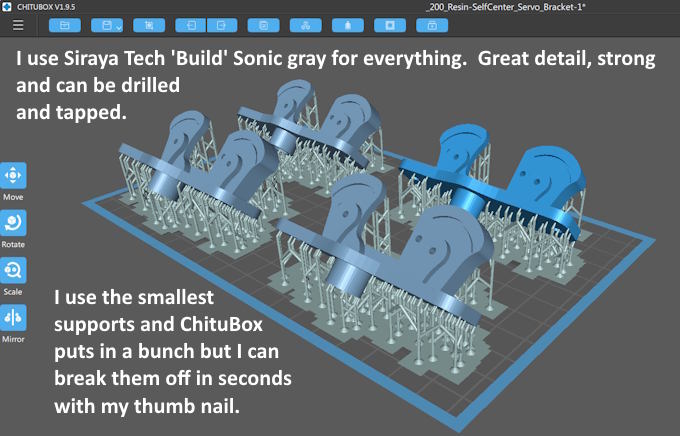
Above is one of my prints on the Bambu A1 filament printer and how I setup for the print.
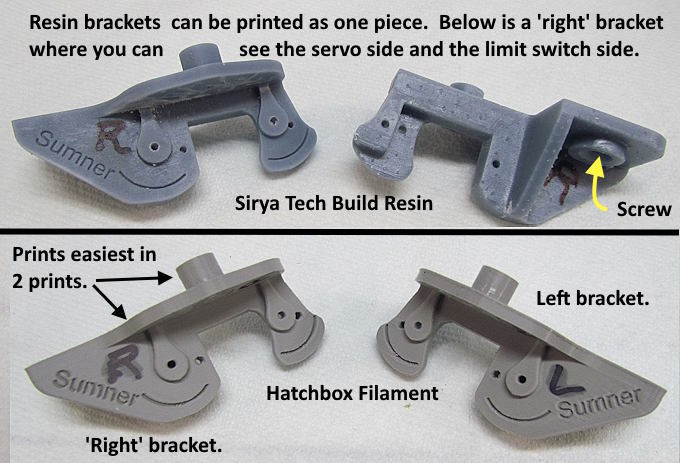
Notice above that I'm using a resin that is strong and can be drilled and tapped. The resin also prints N scale rivets on other prints so I use it for everything. There is a 'right' and a 'left' version of this bracket. If you hold the bracket where the mounting screw goes in and the limit switch mounting pads are on the right side that is the 'right' version. You will find places where the right or left might be easier to use or throwbars are close together and you need to mount them facing each other.
It only takes one Sheetrock (or other screw) to mount the bracket and since it is larger it is easier to screw in. The screw and the protrusion that goes into the 3/8" hole in the layout locates the bracket so that it can't move. You will find that it is perfectly centered under the hole in the turnout's throwbar if you kept your hole through the layout centered on that hole as described further below.
The top print above is the resin print. The bracket in this case prints as one piece and....
.... I place mine on the build plate as shown above. Notice that I'm using a resin that is strong and can be drilled and tapped. The resin also prints N scale rivets on other prints so I use it for everything. I also now use the smallest supports that are used by ChituBox and let it put in a bunch. I can pop them all off in seconds with my thumb nail after the print is cured and any filing/sanding of the support interface is easy and fast to do.
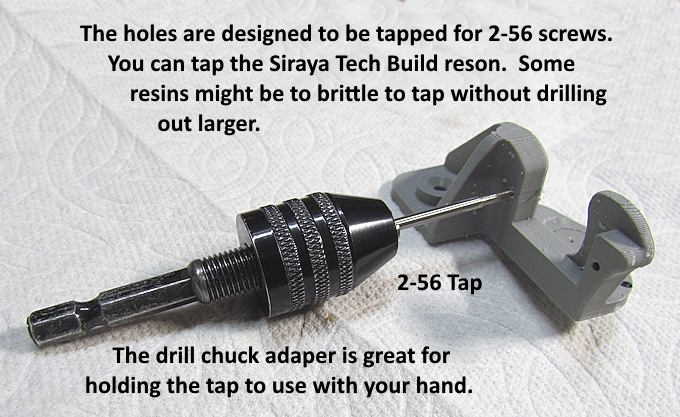
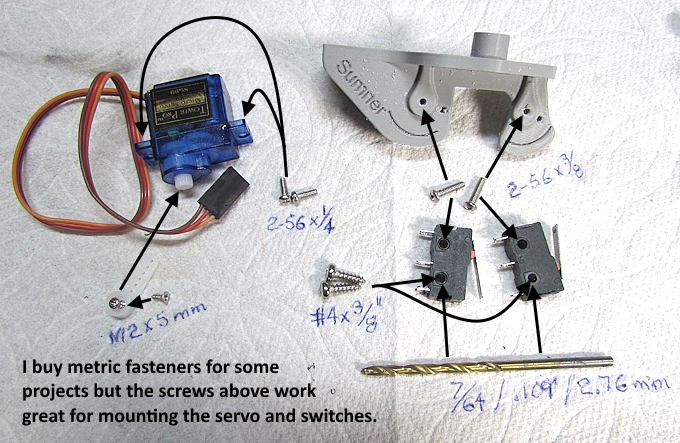
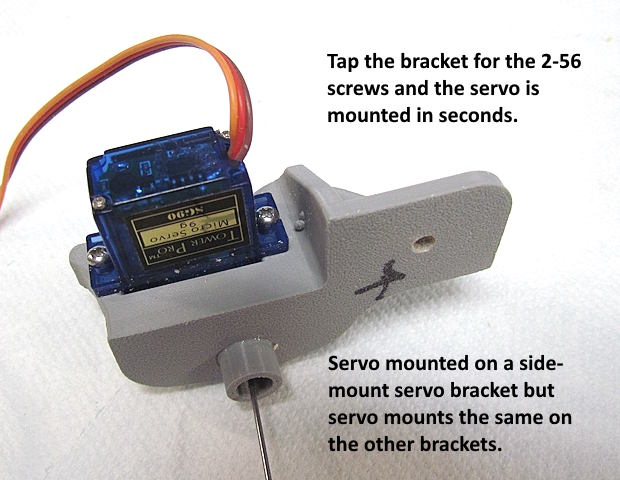
If you use a 2-56 tap (above) you should be able to tap the filament and resin prints with out pre-drilling them.
The #4 x 3/8" self-tapping screws work fine in the bottom of the limit switches to lock the switch in place after adjusting it if you can't get the top screw to hold the limit switch.
I realize some of you are metric oriented. If you can't find a metric size tap/screw to work consider buying the 2-56 tap and screws. They work perfect for the servo and the micro limit switch mounting. I use SAE fasteners for most my projects but also buy metric fasteners for some. They are both easy to find now via the internet regardless of where you live.
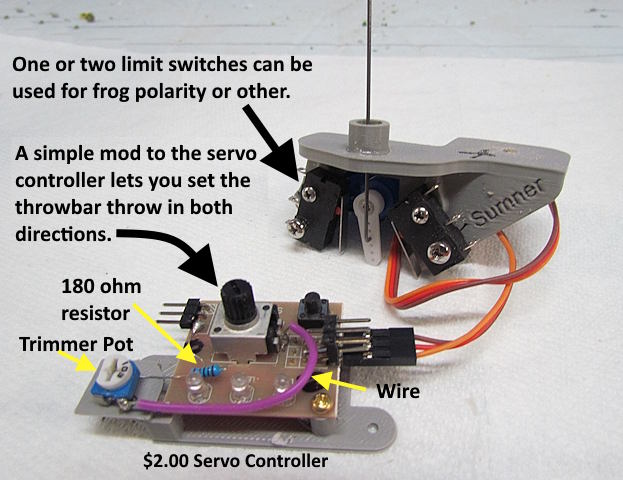
Above is a bracket ready to mount with 2 limit switches on it. In this case one will be used to control the frog polarity of the turnout and the other will control the polarity of one frog on a crossing just past the turnout. On the other side of the crossing there is another turnout. One of the two limit switches on that servo bracket will control the polarity of the other frog on the crossing. One switch on the control panel will throw both turnouts for the crossing route and the frog polarity of the turnouts and the crossing will all be handled by the limit switches on the servo bracket.
I use $2.00 servo brackets with 5 minute mods to control my servos, more info ( HERE ), but you can control them a number of ways.
Drop the servo into the back side of the bracket and run two 2-56 screws in to attach the servo to the bracket.
========================================================================
Servo Bracket Install:
1. Place the turnout 'exactly' where you want it and mark its position.
2. Drill through the hole in the throwbar into the layout top. I use .037" piano wire and put a .040" hole in the throwbar so use a .040" bit for this step.
3. Remove the turnout.
4. Use a small drill bit to enlarge the .040" hole but keep drilling dead-center as you step the hole size up in a couple steps (this will keep it centered).
5. I stop with a 3/16" (.188"/5mm) bit and wobble it back and forth at 90 deg to the turnout (see video) to make room for the piano wire movement.
6. See steps below for another option on drilling out the hole.
7. Take a 1/4", 11/32" and 3/8" below the layout and drill up through the 3/16" hole until the hole is enlarged to 3/8". It is important to step up in drill bit sizes to keep the hole centered. You also don't want to drill all the way through the top of the layout if you want the hole there to stay small. I drill through the 1/2" plywood under my 1" foam board and slightly into the foam.
I spent $20 on a right angle attachment for the drill and use a right angle Dremel tool (1/8" bit) to drill the holes underneath so I can do all of this from the side of the layout.
8. Take the servo bracket with the servo and limit switches on it and put it up into the 3/8" hole. I have the servo moved to where the piano wire is straight up and down. The hole, if you haven't oversized, it will perfectly center the bracket and piano wire above.
9. The bracket should be at 90 degrees (perpendicular) to the turnout above it. Drill a pilot hole using the bracket as a guide and put a single screw (I use a Sheetrock screw) in to hold the bracket. You are done!!
Option 2:
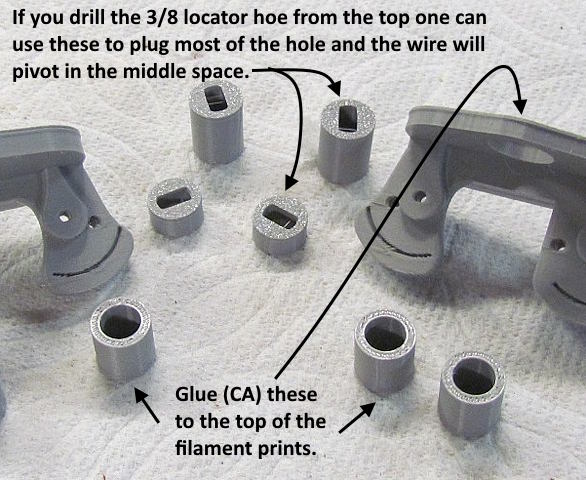
1. You can drill, in steps, up to 3/8" all from above if you want and ....
..... then plug the hole from above with one of the plugs shown above. They have an elongated slot in the top for the piano wire to move in. There are two lengths to choose from depending on the thickness of the surface under the turnout. They don't need to go very far down and can be covered with ground cover.
.
The video above or ( HERE ) shows how to mount one of the side mount servo brackets. Mounting the brackets on this page would be somewhat similar except you would have to go under the lay probably to put the two mounting screws in. Consider the side mount brackets shown in the video if you can mount from the side of the layout or even if you have to go under. The one mounting screw is easier to use than the two small ones. The more traditional brackets shown here are a little smaller so that might make a difference if you are in a tight location..
You can find the files to print this on my thingiverse.com account ( HERE ).
You can find all the files to 3D print this object and others on my thingiverse.com account ( HERE ).
=========================================
...........................On..............e.........Next Page If There Is One