.................................. Return to Sumner's Home Page....
Return to N Scale RR Main Menu........... Return to Rotary Plow Menu
=========================================
...............Previous Page.............................Next Page If There Is One
=========================================
…......--- U.P. N Scale Rotary Snowplow Build Pt. 4 --- …...................
=========================================
I put together a final video on the plow/tender ( HERE ).
You can find the print files ( HERE ).
=========================================
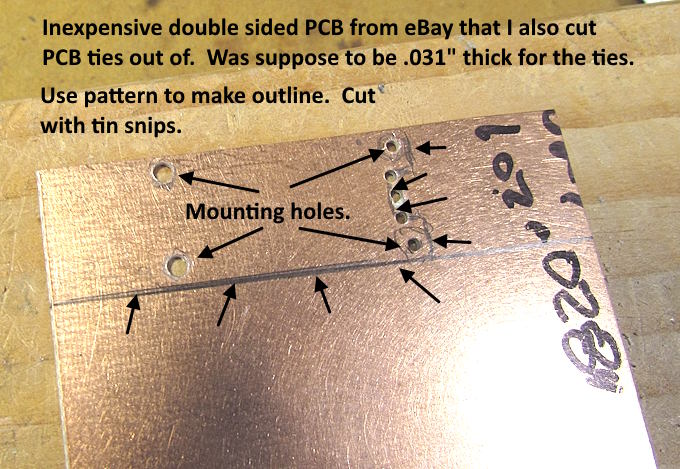
I use sheets of printed circuit board for cutting PCB ties out of and also in a number of my electronic projects. They are cheap and easy to find on eBay and Amazon. Be careful as they come in a number of different thicknesses and single or double sided. I use the .8mm/.031" double sided since that is the correct thickness for N scale PCB ties, especially if using Fast Tracks fixtures.
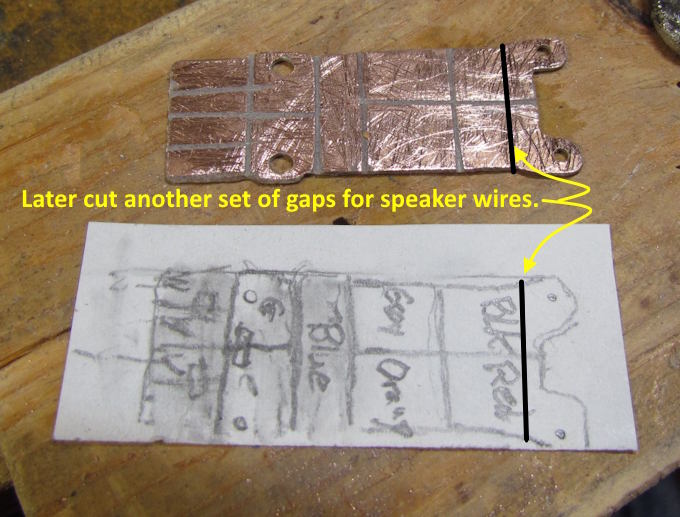
I printed the template which is available as one of the print files with this project and used it to mark the PCB. I drilled some holes to help with cutting (right end). Also drilled the mounting holes at this point. Then cut the PCB with tin snips and used files to finish up the right side indent.
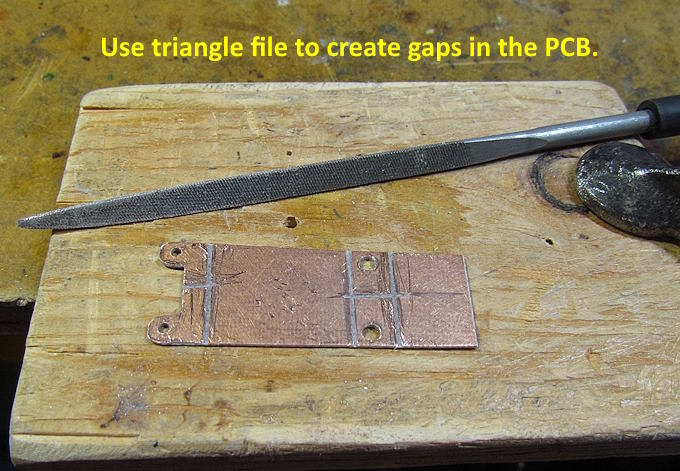
When making ties I use a triangle file like above to cut the electrical insulation cuts in the ties. The tapered end works well enough to make the cuts that don't go all the way across the board. Only takes a couple minutes to file in the cuts shown above (all cuts not in at this point).
Later I decided to add another set of pads on the right above to use with the speaker wires. There is a set from the speaker in the plow down to this board and another set from the Bluetooth sound in the tender.
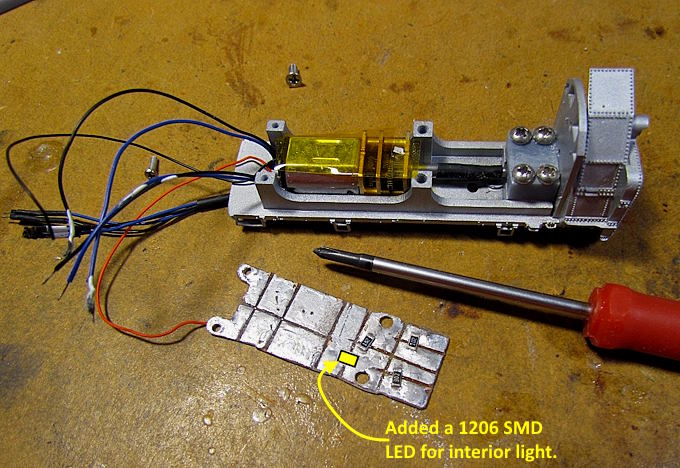
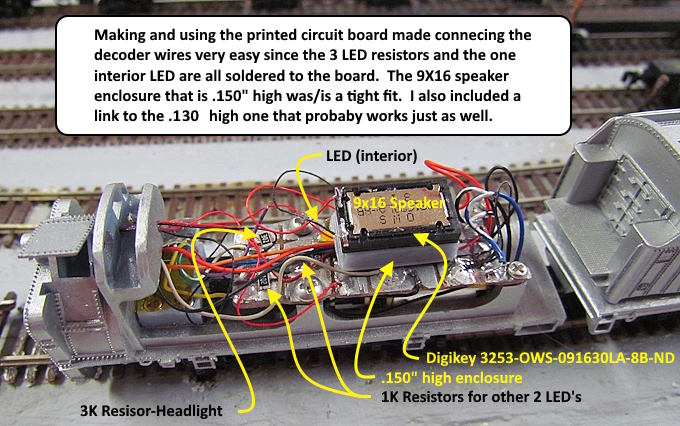
With the cuts in place I then added the resistors for the 3 LEDs (headlight, cab & interior). Also used a 1206 SMD LED for the interior light (saved wiring to one).
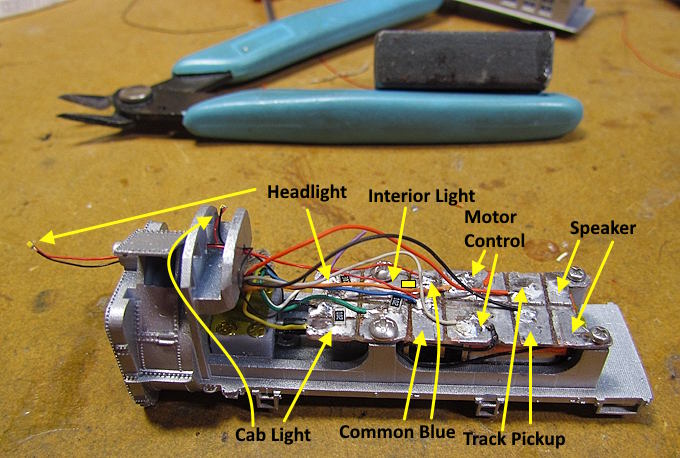
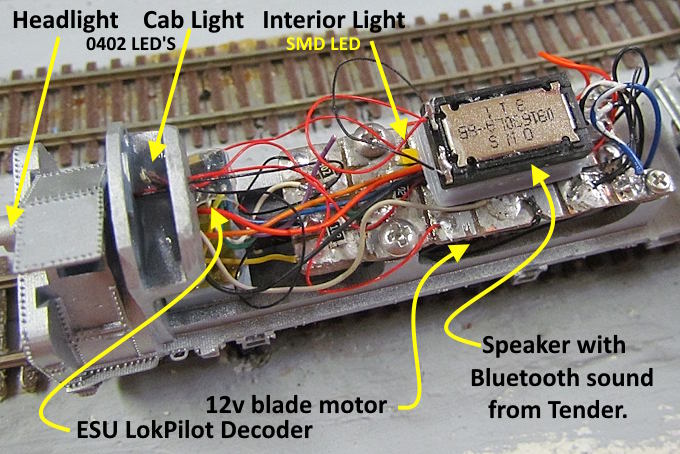
With the board in place it only took a few minutes to solder the ESU LokPilot decoder wires to the board and .....
..... then the wires going to the two LEDs and the motor for the blade. It was well worth it to take an hour and make the board with the solder pads on it. Will also be easy to add or remove wires if I need to in the future.
I used my favorite 9X16 speaker ( HERE ) and printed a .150" high speaker enclosure ( Print files ). The .150" high enclosure is a tight fit. You might choose the .130" high to give a little wiggle room.
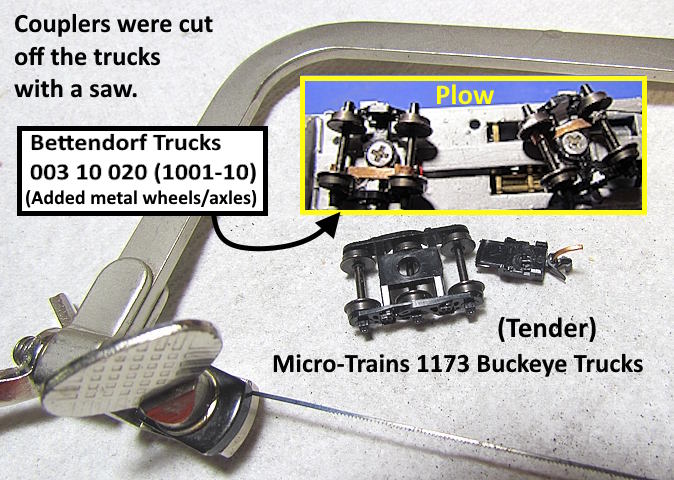
The 3 axle trucks are Micro-Trains N Scale 1173 Buckeye 6 wheel trucks. The plow is using 003 10 020 (1001-10) trucks that don't have couplers that need to be cut off.
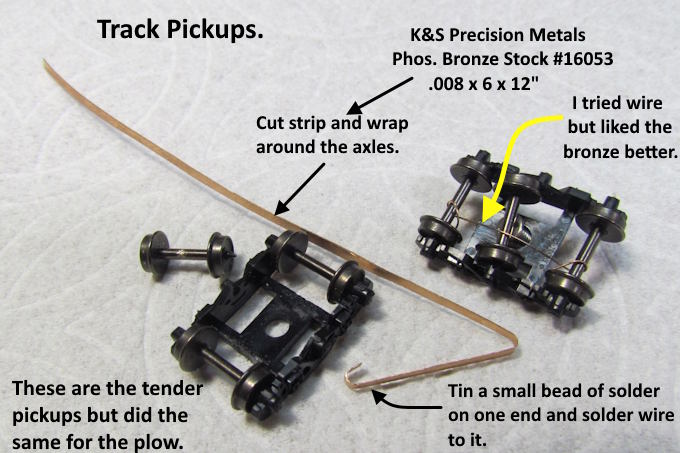
Track pickups were added to the tender trucks as shown above and also the plow trucks. The pickups in the plow and the tender are tied together for better track pickup.
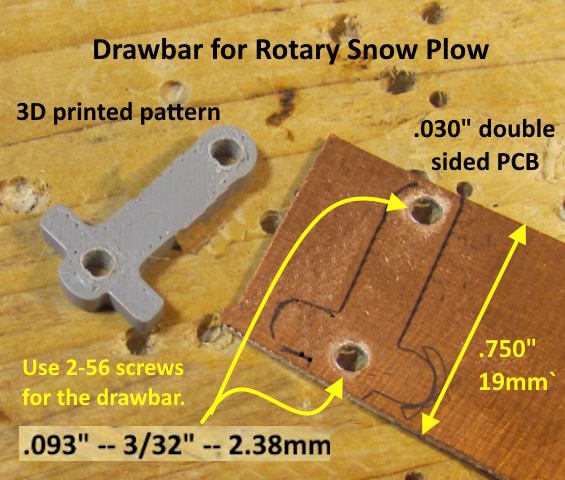
A draw-bar was designed with fusion. Originally I was going to make two PCB throwbars and route the speaker current from the tender to the plow through one and the DCC track current through the other. Abandoned that idea and only made one like above and run the wiring just under it. Hardly visible in actual use. The tabs sticking out on the one end (tender end) help to locate the wiring from the tender to the plow.
=========================================
..………………………......Next Page If There Is One