.................................. Return to Sumner's Home Page....
Return to N Scale RR Main Menu........ Return to Soldering Menu
=========================================
..............Previous Page..............................Next Page If There Is One
=========================================
…..................--- Soldering Irons and Supplies ---
=========================================
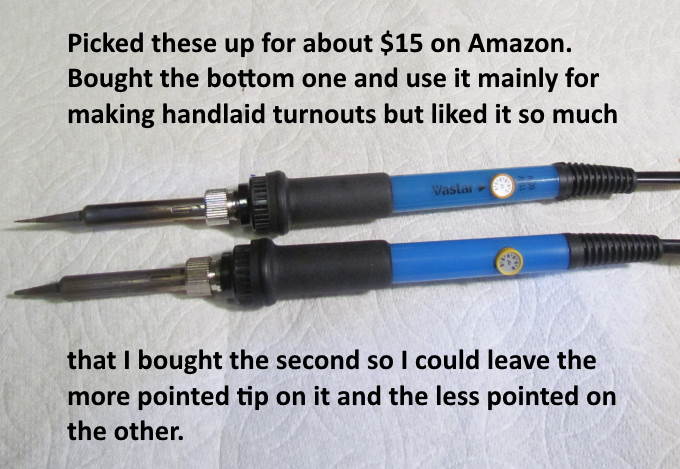
Tools and supplies used for electrical wiring and soldering hand-laid turnouts.
I have a much more expensive brand-name soldering iron that I bought before buying one of the Vastar irons shown above (both are the same iron). I like these better than the more expensive brand-name iron and keep it stored away now. A link to the irons on Amazon ( HERE ) that might work.
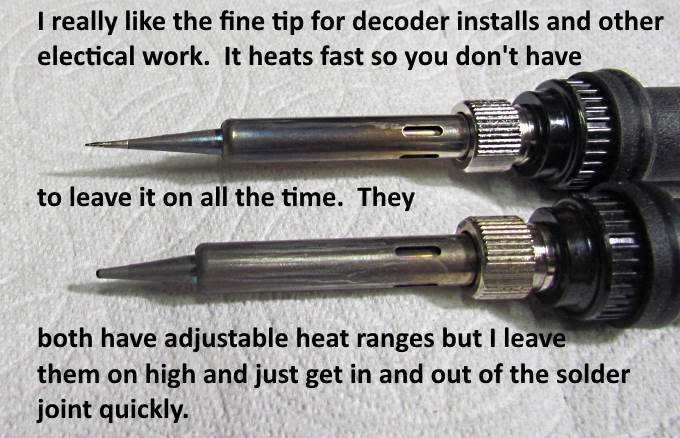
I use the blunter tip for building hand-laid turnouts and the finer one for most electrical soldering. The fine one heats up very quickly so I turn that iron off more while working on a project if I don't think I'll use it for 5 minutes or so.
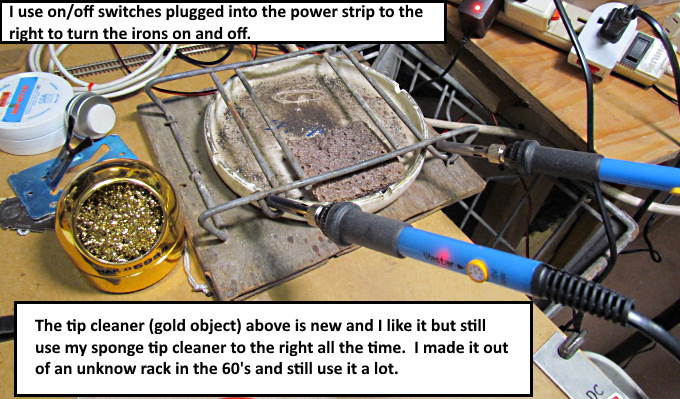
I have the small blue soldering iron stand shown to the left above but prefer the stand and sponge I've used for decades now on the right. Keep some water in it so that the sponge stays wet. I wipe the tip just before and after every solder joint. It should stay bright.
========== Soldering Stations ==============
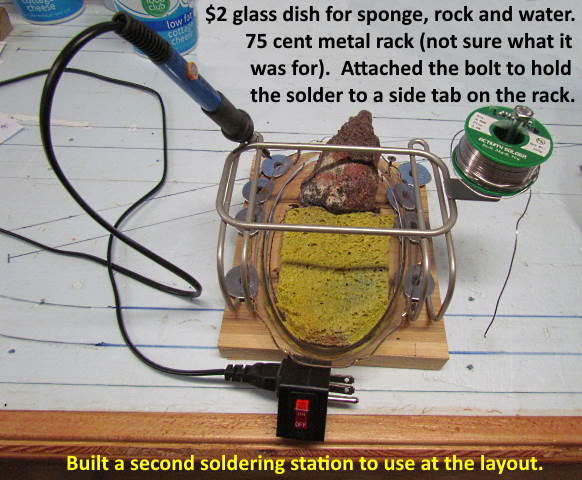
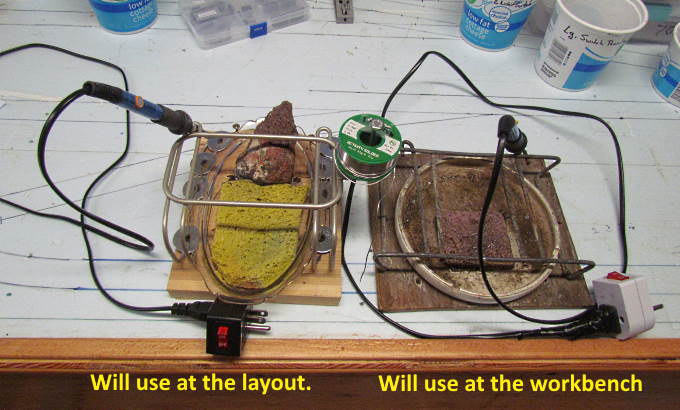
I got tired of taking the soldering station that I use to hold and clean the soldering iron back and forth between the workbench and the layout so decided to build a second one. Total cost was under $3.00 thanks to the second hand store that is about 200 feet up the street from the house.
I started cleaning the soldering iron tip with a wet sponge back in the '60's and have tried other methods like the brass sponge shown further up the page. I don't use it at all anymore and have gone back to the sponge entirely. It is faster and does a better job for me.
I'll be ....
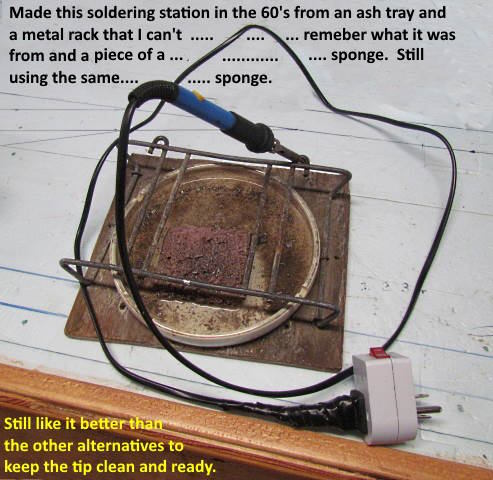
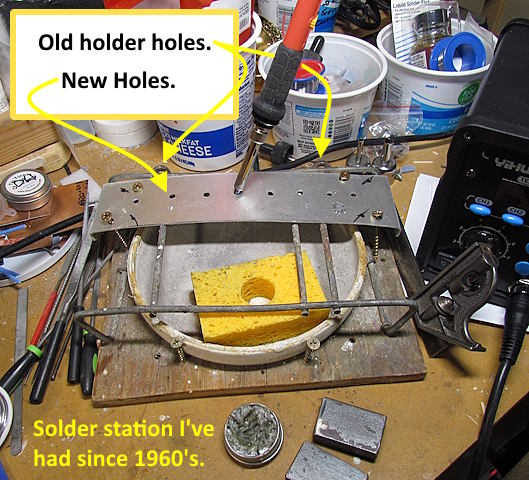
..... using my 1960's solder station only at the workbench now that I've built a couple more soldering stations.
Went up the street to the secondhand store and found the glass dish for $2.00 and the metal rack (not sure what it was used for) for 75 cents. Screwed the rack to a board and added a few other screws to locate the dish. You can still lift it out if needed. Shaped the end of the sponge to the dish and added a rock to keep the sponge from sliding back. Bet you can't guess what the rock is.
.
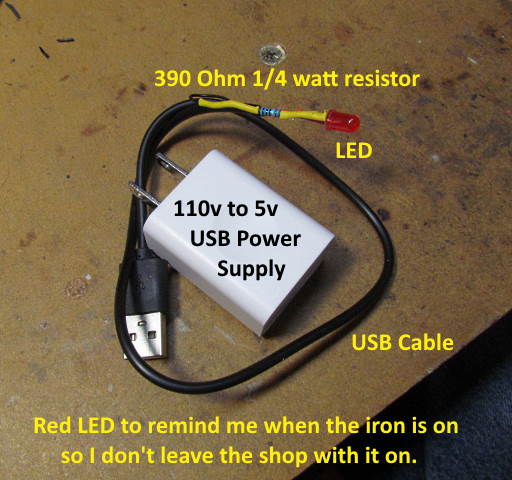
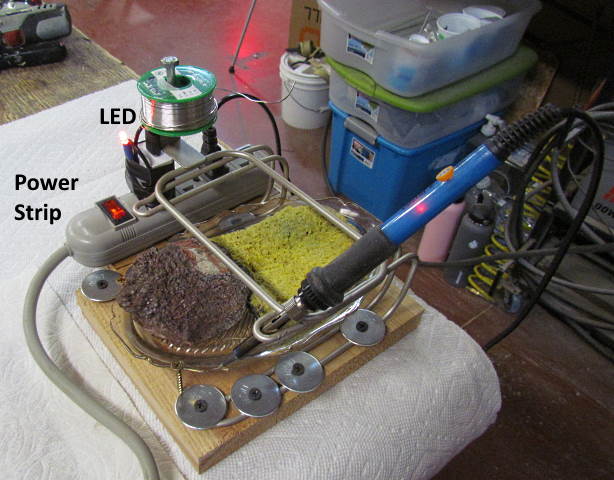
I have a red light bulb on the power strip I use at the workbench for the soldering iron and the resistance solderer. It helps in keeping from leaving the shop with the iron still on and the fire danger that could create. I wanted a 'On' indicator light for this but didn't want to use the larger bulb. I have a number of the 110v to 5v power supplies that are used to charge phones and other items. I allocated one to powering a red LED. I took a USB cable I had and cut one end off and stripped it down to the wires inside. It ended up being a charging only cable and only had a red and black wire and no data wires.
I soldered the red wire to the anode of the LED (the longer lead) and soldered a 390 ohm ¼ watt resistor to the cathode on the LED and then the black wire to the resistor to complete the circuit. I also had added shrink tubing to the exposed wires while building this.
A short power strip was added to the side of the station. Had it laying around but it would of driven the total cost up if one is keeping track of that. With the USP power supply plugged in the light comes on any time the iron is on and I could plug something else in at the same time if needed.
Ed has been helping with the layout now and has been building some turnouts so...
..... made the soldering station above for him to use and....
.... liked the multi-hole iron holder I made from some scrap sheet-metal so made a similar iron holder for my 1960's soldering station above. Some times I have irons with different size tips on the station at the same time.
=========================================..
.................................................. Next Page If There Is One
=========================================
...........................On..............e.......