.................................. Return to Sumner's Home Page....
Return to N Scale RR Main Menu........ Return to DCC++ Menu
=========================================
..............Previous Page.............................. Return to WiTcontroller Menu.
=========================================
….......--- Building Peter's WiTcontroller Throttle ---
.............................. --- Part 4 ---
=========================================
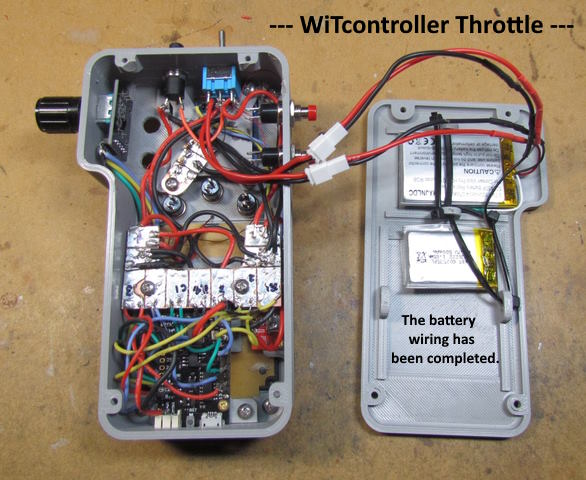
On this page we will finish the WiTcontroller throttle build.
To get the power from the battery to the ESP32 we need to connect the battery to the jack on the end of the ESP32 that a battery would/can plug into to power it. The ESP32 can also be powered with 5v USB cable going to the USB port on the end of the ESP32 and that is the port one connects their computer to to download the software to run the ESP32.
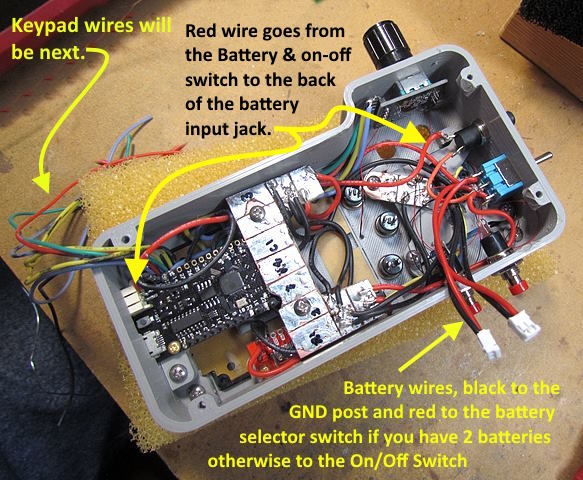
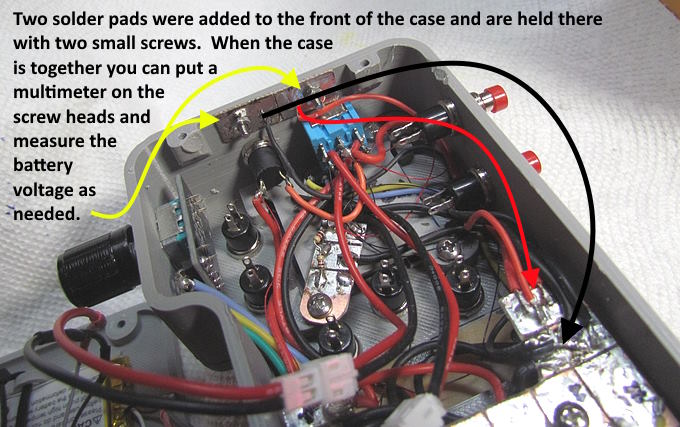
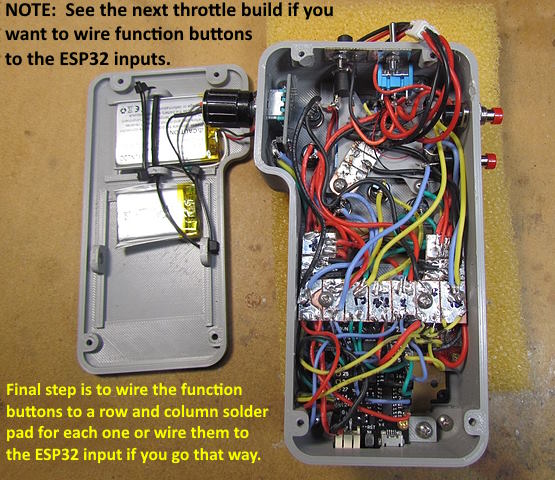
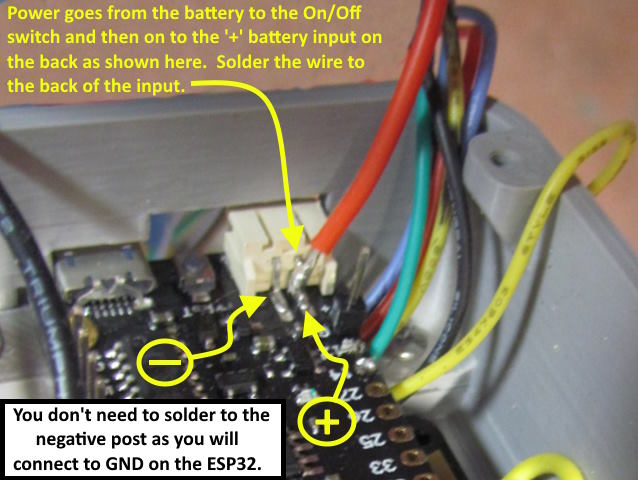
The battery positive power runs to the master On/Off switch (On/Off Pushbutton switch in my case. From the switch the positive power goes to the back of the batter jack at the end of the ESP32 as shown above. Solder the wire as shown above to the back of the jack on the side marked with a small white '+'. You don't need to solder to the negative lead coming off the jack. There is a common negative ground solder pad that the battery, the ESP32 and all the other grounds connect to.
Above we can see a red wire that carries the 3.7v positive battery power to the back of the battery input jack on the ESP32 that was discussed with the previous image. The wire runs from the master on/off pushbutton switch on the front of the case to the battery input jack. The other side of the switch is connected to the positive solder pad for the battery or in my case to the battery selector switch that switches power and charging between the two batteries I have.
.
.
.
.
.
.
.
.
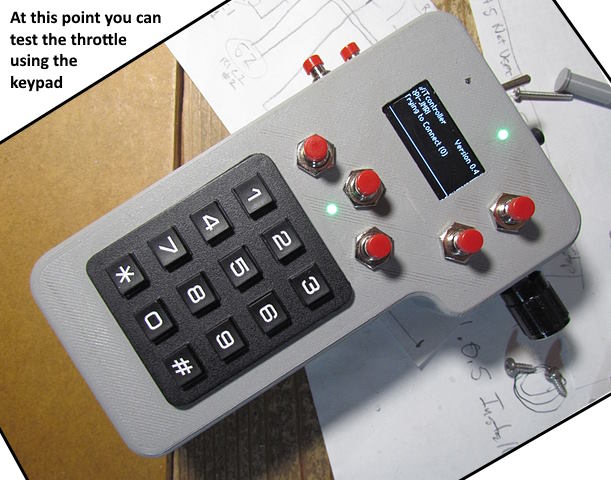
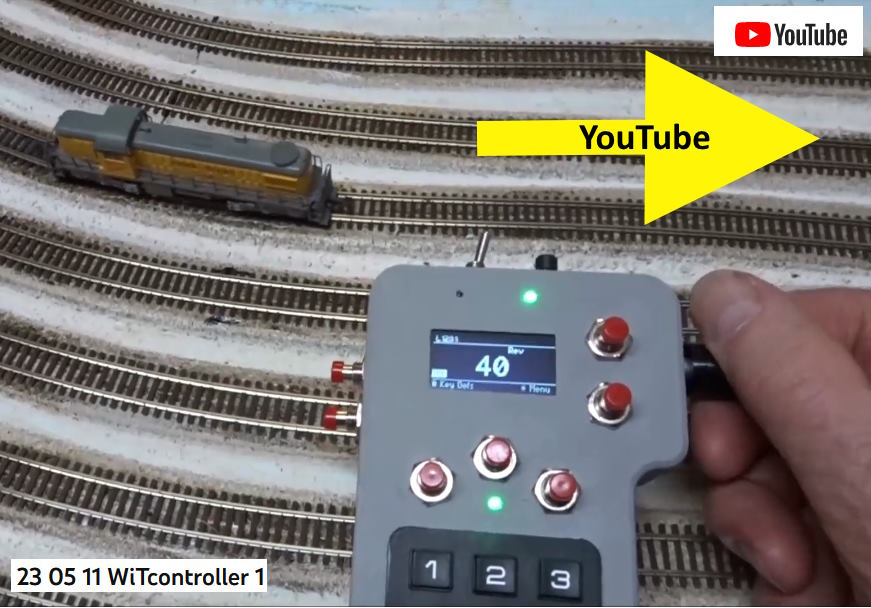
To see the throttle in use click on the image above or ( HERE ). Love the throttle. Peter did a great job on the software. Next I'll build the version of the throttle that uses direct input from the function buttons to the ESP32.
NOTE: You can find the print files on my thingiverse.com account ( HERE )
Add
========== Software Config Files ==============
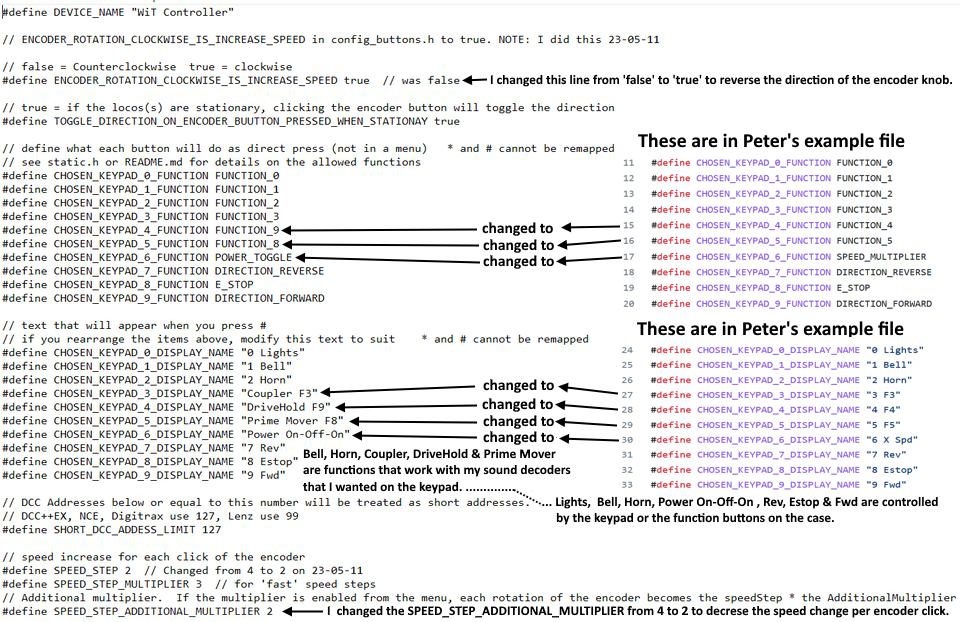
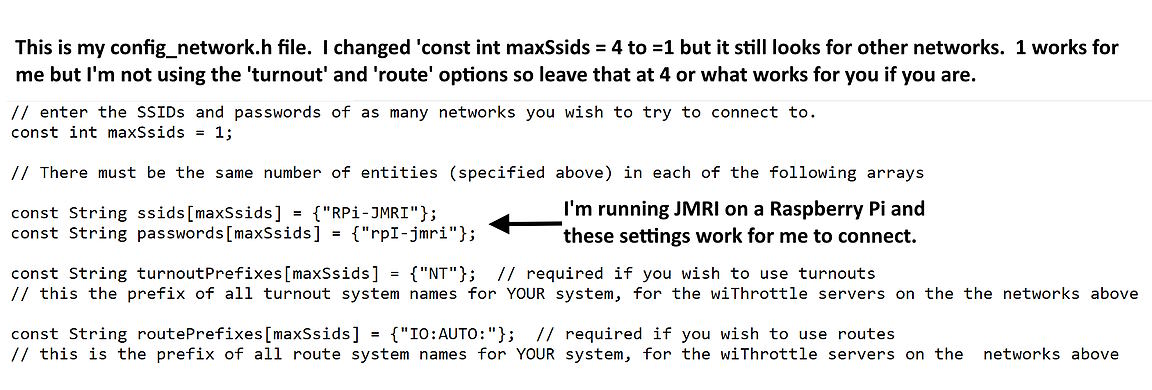
Using Peter's software you need to edit 3 config.h files. He gives you example files and you can edit them easily using something like 'Note Pad'. Next are images of how I edited mine. You might set your function keys up differently and/or your keypad so these are examples only.
Above is the config file that allows you to setup the the keypad for the assignments/functions that Peter's software has as I write this (May '23) and shows how I edited it for what I wanted.
FUNCTION_0 - FUNCTION_28
SPEED_STOP
SPEED_UP
SPEED_DOWN
SPEED_UP_FAST
SPEED_DOWN_FAST
SPEED_MULTIPLIER
E_STOP
POWER_TOGGLE
POWER_ON
POWER_OFF
DIRECTION_TOGGLE
DIRECTION_FORWARD
DIRECTION_REVERSE
At this time you can assign any of the above to the 10 keypad keys. Since in this throttle build we are paralleling the button function keys on the case to the keypad that will mimic pushing one of the keys on the keypad. You can decide with of the above assignments you want to use and then edit the config_buttons.h file like I did above.
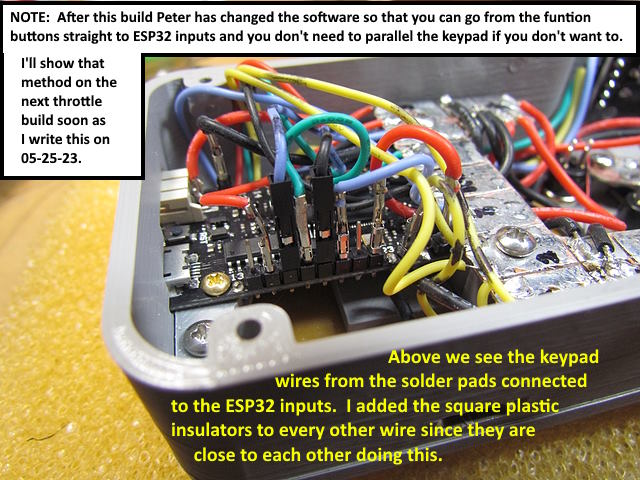
NOTE: The next throttle build will allow you to configure the case buttons to any of the above assignments independently of what assignments the keypad keys have been assigned to since the buttons are connected to other ESP32 inputs. I'll have it up soon so maybe consider that build instead of the one you have been following here. Peter's current software does offer that option now.
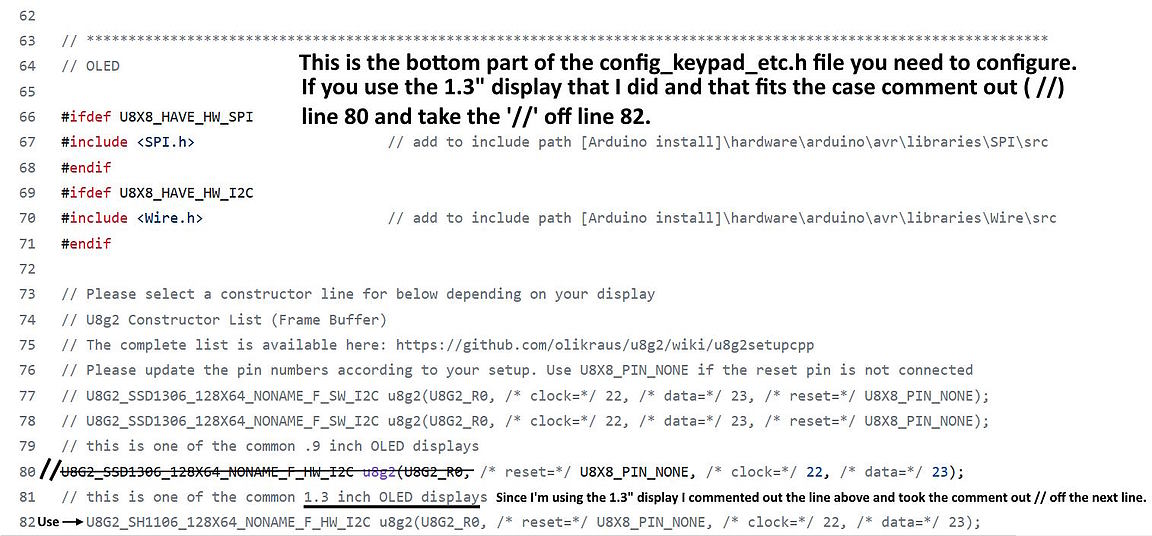
The image above is the last part of the config_keypad_etc.h file. You need to edit his example again and then save it. The only thing I edited with this file was about the OLED display. The file as it is presented is for a number of .96 inch displays. This case is designed for a 1.3” display so I commented out line 80 with the “//” at the beginning of the line and removed those from line 82 to make that the line that will be executed.
You might be able to use a .96 display in the case in some manner but it isn't designed for one (let me know if you were able to go that route). Here in the states I could find the 1.3” display for $2 more, $9 vs. $7 (with shipping on Amazon) so went with it and have been happy with it. If you live somewhere where the price differential is more I'd still consider it as it is a one time buy and I believe worth it as far as viewing quality is concerned.
I run JRMI on a Raspberry Pi and set the config_network.h file to log onto it for the WiThrottle and it works like a charm.
The software can be intimidated to setup if you aren't familiar with GitHub and Arduino's but stick with it and ask for help. A good source for that is with DCC-EX's Discord Group ( HERE ).
To be continued with the throttle build that uses direct input to the ESP32 from the function buttons on the case
If you came into this build here click ( HERE ) to go to the start of the build....Add
=========================================
...........................On..............e......... Return to WiTcontroller Menu.