.................................. Return to Sumner's Home Page....
Return to N Scale RR Main Menu........ Return to DCC++ Menu
=========================================
..............Previous Page..............................Next Page – Part 2
=========================================
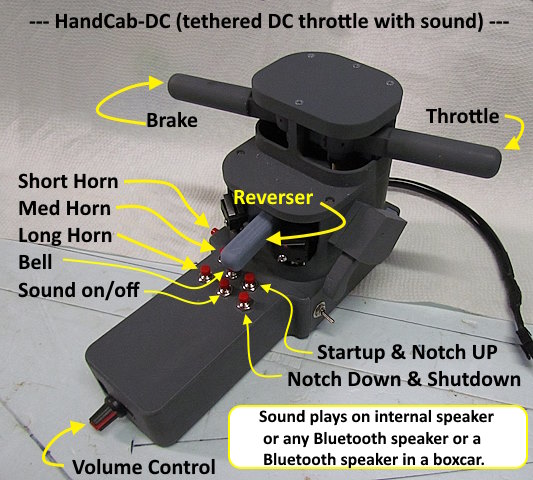
...--- HandCab-DC – Part 1 – DC Version of the DCC HandCab ---
=========================================
Made a ….
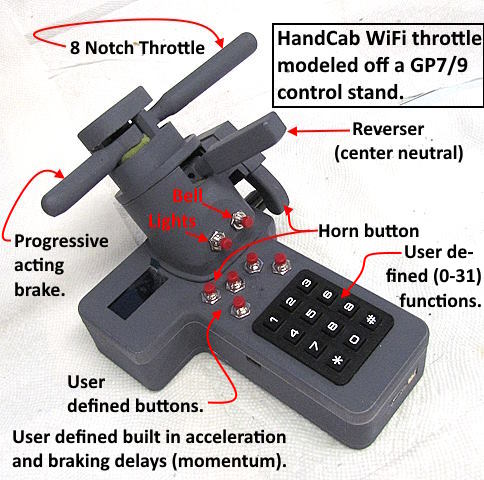
…. DC version of my HandCab (DCC) shown above that is a WiFi throttle.
The HandCab-DC connects to the layout with a tether wire. The controls aren’t as advanced as the DCC HandCab since you can't do as much with a DC throttle as you can a DCC throttle.
It doesn’t have a display, keypad or most of the buttons. The sound version does have a horn and bell.
-------------------------- Throttle Build ------------------------------------------
I have the print files up on thingiverse.com. See the link at the bottom of this page. The following is a rough idea of how to build the throttle.
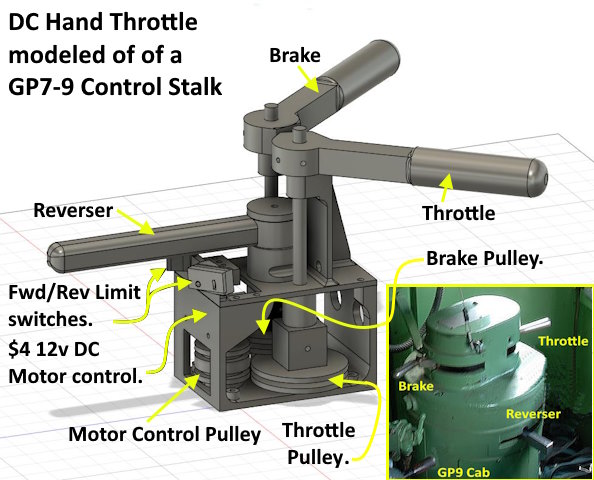
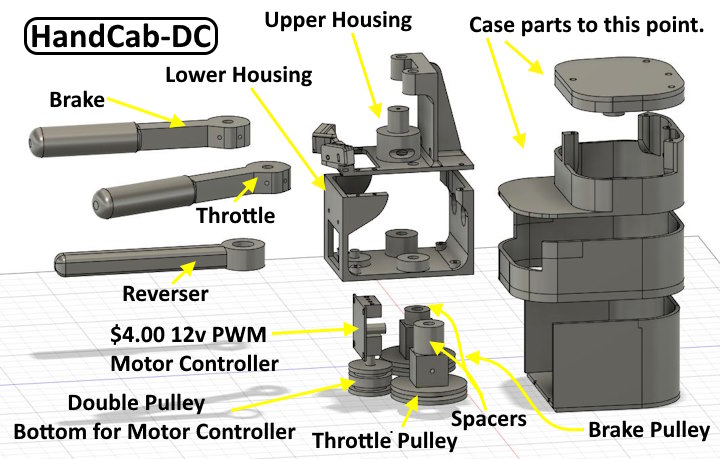
There is a two step pulley attached to the bottom of the $4.00 12v PWM DC controller. One step of the 2 step pulley is connected to a brake pulley attached to the brake handle. The other step of the pulley is attached with a line to the throttle pulley/handle.
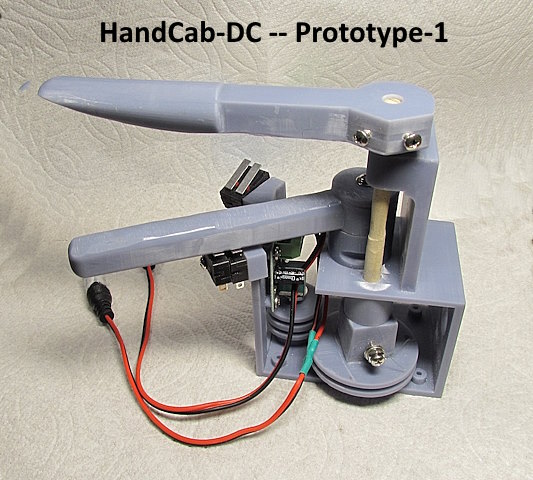
NOTE: Some of the images are not of the final prints.
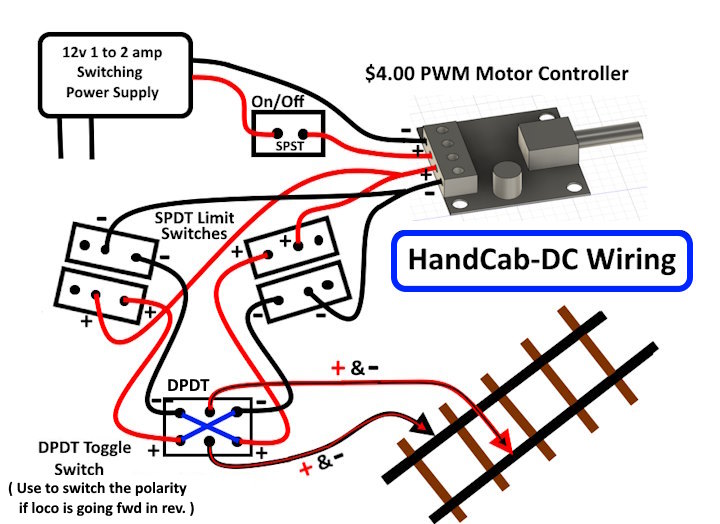
When the reverser handle, bottom handle, is pulled to either side (fwd/rev) it trips the limit switches on that side and changes the track polarity. In the middle the track power is off and the loco won't move.
Above is the modified main housing and some of the other parts. There were some small changes in the final prints vs. what you might see here.
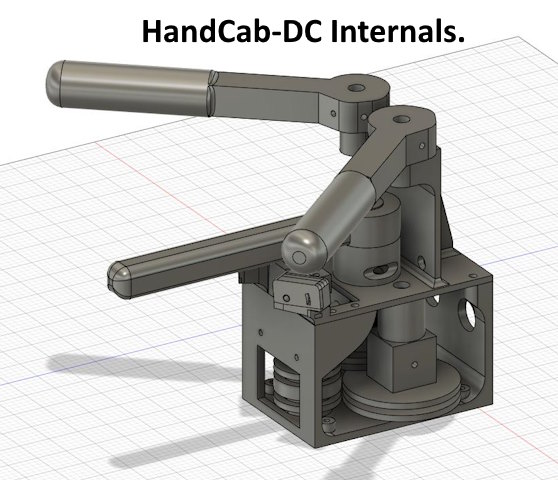
Exploded view of the parts above. Other than the housing parts most of the rest are there to turn the pot shaft on the motor controller board.
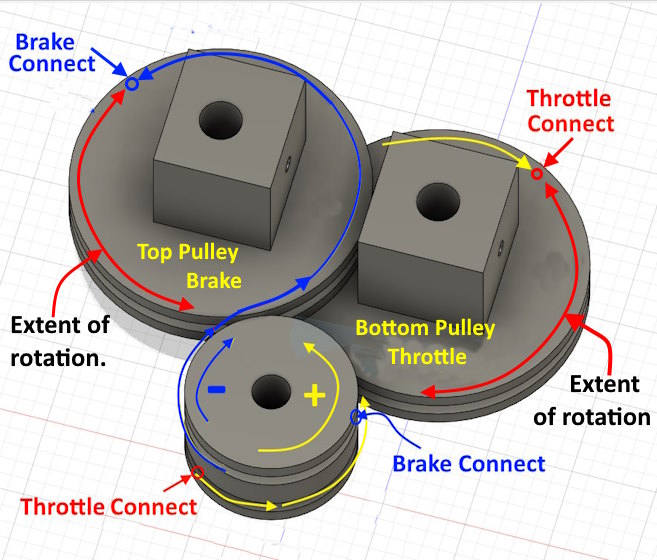
Looking at the image above you can see the pulleys connected to the brake and throttle handles to not rotate very far. Due to the difference in size between them and the pulley on the motor controller shaft it rotates about 50% further than they do. Still not enough to rotate the shaft on the motor controller all the way.
Still far enough to run over N scale 100 mph with the engines I tried. I drilled small holes in the pulleys where I wanted them and used I think about a 12 lb. fishing line. More on that later in the build.
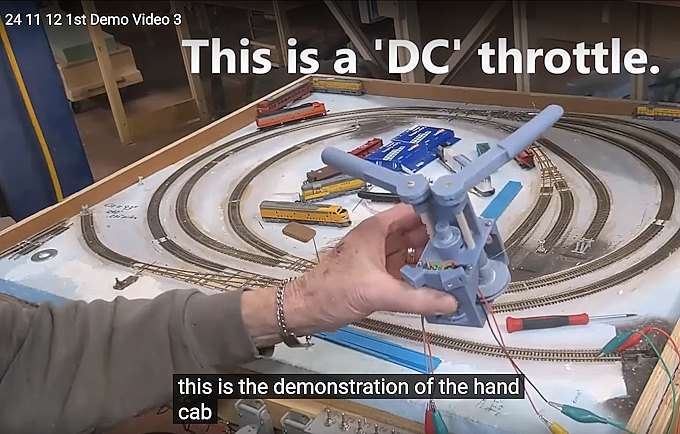
Put up the demo above of the project to this point ( HERE ).
The wiring is very simple if you only go this far with the throttle and don’t want to build the sound version. The DPDT switch is there to correct the direction of the loco as its direction will be different based on how it is place on the track. If the loco is going in reverse when the ‘Reverser’ is in forward throw the DPDT switch and then the direction will match the ‘Reverser’ position.
Parts for non-sound version (25-08-15 -- US):
PWM Motor controller……………………………………...……….. $4.00 (2 for $7.50) (HERE)
DPDT Toggle Switch ………………………………………………… $0.90 (10 for $9.00) (HERE)
Limit Switches (4) ……………………………………………………. $0.40 (12 for $4.50) (HERE)
SPST (on/off) Toggle Switch ………………………………………… $0.90 (10 for $9.00 ) (HERE)
12v 2 amp Power Supply …………………………………………….. $8.00 (HERE)
========== Throttle Finished & Videos ========
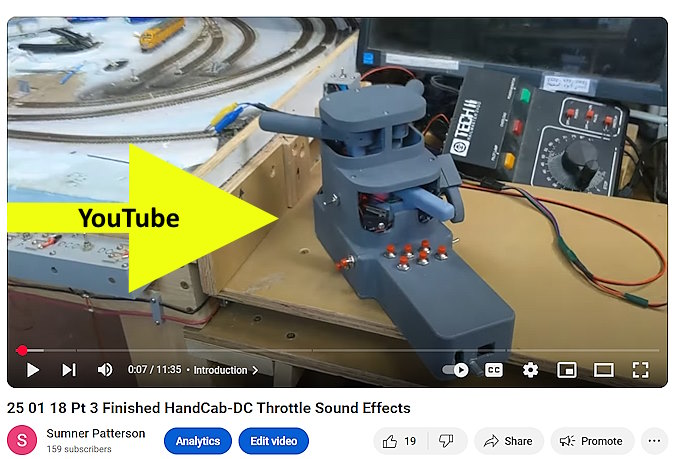
Here are three YouTube videos that show the completed throttle with sound. The non-sound works in the same way as far as controlling the train.
https://youtu.be/wgipUS0k0vE……Overview of parts.
https://youtu.be/y5yvqj4nFIc… Running a train.
.If you only look at one look at this one ( HERE ), a total overview of running a train and sound capabilities.
=========================================
...........................On..............e.........Next Page – Part 2