.......................................Endeavour Index Page..............Electrical Mods Index Page
....................................................Previous
Page.............................
Next
Page If There Is One
==============================================================
........--- Fuses and Terminal Strips Under Quarter Berth --
................................................................................-- Part 1 ---
==============================================================
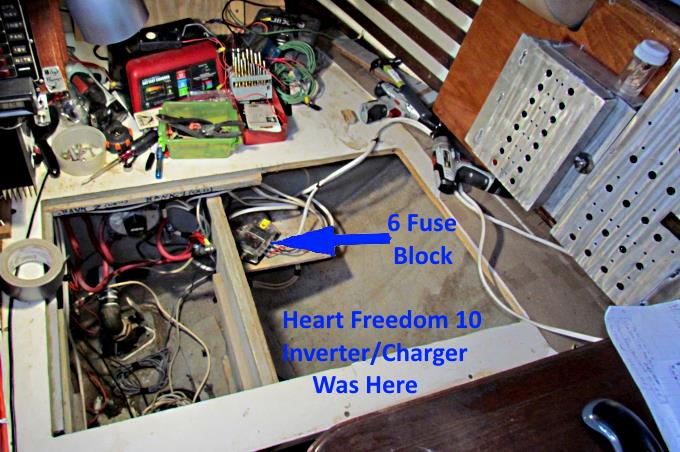
One of the main electrical goals was to install new primary wiring and bring it up to current standards. The batteries were not fused at the batteries and the original distribution panel was out of date. The boat came with an older Heart Freedom 10 Inverter/Charger that was state of the art some years back but I didn't trust it. There was a small 12 volt current leakage somewhere and it went away when I pulled the Heart Freedom out. There was also a Hear Interface Link 2000 Battery Monitor that never gave reliable readings so it was also disconnected along with a secondary fuse panel.
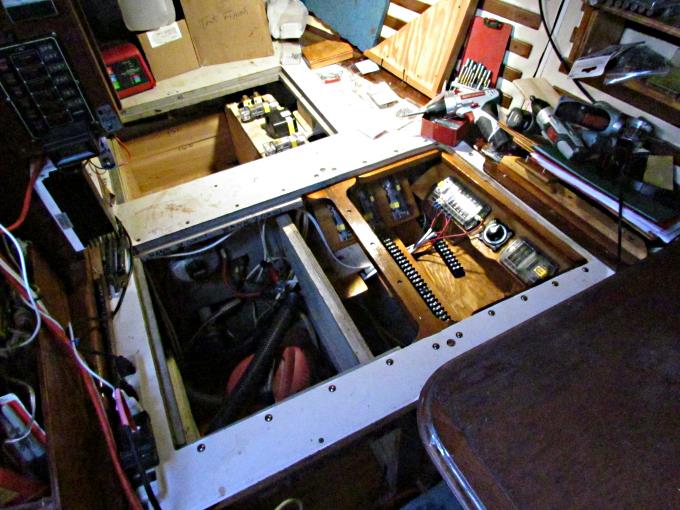
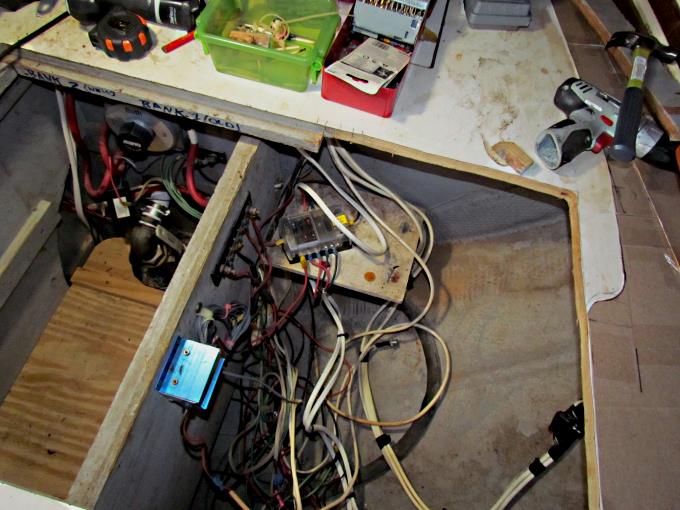
Above you can see the maze of wiring that went to the Heart Freedom and to navigation instruments that were no longer installed in the boat.
I pulled most of it out and wound up some of the communication wires that might possibly be of use someday, but probably will get cut out later also. The side where the Heart Freedom was in was very hard to get to as the hatch in that area barely made it over a corner of the inverter/charger. Not sure how they got it in.
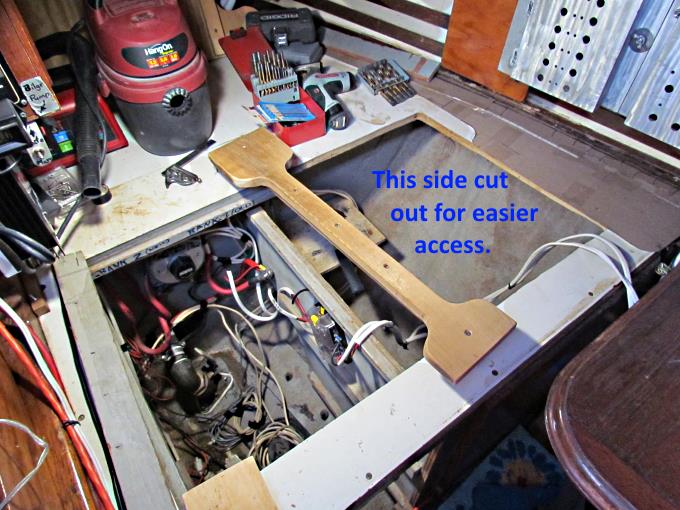
I cut the opening out further towards the hull side to better access the area. A new cross-member was made to support the old hatch and the new one that was basically the piece that was cut out.
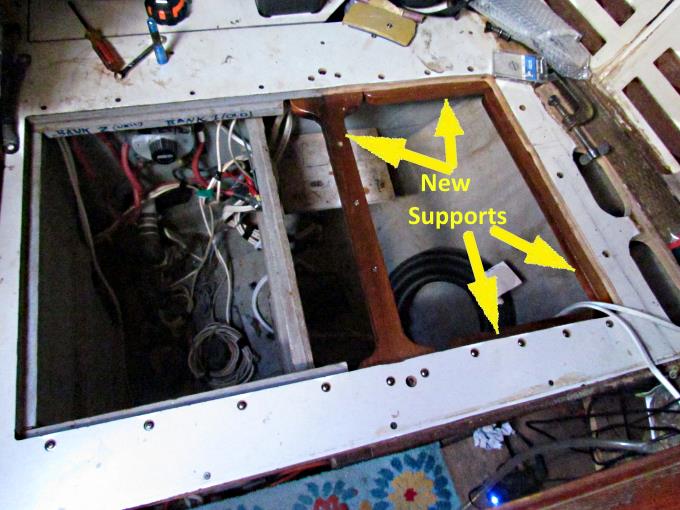
Above you can see the cross-member in place along with new supports for the new hatch. All of these were secured with SS machine screws that go through the top and through the supports and have nuts/washers on the bottoms.
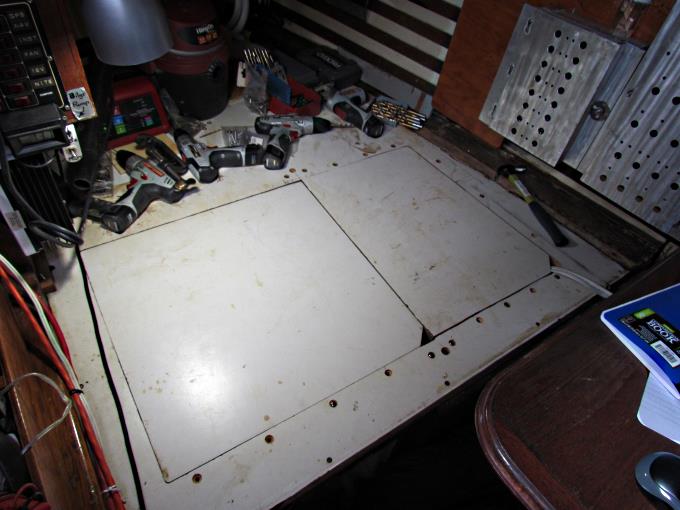
Here we see the old hatch on the left and the new one on the right that is the piece that was cut out. To see how I cut pieces out like this go ( HERE )
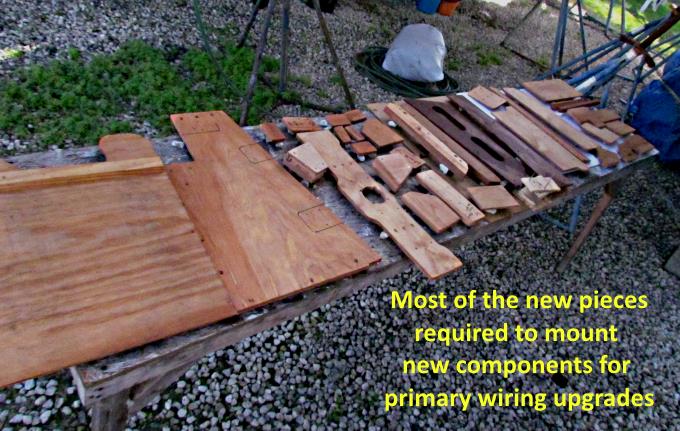
Above are most of the new pieces that had to be made, stained and cleared for the new electrical components. All very time consuming.
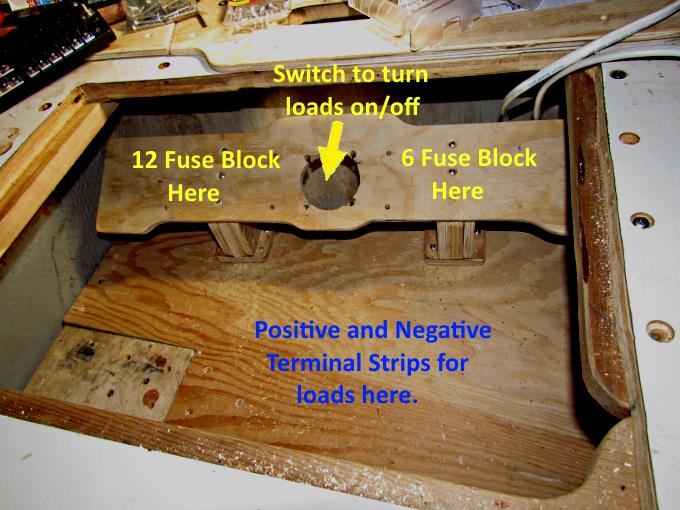
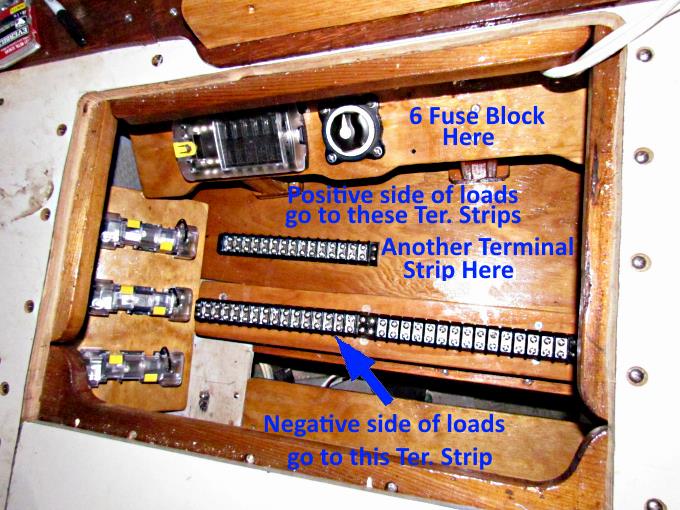
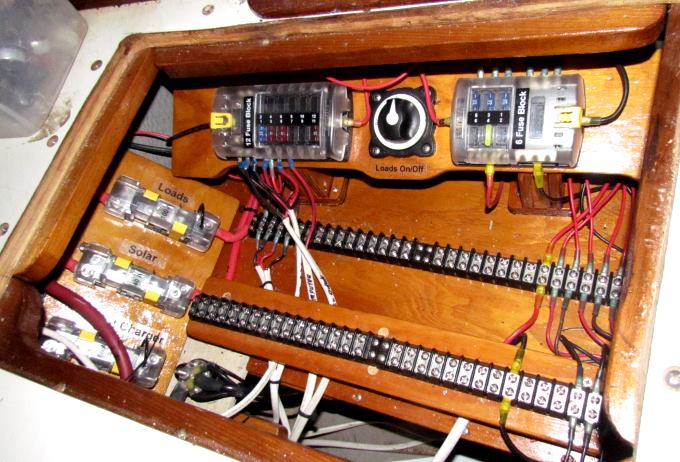
Here we see some of the pieces in place. The back one houses an on/off switch for all the loads with a 12 fuse block on one side of it and a 6 fuse block on the other side. A larger piece of plywood below it becomes a floor for some long terminal strips.
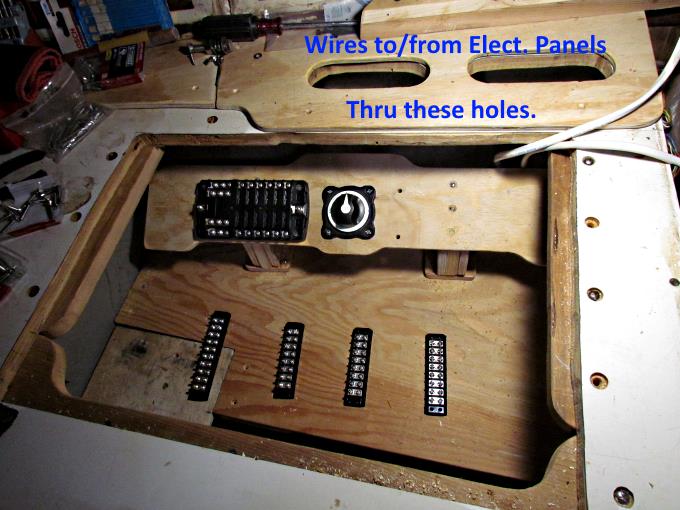
The wires from this area run up to the Electrical Switch Panels and back down through the oblong holes at the top of the picture. Below the terminal strips in the picture you can see a dark area. That is where the wiring comes up from loads throughout the boat.
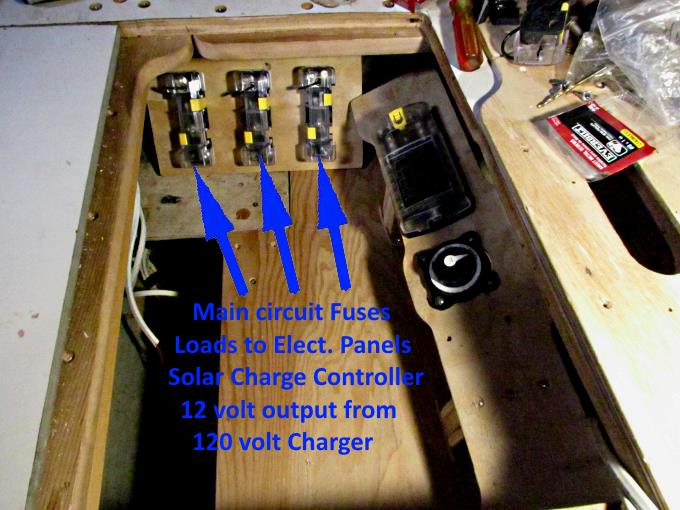
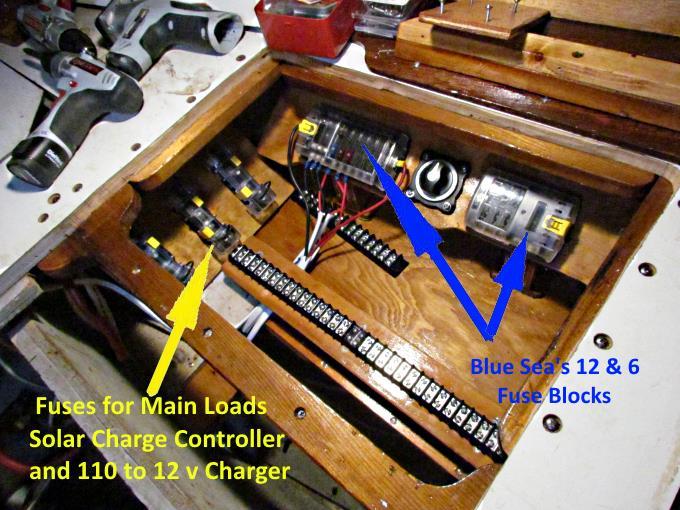
There are fuses at the positive terminals of the house battery bank and the start battery. The three large fuse holders above (Blue Seas 7720 Fuse Blocks) are the fuses for the boat load circuits, the solar charge controller and its input and for the 12 volt output of a 120 volt charger that can be used when there is shore power available or using a Honda 2000 generator that will be on-board.
There are two long rows of terminal strips. The lower one is elevated with some stand-offs. Load wires from different circuits come up from the dark area and under the elevated one. Then the negative wire from the circuit turns back and attaches to the lower strip in the picture and the positive wire goes to the upper terminal strip in the picture. All the negative loads then go to a negative post (out of the picture) and from there to a shunt that measures the amps being used at any point in time.
The positive wires on the other terminal are supplied current for the circuit from the switch panels that were described ( HERE ) and are above this area out of the picture.
The upper opening in the picture above is where the four 6 volt batteries that make up the House Bank are located and where there is now also a combiner located that will be described on a page after this one. Further out of site of the picture is one more opening where the start battery resides.
In the picture above there is wiring going directly to one of the fuse blocks (positive and negative circuit wires). Later that was moved down onto the long terminal strips as described above. I really like the Blue Sea Fuse blocks. You can get them either with or without the negative terminals. I ordered them with, but in my current situation with the longer negative terminal strips, could of ordered them without.
We used our Brother P-Touch label maker to label the different components.
==============================================================
............................................................ Next Page If There Is One