.................................. Return to Sumner's Home Page....
Return to N Scale RR Main Menu........... Return to Building UP's Canyon Division Menu
=========================================
...............Previous Page.............................Next Page If There Is One
=========================================
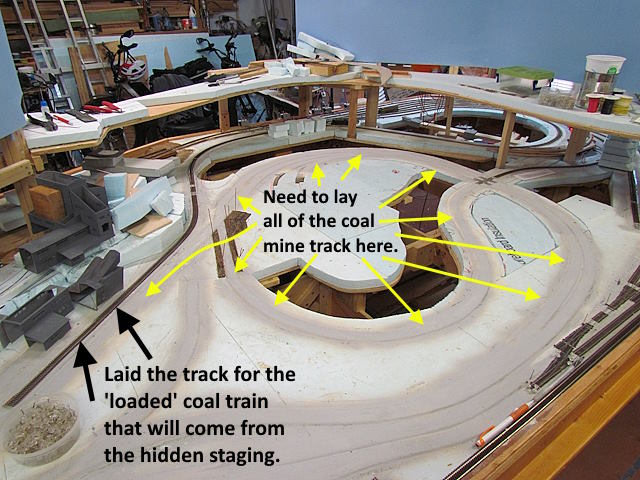
…............................--- Coal Mine Track – Part 1 ---
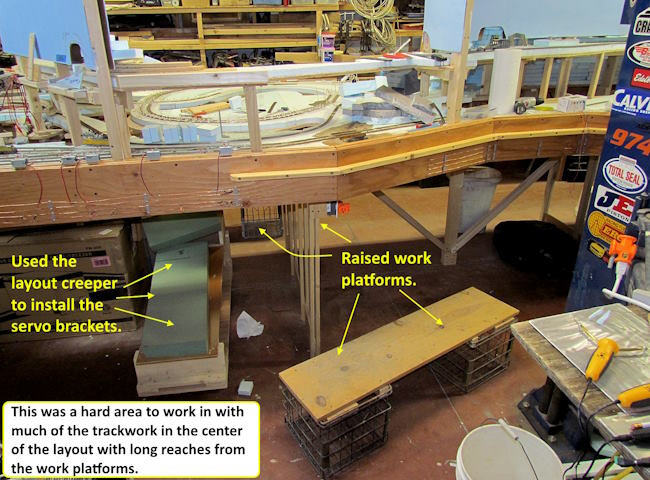
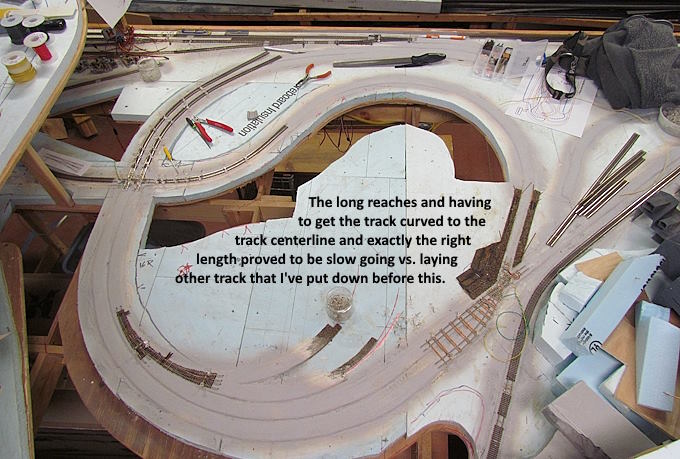
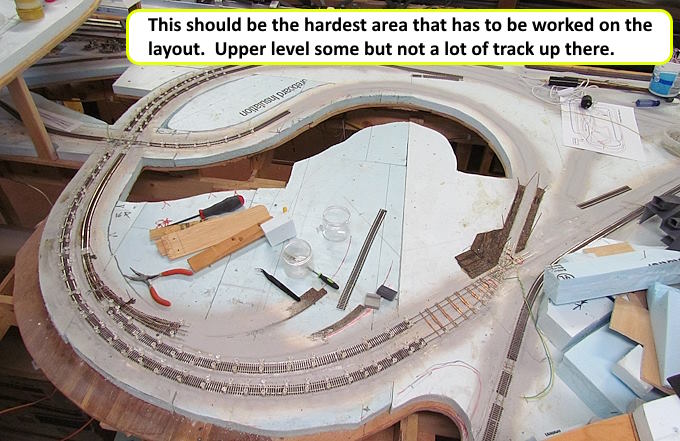
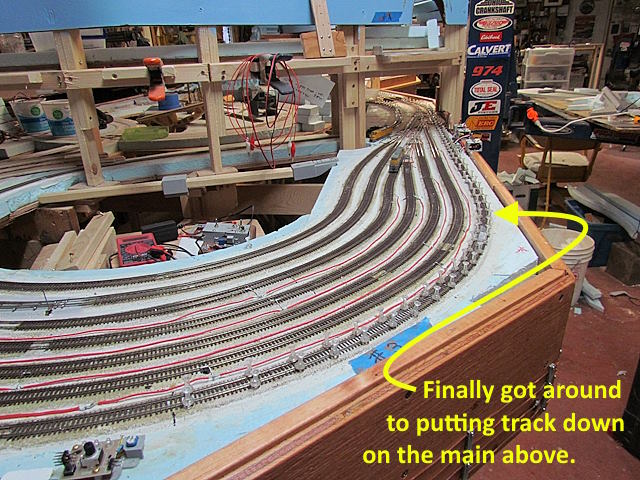
I've dreaded having to work in the next area of the layout. There are long reaches and on one side one has to reach over part of the upper level. I have platforms that I made that are easy to slide around and couldn't of worked this area without them. To accomplish what I'm hoping to do with the coal mine complex all of this track (almost) had to get laid down at some point and it pretty much needed to be now as I need to build the scenery for this area and if it went in first I'd be working around it also.
I want to run on this track some before putting the scenery in so I bit the bullet and proceeded on laying track in this area. Later if I have to attend to a derailed train or need to clean the track here all of the hidden track is easy to get to from below. Couldn't of laid it from below but can reach it pretty easy from below.
.
.
The layout creeper above left has really been handy when I've had to go under the layout. Really glad I made it. Likewise with the raised work platforms. I have one for each side. The metal milk crates (from my milkman days) slide easily on the concrete floor from place to place but are really stable when standing on the platform.
Working from this side was also hindered by the narrow section of upper level there that will ultimately be replaced with a bridge in that location.
Took me two days to lay the track shown on this page. In a different area of the layout I could of probably laid this much track in a day.
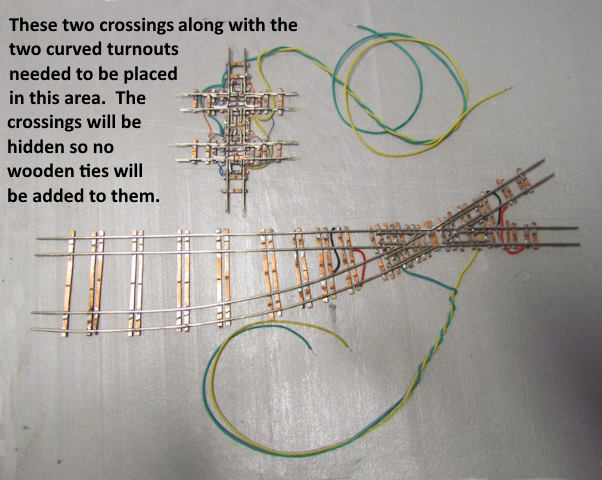
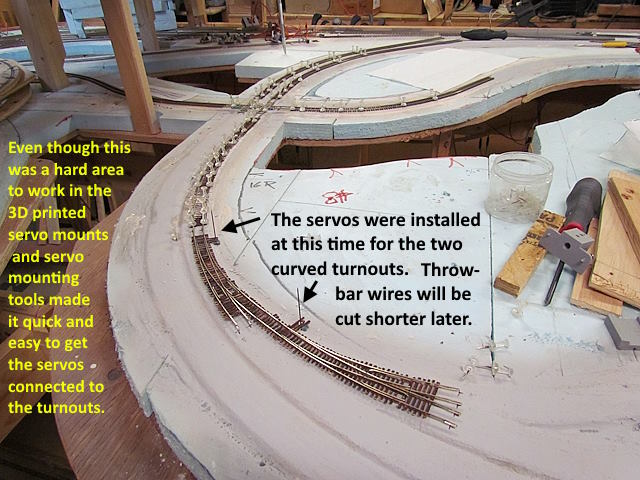
I've tested these two crossings about as much as I can before installing but still hope they work fine when in use. I installed them and the two turnouts without gluing them down. The track to them is glued down but they aren't. I've done this with the turnouts in the hidden staging and so far it has worked fine.
If I need to remove them I can slide the rail joiners back and lift them out. I solder all the joiners on the flex track as it is laid. I have electrical drops on each section of flex track and will add drops to the crossings and the turnouts also since the rail joiners aren't soldered.
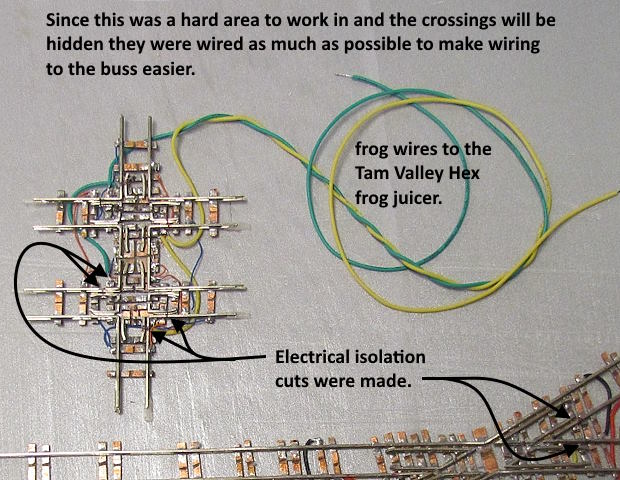
Since the crossings won't be seen I've tried to do all the wiring on them that needs to be done to transfer current to and from the correct rails so I don't have to once they are installed. Also cut the electrical isolation cuts that are needed on the frogs.
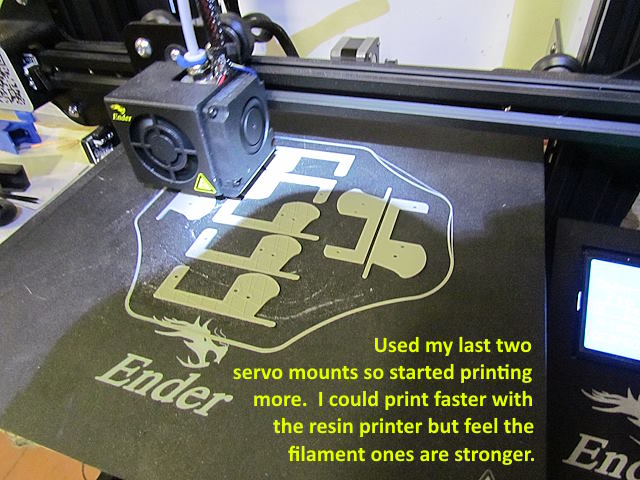
I've developed servo control for my turnouts that costs about $10 a turnout and it includes the servo, servo mount, servo controller, frog polarity handling and a switch box to control each turnout. The wiring is not difficult and you have good control over the throw of the servo so that it isn't overloading the throw bar. Also you don't need an Arduino or any other computer or electronic skills vs. the simple wiring and soldering that is required. You can find the information on this ( HERE )
Above 8 servo brackets are at the beginning of a print on the Ender 3 Pro.
.
Glad to have the track glued down in that area. I don't think there is another area that will be that hard to work in.
to be continued.....
A link to this whole build ( HERE ).
=========================================
...........................On..............e.........Next Page If There Is One