..................................
Return
to Sumner's Home Page....
Return
to N Scale RR Main Menu...........
Return
to Building UP's Canyon Division Menu
=========================================
...............Previous
Page.............................Next
Page If There Is One
=========================================
…...................---
100' N Scale 3D Printed Warren Truss Bridge ---
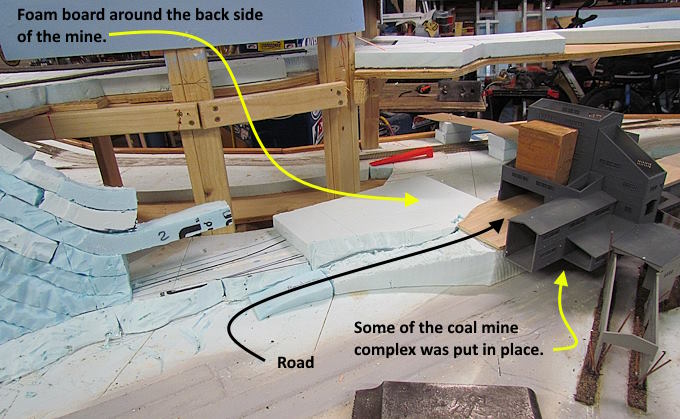
Working
around the coal mine complex.
.
.
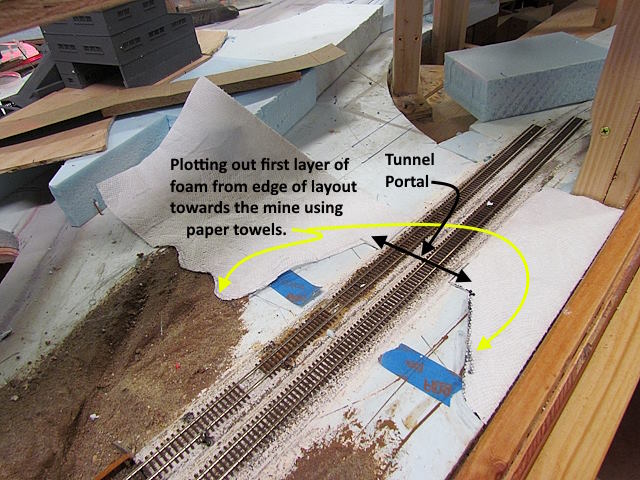
I
find the paper towels to work really well for at least an initial
paper pattern. You can push it down and feel things like the roadbed
next to the track and other features like the edge of the layout. I
pretty much cut these out and mark the foam using them. If I really
want to check things out before cutting the foam I'll use these to
make a pattern on a piece of cardboard from a cereal box. Then place
it in position and if I like it use it to mark the cut line on the
foam.

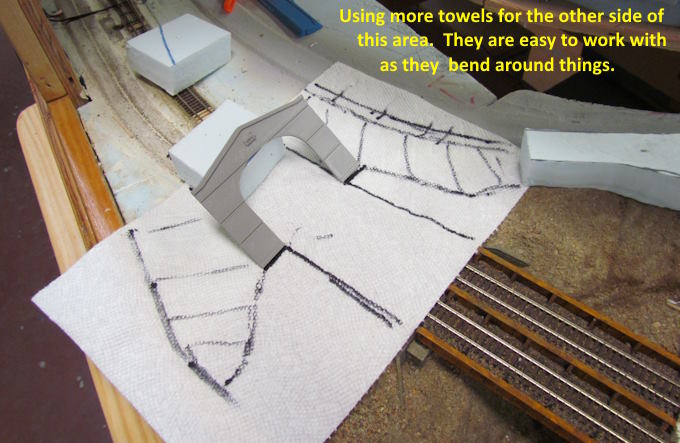
After
cutting the foam with a hot wire knife at about a 90 degree angle I
come back in with a sculpting hot wire knife and make an angle cut to
angle the face of the section before moving on to the next layer of
foam that is marked using the new cut line at the top of the foam I
just cut. More pictures of that (
HERE ).
.
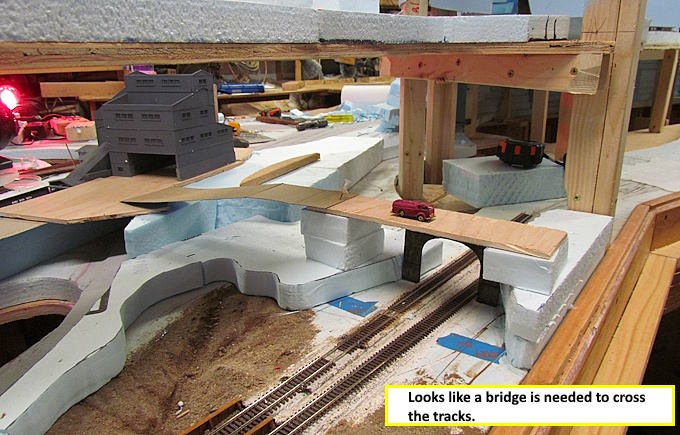
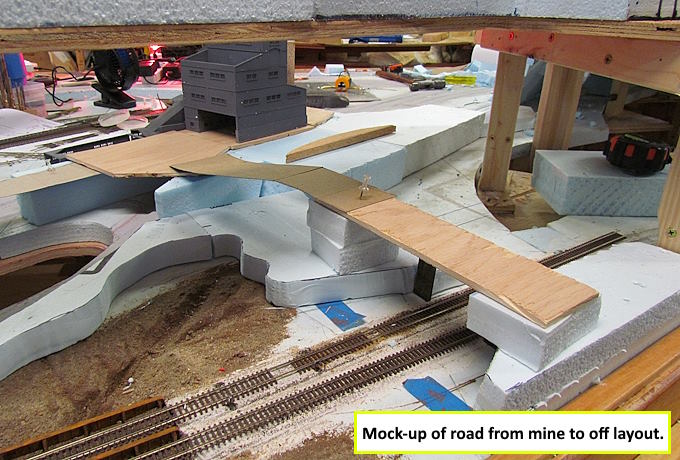
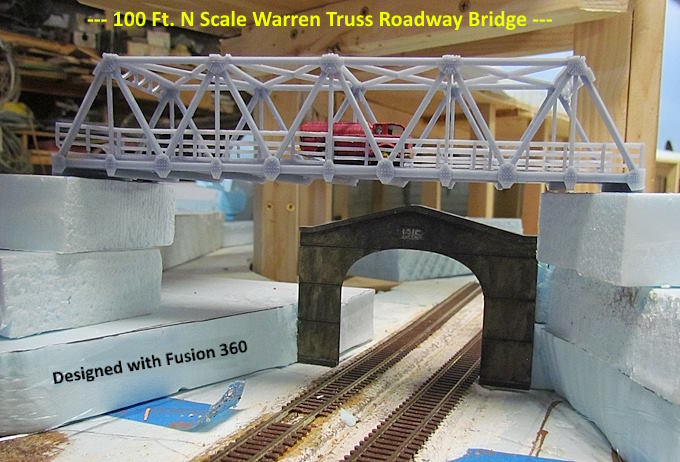
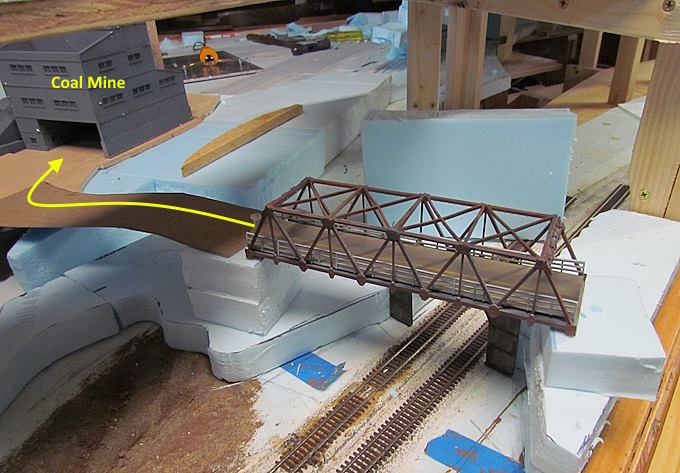
Time
to build the needed bridge. It will cross over the two track mainline
just before it enters a tunnel. I didn't want the bridge to overwhelm
the scene so wanted a narrow bridge like you might find on a back
road in the early 70's. The roadway through the bridge would be too
narrow for larger roads vs. the little used road to the coal mine.
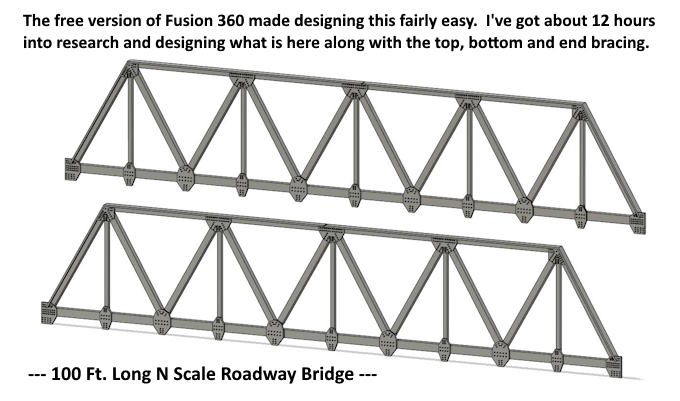
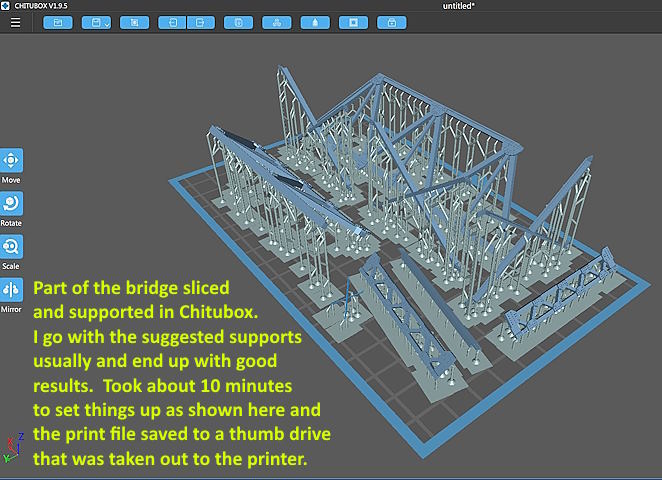
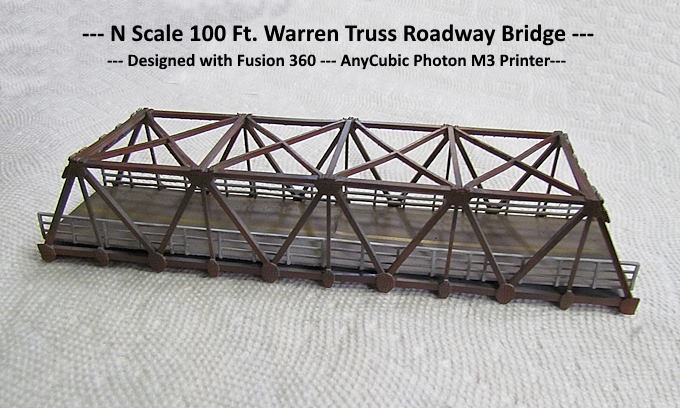
I
spent about 12 hours over 2 days with Fusion 360 (free version)
designing the bridge and then printed it (haven't finished it as I
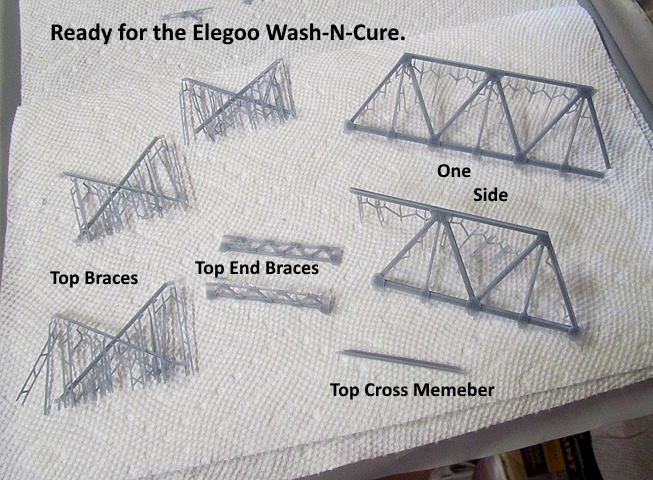
write this). The bottom, top and end bracing all prints separately.
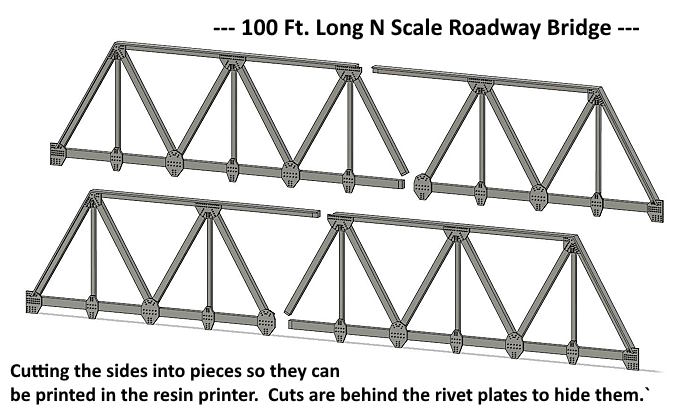
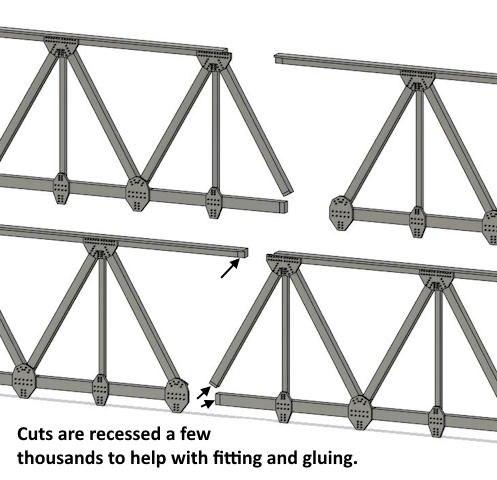
Each of the sides will have to be cut into 2 pieces to fit the resin
printer's build plate. The sides could be printed as single units
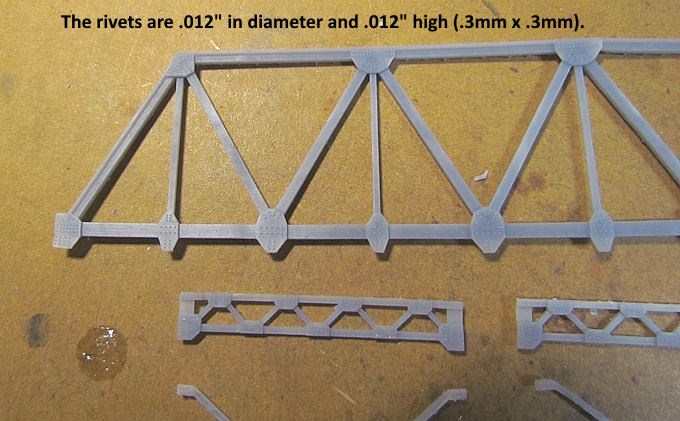
with the Ender filament printer but I want to see if I can get the
rivet detail to print with the resin printer. It is too small for the
filament printer.
Hope to report back if it prints OK and I
can get it glued together and I don't have to end up redesigning
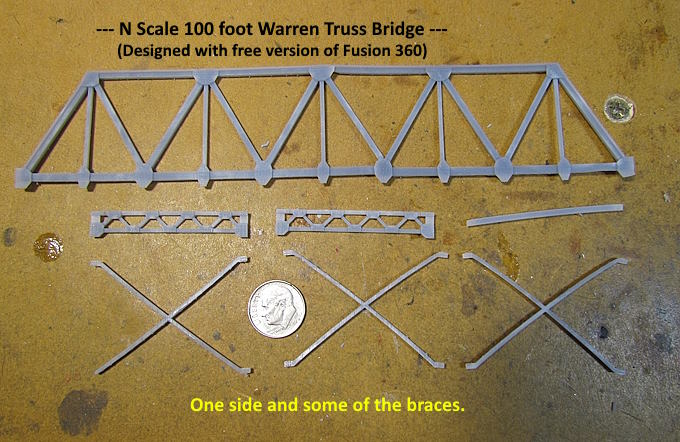
parts or all of it. The bridge is a Warren Truss (equilateral
triangles) and loosely designed on pictures of some I found on the
internet. I'll probably print the deck for it on the filament
printer.

.
.
.
.
.

.
.
.
.
.
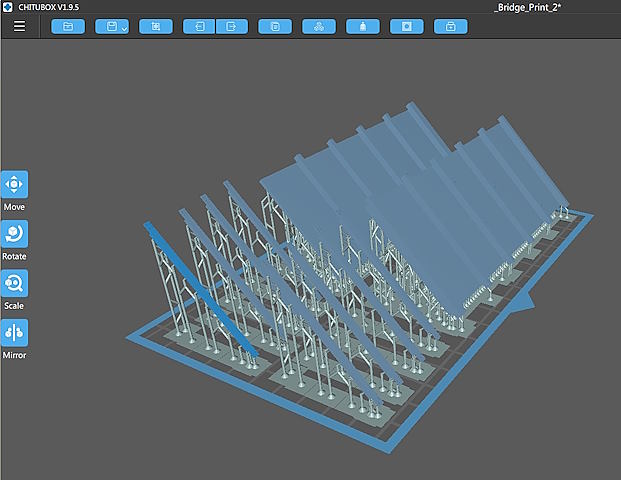
It
took a total of 4 prints with the size of my build plate to print all
of the parts of the bridge. The print above didn't come out so good
the first time around. Some breakage of parts during the printing. I
redesigned it a little and the second go around (shown above) is
printing as I type this. Hopefully it will be better.

Some
of the bracing is very thin and easy to break. I had printed extra
bracing and ended up needing some of it. I think after doing this one
I could get a second one glued up a little more square. Might print
another one at some point but not now.
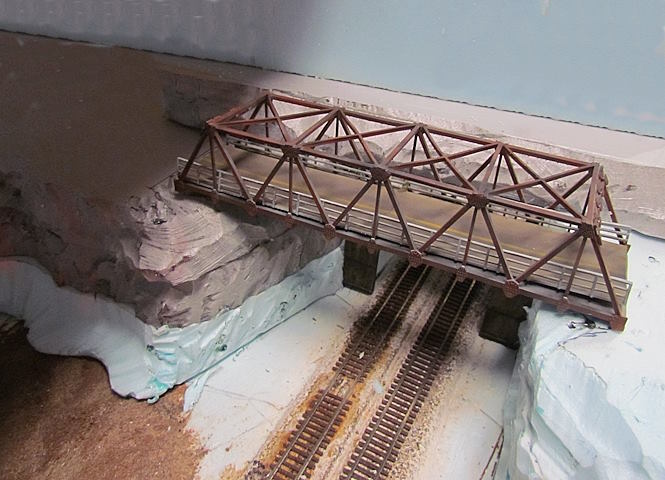
The
deck the truck is on above is part of the model and the bottoms of
the trusses are glued to it.
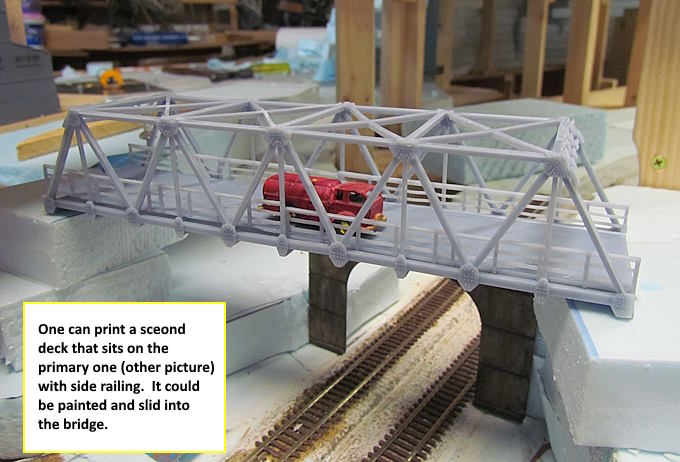
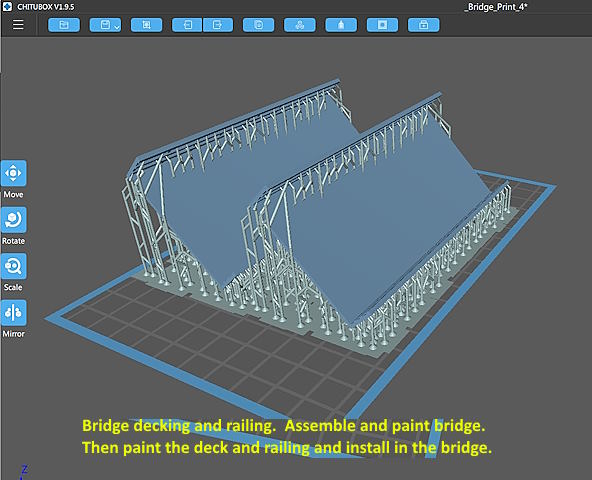
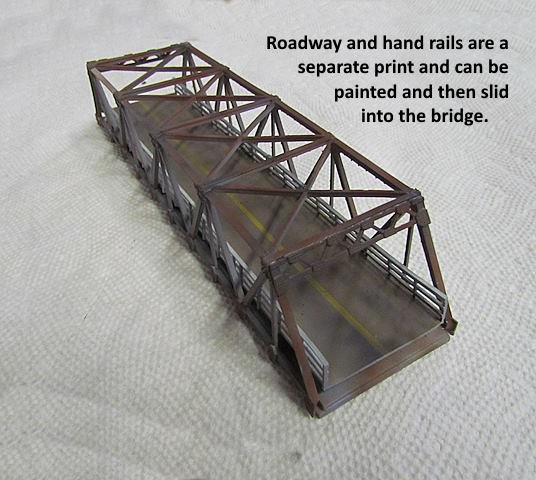
I
designed a second deck with side railing that can sit on the primary
deck shown in the image before the one above. I wanted the option for
the railing and also this deck can be painted (railing and road
surface) and then slid into the bridge. That should make painting it
and and bridge somewhat easier.
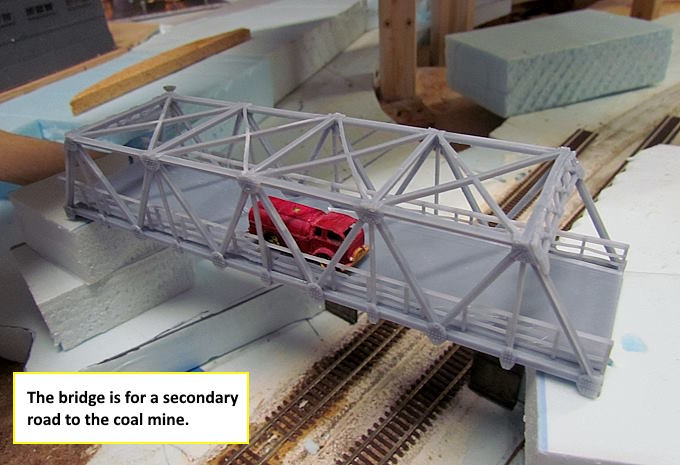
The
primary traffic over this bridge would be to and from the coal mine
with no real through traffic on the road/bridge.
After
taking the pictures above I found out that I can heat areas with a
heat gun and get some of the warping out. I'll work on that a little
but this is by no means suppose to be a commercial product and I
don't want to spend much more time on it other than painting. Need to
move on and I'm satisfied with the look.
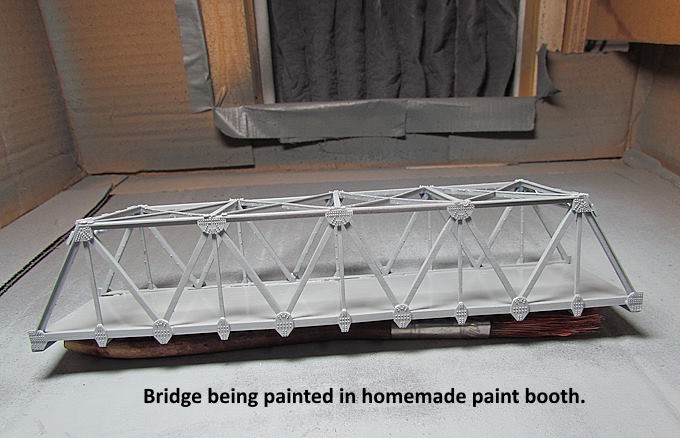
Paint-booth
is working great. For info on building it click (
HERE ).
.
.
.
.
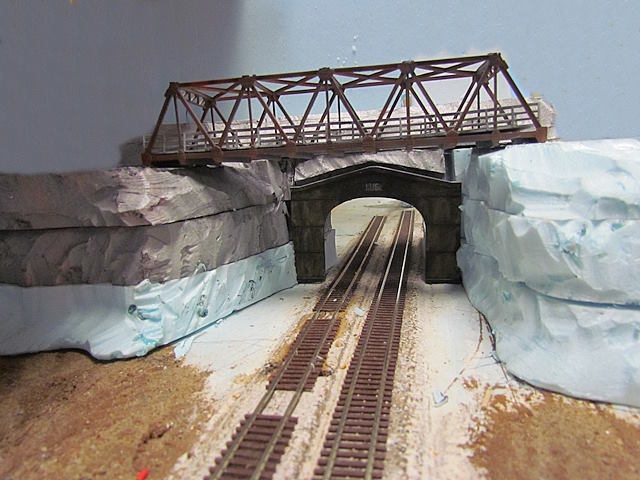
The
rock face behind the bridge and tunnel portal will continue upward to
the upper level where there will be another set of track s and a long
bridge that will cross the canyon paralleling the tracks shown above.
I'll also brush on some more highlights on the bridge when it is
ready to be put in place and glue the roadway down flat on the bridge
decking.
I'll
probably put the print files up after painting it. It wasn't easy for
me to assemble but I don't have much experience with kits and
kitbashing.
to
be continued.....
You
can find the files to print the bridge, abutments and shoes on my
thingiverse account later.
You
can find all the files to 3D print this object and others on my
thingiverse.com account ( HERE
).
=========================================
...........................On..............e.........Next
Page If There Is One