.................................. Return to Sumner's Home Page....
Return to N Scale RR Main Menu........... Return to Building UP's Canyon Division Menu
=========================================
...............Previous Page.............................Next Page If There Is One
=========================================
… …..................................................…--- Slight Diversion ---
_--- Switch Machine Mount & Spring Switcher ---
============================================
In Sept 2022 we went to Phoenix to visit family and help a friend with a health related situation for a week. The week turned into almost 2 weeks as the situation changed. I got to thinking about which of the switch machines that I've made and that can be 3D printed that I wanted to use above the hidden staging area on the layout. There is about 10 inches between the bottom of the upper level and the hidden staging tracks.
My servo switch machine with the ….
….. 3D printed mount ( HERE ) and …....
…. my 'Gravity Switcher' ( HERE ) both mount to the bottom of the layout with screws. Normally this is fine but to install them with only 10 inches of work space would prove to be difficult. To overcome this I thought …..
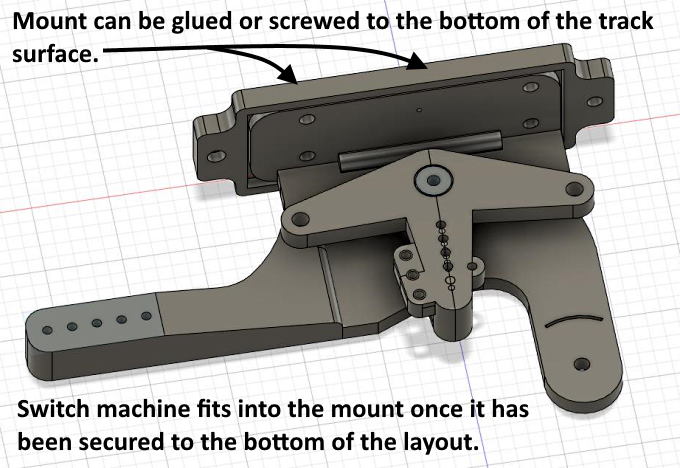
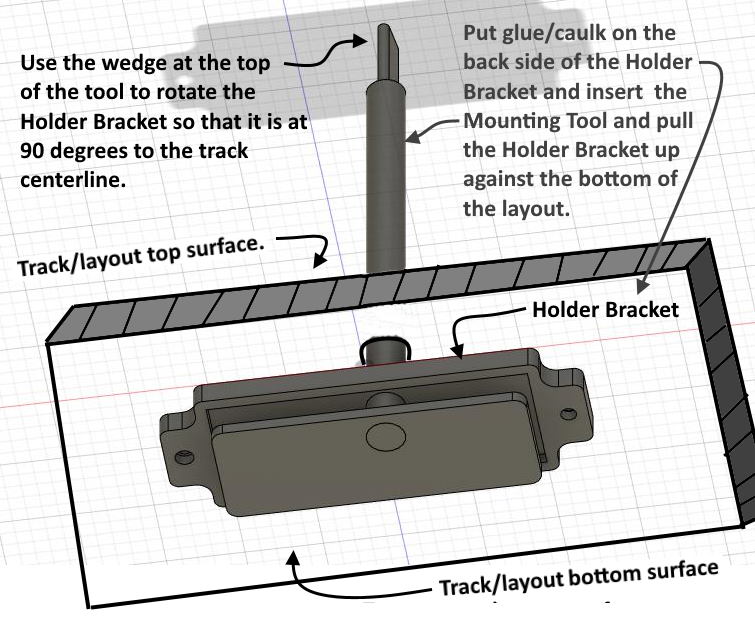
….. I could install a mount under the layout that could be easily positioned and glued/caulked into place.
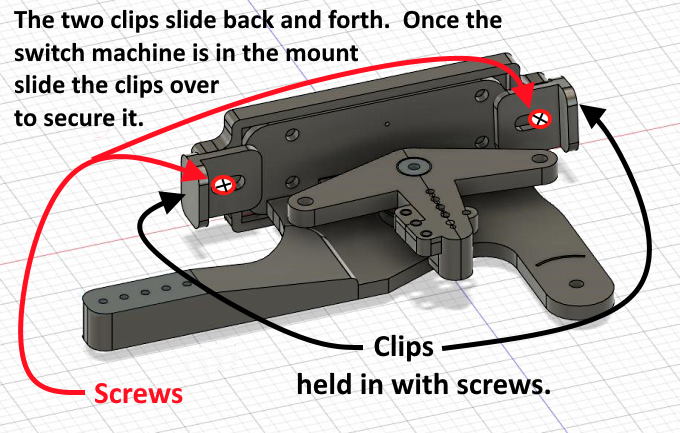
Next I could put either the Servo Switch Machine or the Gravity Switch Machine into the mount and ….
…. slide the securing clamps over that hold it in place and the switch machine would be in place.
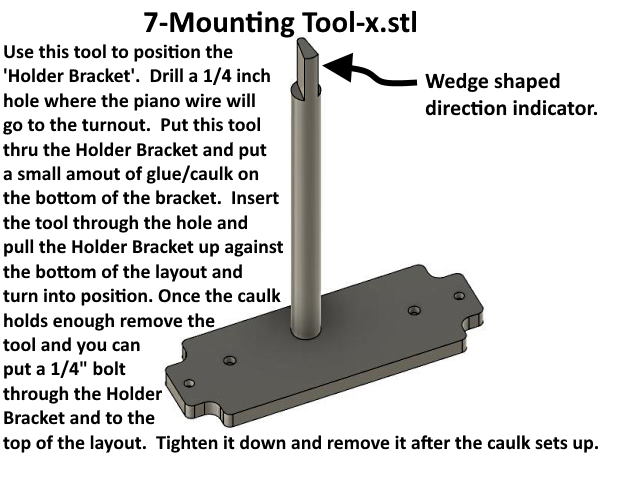
It is easy to locate the mount with the tool shown above.
Insert it into the mount after applying a little caulk to the mount (keep it away from the hole for the piano wire). Pull it up against the bottom of the layout after rotating it into position using the directional wedge at the top of the tool. With it in position the caulk should hold well enough that you can remove the tool and put a 1/4” bolt in its place. Tighten the bolt and pull the mount hard against the bottom of the layout and let the caulk set up and then remove the bolt.
Using the mount and mounting tool means you don't have to do anything under the layout to install either the 'Servo Switch' or the 'Gravity Switcher' and now also the 'Spring Switcher' (if it works). Another nice aspect of using the mount is that if you have a problem with the switch machine down the line you can slide the clips back and remove the switch machine from the mount and install a different one. You could move from a servo operated one to the gravity one or the 'Spring Switcher' that has been shown in the pictures. I've used a mounting system...
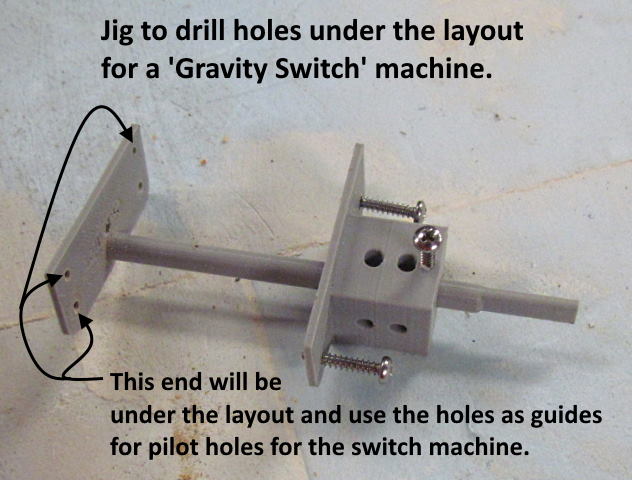
… shown above, that makes it easy to mount the 'Servo Switcher' or 'Gravity Switcher' mainly from above the layout. It makes it easy to locate the pilot holes for the screws used to hold the switch machine but you still need to go under the layout to drill those holes and to put the screws in. You also need to have room to get a drill in place to drill the holes. The holes might be able to be drilled from above but if you have foam over plywood above drilling an accurate hole through all of that would be hard.
I'll soon have the print files up on my thingiverse.com account ( HERE ) and to use the 'Gravity Switcher' there will be new print files for it also with the only change being made to the mounting part of the switch machine so that it fits into the new 'Holder'. If you don't want to use the 'Holder' the old files that are up now will work fine.
============================================
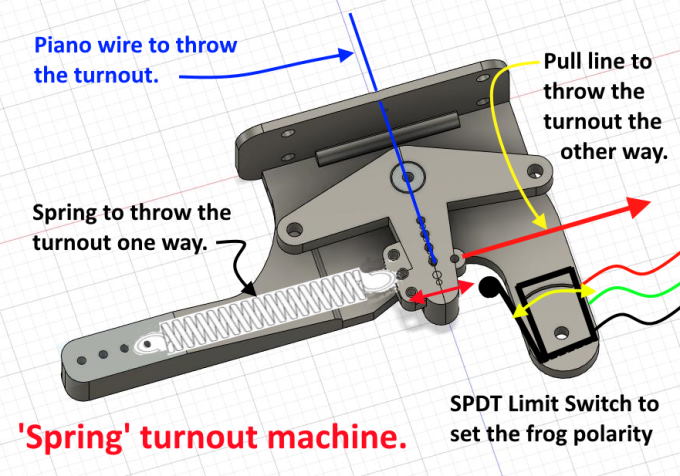
Next up I'll show what I've come up with for the 'Spring Switcher' that has been shown in some of the images above and which at this point is untested. Might do that before posting them. Here is a sneak preview of the design.
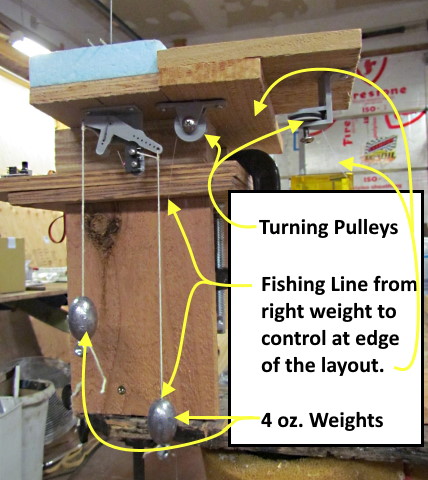
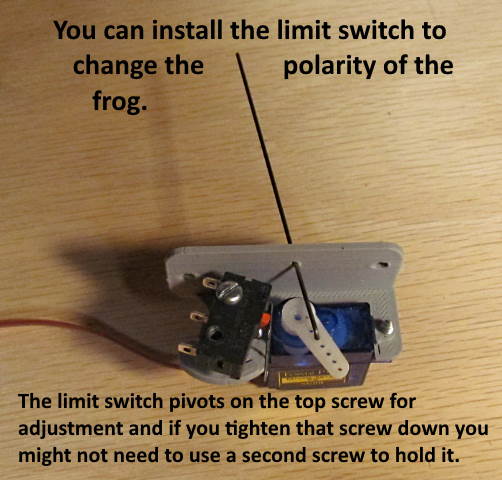
The 'Spring Switcher is very similar to the 'Gravity Switcher' and used much of the latter for designing the former. So far on my test layout I love the 'Gravity Switch'. Easy to install, no electronics except for a limit switch to control frog polarity if you want that and has proved to be very reliable with my hand-laid turnouts. There are a number of options for controlling it and they all pull on a line from the switch machine to the side of the layout. Simple fishing line run through eye hooks. I'm hoping the 'Spring Switcher' works similar.
It uses a 'soft' spring on the one side and a control line on the other side similar to the 'Gravity Switcher'. The nice thing about the line, at least so far with the 'Gravity Switcher' is that is is very easy to run to the side of the layout about any place. It is common fishing line and you can run it through eye hooks in about any direction. At the side of the layout I have a number of controls that can be used to pull on the line and throw the turnout. All are 3D printed and you can see them ( HERE ). Also if you don't have a printer there are other easy options to making a control to pull the line and hold it in position.
To be continued ...........
If you came into the build here you can find the main index for the build ( HERE ).
=========================================
...........................On..............e.........Next Page If There Is One