.................................. Return to Sumner's Home Page....
Return to N Scale RR Main Menu........... Return to Building UP's Canyon Division Menu
=========================================
...............Previous Page.............................Next Page If There Is One
=========================================
…......................--- Elevator Section Part 1 ---
============================================
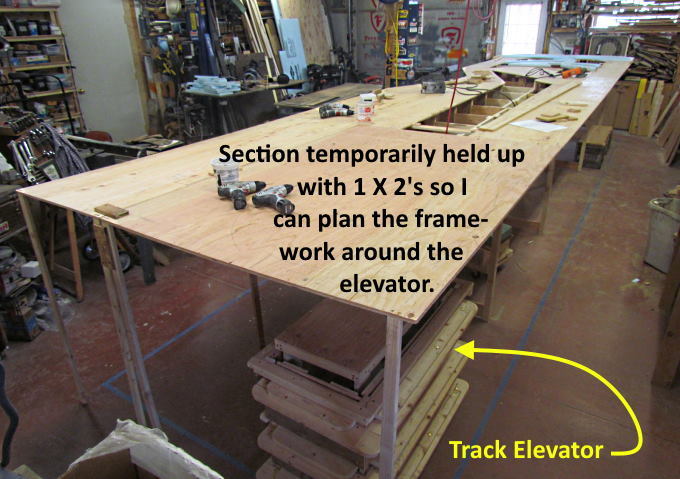
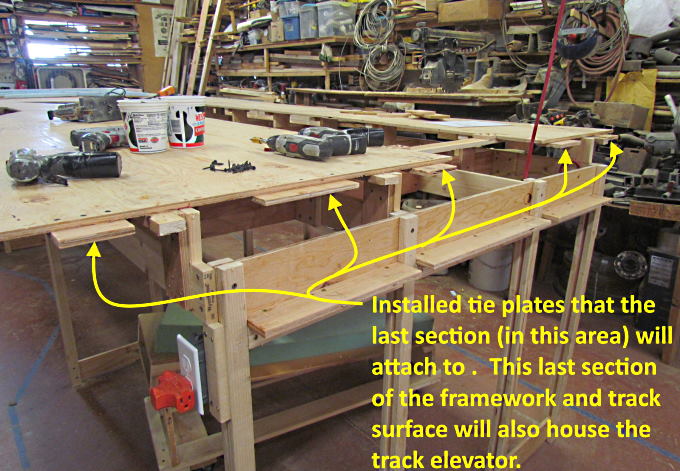
For the layout build before this I was able to build all of the framework and then the track surface and then raise that 3 inches on the risers. This last section of the layout contains the track elevator (that I hope works). I needed to do this section backwards of the other sections because I need the location of the track elevator so the framework would be in the correct location.
To do that I needed to put the track surface in position and then layout the elevator tracks and the tracks adjacent to it. I made a change of plans and decided to move the track that runs around the elevator when it is in the up position to the layout edges vs. inside of the elevator where it would be harder to access that track.
Tie plates were added to the existing track surface.
The two pieces of plywood that would be used for the final section were attached to the existing layout surface using the tie plates. Temporary 1 X 2 legs were added to the end.
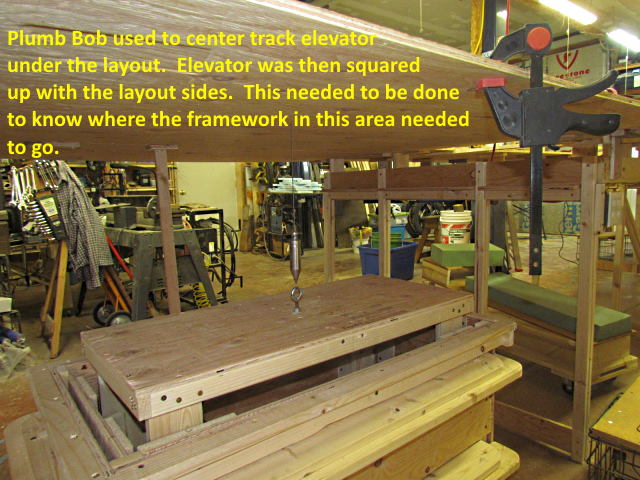
The tracks on the elevator (yellow), those going to or from it (black) and the run around track (blue) were drawn on the plywood. Also the section that will be cut out and placed on top of the elevator (dashed red) was also marked. The center of the elevator section was marked and a small hole drilled there. A plumb bob string went through the hole and …..
….. to the plumb bob below. The elevator was move directly under the plumb bob and squared up with the layout's edges.
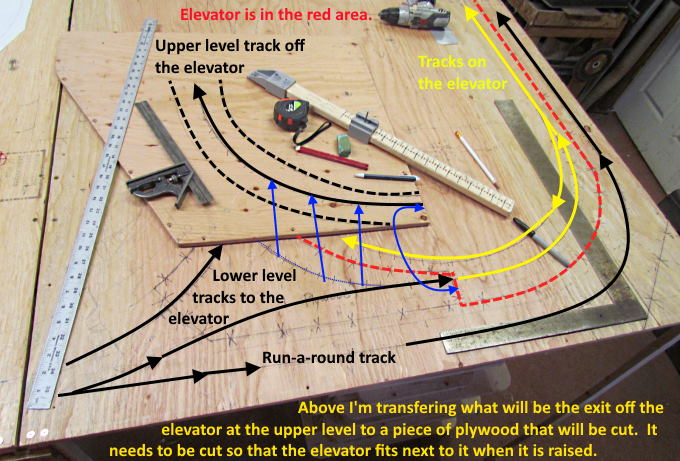
Above I'm marking the cut lines for one of the two upper level exit tracks from the elevator. It has to be cut so that the elevator doesn't hit it in the up position. I laid the plywood parallel with the edge of the layout and then used the lines on the lower level to mark the smaller piece of plywood so I would know where to cut and where the track would go (blue arrows and blue track on large plywood. The blue track line on the large plywood is only there to be able to mark the upper plywood piece.
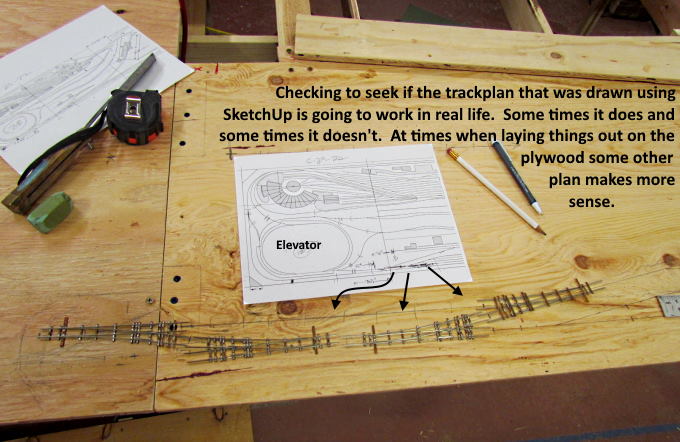
Above are the tracks coming off the run-around-track and the track from the elevator. There will be a double track tunnel entrance just to the left of the left-upper turnout. I was checking to see how close all of this trackwork was going to be compared to the SketchUp track plan. It will move a yard that begins here down a few inches from where I had drawn it. Most of that was because the run-around-track moved the elevator a few inches to the right.
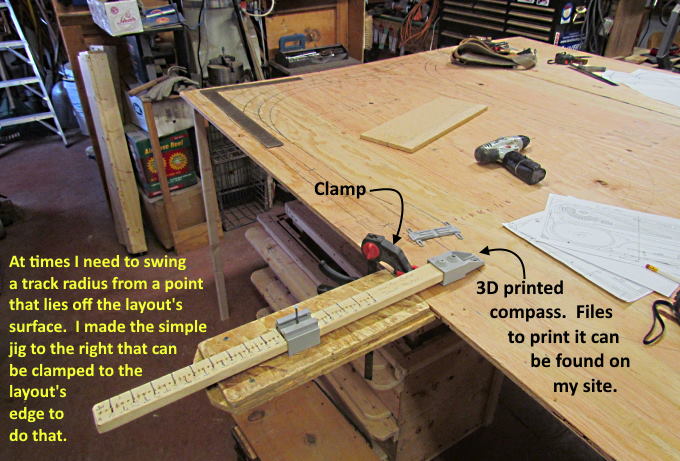
I spent a couple minutes making a jig I can use when I have to swing a track radius from a point off the layout.
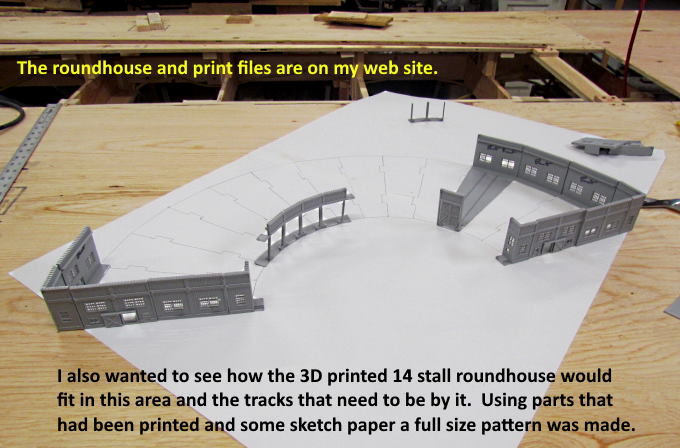
I have a large majority of the pieces printed for the roundhouse and used them to make a full size pattern that I can use in laying out the track to the turntable and roundhouse. More about the round house and links to the print files for it ( HERE ).
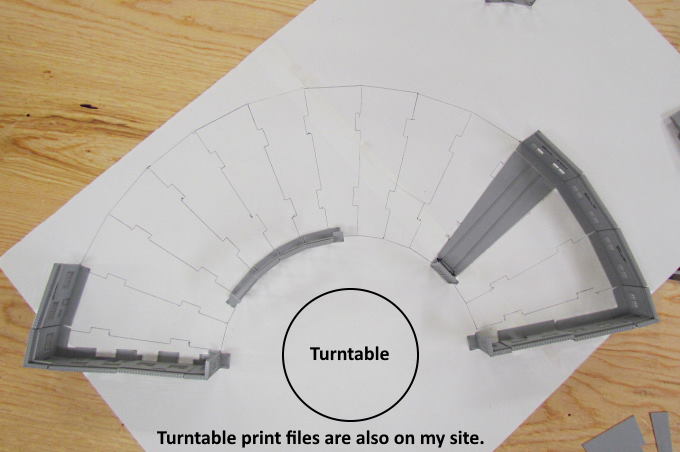
I did complete the turntable and the info on it and a link to the 3D print files is ( HERE ).
I wanted to get a pattern for the turntable and roundhouse so I could see how it fit in this area and if I had clearance for the three tracks that will be on the backside of the roundhouse.
To be continued......
=========================================
...........................On..............e.........Next Page If There Is One