.................................. Return to Sumner's Home Page....
Return to N Scale RR Main Menu........ Return Turntable Menu
=========================================
..............Previous Page..............................Next Page If There Is One
=========================================
... --- N Scale Roundhouse Turntable Build Platform ---
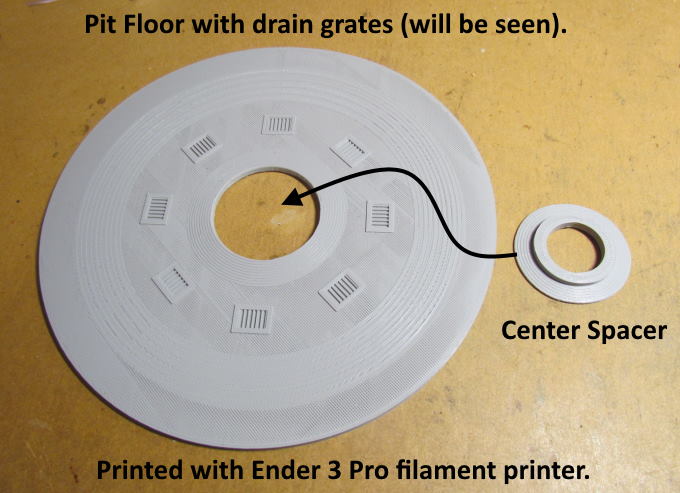
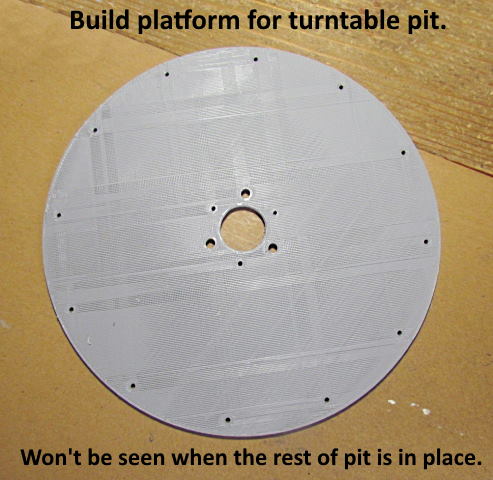
On this page we will start the build of the turntable pit. The first piece (build platform) is used as a foundation for the pit and won't be seen when the pit is finished. The pictures should be self-explanatory.
All the pieces were printed with an Ender 3 Pro filament printer on 'standard quality'. This is a large print at about 8 inches requiring a large build surface.
.
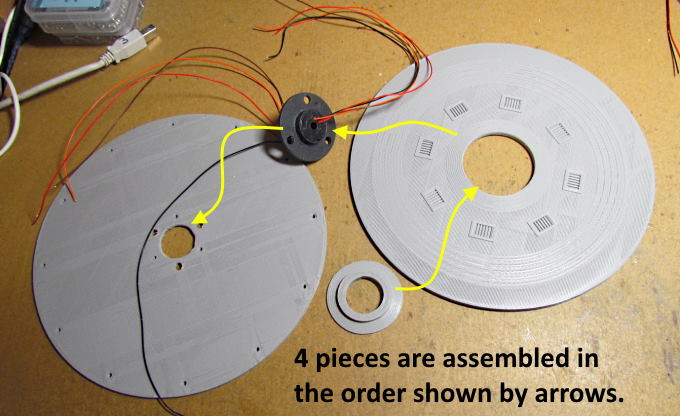
The pieces above will be added to the pit on the next build page.
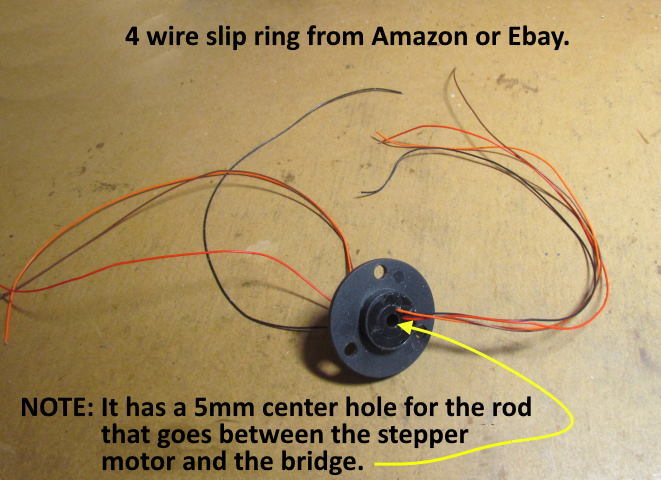
I bought the slip ring on Amazon for around $20.00 ( HERE ). You can find it also on eBay. In some ways I wish I would of bought the 6 wire slip ring as it would of offered more power options for the table/bridge. Also I'd check the connections through the slip ring as soon as you get it. I bought it in Jan. but didn't install and test it until late April and one wire was defective. Amazon did replace it in a few days though. With a 6 wire I could of gone to one of the other unused wires.
I'm using the 4 wires to power a light in the control 'shack' on the table, a flashing warning light, an overhead light on the table and track power. To do that with only 4 wires involved a little trickery (you will see it later). If I had 2 more wires to begin with the Arduino code would have been simpler and I would have had a little more control over the lights. It did all work out so all is good.
NOTE: The 6 wire slip ring is about the same price and appears to be the same size but if it isn't then it isn't going to fit the parts I designed. Also if you want to use the wires in a different manner you are going to have to modify the code I'll post for the two Arduino's.
Above you can see what will be the visible pit floor with drains for the bottom of the pit along with a filler piece for the center of the pit under the bridge.
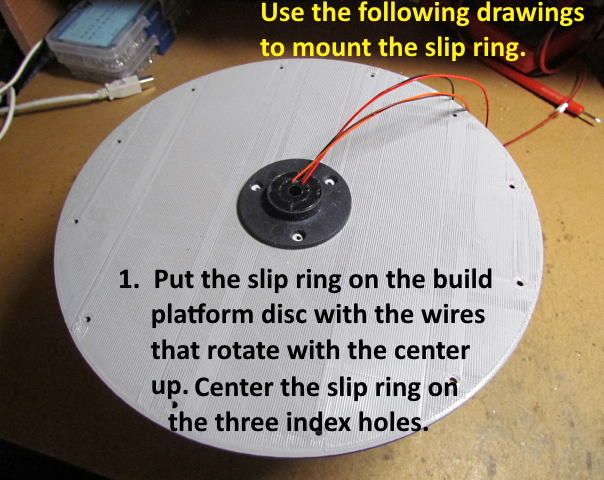
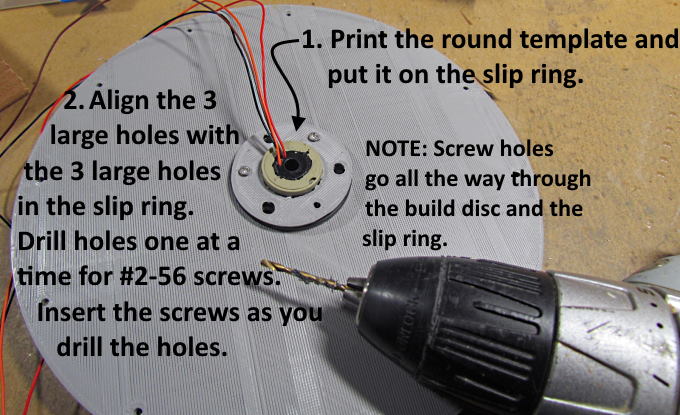
The remainder of this page is devoted to mounting the slip ring onto the build disc. I ordered an assortment of #2-56 pan head and flathead screws to use from Amazon and an assortment of 4mm to 20 mm M2 flathead Phillips self tapping screws from eBay. The screws weren't that much and I'll have plenty to use on other projects (you can see some of them in the background of the next photo).
.
.
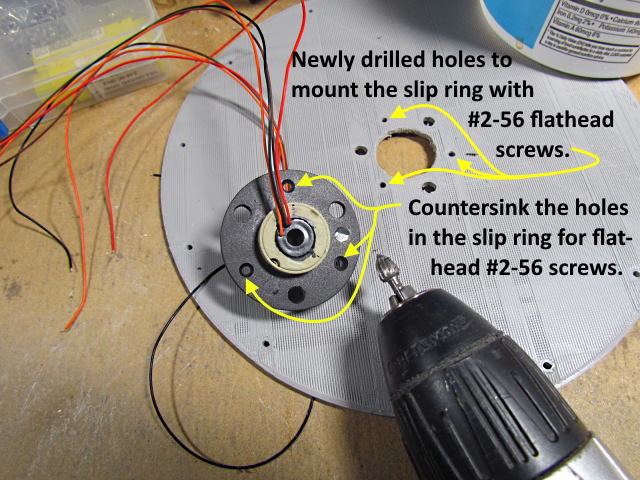
I used a small die grinder bit I had to countersink the screw holes in the slip ring.
Next we will move onto the part of the pit bottom that will be seen.
The files to print the parts above or on my thingiverse.com account ( HERE ).
You can find all the turntable files on my thingiverse.com account ( HERE ).
=========================================
...........................On..............e.........Next Page If There Is One