................................ Return to Sumner's Home Page....
Return to N Scale RR Main Menu.................. Return to Trackwork Menu
=========================================
...............Previous Page......................................Next Page If There Is One
=========================================
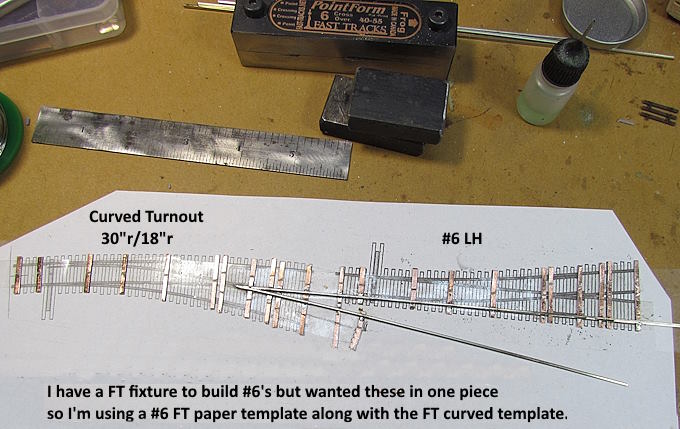
…....--- Curved (30”r x 18”r) & #6 LH Code 55 Turnout Combo ---
=========================================
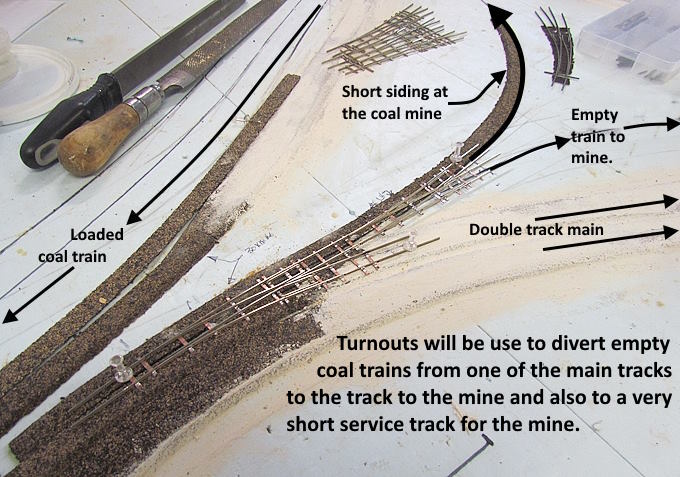
These turnouts were built so that empty coal trains could leave the main tracks and enter the mine area to be filled. Also the #6 LH turnout leads to a short siding to a maintenance building at the mine so that parts and other items needed at the mine can be delivered via the siding. A short switcher and some cars will be the only stock to use it.
Since there is a fair amount going on in a small space I decide to build the two turnouts together. They will be stronger this way and flow better.
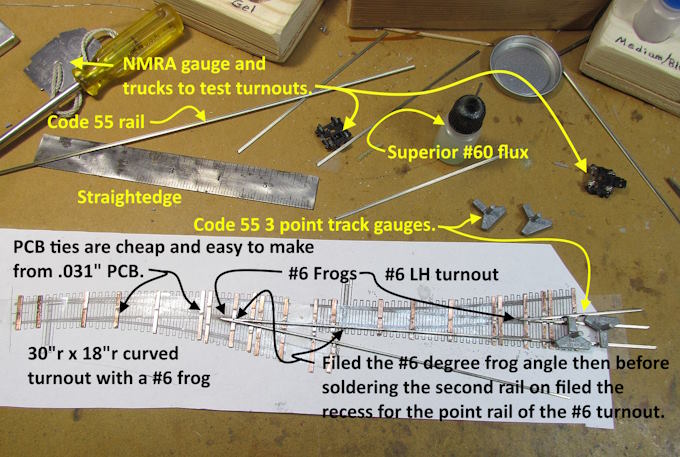
Above are a number of items I use when building turnouts along with a $15 iron (no you don't need to spend $50-$100 on and soldering station). More on the iron I use for about everything ( HERE ).
I filed the recess for the point rail on the #6 turnout but forgot to do the one for the curved turnout. Luckily I only had the stock rail soldered on to a few PCB ties at that point so unsoldered it and filed the other recess in the rail with the Fast Tracks StockAid tool. I strongly recommend getting the StockAid tool and the PointForm tool for the points/frog points and crossing points that you use most. I have it for #6 turnouts and use it for the points and frog for other size turnouts. It gets me close enough on those that I can finish filing by hand.
I also have the StockAid and PointForm tool for code 70 rail as I made a number of turnouts using code 70 for hidden area when it was hard to find code 55 flex track during COVID. I screwed up and ordered a second set of StockAid and PointForm code 70 tools by mistake. Contact me if you are interested in them ( contactsumner1 (at) gmail (dot) com ).
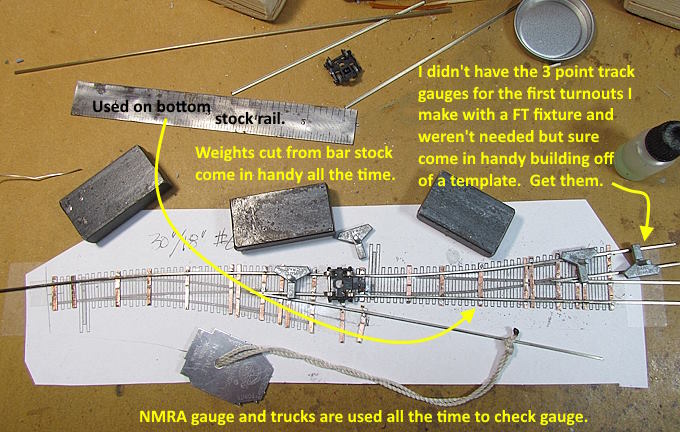
If you are building from templates do yourself a favor and get 3-5 of the 3 point track tools for the code rail you are using with. I didn't for a long time and in hindsight is was a mistake. You will make turnouts quicker and better with them.
.
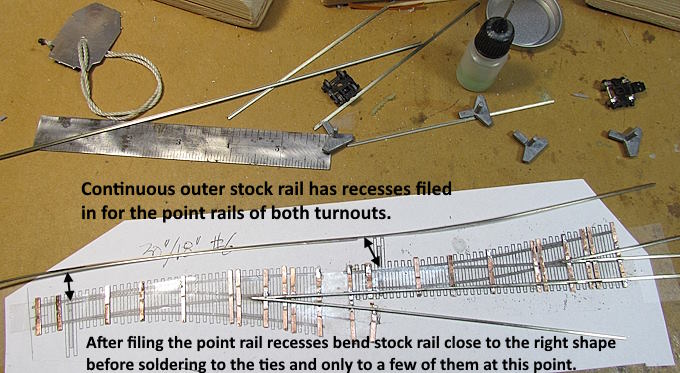
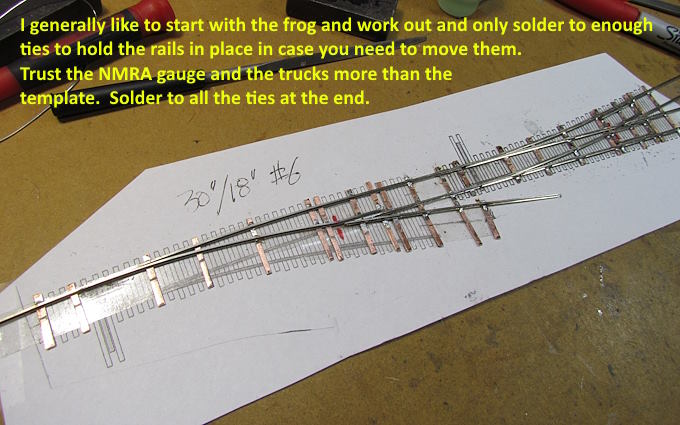
I try and start from the center (frog) and work out if at all possible. Easier to move the outer stock rails out if needed than to mess with a frog that has been boxed in by them (chances are you will need to do some minor tweaks sooner or later.
You will swear that you built the best most accurate turnout ever made until you start different locos through it. Nine different ones might go right through but the tenth might derail. It might be the loco, check the wheel gauge, but it might still be the turnout. Take the time to fix it (more on that later) or don't run the loco through it. Maybe for a siding very few locos will ever take the divergent route onto the siding.
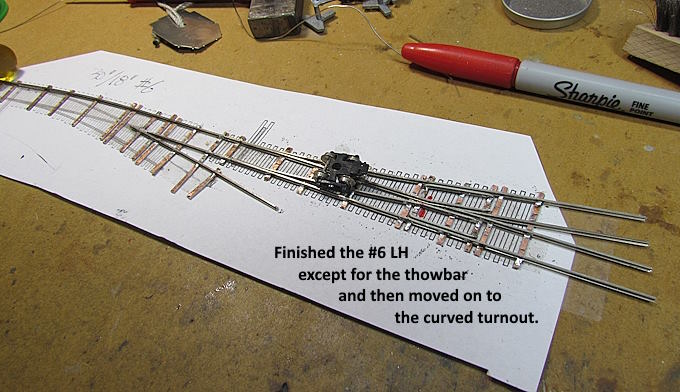
Above is where the combo are going. You can see the need for the curved turnout. Going onto the divergent route on the LH #6 there is a shallow 'S' curve but...
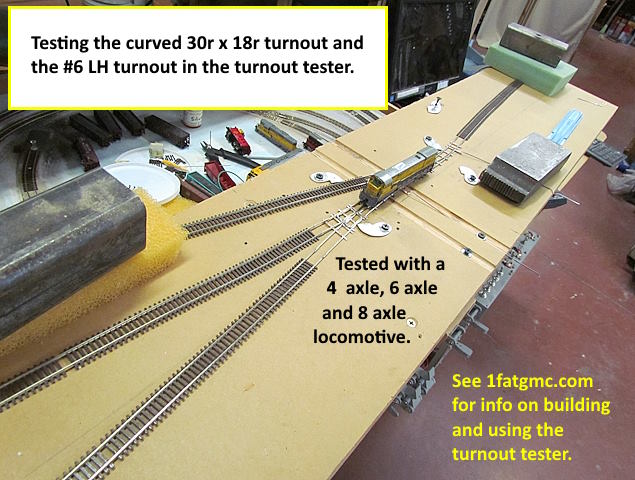
…. on the turnout tester all three locos that I tested with made the turn onto the divergent route OK. On the layout about the only thing that will access that spur siding will be a short 4 axle switcher used at the mine.
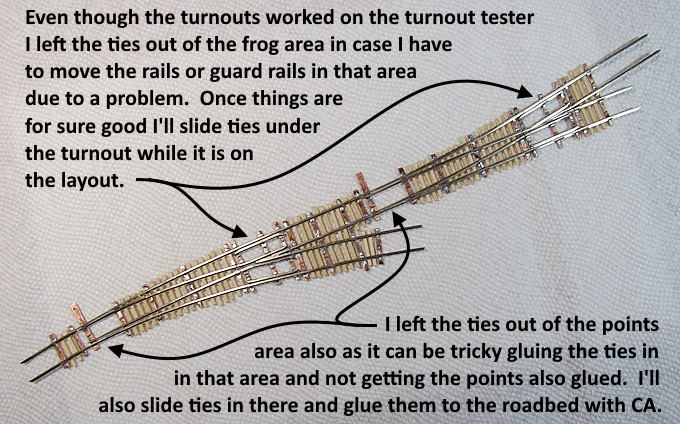
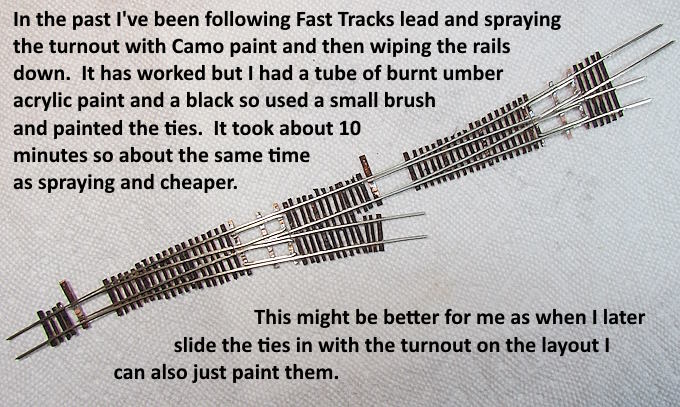
I'm really like putting ties on with the fixtures above and with CA vs. the Pliobond I use to use. More on attaching the ties and links to the print files for the fixtures ( HERE ).
.
I need to get the roadbed finished before installing the turnouts. It is about half finished at this point with only one strip of the cork down. When this is installed I'll try and remember to come back and update this with a few pictures with the turnouts in place.
=========================================
...........................On..............e.........Next Page If There Is One