.................................. Return to Sumner's Home Page....
Return to N Scale RR Main Menu.................. Return to Trackwork Menu
=========================================
...............Previous Page......................................Next Page If There Is One
=========================================
…..........................................................…--- “Gravity-Switcher” ---
....--- Weight/Gravity Operated 3D Printed Switch Machine ---
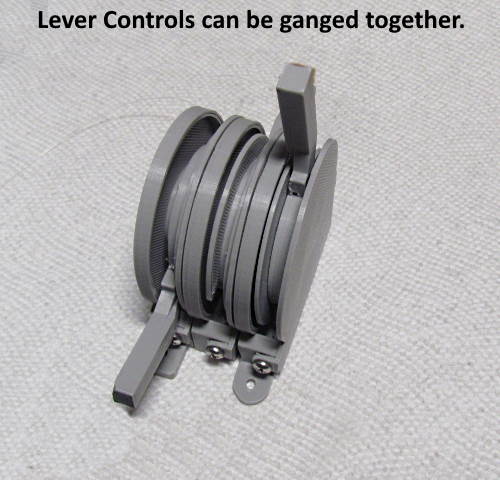
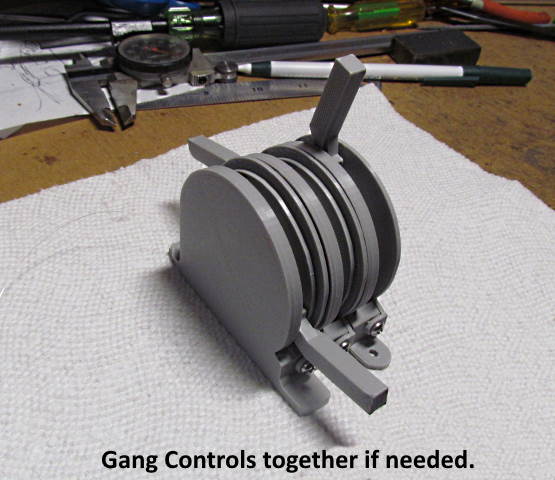
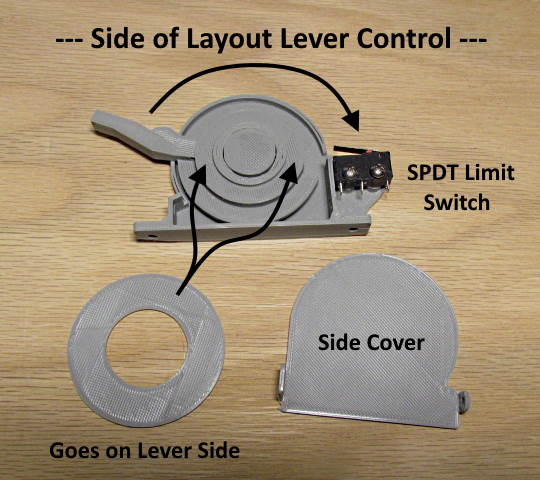
.................................--- Lever Controls ---
=========================================
You can find all the files to 3D print this object and others on my thingiverse.com account ( HERE ).
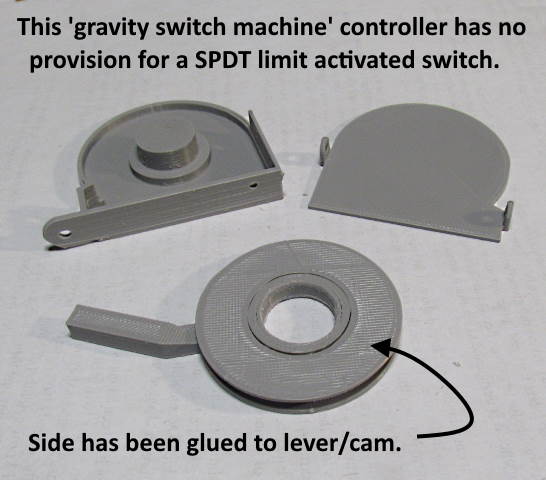
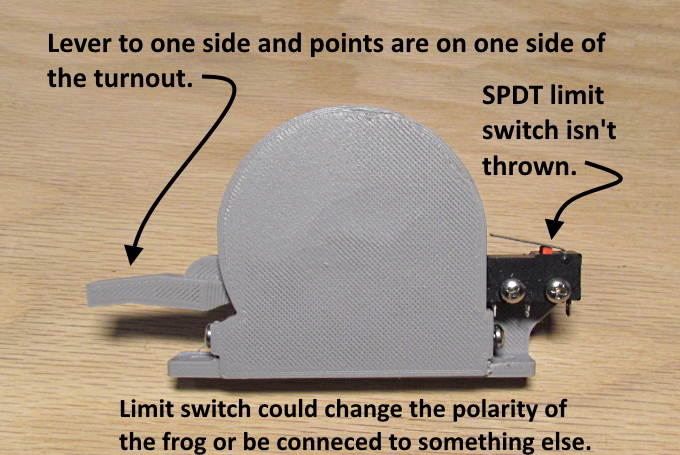
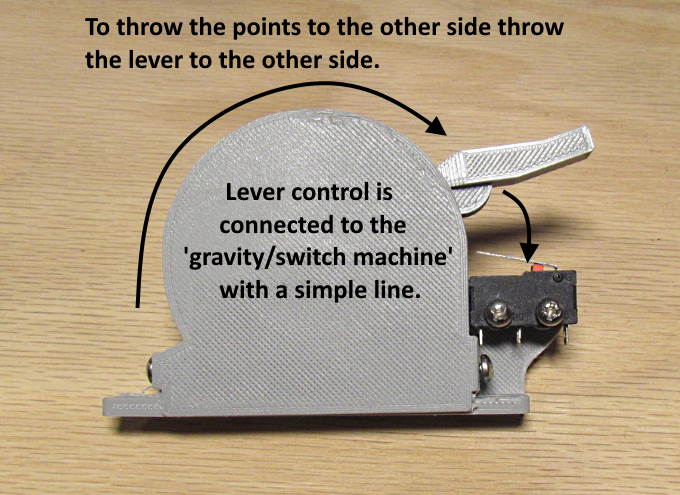
On this page I'll show a 'lever' option. There are two versions again, one with and one without a SPDT switch that can be used to change the polarity of the frog or for another function.
=========================================
NOTE: The latest prints are a little different than the pictures show below. The main change is the main housing body on the back side near where the SPDT switch is or would be has a 'dimple' there now. The lever has a hole in the side that catches the 'dimple' and helps to lock the lever in that position. When you pull the lever the other way it will pop past the dimple. I'll show this at the bottom of this page.
=========================================
.
.
.
.
.
.
.
.
.
.
.
.
.
.
.
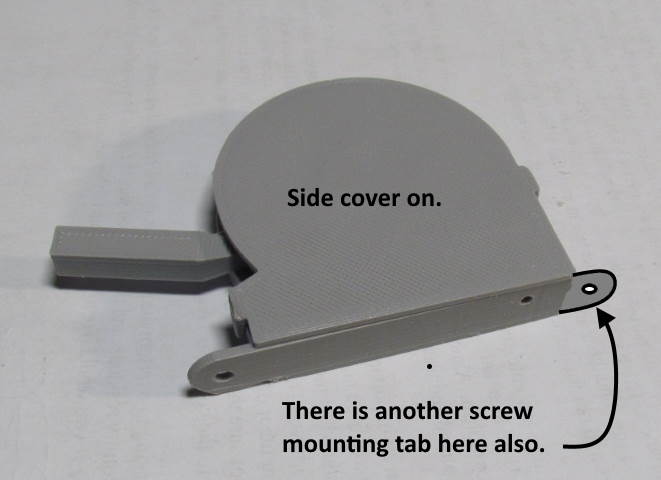
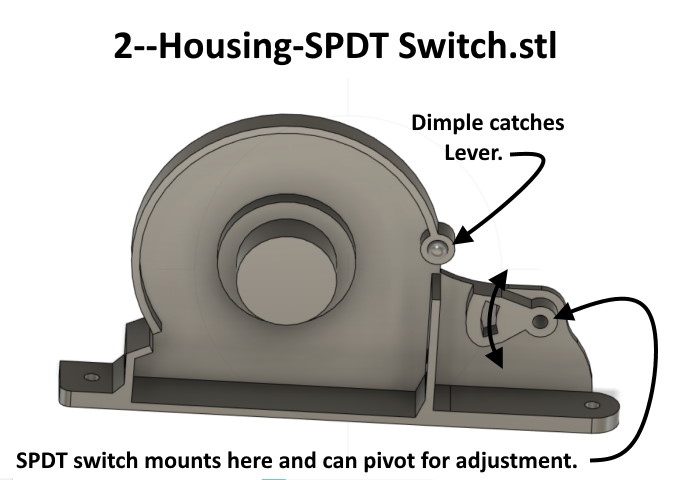
Above you can see the changes I made to the housing with the switch and also the switch-less housing. I added a dimple on the side of the case to hold the lever in place when it is in the back position. On the case that also has the SPDT switch mount on it (shown above) I moved the switch back .125 inches and also made it so that it can swivel for adjustment if needed. The switch pivots on the hole to the right and the second switch screw goes into the slot to the left to lock the switch into place. I also moved the rear mounting hole that is used to mount the control to the bench-work further back so that it is easier to screw that screw in if you are ganging multiple controls next to one and other.
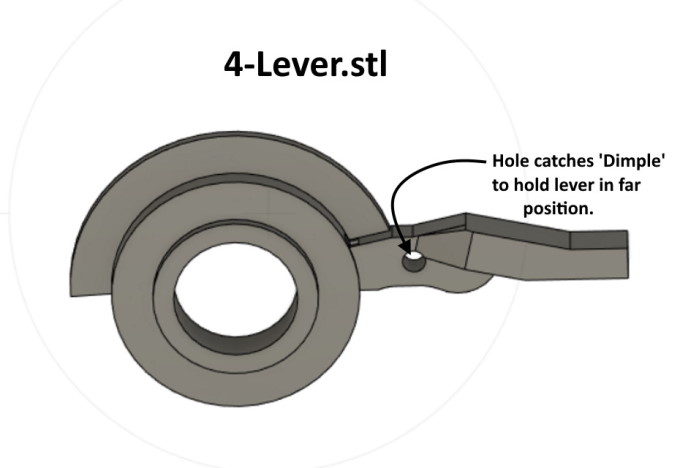
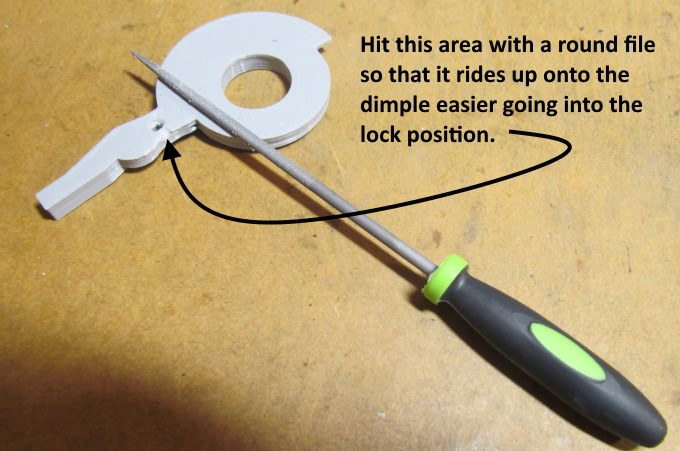
The next two picture will show how to modify the capture hole in the lever assembly shown above.
Spending a minute or so with a rat-tail file to help ease the lever up and over the dimple is a good idea.
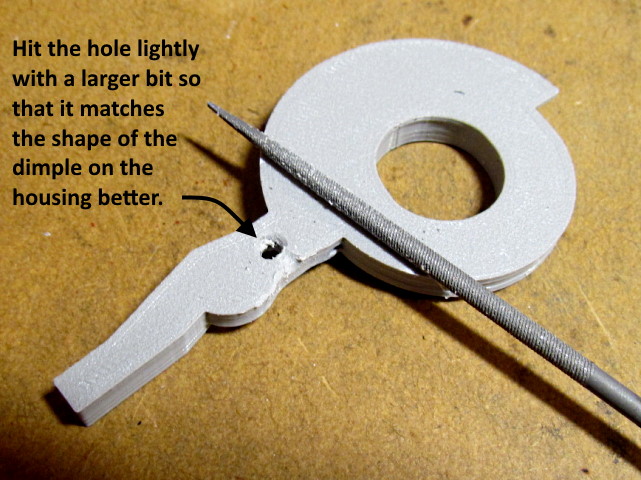
File a slight ramp up to the hole and also chamfer the hole out a touch with a larger bit.
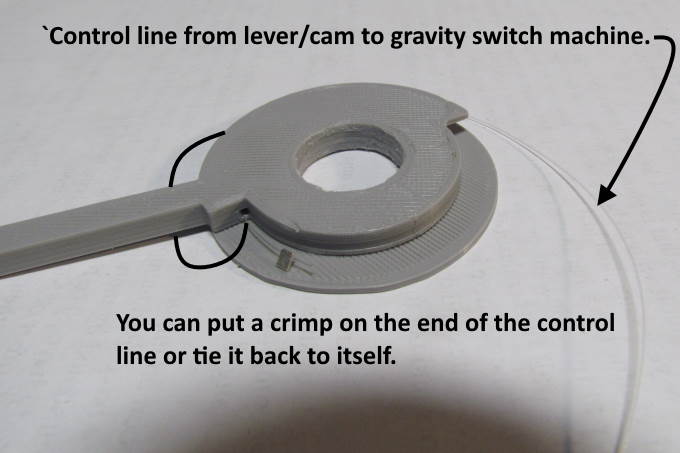
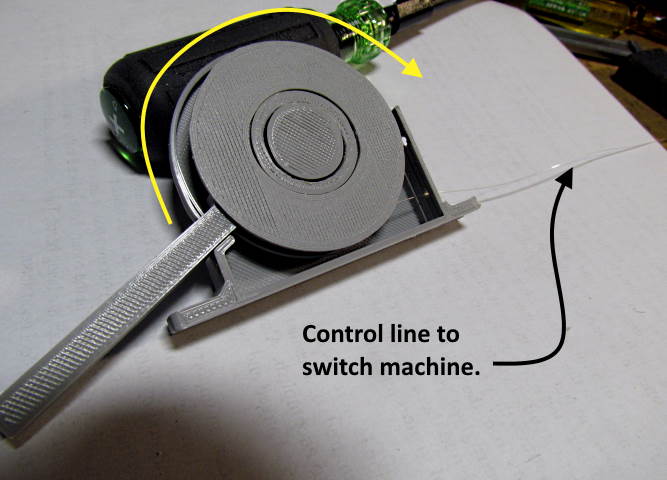
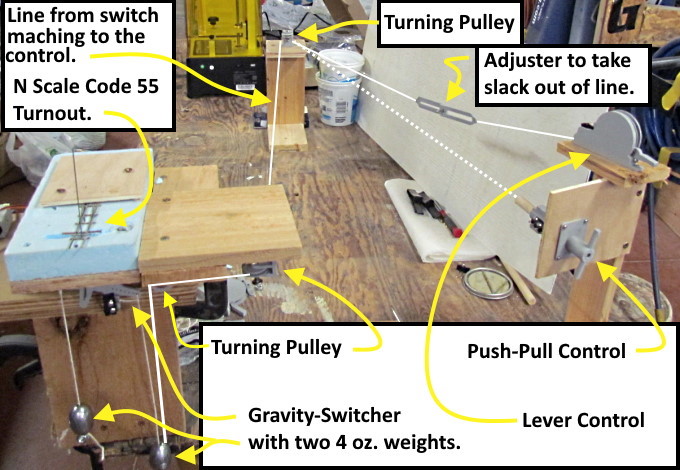
Above is a picture of my test rig for testing the 'Push-Pull Control' and the 'Lever Control'. At the moment it was setup for the 'Lever Control'. I'm using mono-filament fishing line which is very hard to see so I highlighted where the line is with the 'white' lines. Also shown in the picture is one of the two adjusters you can printout to take the slack out of the line. It and the other one will be shown on the next page. Taking the slack out isn't too critical as both controls move the line quite a bit and the only thing you are doing in lifting the weight on the right side under the 'Gravity-Switch' machine on the left. The whole setup is pretty forgiving on how you run the line and how you take the slack out of it.
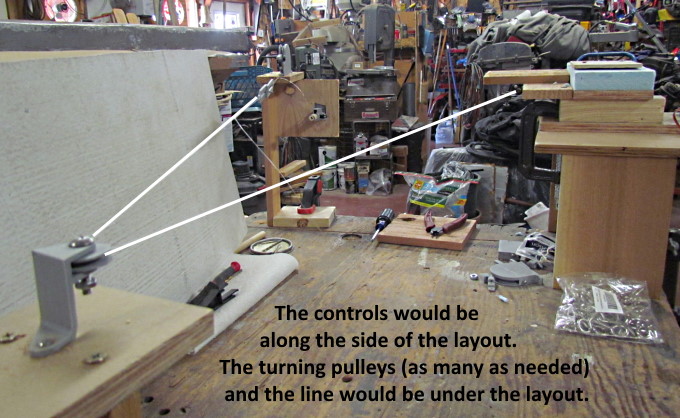
Above we are looking from the other end of the test setup where the pulley that turns the line back is located. You could have a number of pulleys depending on the situation. In this test there was another one just to the side of the 'Gravity-Switcher'.
For a video on how the Lever controls operate the Gravity-Switcher click ( HERE ) or on the picture above.
You can find the files to print the items on this page only ( HERE ).
You can find all the files to 3D print this object and others on my thingiverse.com account ( HERE ).
=========================================
...........................On..............e.........Next Page If There Is One