.................................. Return to Sumner's Home Page....
Return to N Scale RR Main Menu........ Return to Servo Control Menu
=========================================
…..................--- Soldering Tools and Supplies ---
=========================================
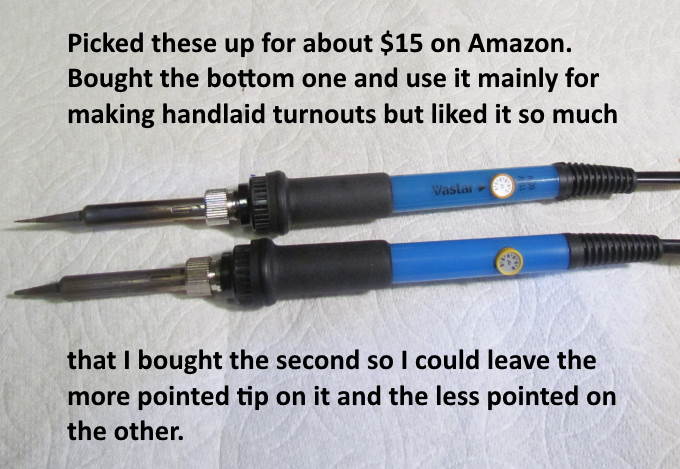
Tools and supplies used for electrical wiring and soldering hand-laid turnouts.
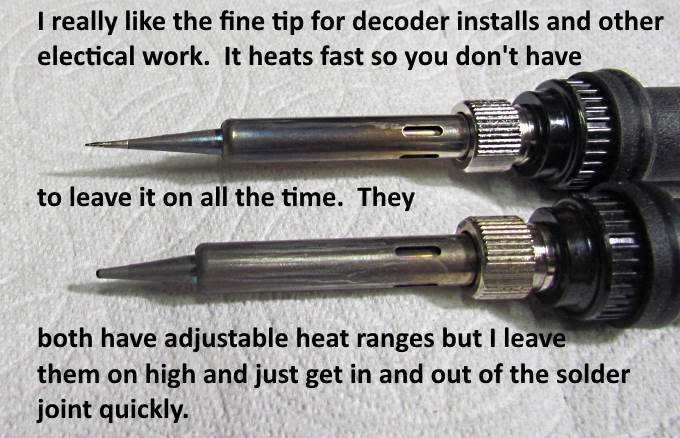
I have a much more expensive brand-name soldering iron that I bought before buying one of the Vastar irons shown above (both are the same iron). I like these better than the more expensive brand-name iron and keep it stored away now. A link to the irons on Amazon ( HERE ) that might work.
I use the blunter tip for building hand-laid turnouts and the finer one for most electrical soldering. The fine one heats up very quickly so I turn that iron off more while working on a project if I don't think I'll use it for 5 minutes or so.
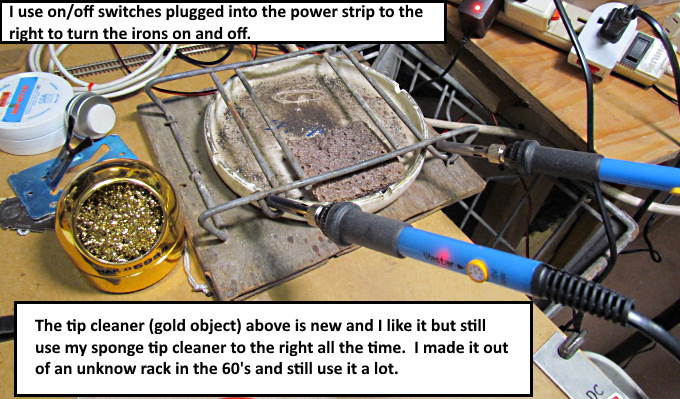
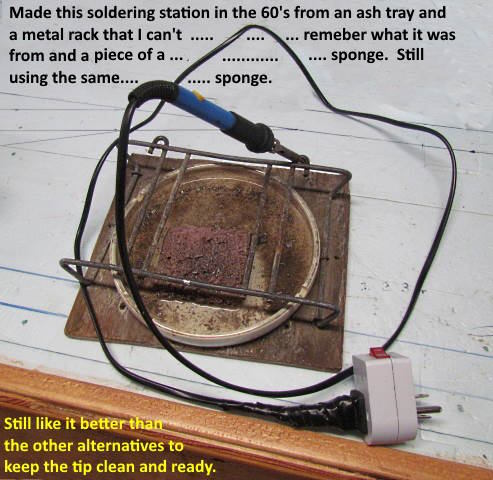
I have the small blue soldering iron stand shown to the left above but prefer the stand and sponge I've used for decades now on the right. Keep some water in it so that the sponge stays wet. I wipe the tip just before and after every solder joint. It should stay bright.
I love the Kotto solder smoke remover shown above for pulling the soldering fumes away from my face. Bought It in 2023 and pondered spending the money on it but don't regret that one bit since buying it. Works great and highly recommend getting one. Got mine from Amazon ( HERE ) but you can find them other places as well (just saw that I could of saved $10 on eBay).
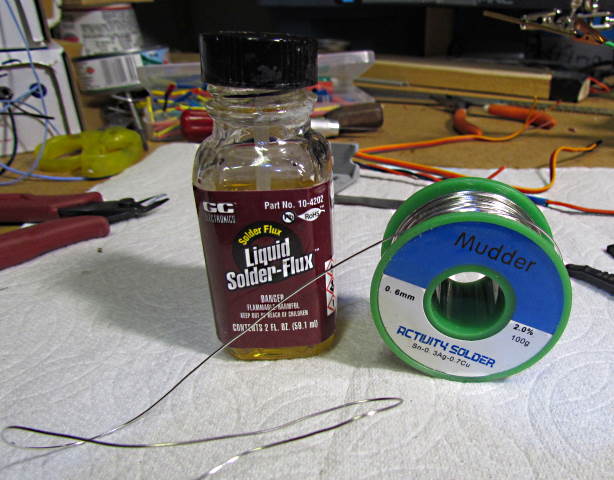
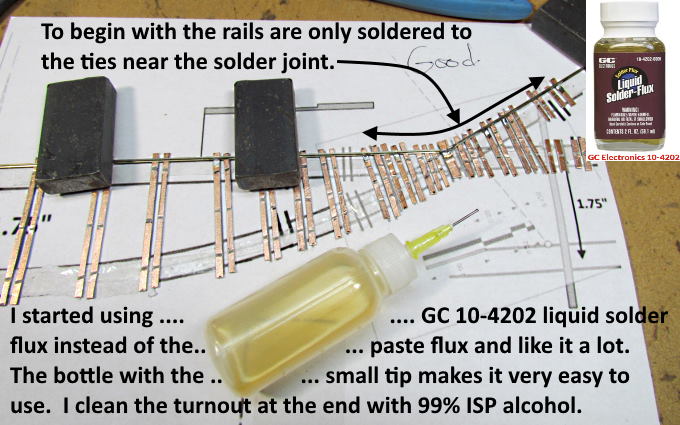
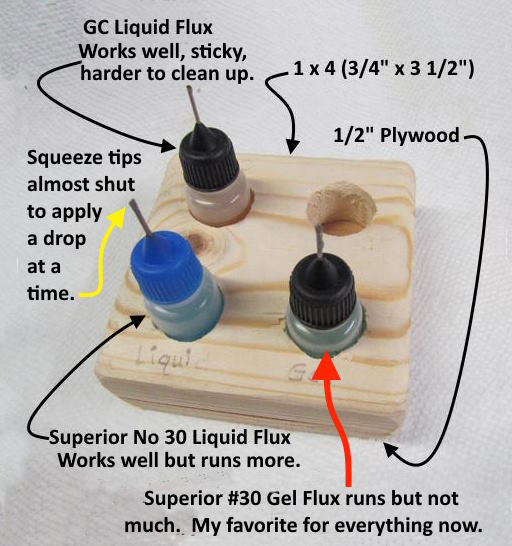
I really like using the GC Electronics liquid solder-flux shown above but now I'm a bigger fan of Superior No 30 gel and liquid further down the page. I use the GC or Superior sparingly on most solder joints.
I like the Mudder rosin core lead free solder also and use it for the hand-laid turnouts also. The .6 mm solder seems to work well for both jobs. I bought some .3 Mudder solder but it is too thin for most soldering jobs. I've also used Maiyum .8mm rosin core solder with equally good results.
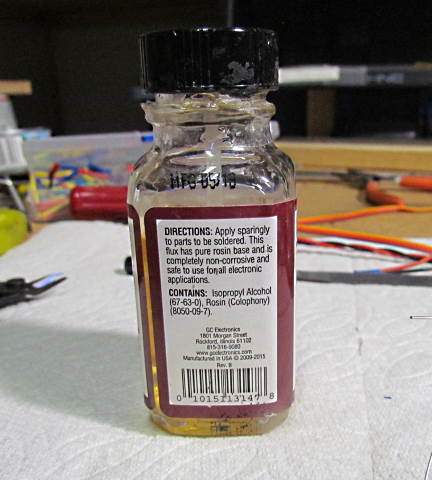
According to the label the liquid flux is safe for all electronic applications. I haven't see any ill effects from using it. Using it the solder joint goes very quickly with a hot iron. I leave the irons on the highest settings for most soldering and on small wire and parts like this you usually have a good solder joint in only a second or so. On and off the joint is usually the case.
NOTE: When I finish a turnout I brush it down with 99% Isopropyl Alcohol using an old toothbrush. Just takes a few minutes and removes any stray sticky flux that remains. They say you should do the same with most fluxes if you are soldering up a PCB. Wiring individual wires or tinning them I don't worry about cleaning as you burn it all off. The Superior #30 below cleans up, if you need to do it, with soapy water which is really nice.
Another thing I should of done a long time ago is …
… to use a bottle with a small dispenser tip to put the flux on vs. micro brushes. Don't use as much, easier to apply and can control the amount much easier. I'd recommend not putting doing this off like I did.
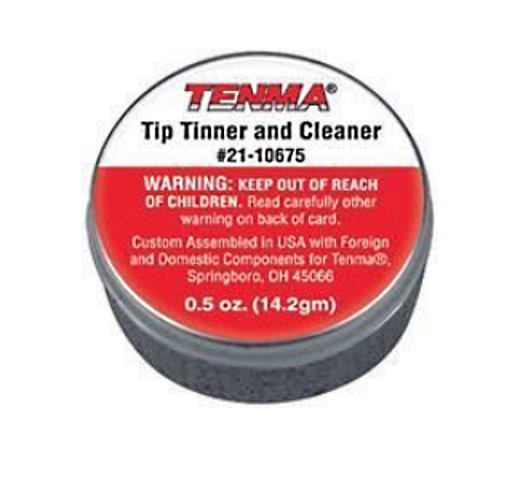
If you clean the tip and you can't get solder to melt and stay on it you might need to replace it or try cleaning it with a tip cleaner....
… like the one above or one similar. If you still can't get the tip tinned and/or solder to stick to it you need to replace it.
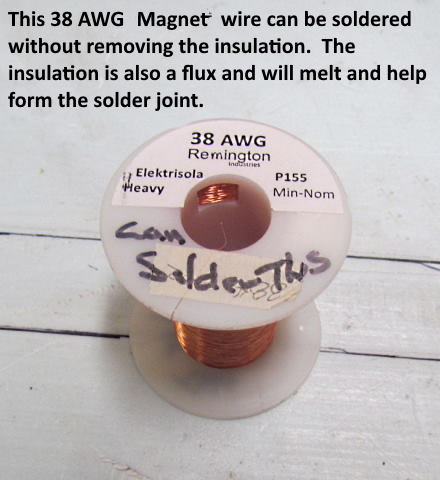
I've used magnet wire on some decoder installs. I like it because it is so thin but don't like removing the insulation from it. I usually burn it off with the soldering iron.
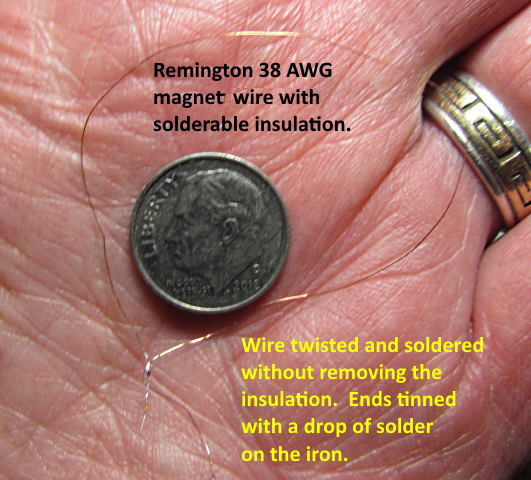
Recently came across the magnet wire shown above where the insulation is also a flux. You don't need to remove it as it will act like a flux when you go to solder the wire.
I've only done a test of soldering it and tinning the ends (above) and so far I'm impressed and will try using it the next time I need to use magnet wire. The spool was about $12 and I think has over 2000 feet on it so I'll never run out. If you want to try some make a $1.00 paypal donation to my site to cover postage and I'll send you 20 feet or so to try out. The 38 AWG was the smallest they had but I can't image working with anything smaller.
For soldering flux I like ( THESE ) small bottles I bought. For the flux I use the small metal tip and pretty much smash it shut so that when soldering I can control a small drop at a time if I want that for the solder joint on wiring or on turnouts.
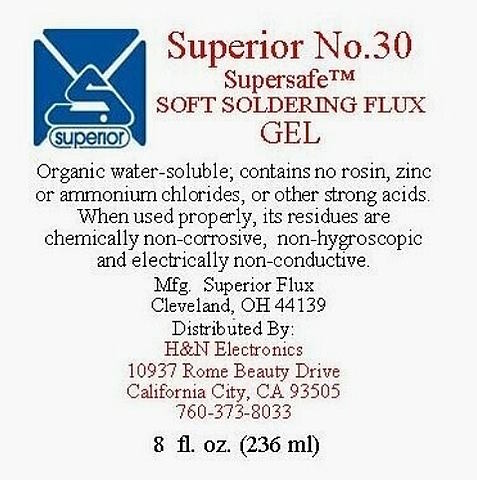
I've used a number of different fluxes for turnouts and wiring and my favorite now is Superior No. 30 Supersafe gel. It is still liquid but doesn't run as far when applied as most other liquid ones do and like it better than the pure pastes that take longer to apply with a mico-brush. I like the gel on the turnouts as it runs far enough for the PCB tie/rail soldering joint and not further.
The Superior fluxes are non-acid and non-rosin so clean up much easier and they work great.
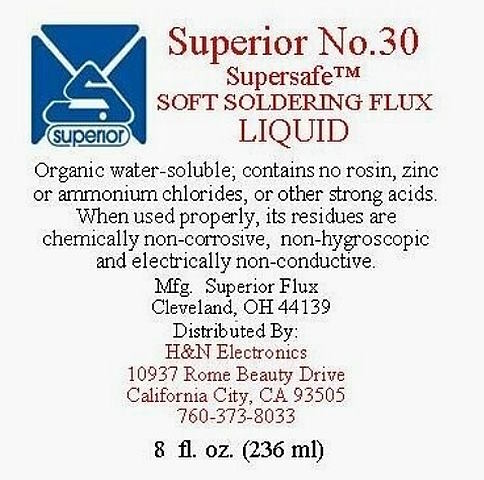
I also have the Superior No. 30 Supersafe Soldering Liquid and use it if I want or don't care if it flows further. You can buy them as a 2 pack to try out and they go a long ways. I read where others were using them for turnout construction so decided to try them after putting it off a year or so. Glad I gave them a try and wish I would of sooner. They are harder to find. I ordered direct (see links) and they came quickly.
Above are the applicator bottles I use with the flux. I smash the metal tips in some to slow the flow. I like it to not flow out unless I'm squeezing the bottle some.
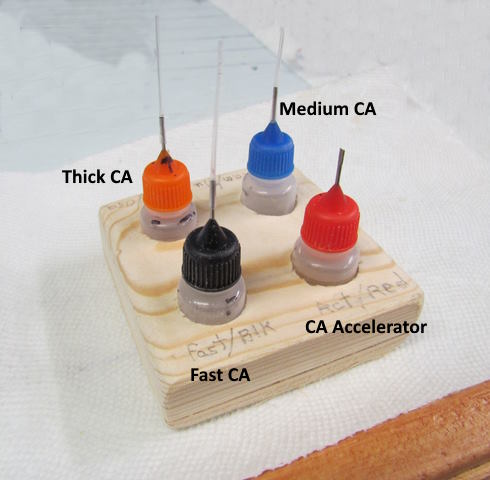
I also ….
….. use similar bottles for the fast, medium and thick CA glues that I use. The glue doesn't harden in the long applicator tips normally and they are really cheap.
========== 2nd Soldering Station ==============
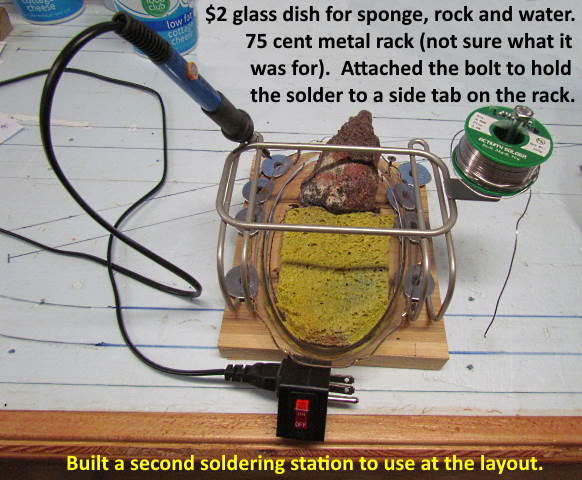
I got tired of taking the soldering station that I use to hold and clean the soldering iron back and forth between the workbench and the layout so decided to build a second one. Total cost was under $3.00 thanks to the second hand store that is about 200 feet up the street from the house.
I started cleaning the soldering iron tip with a wet sponge back in the '60's and have tried other methods like the brass sponge shown further up the page. I don't use it at all anymore and have gone back to the sponge entirely. It is faster and does a better job for me.
So onto pictures of the second soldering station.
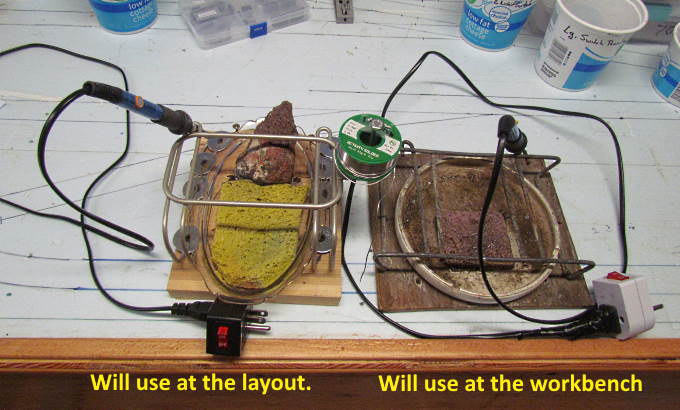
I'll keep this at the workbench now.
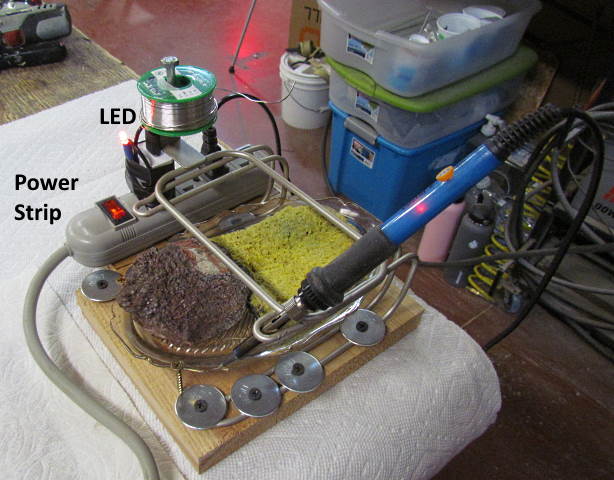
Went up the street to the secondhand store and found the glass dish for $2.00 and the metal rack (not sure what it was used for) for 75 cents. Screwed the rack to a board and added a few other screws to locate the dish. You can still lift it out if needed. Shaped the end of the sponge to the dish and added a rock to keep the sponge from sliding back. Bet you can't guess what the rock is.
.
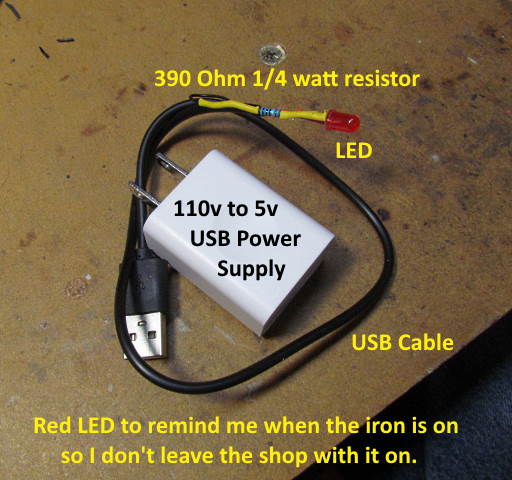
I have a red light bulb on the power strip I use at the workbench for the soldering iron and the resistance solderer. It helps in keeping from leaving the shop with the iron still on and the fire danger that could create. I wanted a 'On' indicator light for this but didn't want to use the larger bulb. I have a number of the 110v to 5v power supplies that are used to charge phones and other items. I allocated one to powering a red LED. I took a USB cable I had and cut one end off and stripped it down to the wires inside. It ended up being a charging only cable and only had a red and black wire and no data wires.
I soldered the red wire to the anode of the LED (the longer lead) and soldered a 390 ohm ¼ watt resistor to the cathode on the LED and then the black wire to the resistor to complete the circuit. I also had added shrink tubing to the exposed wires while building this.
A short power strip was added to the side of the station. Had it laying around but it would of driven the total cost up if one is keeping track of that. With the USP power supply plugged in the light comes on any time the iron is on and I could plug something else in at the same time if needed.
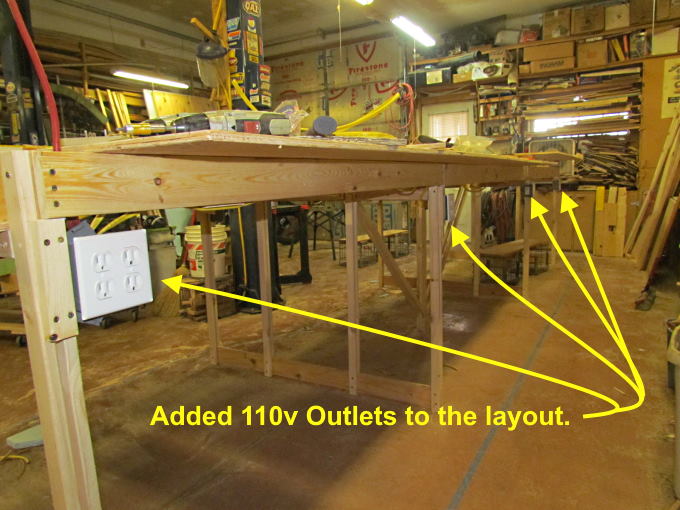
I have a number of power strips at the workbench with one dedicated to soldering and the warning light. At the layout I added ….
…. 110v outlets around the perimeter of the layout just behind and below the fascia. It will be very easy to now use the work station at the layout since I can plug into any of those. They have proven to be much better than dragging extension cords around the layout when working on it and I also have the DCC-EX Command Station, track power supplies and the 5 volt power supply all plugged into those outlets. More on them ( HERE ).
The metal stand had a tab off to one side on the top. I drilled a 1/4” hole in it and mounted a bolt there to hold the spool of solder. It will be a good storage spot for it and I could leave it there but usually have the solder down on the work surface with a foot to two pulled out for use.
The other soldering station works great at the workbench but this will actually be better at the layout.
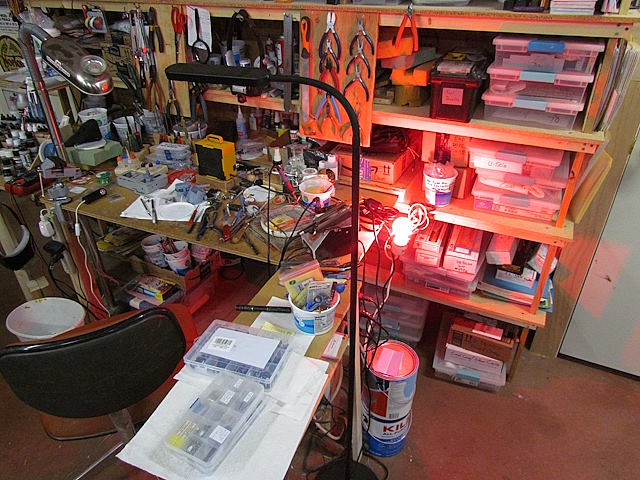
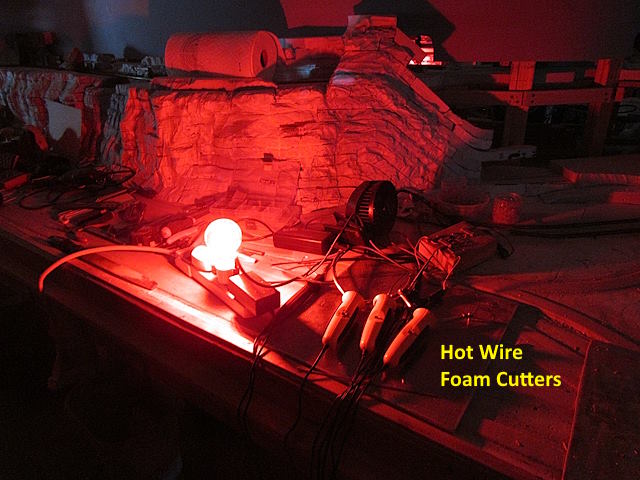
Warning Lights: I go a little overboard on lights that remind me that I have soldering irons on, hot wire foam cutters on and/or the layout power on.
The light above is at the work station where I do a lot of soldering.
The light above is on any time I'm using the hot wire foam cutters. Not a good idea to leave the work area with one of them on.
.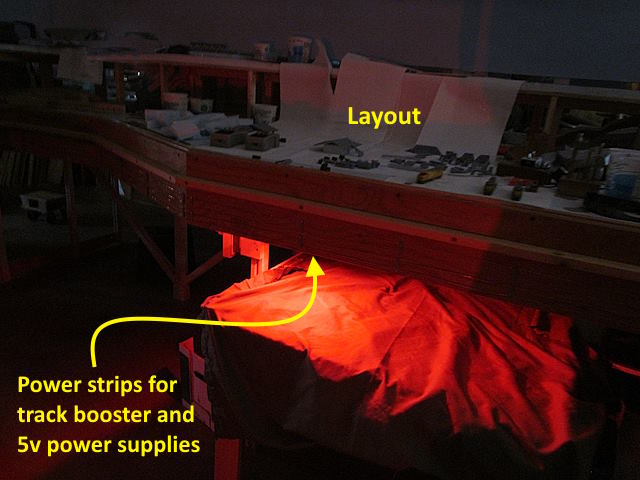
The light above is not so much a safety issue. It lets me know if the power supplies for the track boosters and for the 5 volt power or on. The shop is large so it is nice to look back before I go in the house and see if there are any red lights burning.
=========================================
...........................On..............e.......