.................................. Return to Sumner's Home Page....
Return to N Scale RR Main Menu................... Return to Scenery Menu
=========================================
..............Previous Page.......................................Next Page If There Is One
=========================================
............................... --- NtheBasement ---
….............--- Ballast & Landscaping Techniques ---
=========================================
Intro: I majored in Geology for two years before switching majors a long time ago. I can say from my studies then that I feel NtheBasement who posts on nscale.net has some of the best looking/most authentic rock formations I've seen in model railroading. He posted a tutorial there on how he does rock work, ballasting and other woodland/trackside scenery. You can find that tutorial ( HERE ). The following is more or less a reproduction of the tutorial minus a lot of other comments that went on in the thread there. I think it is an exceptional useful tutorial in a number of ways. I'll turn it over to him now.
=========================================
Ballast:
Technically not terraforming, but next step is ballasting.
Not my favorite part of model railroading. I use Woodland Scenics fine ballast. I use a seed dispenser, a dollar store cosmetics brush, and the usual 1:1:1 Elmer's H2O Iso and medicine dropper.
I paint the cork shoulders with Elmer's and add ballast to that; it helps keep the stuff from falling off the shoulder. Then I make a nice linear pile of ballast between the rails and sort of bulldoze and clean off the ties with the cosmetics brush. I add more outside the rails until the shoulder line is gone. Mist with isopropyl and flood 1:1:1 between the rails twice, than add more 1:1:1 wherever unflooded ballast remains. You need continuous ballast over the top of the shoulder so that the glue will soak down to the ballast below the top of the cork.
The last section is done! I have all three ballasted turnouts up and running too. Once the last glue has dried it will be rail cleanup time and then running trains again before the landscaping phase starts.
I decided not to ballast the Atlas arch viaduct, not really sure it would be appropriate anyway. I still need to figure out what roads and buildings will be needed in the yard in the foreground.
=========================================
Landscaping:
Started landscaping.
I found places that got sprayed with wash when I removed the protective paper from the wall. Had to repaint some sky to fix it. Then I added paint behind where the trees will go so that the upcoming "woods are lovely, dark and deep" instead of having blue show thru the gaps.
I'm modeling a forest, so rather than model individual trees I just do the whole forest. First step: to drill a bajillion holes, vacuum the chips, and plant tree trunks. My trunks of choice are from a neighbor's River Birch. The twigs are thin, strong, fairly straight, and River Birches thoughtfully deposit large quantities of themselves on the ground. He might be wondering about the footprints in his yard though... I also use spray-painted wire for trees that may get in harm's way during track cleaning.
I add lots of stuff to the ground - sifted topsoil, sifted peat, ground oak leaves, leftover tree trunk logs, and various pieces of Woodland Scenics foam. I stick with dark green to model the shady inside of the forest and go with lighter stuff out on the cliff face where the soil is drier. The key, as with just about anything in nature, is to have a variety of colors and textures. Half the stuff on steep slopes will fall to the track as I mist.
Another round of misting with isopropyl and then flooding with 1:1:1 Elmers:Water:Iso with an eyedropper. I made sure every cliff ledge got glue, and as the glue ran down the cliff face I watered it down with Iso mist and threw some WS fine grass at it to make it look like a north-facing (and moist) cliff.
I haven't found a quick way to do tree tops without going thru a ton of WS foliage clusters, so I use a slow method. Quilt batting from a fabric store is stiffer than poly fill and you can peel it apart in layers. A bag is enough for a big layout. I use spray paint on it to get rid of the white, but just as important the paint also binds the fibers and makes it stiffer, and it won't let loose when I wet things. I cut pieces to fit the forest, adding layers in front.
It is tricky to add leaves without the batting edge showing. I peel apart WS foliage clusters and make sure they overhang the edges that will show. Glue is dark grey house paint from a sample can, which takes a while to dry. Note the non-stick craft mat underneath.
You can add top leaves while on the mat, or add them after gluing the batting to the tree trunks. I use the usual 1:1:1 Elmers/iso/water. I use mostly WS clump foliage but have used everything from coarse turf to bushes. Note when you soak things down they get heavy and sag, which is why you need the edges in place first. To glue the batting to the trunks I paint the trunk tips with straight Elmers.
The key to filling once the forest is in place is to do it in stages, waiting for the glue to dry before filling some more. Otherwise the stuff that you glued 5 minutes ago can all collapse under the weight of the glue mix. I usually work from top down. For a Carolinian forest, any place that gets sunlight should have something green growing on it, so you end up with almost a wall of green.
Took a long time to finish the forest, and it looks much better with the cardboard and newsprint wall masking gone. Some day I may paint backdrop hills and then slide them in behind the scenery where the masking was.
I've used WS dark, medium and light green clusters, clumps, and bushes, coarse turf, green and earth blended turf, harvest gold, wild honey and light green grass, and a Noch grass that I lost the label on. All that time and $$ are a good reason to model the arid Southwest instead of the Appalachians.
I have three grass applicators and the WS is by far the fastest. I used a War World Precision applicator for adding grass next to cliffs and forests but it is very slow. I want to put shorter stuff in front of the upper track so I'm trying to add perimeter grass first and the short woods after. Certainly helps to have low humidity while grassing..
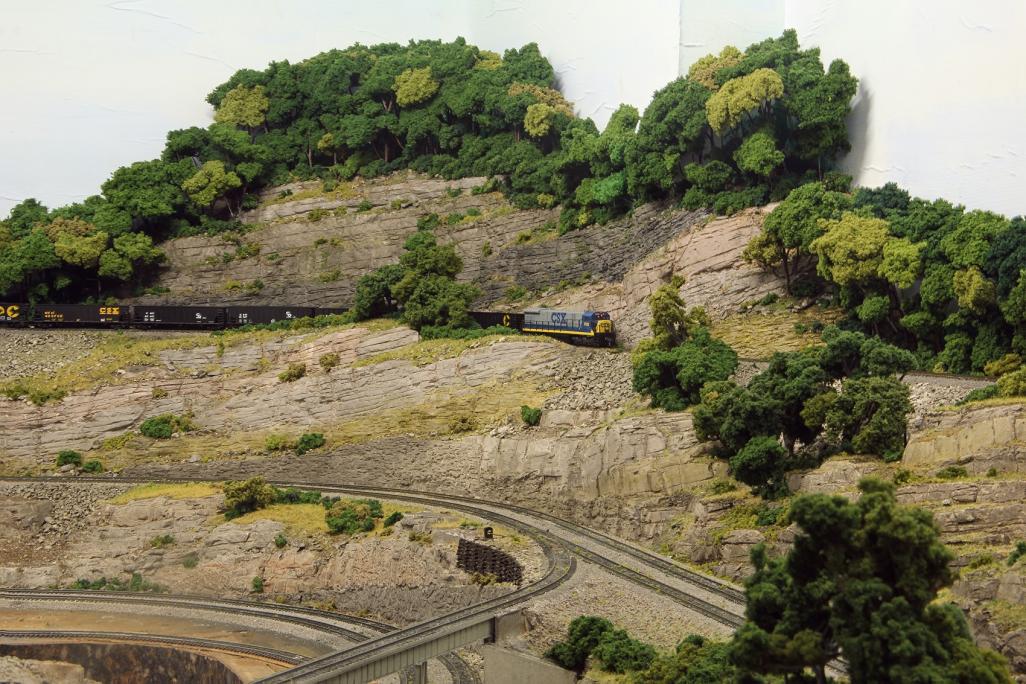
Not sure how I like the woods at the bridge since the trees are higher than the track. I think I will use recycled WS trees on the five foot insert behind the rest of the bridge. Still need a low tree where the backdrop paint is exposed to the light.
One last photo using Combine ZP for photo stacking:
NOTE: Thanks to NtheBasement for the great tutorial.
Now take a cab ride around NtheBasement's layout and …..
enjoy the ride and the scenery. Click ( HERE ) or on the image above.
Also check out his video …..
… ( HERE ) or above on 'Moving Coal The New Way (N scale way). Coal cars are actually loaded at the mine and unloaded at the power plant. ( HERE ) is a link to his YouTube channel and his other videos.
=========================================
...........................On..............e.........Next Page If There Is One