.................................. Return to Sumner's Home Page....
Return to N Scale RR Main Menu.............. Return to Locomotive Menu
=========================================
..............Previous Page..............................Next Page If There Is One
=========================================
…..........--- Micro Trains 1015/1016 Coupler Build ---
A while back I put some MT 1015 couplers together following a video I saw. They went together probably better than what would of happened if I hadn't watched the video but still they were a real pain and I didn't look forward to putting more together. After a search I saw a comment about using the coupler installer that I guess Micro Trains sells. I didn't actually see it but then mentioned putting the parts down over a post on the machine. The light went on and not sure if the following is how it works and I'm sure someone else must also use his approach but decided to document it and post it.
The pictures should tell the story. Also I think I'm going to make an improvement on this with a design that can be 3D printed and will post those files when I do but doubt it will actually be much better that what I did below.
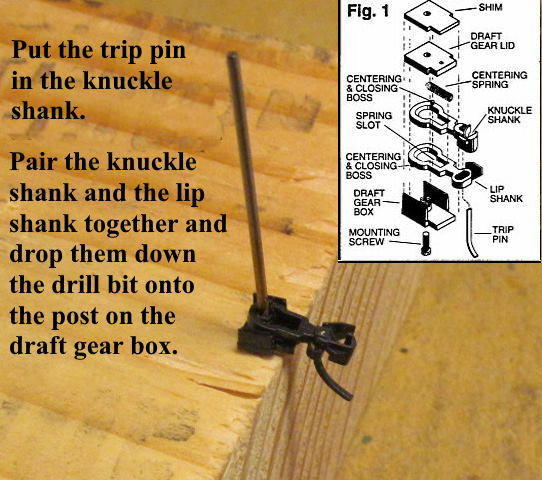
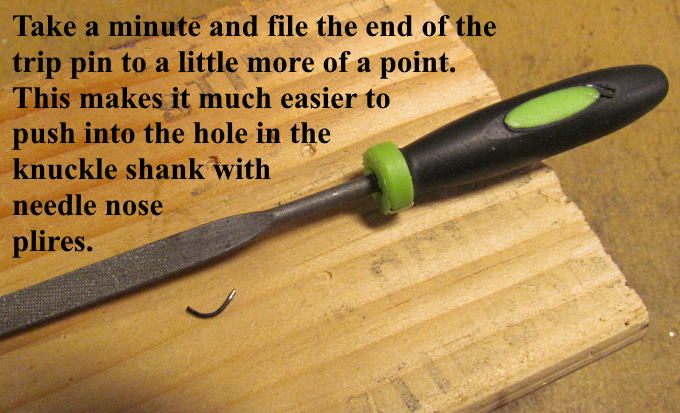
Maybe the hardest part of the install for me is getting the trip pin pushed into the knuckle shank. I found it is much easier if I take a minute and file the one end into more of a point. With that done it isn't terribly hard to push it into the knuckle shank hole with needle-nose pliers.
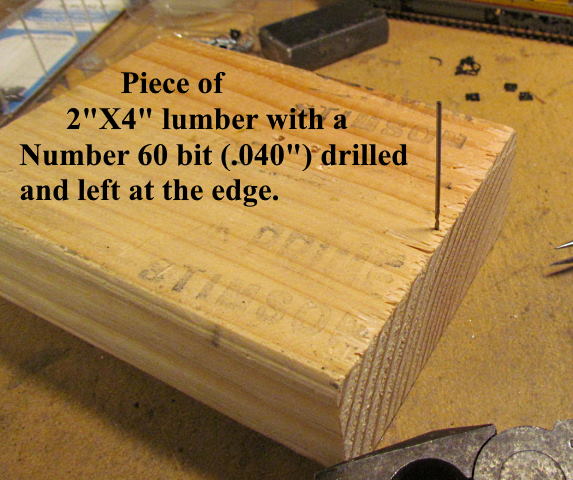
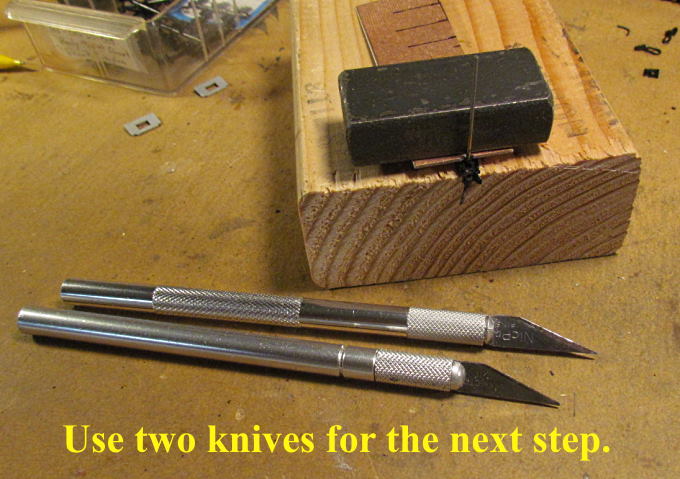
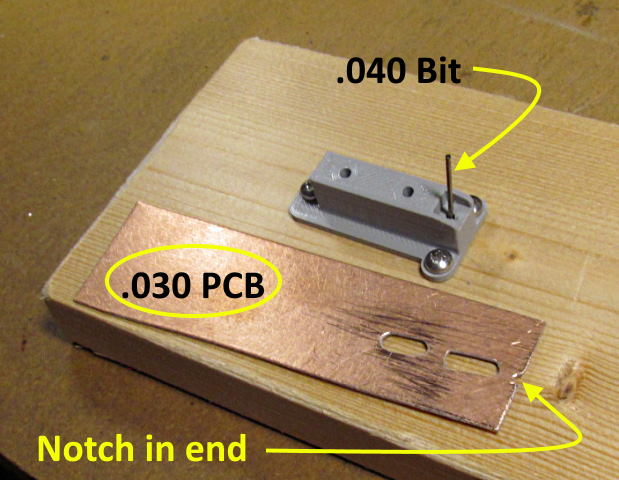
The magic that makes the install so simple now is a .040” drill bit sunk in the end of a piece of 2 X 4 lumber or about an size. Drill a hole close to the edge with the bit, remove it from the drill and place it in the hole.
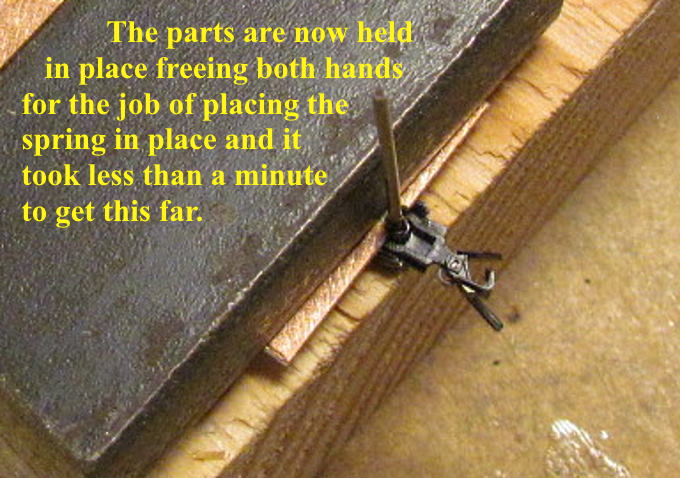
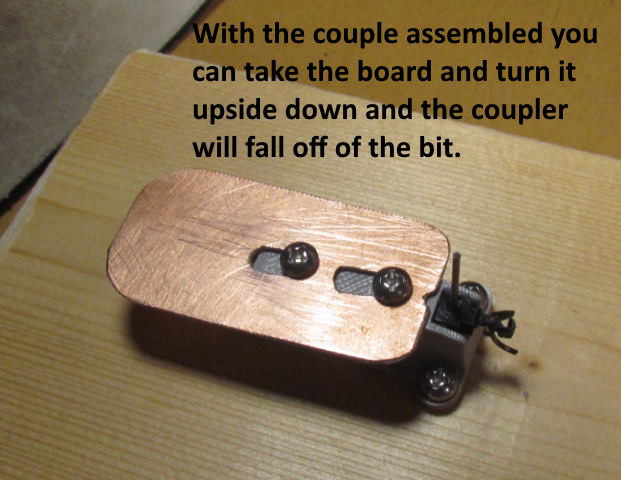
The bit is going to keep all the parts where they are suppose to be and make the spring and lid assembly really easy.
.
.
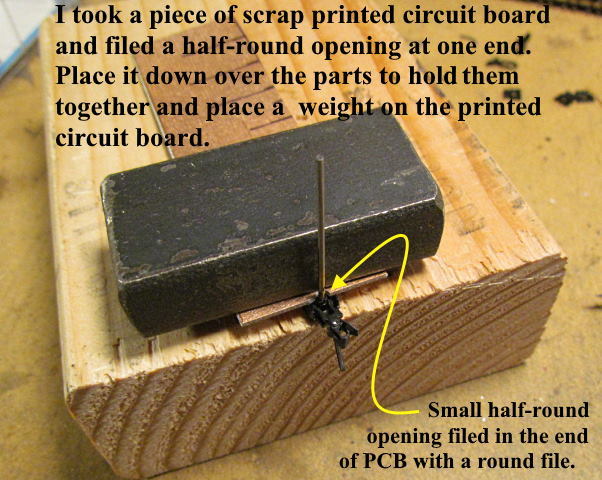
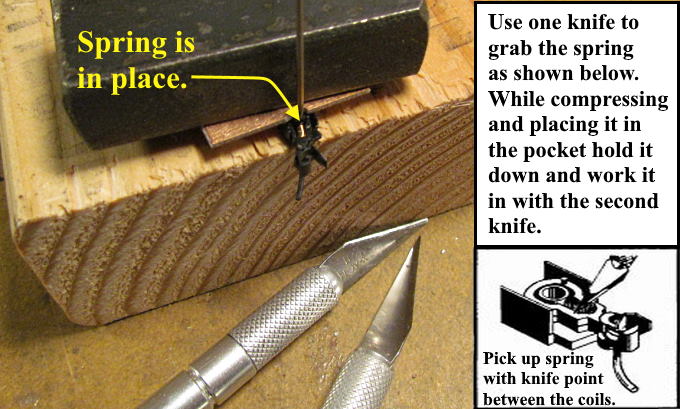
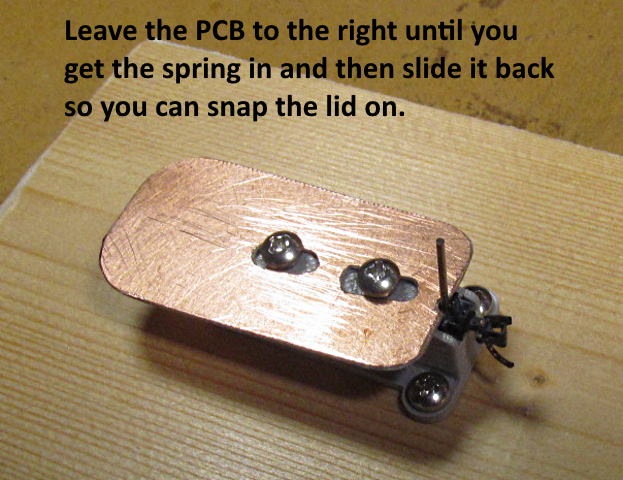
The printed circuit board and weight helps to hold the parts in one place as you put the spring in. You could also use something like styrene in place of the PCB.
.
.
Before I started using 2 knives I had springs flying all over the place. Using the second knife to capture the spring in the pocket over the knife holding and compressing the spring makes it so much easier and I didn't loose a spring.
.
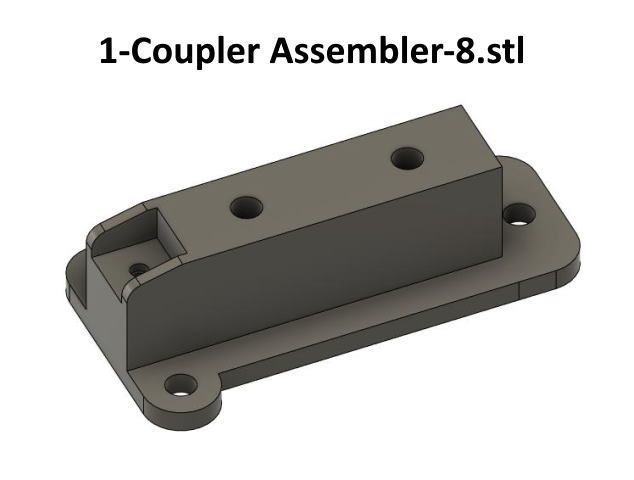
Since I have an Ender 3 Pro 3D printer I designed another version of the 1015/1016 coupler assembly aid using Fusion 360 shown above. It works the same as using the bit inserted in the piece of wood just a little fancier. I'll post the files on my thingiverse.com account ( HERE ).
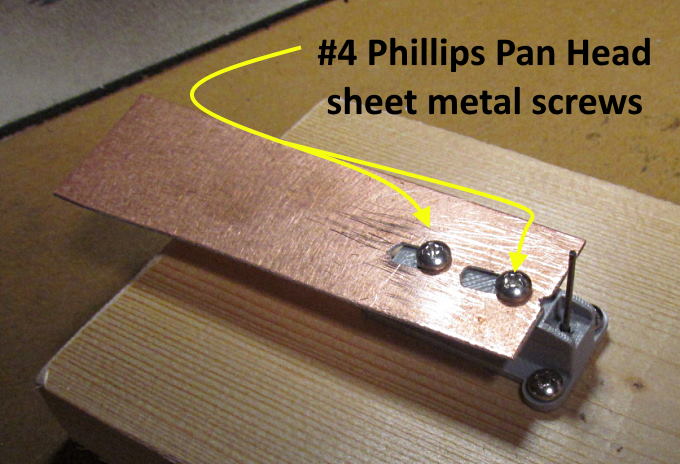
I used the same piece of PCB that I had used before but added some slots in it.
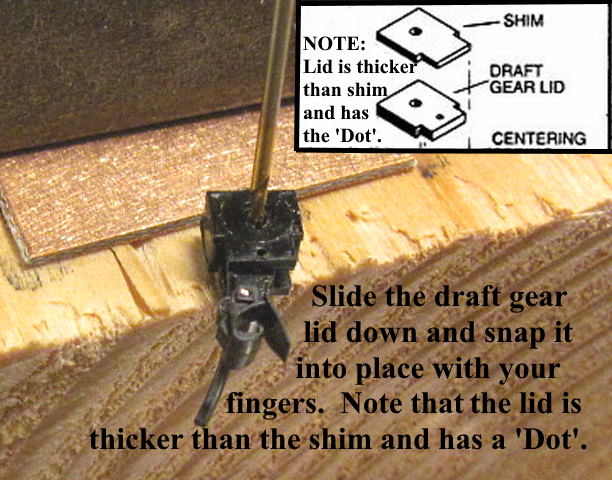
The pan head screws locate it on the fixture.
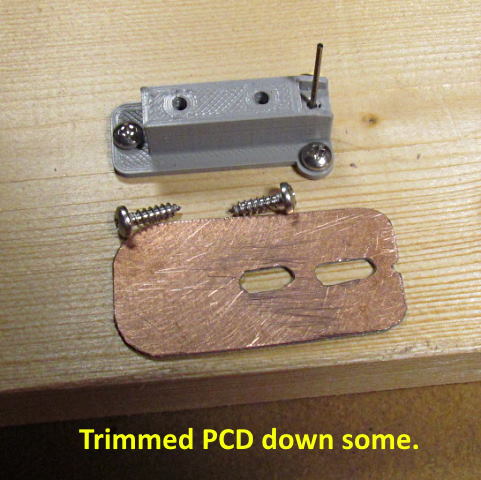
I cut it down once I saw that it worked well since the screws take the place of the weights.
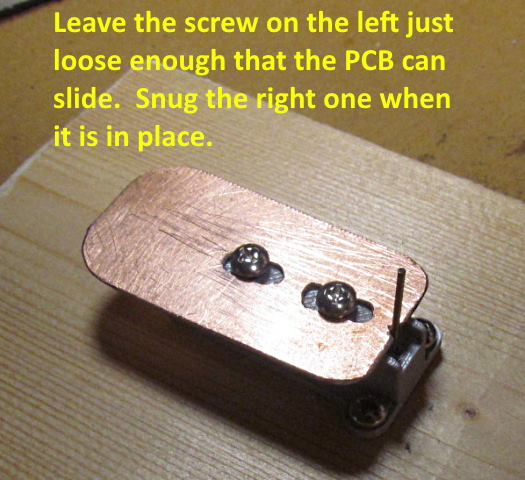
I found once I had the screws adjusted right I didn't even need to loosen and tighten the right one.
.
.
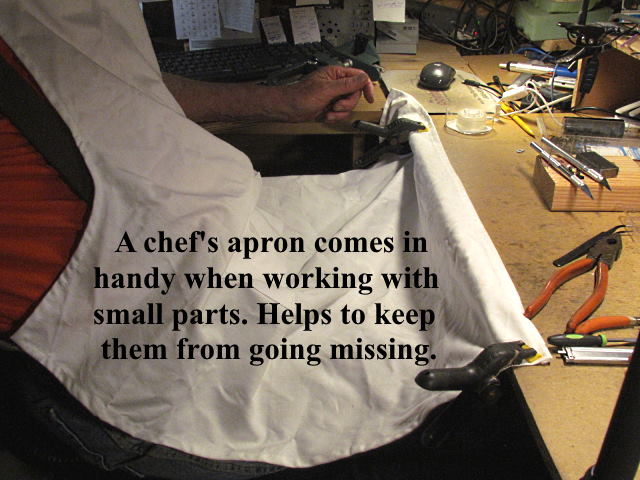
I've started using an inexpensive chef's apron attached to the work surface when working with small parts and highly recommend getting one.
Using the steps above I can put those little tiny couplers together in under 5 minutes now and won't be dreading the next time I have to assemble some.
As mentioned above you can find the print files on my thingiverse account ( HERE ).
You can find all the files to my 3D print files on my thingiverse.com account ( HERE ).
=========================================
...........................On..............e.........Next Page If There Is One