.................................. Return to Sumner's Home Page....
Return to N Scale RR Main Menu.............. Return to Locomotive Menu
=========================================
..............Previous Page..............................Next Page If There Is One
=========================================
.--- Using 3D Printed Parts for U30C Coupler Conversion ---
Kato produced GE U30C's starting in 1989. The early ones had truck mounted couplers with the later runs going to shell mounted couplers. I had two of the later U30C's and one early one. I was going to renumber one as a U28C as the later U28C was very close to a U30C.
I converted one of the later ones to DCC using a Digitrax DZ123 decoder. Another later one was converted to DCC using an inexpensive XL sound decoder (I'll post that later).
The early one with truck mounted Rapido couplers had one bad truck. I ordered new trucks and they came without couplers on them leaving me with a shell with gaping holes on each end. I did some searches and found I could buy a conversion kit that mounted Micro Train couplers on the shell. After looking at them I decided to design some similar ones using Fusion 360 and see how they would print using my Ender 3 Pro. They didn't print with quite the detail of the kit ones but for me are close enough considering how hard they are to see when the loco is on the layout.
The following shows my printed mounts but I believe the kit install would mostly be the same.
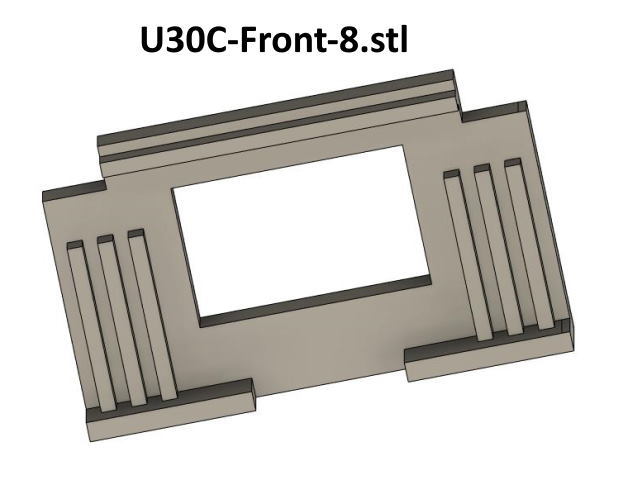
Above is what the Fusion 360 print was suppose to look like but the vertical bars and top horizontal one barely printed since they are so small. I could of tried printing them with the resin printer I've bought but didn't have experience with it at this point so stuck with the filament printer. I believe the resin prints might be more brittle and these will hold the coupler and will be subjected to the forces on it.
.
I had to print the mount in two pieces and ….........
........... then glue them together...
I tested fitted the mount and......
….. then drilled a hole and tapped it for the coupler mounting screw (not shown).
The coupler I used is a Micro Trains 1015 short shank coupler. It could be replaced if needed with a 1016 medium long shank.
I drilled the mounting hole for the screw and attached the coupler to the mount before gluing the mount in place.
.
.
.
I'm happy with the outcome and will paint the mount to match the gray on the loco and call it done.
You can find the files on my thingiverse account ( HERE ).
You can find all the files to my 3D print files on my thingiverse.com account ( HERE ).
=========================================
.........................................Next Page If There Is One