.................................. Return to Sumner's Home Page....
Return to N Scale RR Main Menu........ Return to Decoder Install Menu
=========================================
...............Previous Page.............................Next Page If There Is One
=========================================
--- ESU Decoder in Bachmann N Scale Doodlebug – Pt. 3 ---
============================================
Part 3 and conclusion of decoder install.
The Doodlebug has the Bachmann white gears that tend to crack. These seem to be fine but who knows what the future will hold for them. Randgust has replaced the Bachmann chassis with a Tomytec chassis for one of these that had bad gears. You can find that build ( HERE ). I ordered one of those chassis from Plaza in Japan. The chassis and shipping was very reasonable and I received it in a speedy 12 days. I'd do business with them again.
Since mine is running well now I'll just hold onto the Tomytec chassis. I did leave all the decoder and LED wiring the stock lengths. So I have a lot of extra length wiring under the shell and it is working fine and fits but I'll shorten it all up if I make the chassis change. Leaving it long though will help if I have to do that.
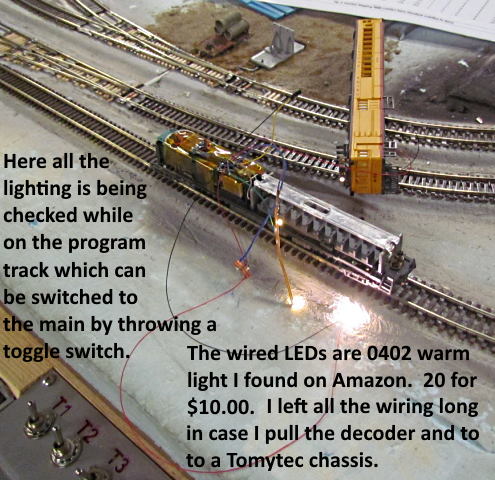
In the next photo I've started to program the decoder before putting the shell back on. I'm able to quickly make a decoder change and then check the change.
I have the test track wired so that with a single toggle switch it is either DC or DCC. For DCC I use a DCC++EX Command Station running on an Arduino with JMRI running on a $35 Raspberry Pi computer. I can run either the JMRI throttle or a phone throttle. BTW you can have all of that for under $100.
I'm using JMRI'S Decoder Pro for most of my programming but did recently buy an ESU Programmer (mainly to use with some sound decoders). I didn't use it to program this decoder. You can download and use ESU's software that works with the physical ESU Programmer. You can run it on a computer and use it as it you were connected to the decoder. You can then see the CV's that are changed on the computer screen and make those changes using DecoderPro if you want to take that route.
For this computer I programmed it by reading the decoder's instruction manual and writing down the CV's I'd need to change for the lighting effects I wanted and was close to having them right. I also used the ESU Programmer program on the computer to see which CV's it changed but didn't use the ESU Programmer connected to the program track.
To program the decoder I used JMRI's DecoderPro which I have running on the Raspberry Pi and I can program decoders with it on the program track. The program track is a spur off the main on my test track. It is fairly long and can be switched via a toggle switch to be either the program track or a spur off the main.
This is really handy as with the toggle switch one way I can program and save the changes to the decoder. Then throwing the toggle switch makes the spur part of the main track wiring where I can use a JMRI or phone throttle and run the engine to checkout the changes. If I still need to make a change I flip the toggle switch and I'm able to make another change using DecoderPro. Using the same track I can make changes to the decoder and check the changes in a matter of seconds without having to physically move the engine. If the programmable spur isn't long enough to check the changes I run the engine out onto the test track's main oval for testing.
Above you can see the computer screen in the background running DecoderPro and a JMRI throttle. The Doodlebug is out on the main oval where I can easily observe the changes made to the decoder if I need a longer track length than the programming track provides.
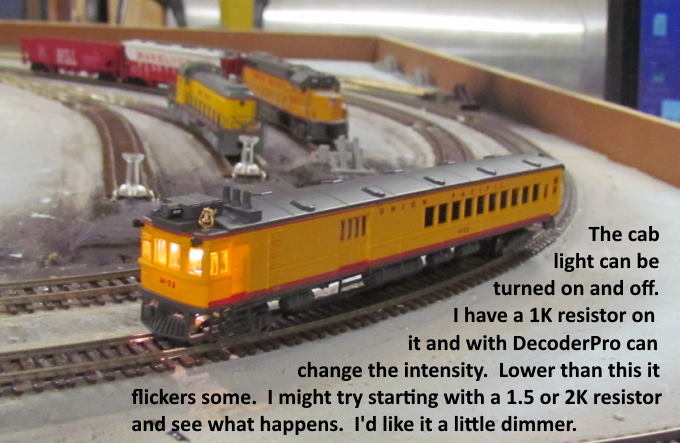
Even though you can dim the LED light to some extent with programming I might try a different resistor for the cab light. If I try and dim it past what is shown above through the decoder it starts to flicker. It isn't bad now and actually dimmer than what the photo shows but I'd like to dim it more if possible.
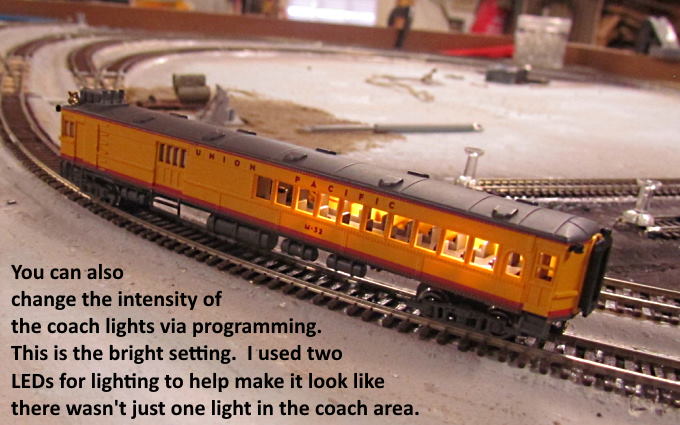
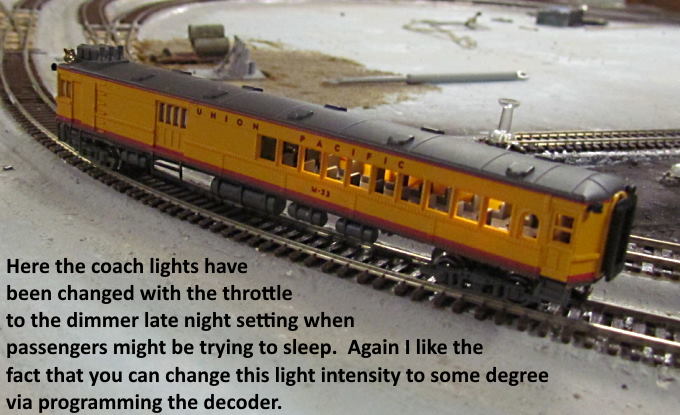
I'm pretty happy with the two different intensities that one can switch between for the coach lights.
.
.
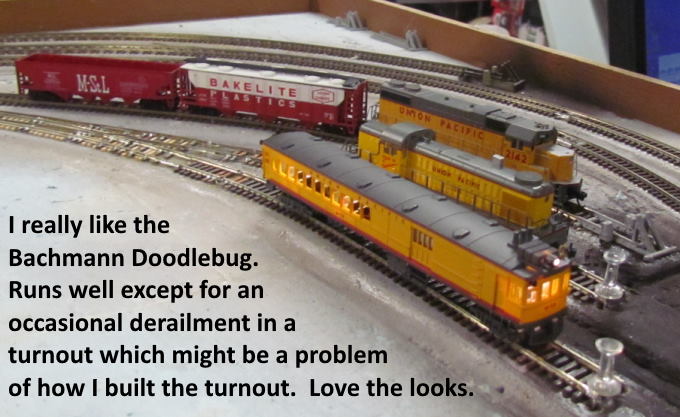
I have two turnouts that the rear (light end) trucks derail on at times. Since other engines don't derail there I think it is the Doodlebug but maybe the hand-laid turnouts are the problem. I did have to re-gauge the trucks as it started with problems on a lot of the turnouts. I have a feeling that if I changed to the Tomytec chassis things might be better. I also have an Atlas scale speed motor that I'd try if I went that route but the engine has pretty good slow speed control as it is.
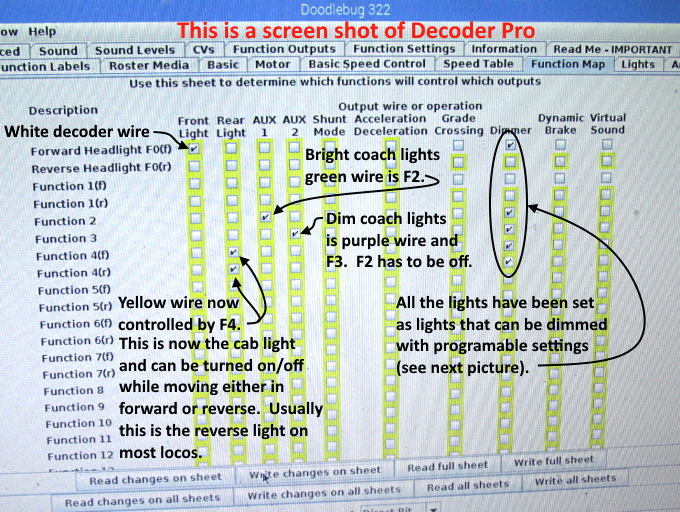
Above is a screen shot of DecoderPro and the changes I made to what is normally the yellow decoder wire for the reverse light. It is now controlled by F4 on the throttle and won't turn on/off with engine direction changes. Also F2 controls the Aux 1 wire (green) and will turn the coach lights to bright. F3 controls the Aux 2 wire (purple) and turns the coach lights to dim (F2 has to be turned off). On the right side the 'Dimmer' boxes have been checked which allows all of the wires to also be controlled by the decoder somewhat in addition to the resistor that is with LED.
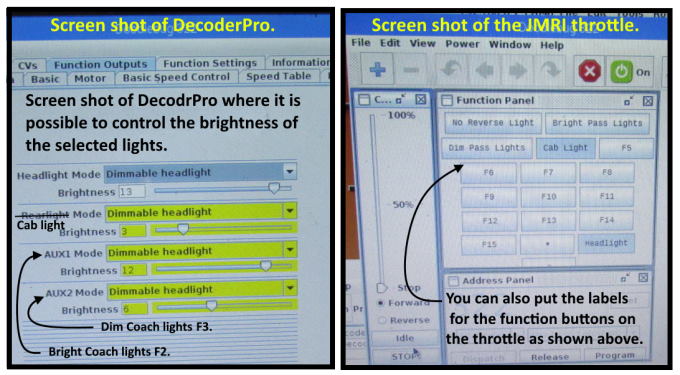
Above left you can see the slide controls where you have some control over the brightness of each LED. The current limiting resistor you have on each resistor will also effect the brightness.
On the right is a screen shot of a JMRI throttle that you can use along with a mouse to control the engine. Since I also labeled each function using DecoderPro I see what the function controls not F1, F2, etc on the JMRI throttle and also on my phone throttle connected to JMRI's web throttle running on the Raspberry Pi. I have no idea how other DCC throttles will react (might see the labels maybe only see the function numbers???).
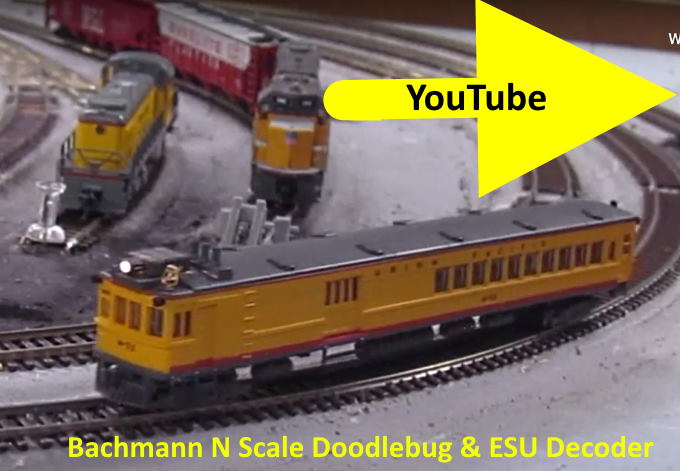
Click ( HERE ) or on the picture above for a video of the Doodlebug running.
This concludes the decoder install. I really like the ESU decoder's size and how versatile it is. I ordered more and will use them in the engines where I want better engine control, more lighting effects and some of the other features they have over some of the decoders I've been using. They are only about $3-$4 more than the Digitrax DZ126T decoders I've used. I'll still use the DZ123's and maybe some of the 126T's in engines I just need to get running under DCC. Most of my engines are older DC engines. The run well, were less expensive and I like them so no regrets there.
I also have a couple ESU sound decoders to install and after this experience look forward to doing those installs when time permits.
=========================================
...........................On..............e.........Next Page If There Is One