.................................. Return to Sumner's Home Page....
Return to N Scale RR Main Menu........ Return to Decoder Install Menu
=========================================
...............Previous Page.............................Next Page If There Is One
=========================================
.. …............................. .--- Flexible PCB Strips ---
=========================================
I saw these flexible PCB strips being used first on nscale.net by SteamPower4ever (Jens) in one of his decoder installs ( See how he uses them ). I couldn't find a source in the States for them or any source that would ship to the States from Europe. He was so kind to order some and then ship them himself (thanks again Jens). Later I found a source on eBay that would ship and ordered more so now probably have a life-time supply for about $20 total.
The site that I've found on eBay that sells them has a number of strips for sale until that auction ends and they usually starts another so it is hard to give a link to an auction that continues to work. I'd suggest Googling “ (4 €/m) HOCHFLEXIBLE Folien Streifen Platine 500x2,1mm Einseitig ODER Beidseitig “ and look for an eBay auction that is current. You are looking for the seller Ledbaron ( HERE ).
If you don't find one I'd check a week later as they usually reappear and come up for sale again. If anyone can find someone selling them in a more convenient way please let me know ( contact20 (at) purplesagetradingpost (dot) com. Someone that maybe sells decoders ought to order a bunch and stock them in the U.S.
Here is another link to them but not sure if they will U.S. ship ( https://www.shop-014.de/michawi-p2912h320s325-flexible-Streifen-Pl.html )
============================================
UPDATE 24-03-29: As of this date there is an eBay seller ( HERE ) that is advertising the PCB strips. They are EU shipping only though.
============================================
I found these extremely useful for:
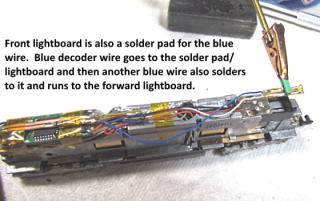
1. Lightboards …...................................................................
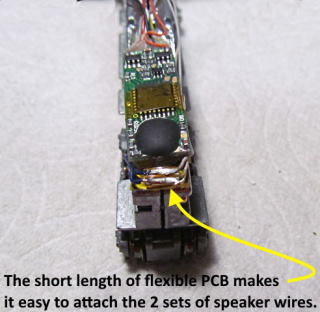
2. Joining wires together ….................................................
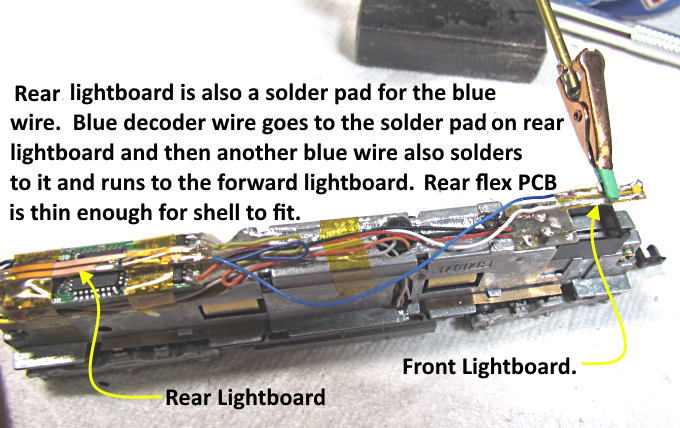
3. Using as a solder pad in a tight area …........…
4. Running power through a tight space ...….....
=========================================
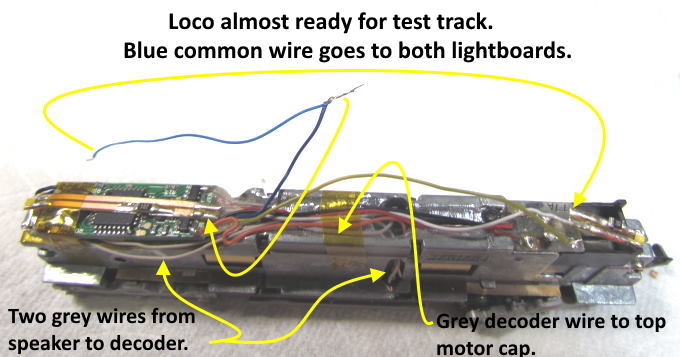
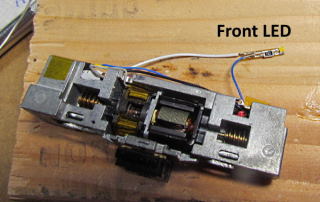
I'll conclude with some pictures from various decoder installs and other projects showing how I've been using them.
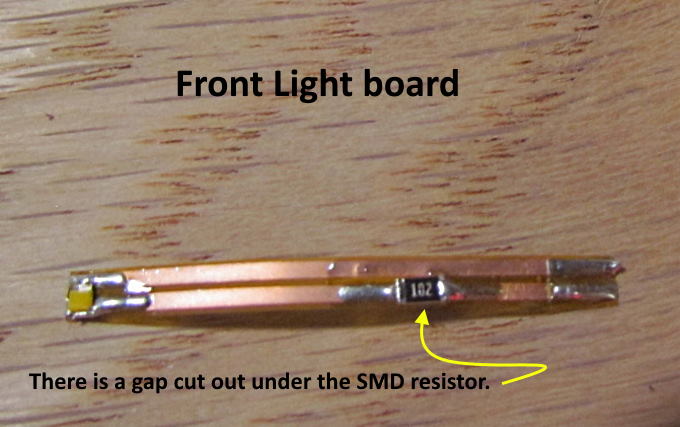
Lightboards:
.
.
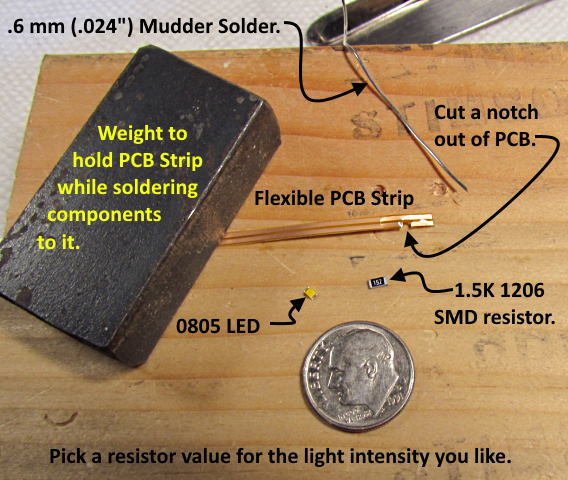
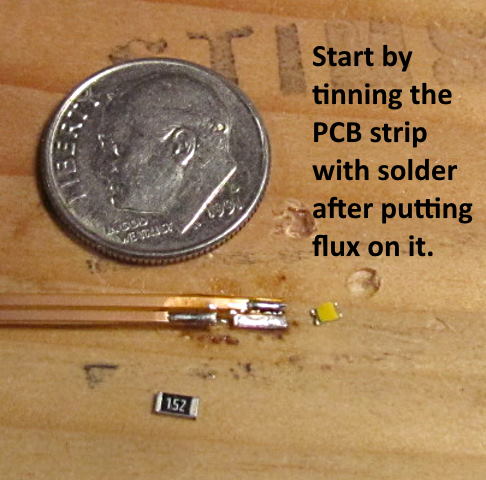
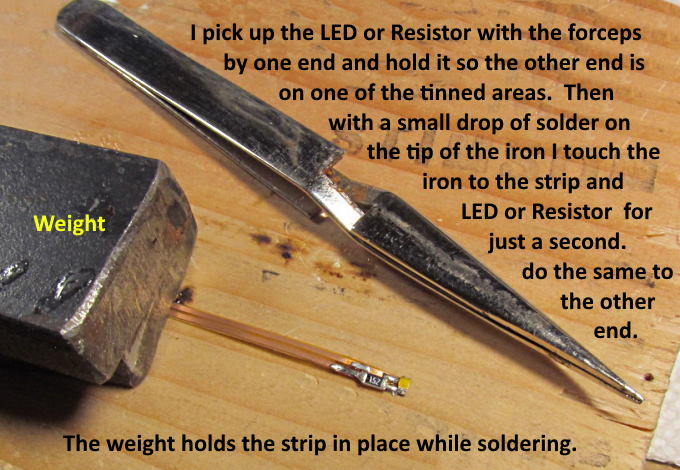
Soldering the small LED and resistor can be intimidating. The flex PCB helps with this as it lays flat. I put a weight on it and leave the strip long at this point as it is easier to hold. With the strip pre-tinned you can pick up the LED or resistor and hold it by one end and place it on top of the tinned section. Put a very small drop of solder on the end of your iron (first) and then just touch the iron to the LED/Resistor and the strip at the same time and remove it quickly as soon as you see the solder flow onto the LED/Resistor. With one end soldered on move to the other end and solder it. It will be easier as it is in place held by the other end.
With the components soldered on I test across the resistor with an ohm meter to make sure it is soldered to both sides. I also use a LED tester I have to test across the LED to make sure it is working. Remember that the LED is polarity sensitive so you need positive going to the anode side and negative to the cathode side. If it doesn't light swap the leads and see if it does. You can check the whole assembly by running the current through both the resistor and LED.
The LED is polarity sensitive so you should look at the markings on it and place it in the short circuit in a way that suits you. However if you mistakenly soldered it into the circuit backwards that is no problem. Just swap the blue wire and the other decoder wire (white or yellow) around and the LED should work fine. It doesn't matter if the current flows through the resistor before or after the LED.
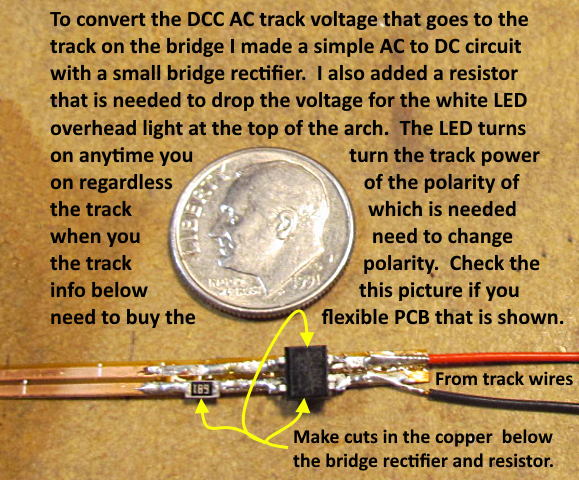
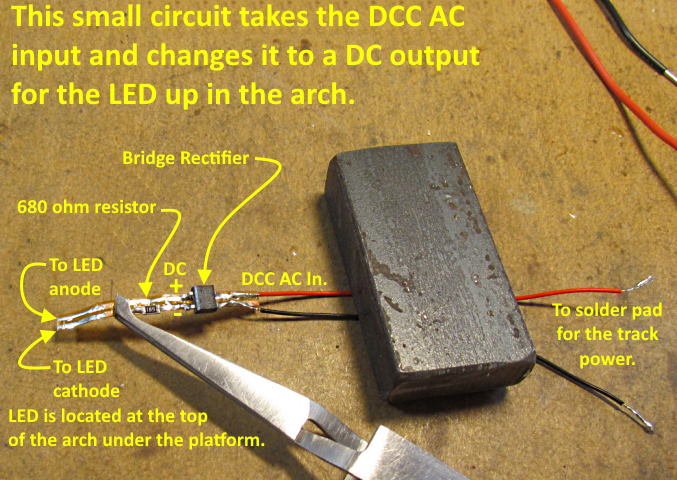
AC to DC Circuit:
The following is a circuit I used in my turntable build ( HERE ) where I needed to convert the DCC AC voltage to DC in the turntable itself.
.
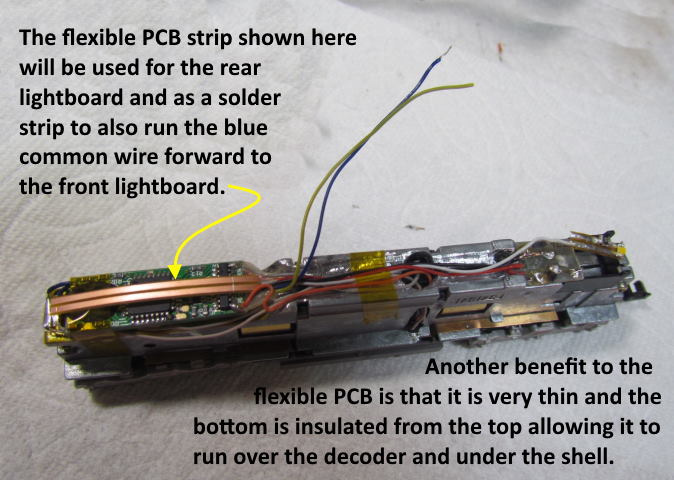
Solder Pad and Running Through a Tight Place:
.
.
.
If you are in the U.S. For about $20 (less or more for others) you can pickup a supply of these from Europe that will probably last some time. Once one starts using them you find all kinds of situations where they come in very handy.
=========================================
...........................On..............e.........Next Page If There Is One