.................................. Return to Sumner's Home Page....
Return to N Scale RR Main Menu........ Return to 3D Printed Objects Menu
=========================================
...............Previous Page......................................Next Page If There Is One
=========================================
…...............g ------ N Scale Water Tower Pump House ---
=========================================
You can find all the files to 3D print this object and others on my thingiverse.come account ( HERE ).
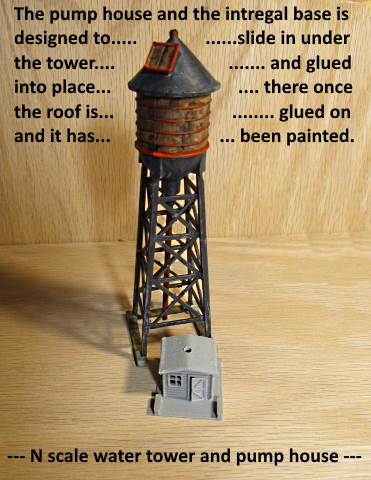
On the previous page I'd designed a water tower that loosely follows the lines of one that I found on the internet. It had a pump house at the base. What follows is my attempt at a pump house which could also be used as a small building any place on the layout. I'll probably also make a switch machine slide with the building on it. More about the switch machine and how you can use a house or something else to throw a turnout and change the polarity of the frog ( HERE ).
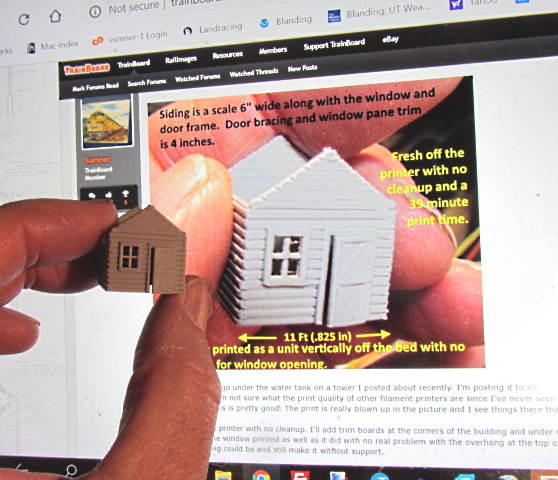
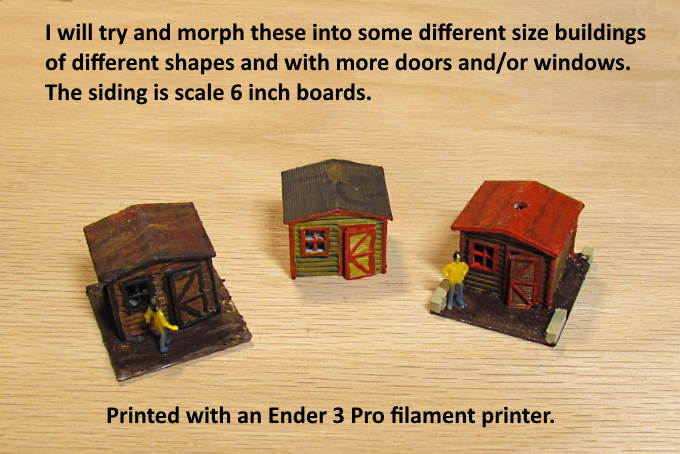
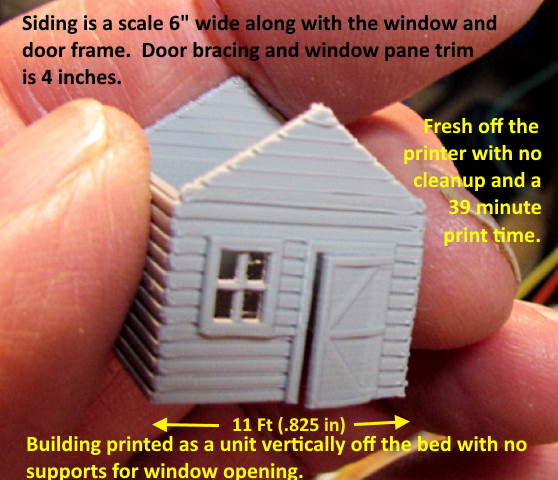
As you look at the pump houses on this page and other N scale objects on the other pages here keep in mind how small these objects are and what they will look like from normal viewing distances. A common view seems to be that a filament printer like the Ender 3 Pro I'm using isn't suitable for N scale objects as it can't print the small details. That might have been true with earlier filament printers but I'm more than happy with how the Ender handles printing these objects.
Above the siding is 6 inches in width and the window framing is 4 scale inches along with the boards on the door. You can get detail down to about scale inches. From normal viewing distances of a foot or more you aren't going to see detail much smaller than that even if you can print it. I won't be printing loco or car shells but for tons of other things the Ender is just fine in my world. I like that you don't have the curing process, cleaning process, chemicals and smell to deal with like you do with a resin printer. Design, print, design some more, print again and if happy paint. Simple and fast.
This isn't meant to imply that there isn't a place for a resin printer and I might still end up with one, but in my case the Ender has been a good choice for my first printer and I see it being the workhorse well into the future. If a 3D printer is in your future do your homework on filament and resin printers and decide what fits your needs best but don't believe the line that a filament printer can't be used for N scale objects.
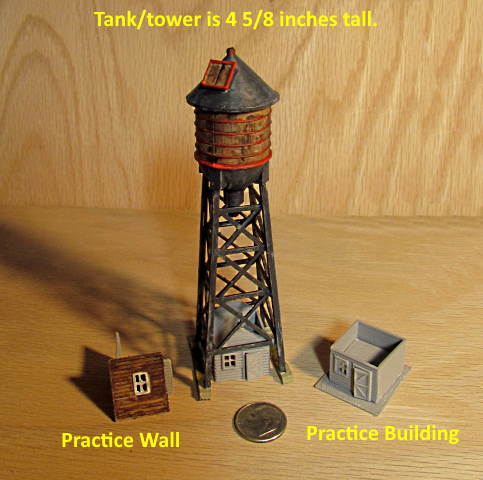
After designing the tower water tank I started on a pump house and made a practice wall and then a structure before fine tuning the dimensions and such for it to work with the water tank tower.
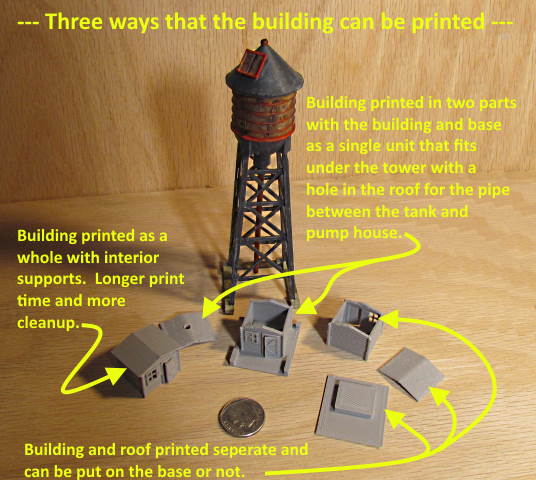
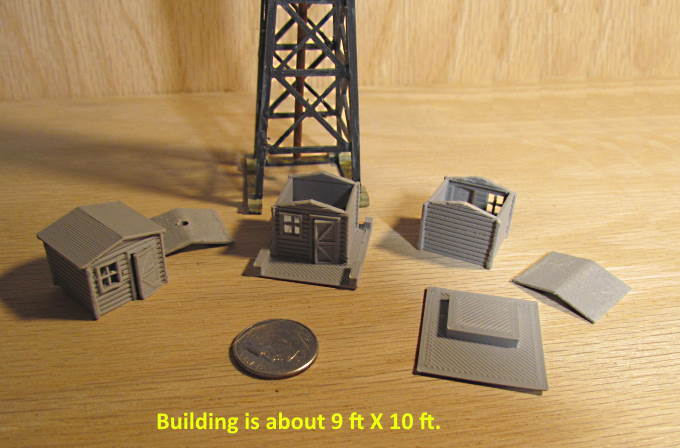
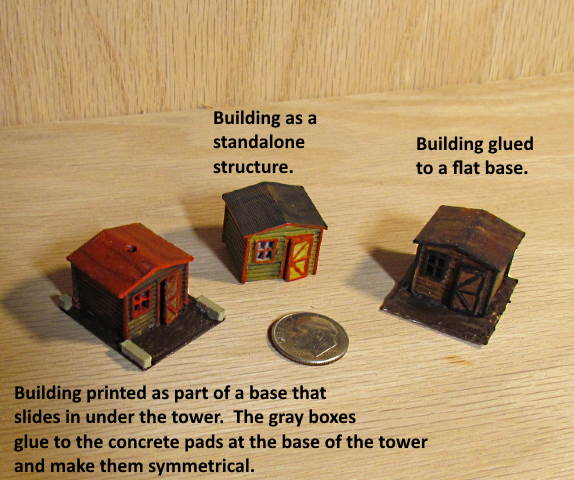
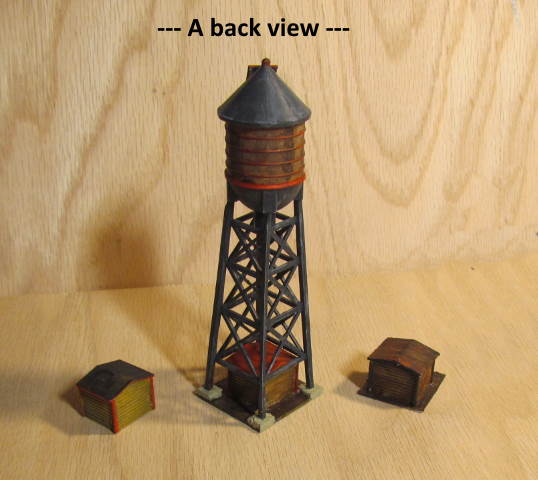
I ended up with three versions of the pump house. The one on the left above prints as a single unit with the roof being printed attached to the building. It prints fine but is a longer print as you need to add supports to the print to support the roof from inside the building and to also support the overhangs. It wasn't too hard to remove the outer print supports but I gave up trying to remove the inner ones and you can see them to some degree through the window. I won't be using this print method but will put the print file up on my thingiverse account if you want to print it along with the other options.
The middle option is the best to use if you are going to use the pump hose under the tower and not as a standalone option. The roof prints separately with a hole in the roof (although you will have to enlarge it to the proper size). The building a deck under it prints as a unit. The deck is designed to slide in under the tower. Actually you put it in from the bottom after gluing the roof on the building so don't glue the tower down and think you can later slide the building and base in.
The right option is a building that you print to put anywhere on the layout you so choose. If you want there is also a base that can be printed and the building can be glued to it but you don't need to necessarily use the base.
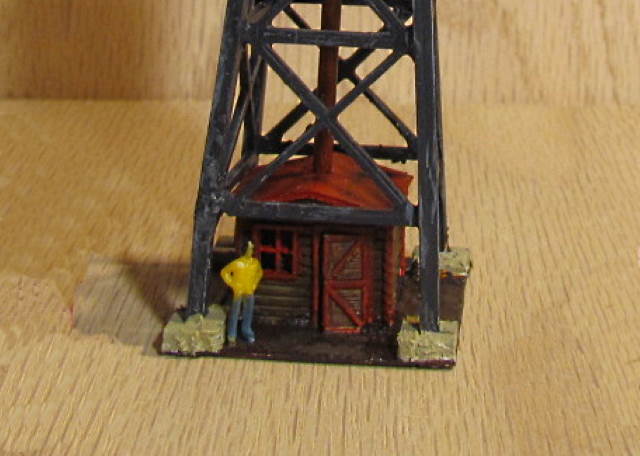
The box like things on the deck that the middle building is on correspond and fit against the concrete pads that are at the bottom of the tower. After you paint the building and deck and have the roof with the hole glued to the top of the building slide it up the pipe coming down from the water tank.
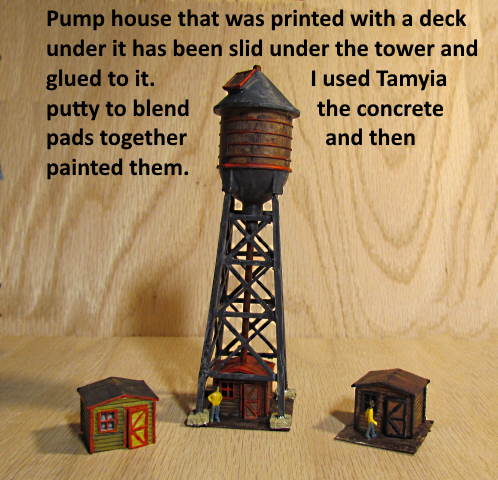
Put the whole structure on a flat surface and line up the concrete pads. Squeeze it together and turn it upside down and use Super Glue to glue the back seam of the deck to the bottom of the tower. Then squeeze the front pads together and glue that end. You should now have a good looking building and deck at the bottom of the tower. I then use little dabs of Tamiya putty to fill the glue seams on the concrete pad areas and paint them with aged concrete colored paint.
Building above is ready for paint. Then it is slid up the tube and glued as explained below the previous picture.
Have some fun painting the buildings. I painted these in about 30 minutes and rotated from one to the other.
I'll use the basic walls to make some different buildings for the layout with the same siding. Fusion 360 will make it fairly easy to cut the building apart and add length and/or width along with addition doors and/or windows.
In the picture above the tower appears to be leaning but it isn't. Must of been the wide angle on the camera shot.
I got the little guy off of ebay. They were about $6 for 100 of mixed figures.
I'll probably try and work a little more on the water tank but this project is about done in my mind.
A final shot from the back side.
You can find all the files to 3D print this object and others on my thingiverse.come account ( HERE ).
=========================================
...........................On..............e.........Next Page If There Is One