.................................. Return to Sumner's Home Page....
Return to N Scale RR Main Menu........... Return to Building UP's Canyon Division Menu
=========================================
..............Previous Page..............................Next Page If There Is One
=========================================
….......--- Build Track Elevator Part 1 ---
============================================
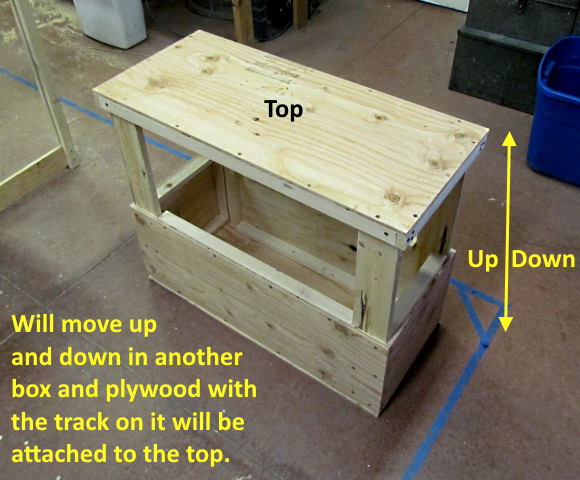
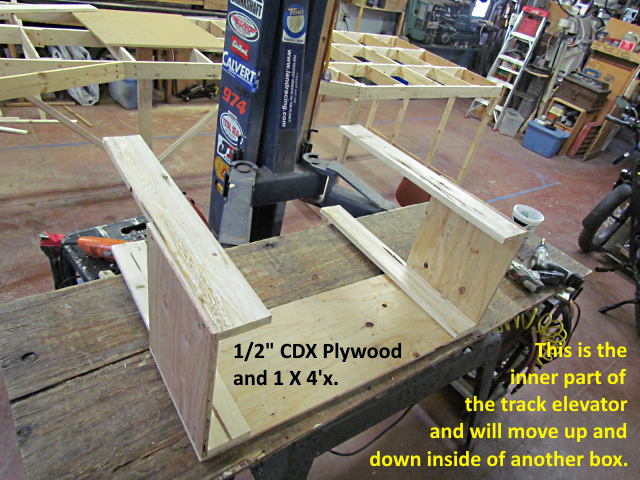
Next up is the build of the track Elevator that will sit in one corner of the layout. It will hopefully move a train that is up to 10 feet long up or down 12 inches. The upper level will represent track further up in the canyons or mountains. More about the track elevator on the first page of the build ( HERE ). If you haven't read about it the following will make more sense if you go back and take a couple minutes to see how I hope it works.
.
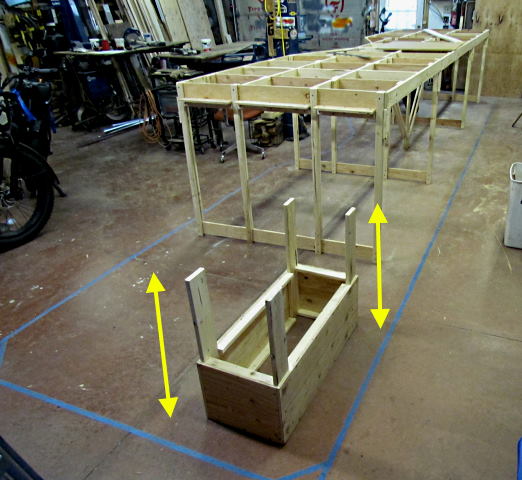
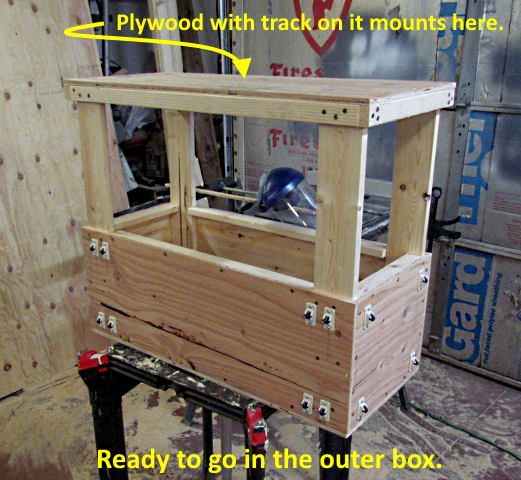
The elevator will be located in the area shown above. Once I have it in place the rest of the framework will be added to the area above the tape lines on the floor.
This and the box it will move up and down in need to be as square as possible. This is necessary so that this box moves up and down in the outer box with as little side to side movement as possible. There will be locating pins at the top and bottom of the travel but still want this to move up and down as straight as possible.
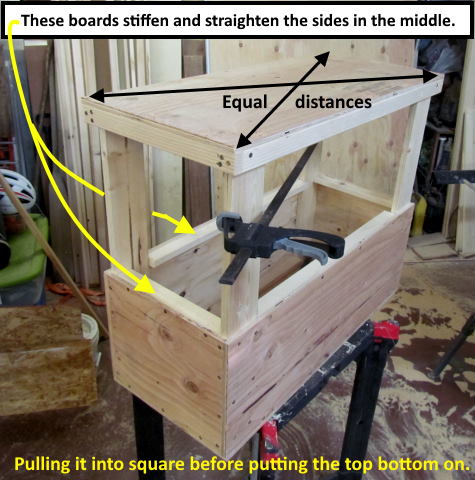
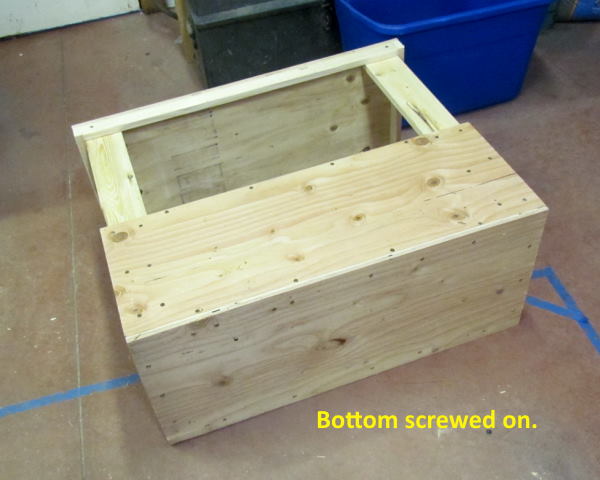
I measured diagonally as I went along and got the diagonal measurements at the top and bottom as close as I could with a clamp before screwing on the bottom shown above and …..
…. and then the top. The top and bottom plywood keeps the box very square.
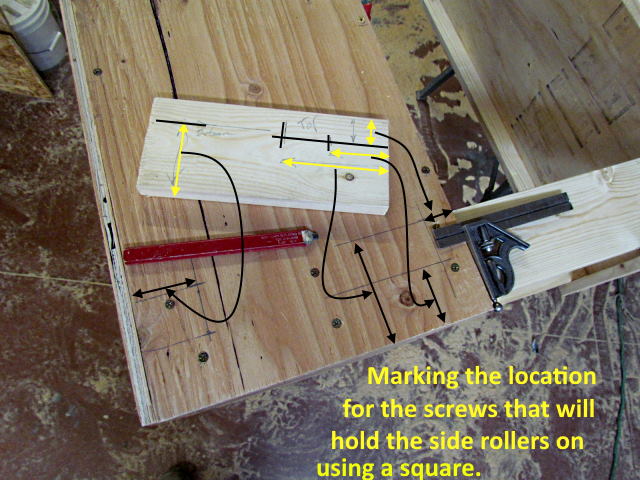
Next up was putting rollers on the side of the box which will hopefully make it as easy as possible to pull It up and down. I marked the measurements I wanted on a scrap piece of wood and transferred them to the box with a square. I did this on all four sides before going on.
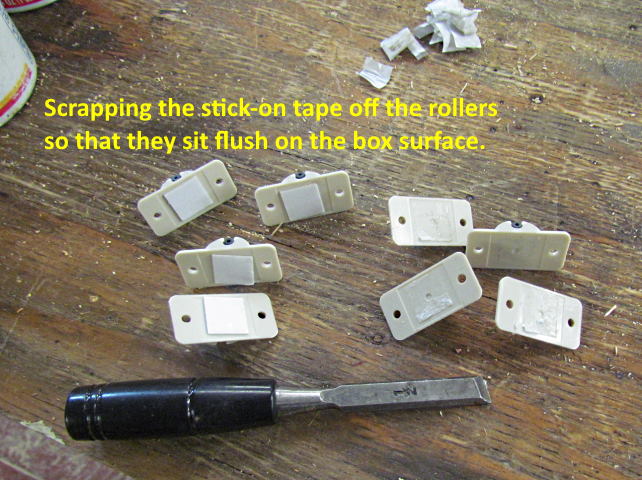
The rollers (24 in a package for $12) had adhesive tape on them which I removed so that I could screw them on flat to the box surface.
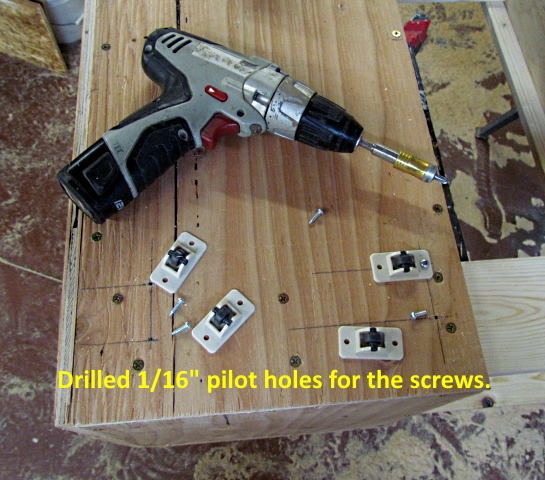
I drilled a 1/16” pilot hole only for the top screw in each of the positions I had marked. Then ran a screw in and back out. Next I put the roller in place and put the top screw in. I took the square and squared it up vertically and drilled the bottom pilot hole. Finally I put the bottom screws in. This all took only a few minutes with the first screw holes already marked. I had the 1/16” bit in one drill and the other setup as a screw gun as shown above.
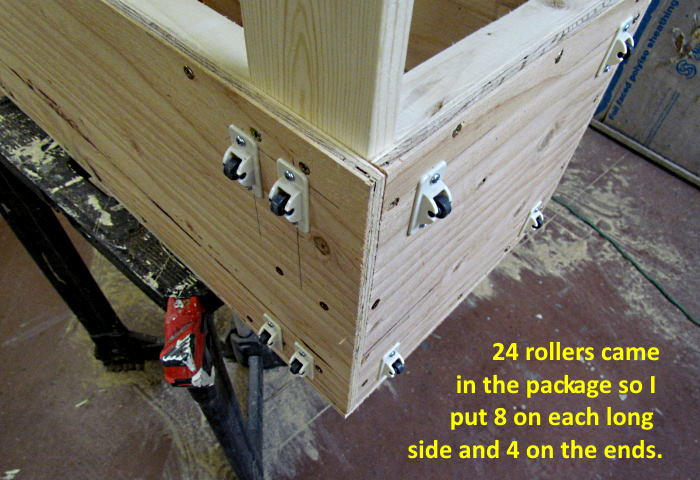
There were 24 rollers total in the $12 package. I decided to use all of them with 8 on each of the long sides and 4 on each end.
Next up will be building the box that this will move up and down in.
To be continued.......
=========================================
...........................On..............e.........Next Page If There Is One