.................................. Return to Sumner's Home Page....
Return to N Scale RR Main Menu........ Return to SpeedTrap Menu
=========================================
..............Previous Page..............................Next Page If There Is One
=========================================
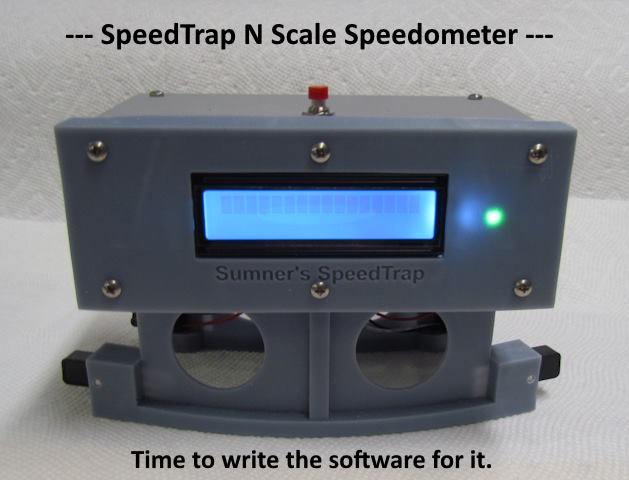
…......................--- N Scale SpeedTrap Speedometer – Pt. 3 ---
=========================================
.
Above is the wiring diagram. I would print it out and use it for the color coding of the wiring. It will make wiring a lot easier if you follow what I've done above and what you will see in the build. Will save a lot of confusion. Notice that I used 5 wire colors the ones in one of the two choices of colors for the wires I've recommended.
If it is hard to print the image above here is a link to it alone ( Image HERE ).
============== Parts =====================
The following parts list shows where I bought the parts. Use it but also by using it you will be able to get a description of the parts used that you could use to search for parts from other suppliers.
1 - ESP32 LOLIN32 Lite …....................................................... I bought 3 for $16 ( HERE ) but here is one for $7 ( HERE ).
2 Sets - IR Break Beam Sensors ($2.95/set) …..........…......... $5.90 (HERE)
1 - SUNFOUNDER I2C 2x16 LCD 1602 Display ….............. $10.00 ( HERE )
1 - On/Off switch …...................................................................... 10 for $7.00 ( HERE ).
1 - 3 stage Adafruit 4410 USB charger ...................................... $6.00 ( HERE ) or ( HERE ).
1 – Adafruit 3v to 5v booster …................................................... $2.95 ( HERE ) or $7.00 ( HERE ) with free freight.
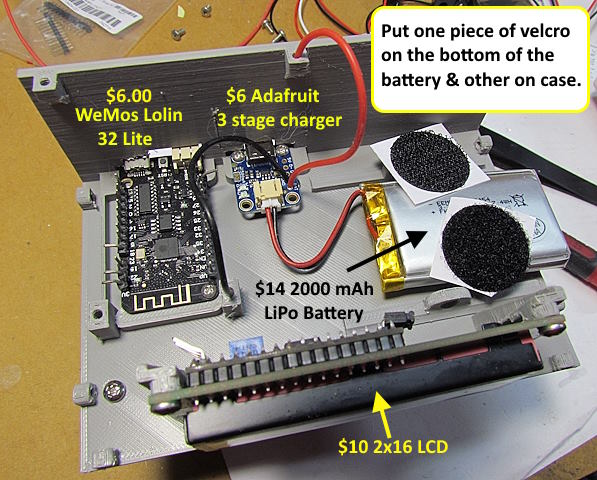
1 - Battery ….................................................................................. $11.00 (1100 mAh ( HERE )) or $14.00 (2000mAh ( HERE )).
1 or 2 or none JST connectors …............................................. 10 for $7.00 ( HERE ).
.
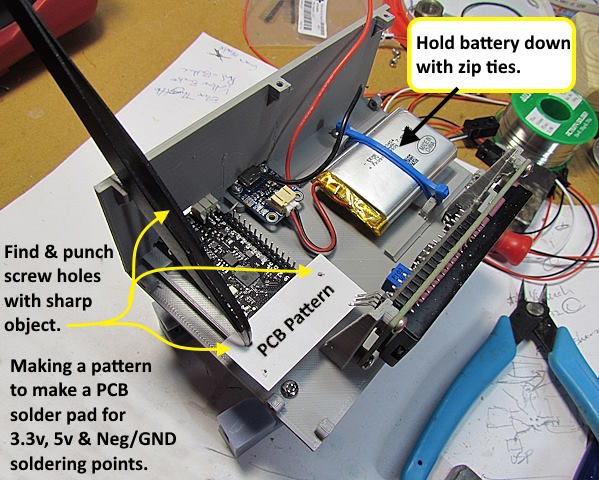
I make up solder pads for most of the projects I do and also at times for decoder installs. They are an easy way to attach a lot of wires together in a small space. For this build I only needed one that was divided into 3 sections. I started by making the paper pattern shown above. I only took about 15 minutes to make it. If you haven't tried this approach I'd recommend trying it on this project.
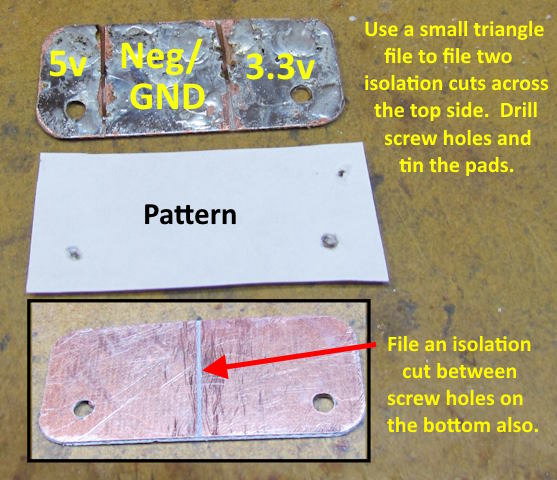
The PCB sheets are really cheap on eBay. For instance what I use for the above and cutting N scale PCB ties for handlaid turnouts ( 8 pcs Double Sided Copper Clad Circuit Board Laminate FR-4 .030 for $8.00 with free shipping ) . If that link doesn't stay active here is a general one ( HERE ).
.
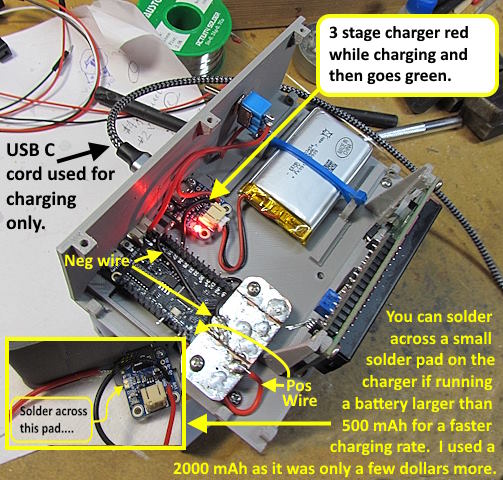
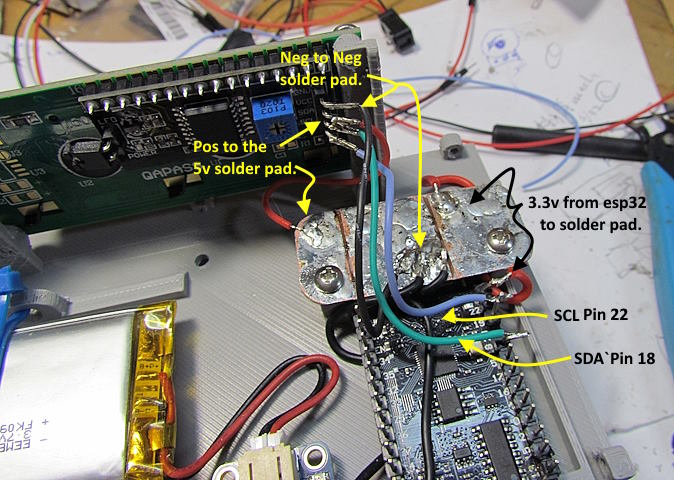
I ran a black wire from the esp32's GND pin (just out of sight at the bottom of the image above) to the center solder pad. That will be were all of the negative wires will attach. The 3.3v esp32 pin is at the top right of the esp32 above. I ran a red wire from it to the solder pad above it. Everything that gets 3.3 volts will be soldered to that pad.
The display needs 5 volts so ran a red wire from the solder pad on the left to the voltage in on the back of the display. The negative wire on the display goes to the middle negative solder pad and the SCL & SDA wires from the display go to the esp32 as shown above.
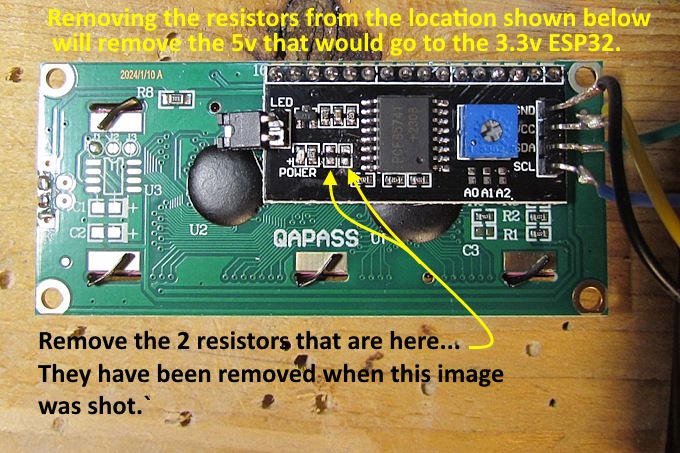
(25-09-20 Update) I used my speedometer for some time with no problems with the wiring shown above. Then I learned more about the I2C lines (SDA/SCL) that connect the display to the ESP32. The ESP32 is a 3.3v device and the display works best at 5v. With 5v going to the display it was putting 5v on the I2C lines going to the ESP32 which has the potential to damage the ESP32…...
… I used my speedometer for some time with no problems but decided to ‘make it right’ and I’d suggest you do the same as it is very easy to do. You only need to remove two 4.7K resistors from the location shown above. After doing that the display will get 5v and the two I2C lines will be at 3.3v.
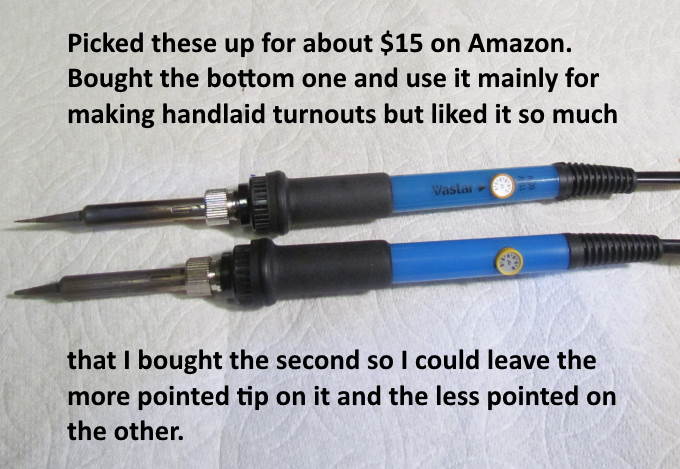
To remove the two resistors I …..
……. used a long very thin tip soldering iron (top above) and laid the tip on the side of the resistor so that it was touching both ends and the two solder pads and the resistor came right off.
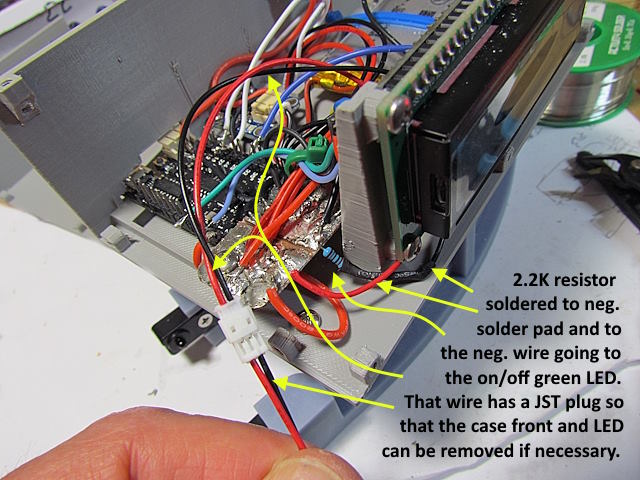
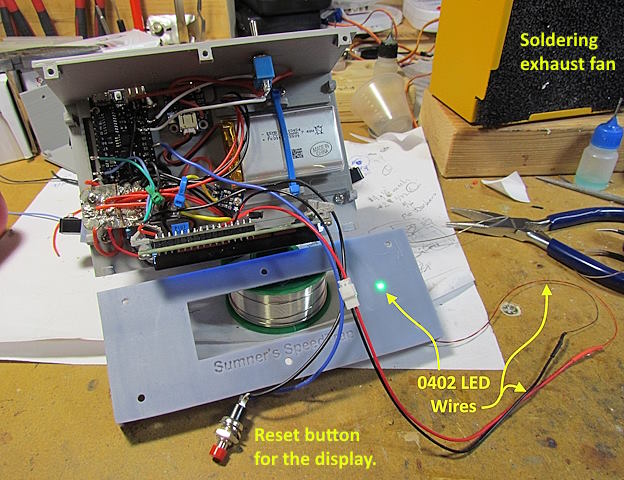
The black wire of the reset button switch above goes to the negative solder pad and the blue wire goes to pin 32 on the esp32. If you haven't soldered to these button switches be aware of heat can damage them quickly. For more on how to solder to them go ( HERE down the page ).
I added a JST plug to the wire going to the on/off LED but it probably wasn't need if you keep that wire long enough to set the case front off to the side if needed. I did do that for the wire going to the pushbutton switch on the case top and it has worked fine.
Not sure how I'll use the reset button but will probably use it to reset the display before getting and reading the next mph for the loco.
As I write this I've started on the software for the SpeedTrap Speedometer and hope to have it done shortly.
For the whole build of this speedometer go ( HERE )
=========================================
...........................On..............e.........Next Page If There Is One