.................................. Return to Sumner's Home Page....
Return to N Scale RR Main Menu........ Return to 3D Printed Objects Menu
=========================================
...............Previous Page......................................Next Page If There Is One
=========================================
…....---- Inkscape Letters & Art to Fusion Designs ---
=======================================
Short how to do on how I use Inkscape for lettering or art work that I can use in Fusion designs. The following only takes a few minutes to do once you have done it a couple times. I'm sure others might take a different approach but this works well for me.
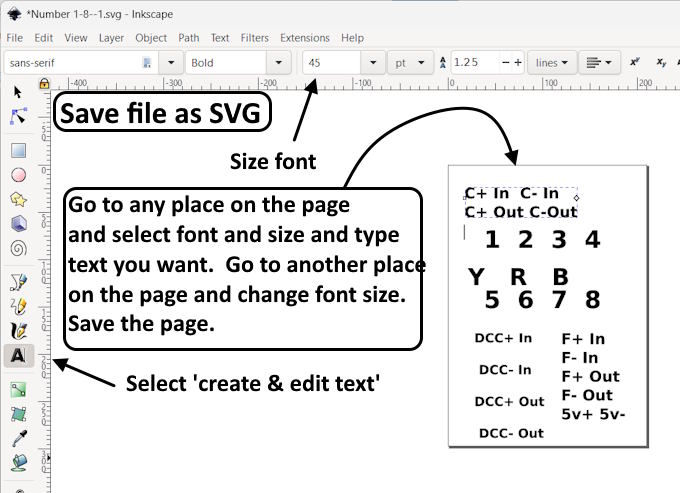
Open a new document in Inkscape and select a font and font size and type in your lettering. You will notice that it goes into a box on the document. You can click on a different and it will start a new box where you can change style and size if you want. When done (keep it open as you can come back and make changes, save the document as a SVG file in the same folder where you are working on your Fusion design.
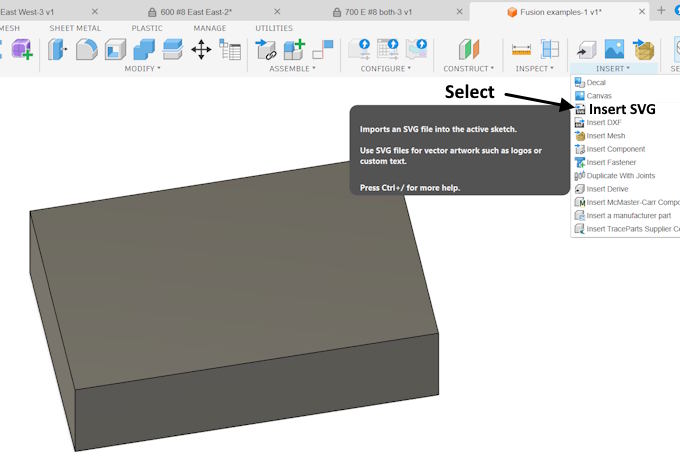
In fusion with your design open use the 'INSERT' command and 'Insert SVG' and.....
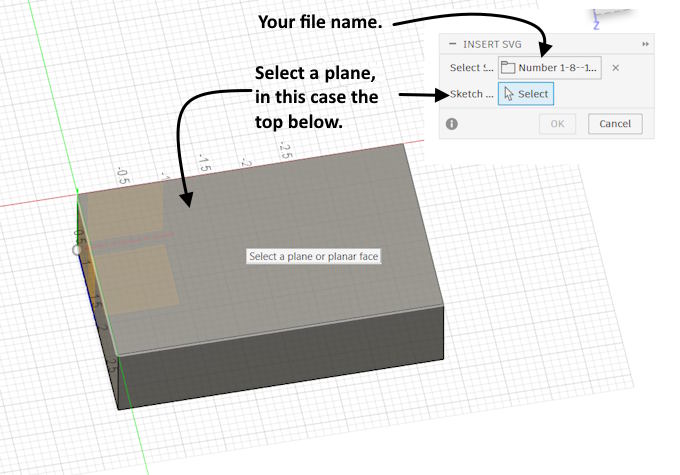
..... with the file selected click on the face where you are going to put the text. The text will go on that plane....
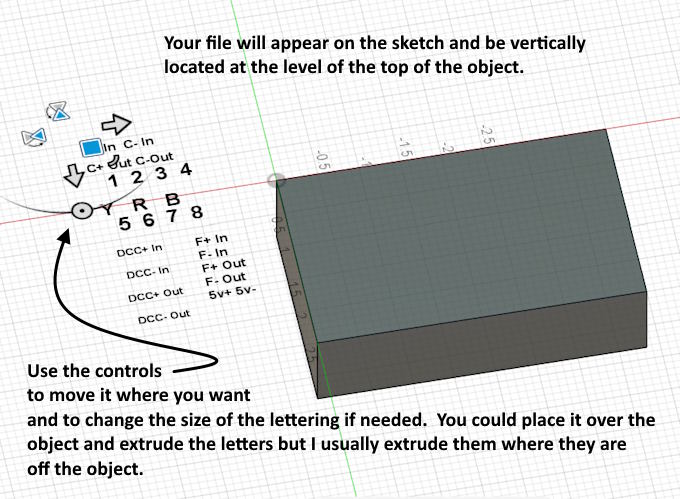
..... but will be positioned off of it but at the same height. You can move the text over onto the face and do the following but I usually like to leave it off the face myself and work with it from there as you have more flexibility of where you place the text on the face.
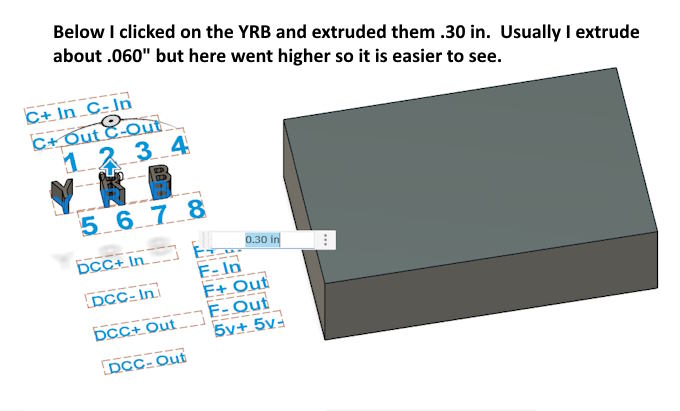
..... Above you can see the text in the different boxes that were created when editing the document in Inkscape. Click on a box you want to use the text from. Use the extrude command to extrude it upwards from the plane it is on. This can be the final height or you can adjust that in a minute if it isn't the height you want or you want a negative letter in the design surface.
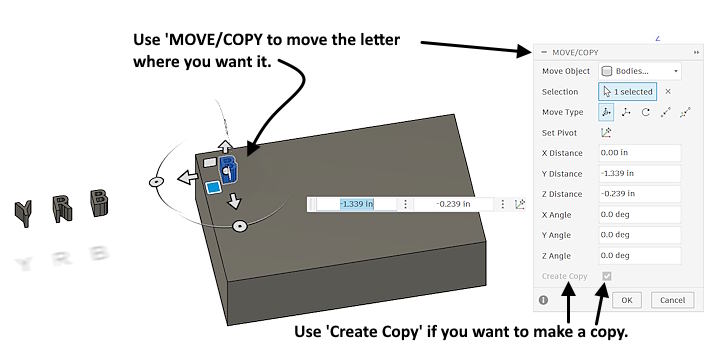
Use the 'MOVE/COPY' command to pick a letter and move it to where you want it. The bottom will be sitting on the design as you picked that plane earlier. You can also click the 'Create Copy' box if you want to save the original letter, it can be deleted easily later.
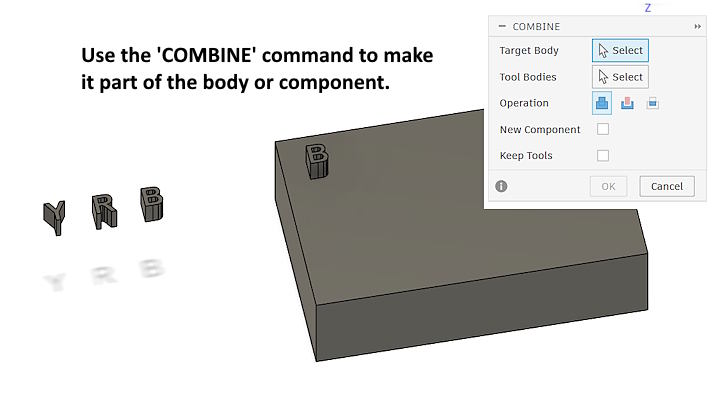
Using the 'COMBINE' command will fuse the letter to the body or component and it will now be part of it. The target body above is the main design body and the tool body is the letter.
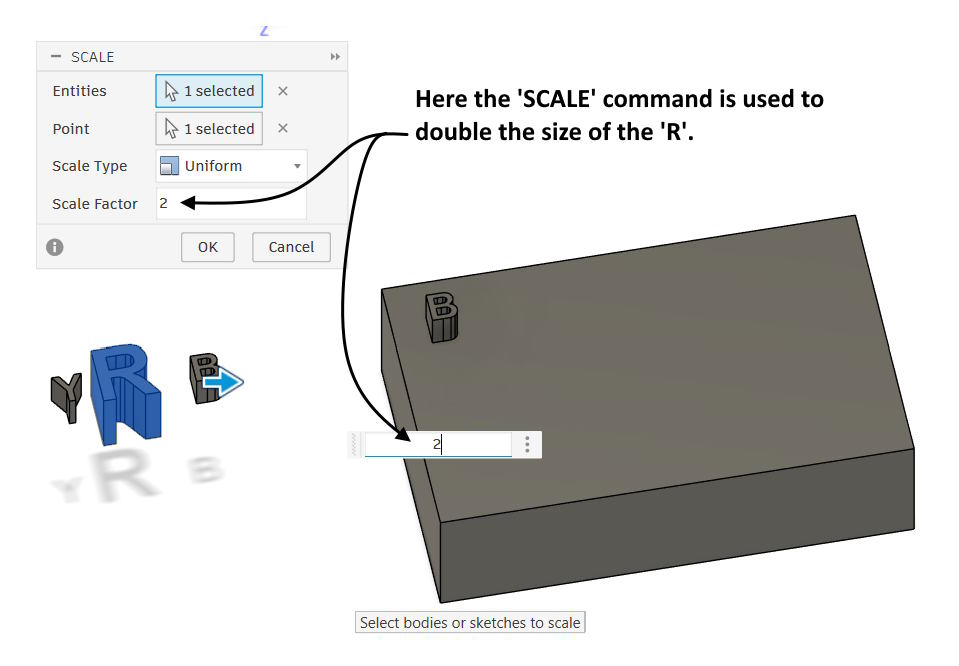
If you don't like the size (font size in Inkscape) and end up wanting it larger or smaller you can use the 'SCALE' command to change the size or you can edit the letter with other Fusion tools. Above I scaled the R to double its original size.
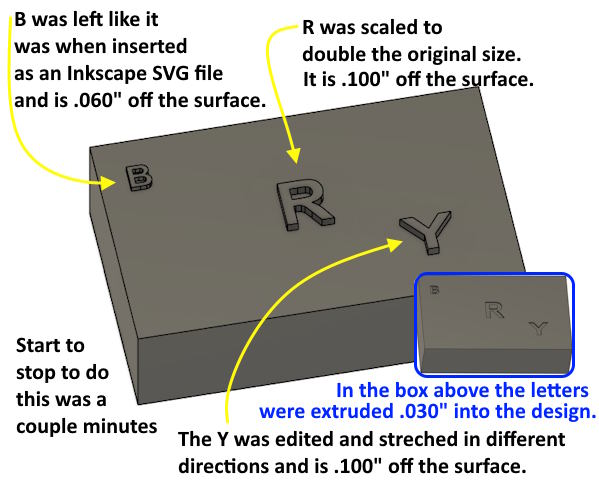
Above by working with the letters individually I was able to resize them, reshape the Y and place them at different heights above the design using the 'Extrude' tool. In the blue box I used the extrude command to extrude all of them .030" into the design (the amount I usually use). Often I'll take a whole word or line of text and move, scale and extrude it at the same time instead of breaking it up. With individual numbers and/or letters I scale and place them individually.
Hope this helps someone. Your knowledge requirements with Inkscape are minimal and you only use a few Fusion tools to do this. Ones you normally use to do a lot of other things in Fusion.
=========================================
…...........................................Next Page If There Is One
.....................................Next Page If There Is One