........................Endeavour Index Page............Plumbing Mods Index Page
..................................Previous
Page..............................
Next
Page If There Is One
==================================================
......................--- New Head & All New Plumbing-- Part III ---
==================================================
Now that the head and pump were mounted it was onto running the plumbing between them and onto the waste holding tank. There are a number of ways to run waste plumbing and I had looked at all of them and had spent hours over the years between buying the boat and installing new plumbing to consider what I felt was best for us.
We wanted plumbing that was functional and that would eliminate odors that are associated with rubber lines that age. We also wanted to be able to take care of any clogs that might take place and to try and eliminate them in the first place. To accomplish those goals it was decided to run PVC for most of the lines with rubber only where the PVC connected to the head, pumps and holding tank. PVC in homes is generally trouble free and I felt very good about using it for the boat with the rubber mounting at various places. In addition to using the PVC there are easy to use clean-outs on every run that allow the use of a plumber's snake and the pumps are very easy to open and clear if needed. I'd read so many horror stories about plugs in people's waste water lines that I didn't want that to be the case on the Margaret Anne.
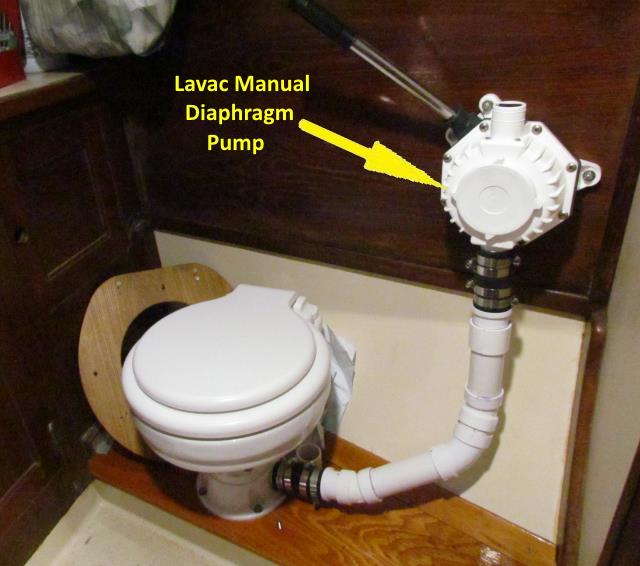
First a short line was constructed between the head and the diaphragm pump. These pumps have a reputation of working very well and hardly ever clog and if they do the face unscrews easily to handle the situation. As you look at these pages you will see a number of different PVC fittings used to accomplish the run. It would of been easier and far quicker to buy some rubber sanitation hose but I feel this is going to give much better service over the years.
The factory hoses that were on the boat at the time of purchase snacked all over the place and had low spots that wast always sat in. They were a nightmare. I want to have things functional first and beautiful second. With that in mind there are no low spots in the line from the head to the holding tank and it is as straight a shot as was possible between the two.
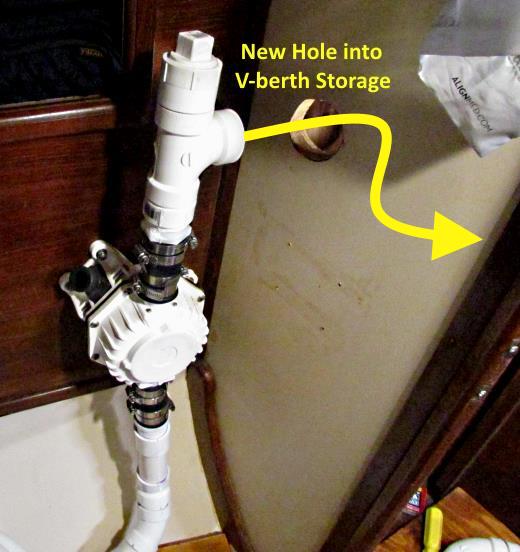
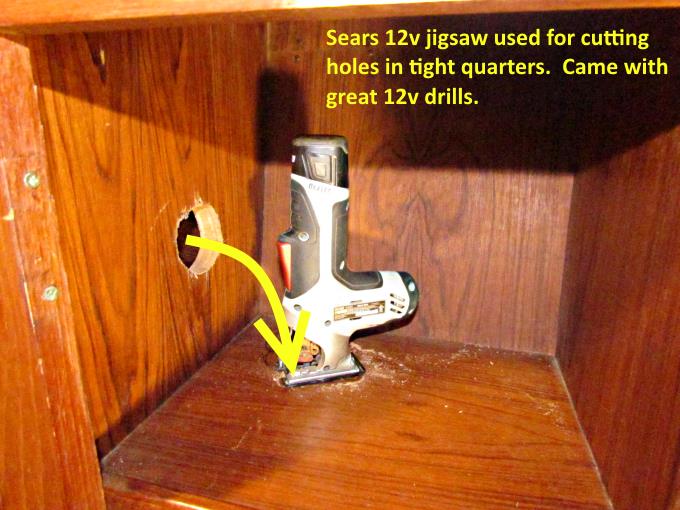
To make that happen the line does go through an area of storage in the V-Berth area. The PVC is 1 1/2 inches so actually takes up very little space and we noticed no real difference in the cloths we could store in these shelves afterward compared to before. I love the Sears Nextex saw and drills I have with their 12 volt lithium-ion batteries. They charge quickly, run a long time on a charge and are very powerful. Not like the 12 volt tools of a few years ago. I take them on all the boat trips and they don't take up much room and charge using a small pure-sine wave convert in 20 minutes or so.
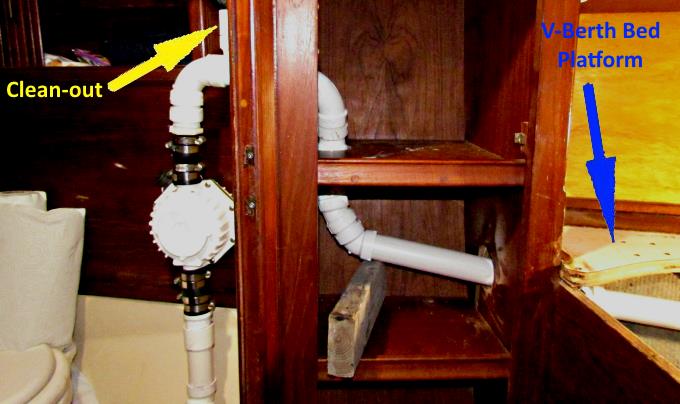
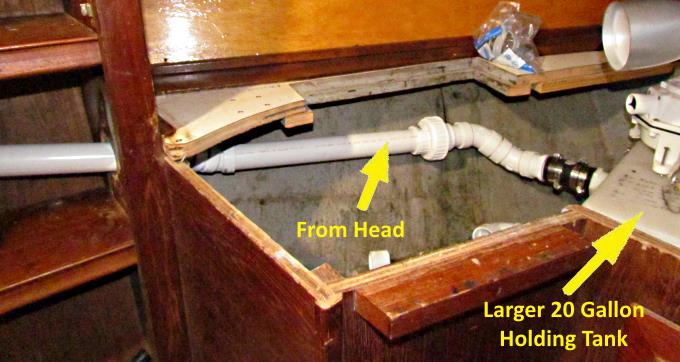
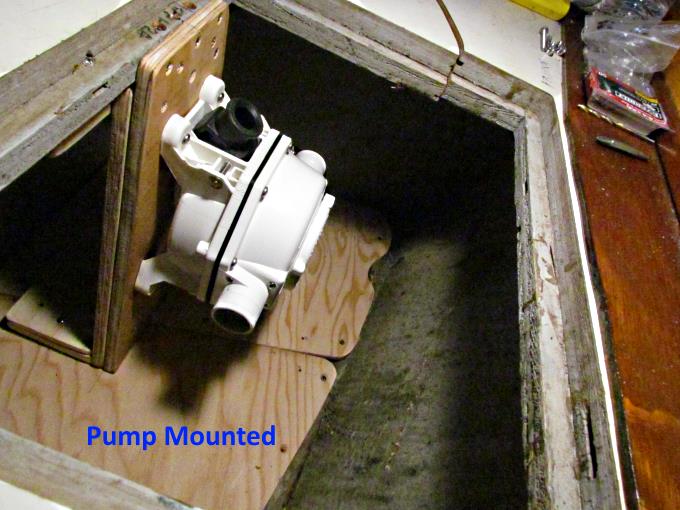
The line from the pump has a clean-out fitting just past the pump that allows you to use a plumber's snake from there to the holding tank and it is also all down hill to the tank after the fitting. The pump is mounted according to Lavac's instruction's just above the top of the head. This is now a short run to the holding tank that is under the V-Berth's bed platform.
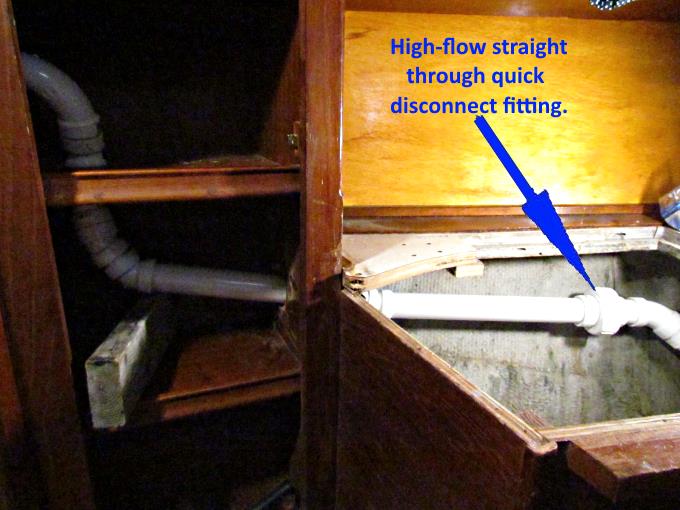
Just before the tank there is also a high-flow straight through quick disconnect fitting that would also make future maintenance far simplifier than the rubber hoses that were in the boat.
You can see that the run ends dumping into the larger, new, holding tank just after the quick disconnect fitting. There is no "Y" valve in this setup. All waste goes directly to the holding tank first. This is a system that West Marine Advisor recommends and after a lot of thought I also liked it better than the complexity of the "Y" valve and additional plumbing from it to the thru-hull outlet fitting. Once again this is a much more functional setup vs. what was in the boat.
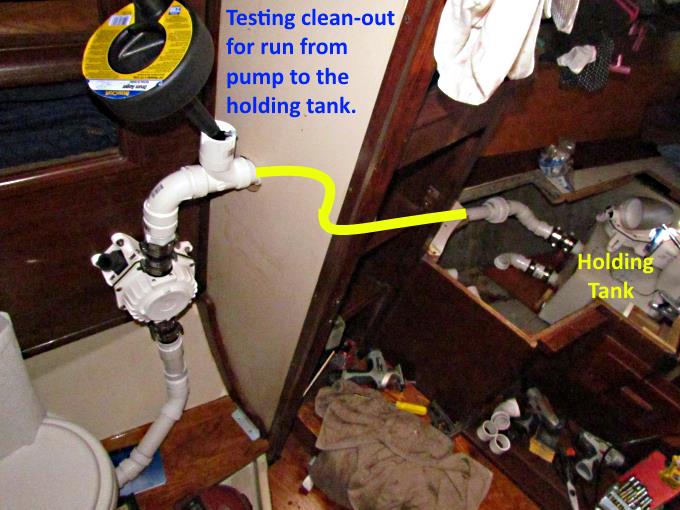
I ran a snake through the different runs to make sure that it would work on all of them, before and after the holding tank.
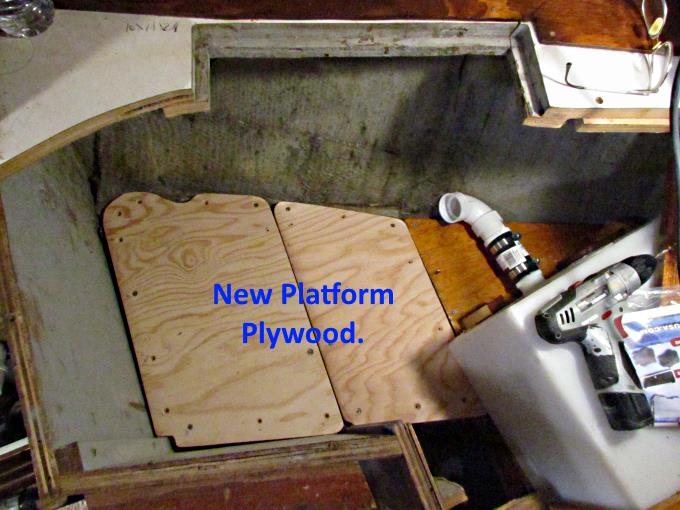
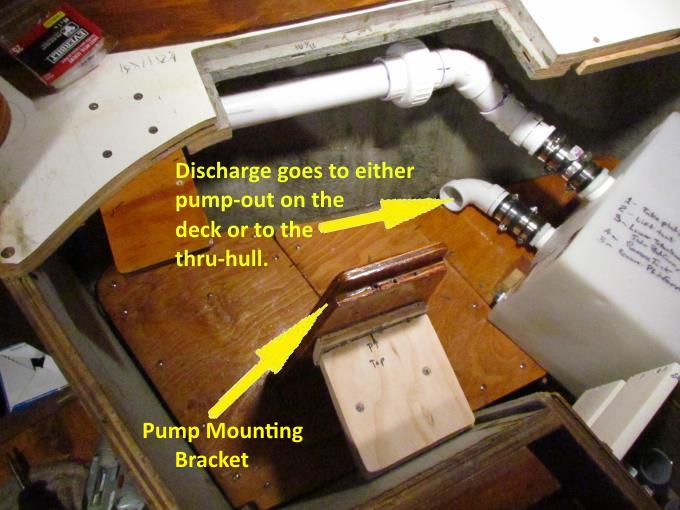
The wood platform where the original holding tank sat had some damage so a new one was made to replace/reinforce it. Also the holding tank was replaced with a larger one and moved so that this area could be used for the discharge pump and associated lines.
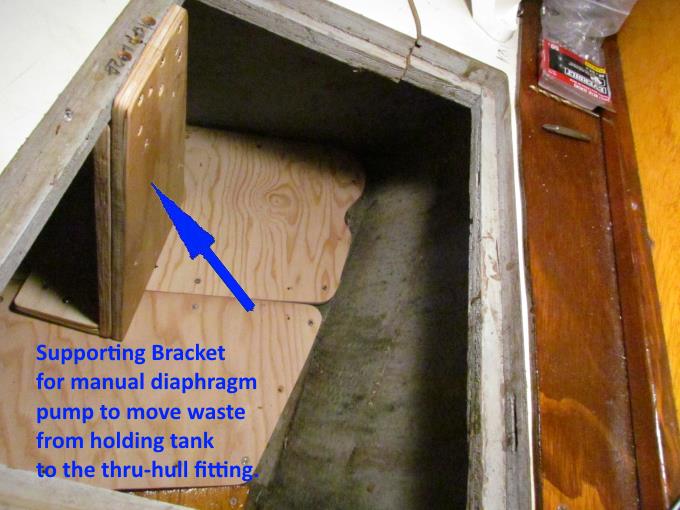
A support was constructed to ....
.... mount the discharge pump to, also a manual diaphragm pump. It is located just below a hatch that is under the first cushion of the bed in the V-Berth. The bed's mattress is made up of three cushions that make it easy to make the bed and to gain access to the compartments under it in a matter of a minute or less. To get to the pump you just fold the first cushion and bedding forward over the second cushion.
To add in the install of the tank and this plumbing a larger area of the bed platform was removed. At the top of the picture one can see where the hatch is here once this larger piece is put back into place.
There is one discharge at the bottom of the tank and ....
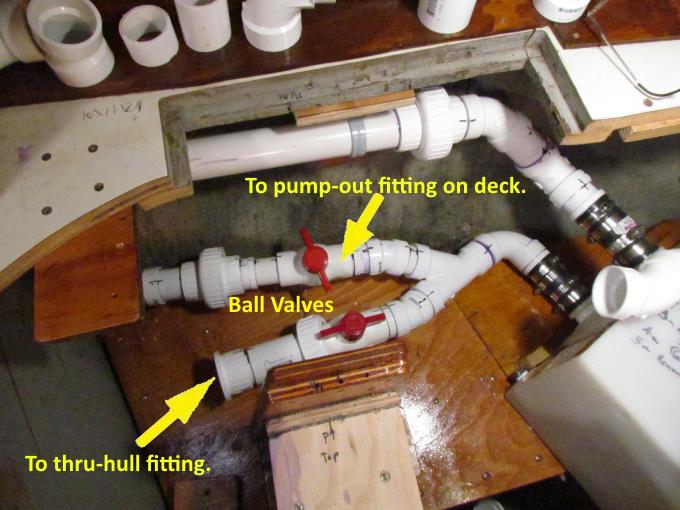
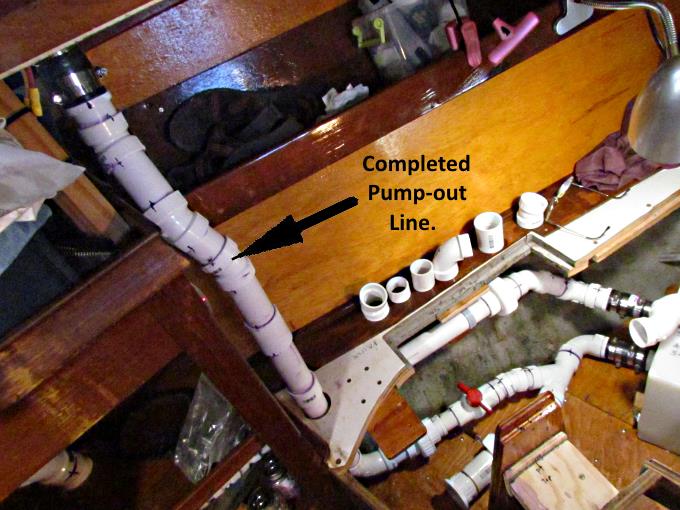
.... it goes to a "Y" fitting. After the fitting there are two branches. The top one above is the line that terminates just above this area on the deck above and is what will be used when there is opportunity to have the holding tank pumped out. The other branch goes to the manual pump and then onto the thru-hull at the bottom of the boat. There are ball valves on each leg so that the one that is not in use or both can be turned off, which would be the case unless the tank is being emptied.
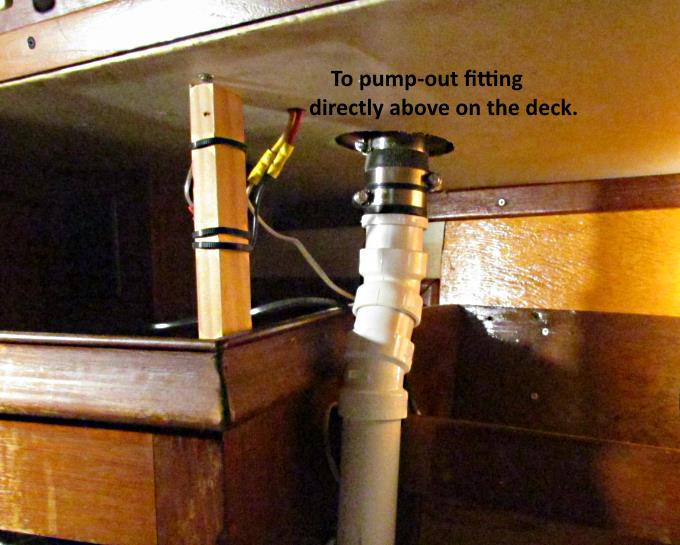
A new pump-out fitting was installed on the boat's deck just above this area. Previously the pump-out fitting was further astern of this location and there again the hose for the pump-out wound its way in and out of cavities in the area from the holding tank to back past the head and in the cabin area. It made no sense and these lines all had low spots in them an smelled and would again as soon as new rubber hoses turned to old ones even if they were premium sanitation hoses.
From the deck it is a straight run down into the area under the bed and then a couple feet over to the holding tank. If needed a 'snake' could be run down from the deck fitting through this section of line to the holding tank.
The line is back in a corner of the bed area where we don't have the mattress in and an area that you can't possibly use while in the V-Berth. We plan on covering the PVC with a cloth sleeve. When we brought the boat to the yard we had the old holding tank pumped out but upon removing the old hoses still found waste in them. It was a very inefficient system.
To flush the holding tank out will now be a pretty simple procedure. Bring water up to the deck in a bucket via a rope and pour it down the pump-out line into the tank or pump it through the head. Put say 10-15 gallons in the tank and let the boat's motion slosh it around. Then pump it out via the thru-hull at the bottom of the boat. We will do this while still far enough offshore to legally dump and then use Double Doodie Bags from that point on until back in the boat yard. That will leave us with a clean system while the boat is in storage there.
=================================================
............................................................................. Next Page If There Is One