.................................. Return to Sumner's Home Page....
Return to N Scale RR Main Menu........... Return to Building UP's Canyon Division Menu
=========================================
...............Previous Page.............................Next Page If There Is One
=========================================
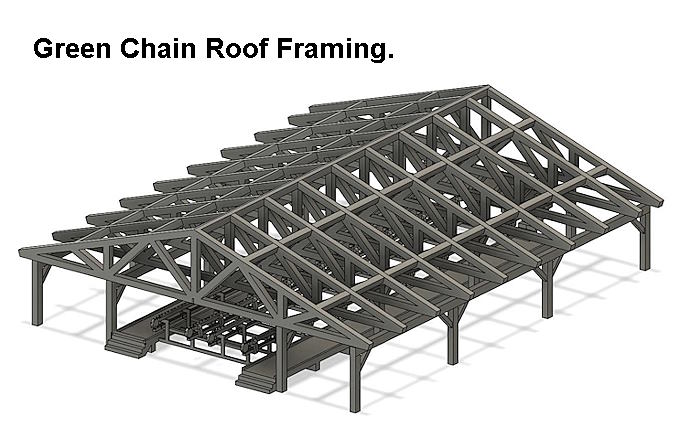
…..............................--- Sawmill Design/Build – Pt. 3 ---
=========================================
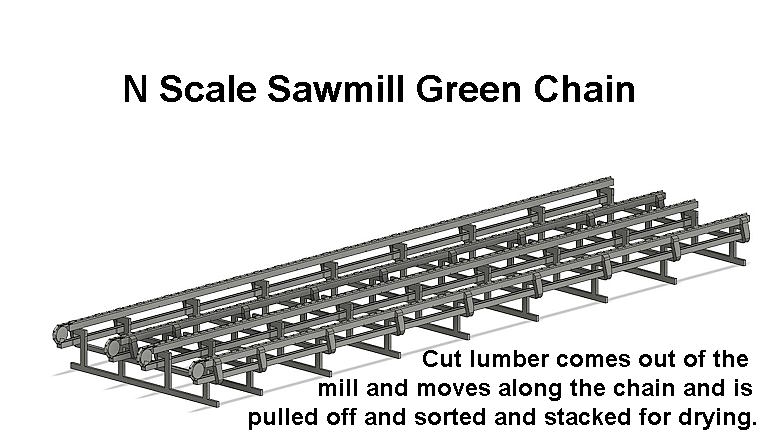
Getting the cart before the horse here and working on the 'Green Chain' for the sawmill project. A couple weeks before this I didn't know what a 'Green Chain' was. For those that don't it is where the lumber is sorted and stacked after being cut so that it can be put out to air dry or be kiln dried before shipping of planed if it is to be made into finished dimensional lumber.
Below is my first attempt at a design and printing part of the green chain complex. I'm doing this while it is printing and hoping that doesn't jinx it. A lot of the print is very small and I'll be interested in how/if it prints and how hard it will be to remove supports without damaging the print. If this fails I'll design something more 'solid' that will hopefully represent the green chain. It isn't going to be close to the edge of the layout and with the roof over it not much will be seen anyway.
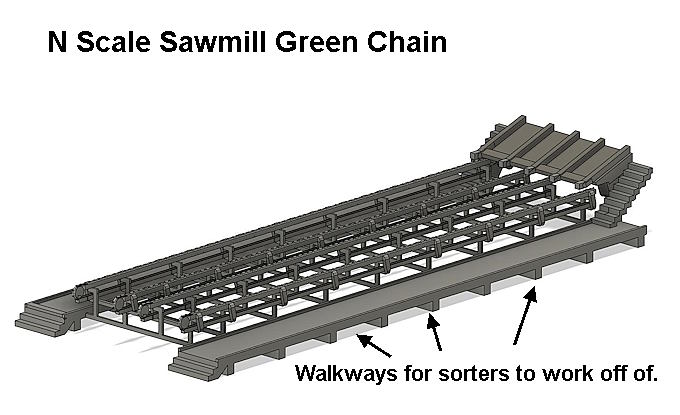
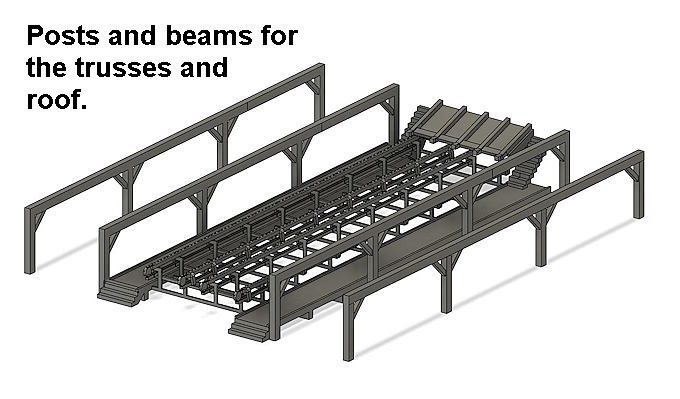
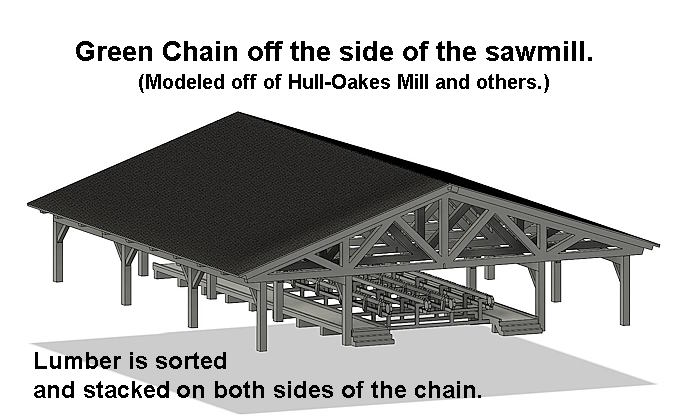
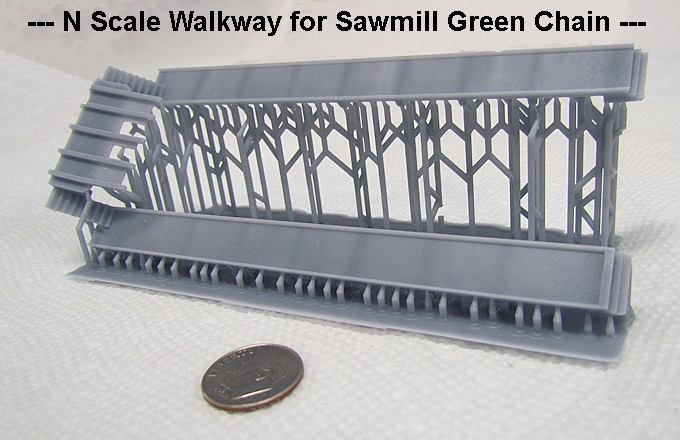
Some times the green chain is part of the main building but usually on a wing outside the main building. Mine and most others have a roof for some protection from the weather since there will be workers almost constantly sorting and stacking the lumber coming out of the mill.
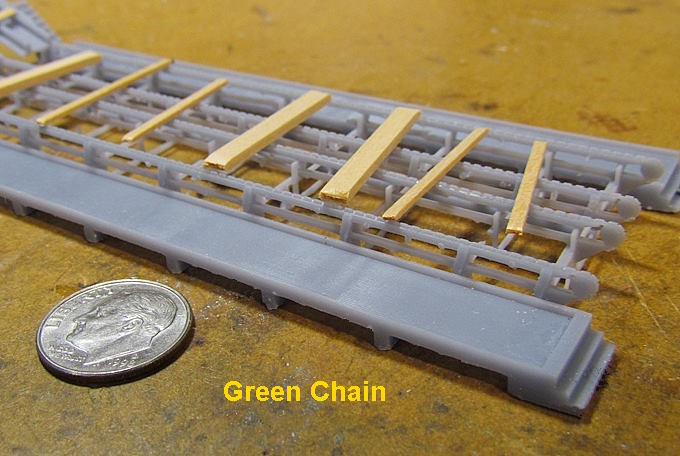
There are walkways down both sides of the chain for the sorters to work off of.
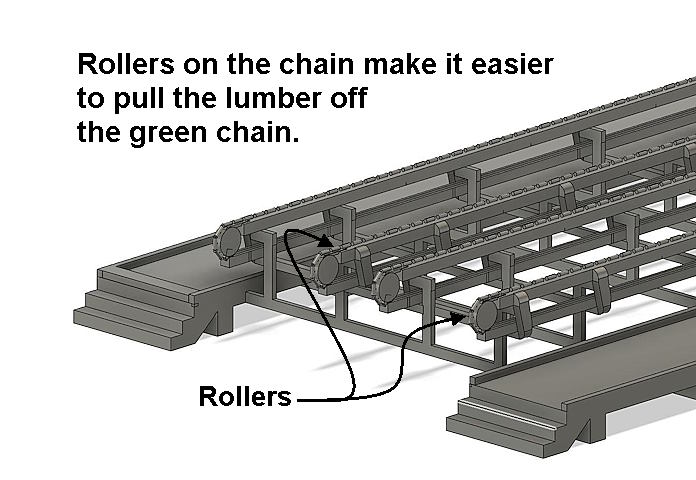
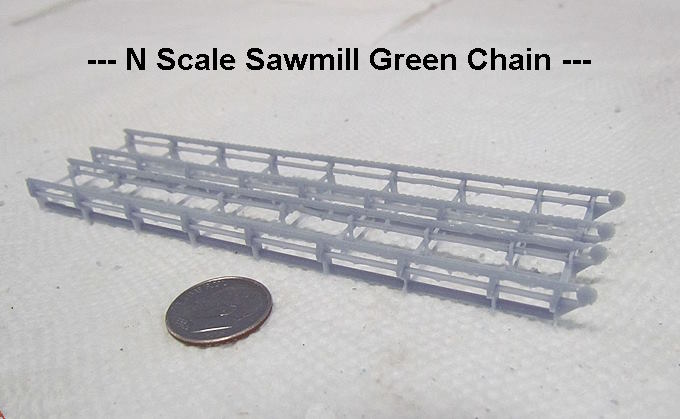
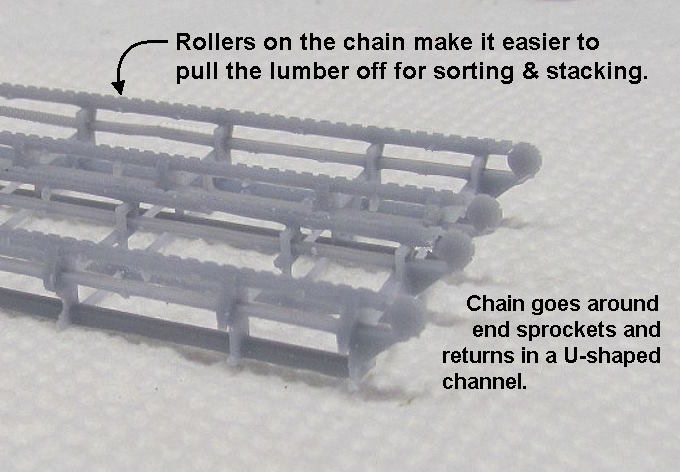
Some of the other chains in the mill have bars that stick up off the top of the chain to help push the lumber along. The green chain has rollers on the top of the chain. They make pulling the lumber off the chain easier as it slides on the rollers. I oversize these some but they will still be really small on the actually print and of course won't roll.
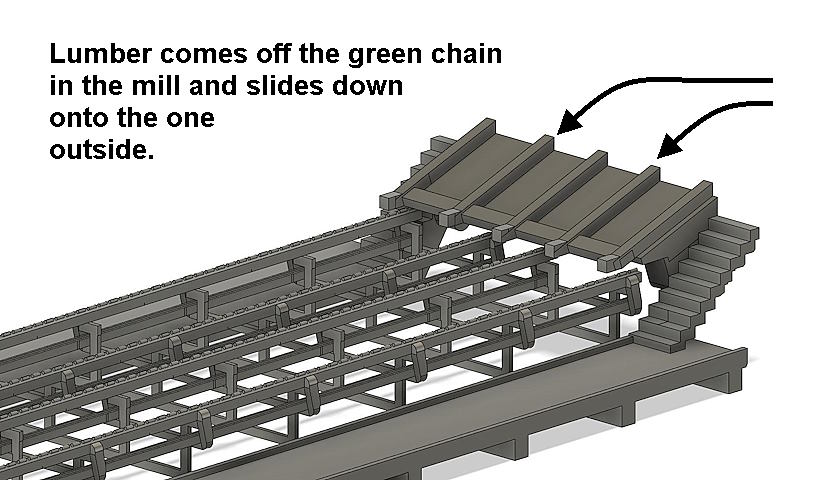
The green chain starts in the mill where lumber that has been cut to width and length moves onto it. At the edge of the building it will fall onto the incline and slide down to the green chain.
Most of the rest of the images are pretty much self-explanatory.
.
.
Hard to see on the image above but I designed and hopefully it is going to print.....corrugated roofing. I wanted to try it as the detail is too small for my filament printer. I'll see how the resin printer handles it. I did print a small sample and the detail is only visible if you are very close to the print.
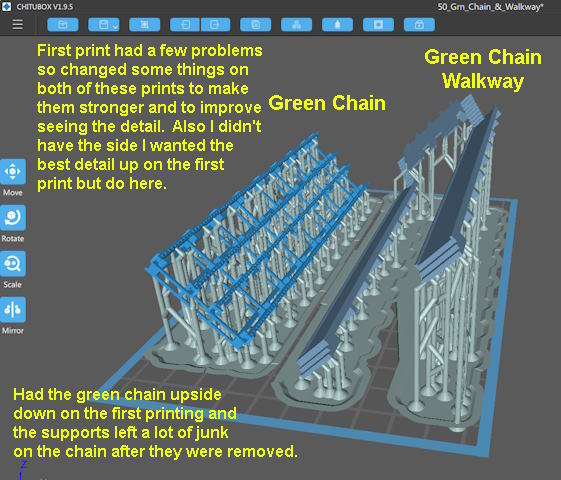
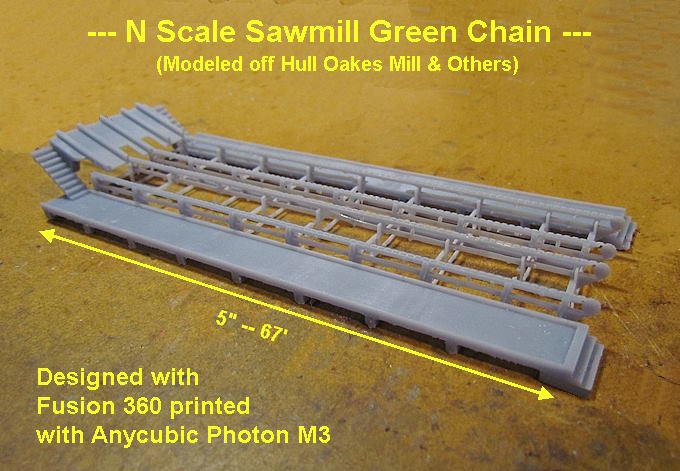
Above is the second print with the green chain rotated so the good side is up in the image, down on the build plate with the side I want to look the best being printed last. The green chain and walkway barely fit on the build plate. I designed the length of both to work like this.
.
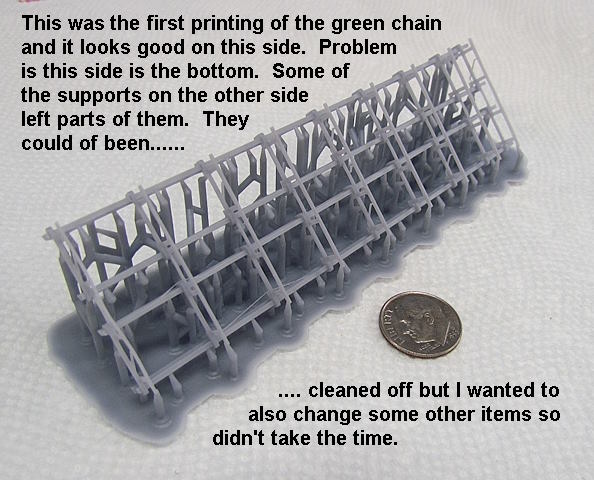
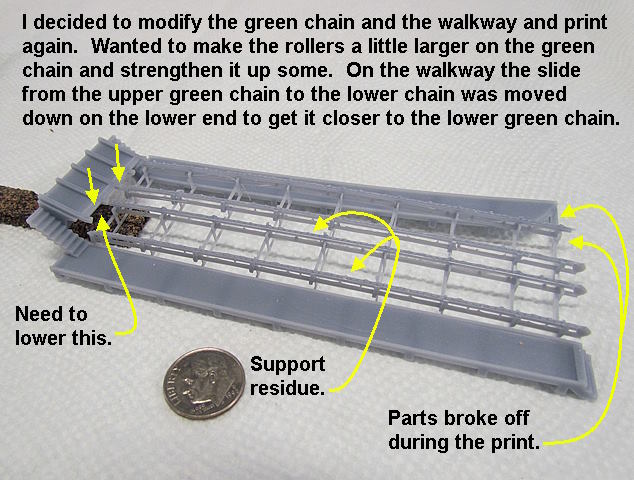
Above is the first print attempt with the green chain and walkway and it shows some of the problems that cropped up. Hopefully the second print will be better.
====== After a few Mods and another Printing ======
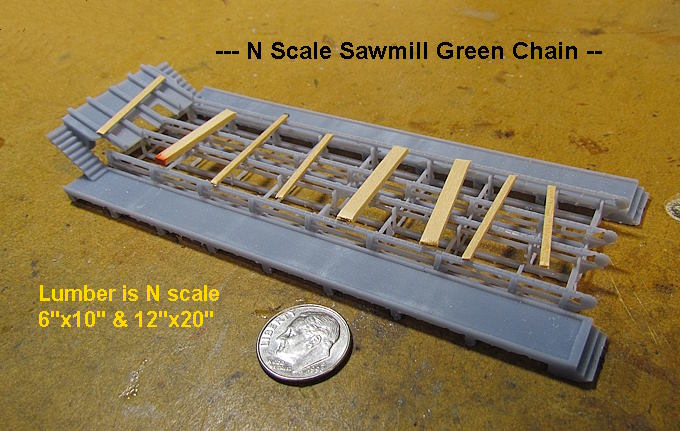
After reinforcing a couple areas the second print of the green chain and walkway came out well. This was a 3 hour print.
This time I got the side that I wanted to look the best printing last. I'm happy with the print but it took probably a half hour to remove the supports as the green chain has some really fragile parts to it. I broke a couple but after getting the print off the raft/supports used some CA to fix the breaks except for two where the piece broke and disappeared. Still there are so many boards in the chain the couple missing ones aren't noticeable and the chain will be under a shed roof.
The supports for the walkway were much easier to remove and only took maybe 5 minutes.
.
For the first print the rollers might have been close to real size at 2 inches in diameter and 6 inches long. You could hardly see them even up close at that scale (.013”x.038”). I increase the diameter to .020 inches ( about 3 scale inches) and like it a lot better as at least now you can see they are there.
Above I cut some larger timbers and put them on the chain.
I though about beefing up the frame members under the chain to make it easier to remove the supports but decided against it as I like the look the way it is. If there is interest in this I'll put the print files up and just take it real slow in removing the supports.
I've got about 6 days in the total project so far, the green chain and shed along with a lot of the main building done. I just looked and I've created 392 files in the design stage. I backup often while designing so a number of those are back-ups at different stages of designing. I like it so not complaining but if you bought a printer and plan on designing there is a lot of time that goes into it. I find it to be very rewarding coming up with something where there was nothing there before and like that I can design specifically for my railroad.
To be continued............
A link to this whole build ( HERE ).
=========================================
...........................On..............e.........Next Page If There Is One