.................................. Return to Sumner's Home Page....
Return to N Scale RR Main Menu........... Return to Building UP's Canyon Division Menu
=========================================
...............Previous Page.............................Next Page If There Is One
=========================================
…..............................................................--- Mesa Part 4 ---
=========================================
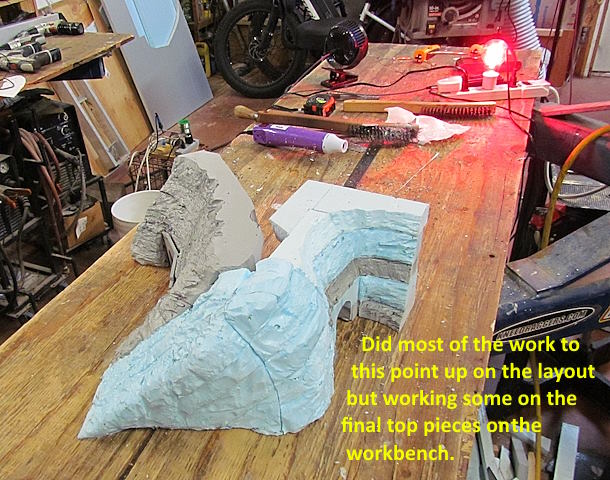
Continuing on ….........
.
.
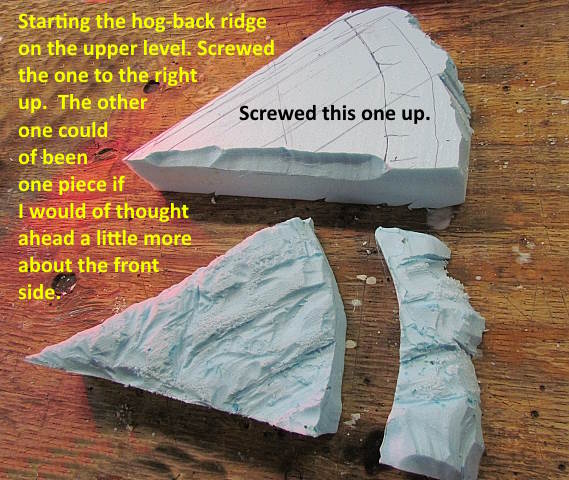
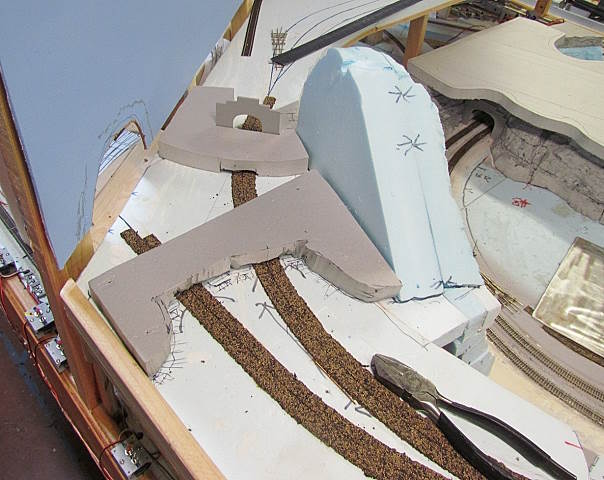
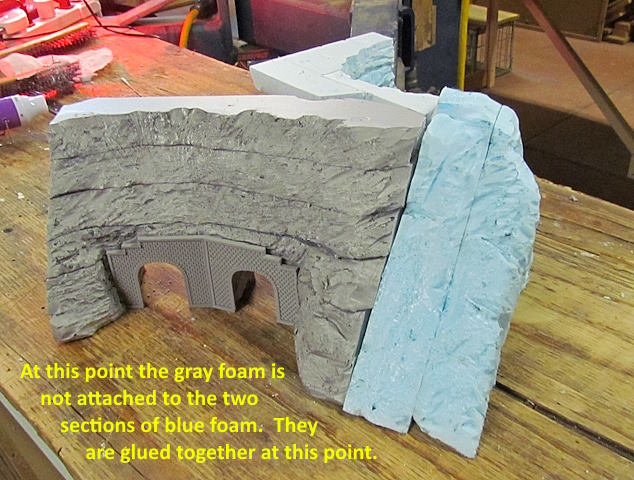
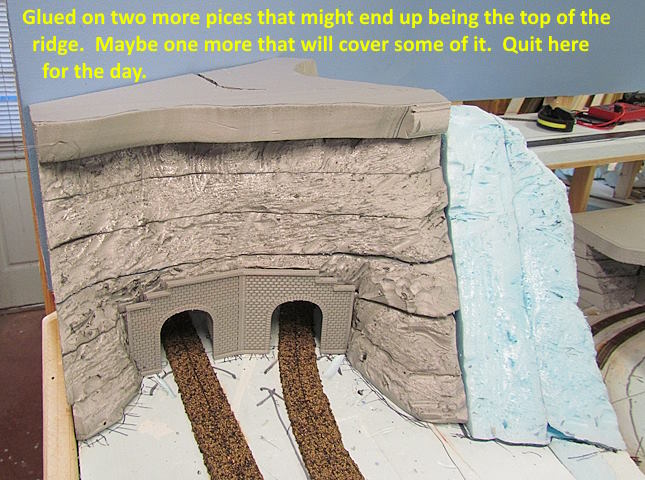
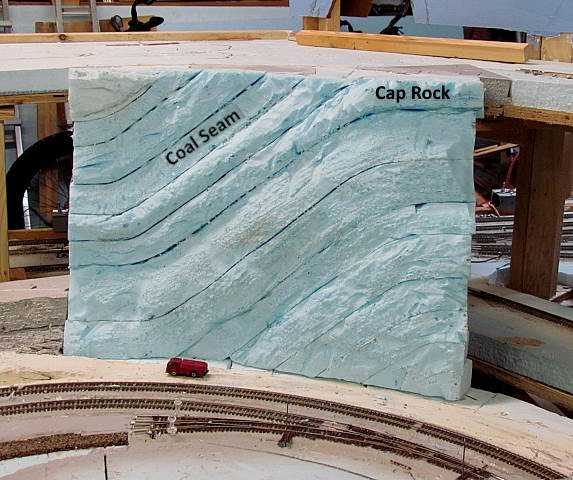
I cut too much off the bottom of the top piece above with the hot knife when cutting it out. Then the bottom piece I forgot to account for the rock face continuing along the face of the ridge. Had to cut another piece to take care of that so now there are two pieces which could have been one but no problem. Glue them together into one and continue on.
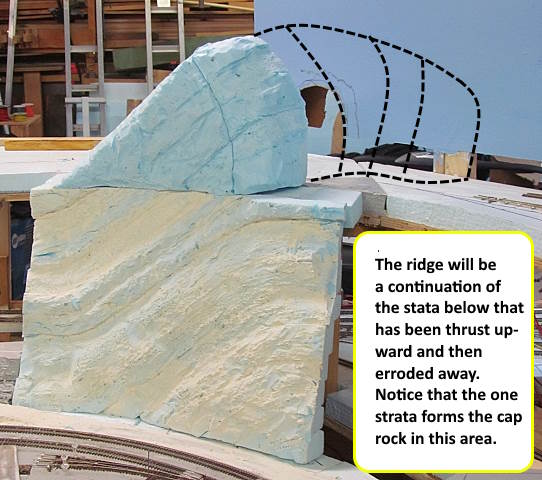
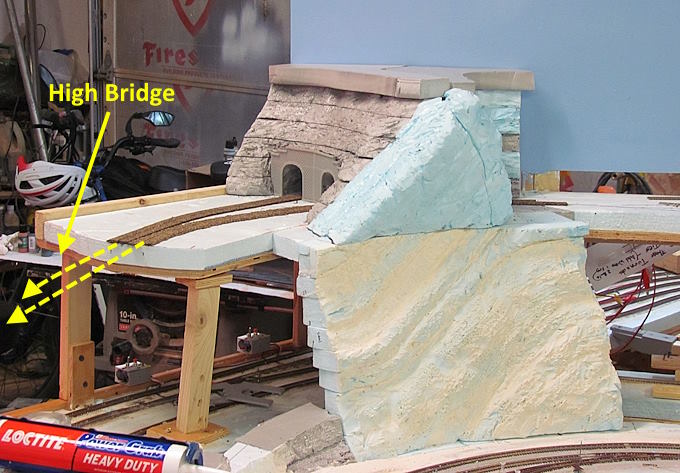
The rock face of the hog-back ridge will continue over to the center backdrop.
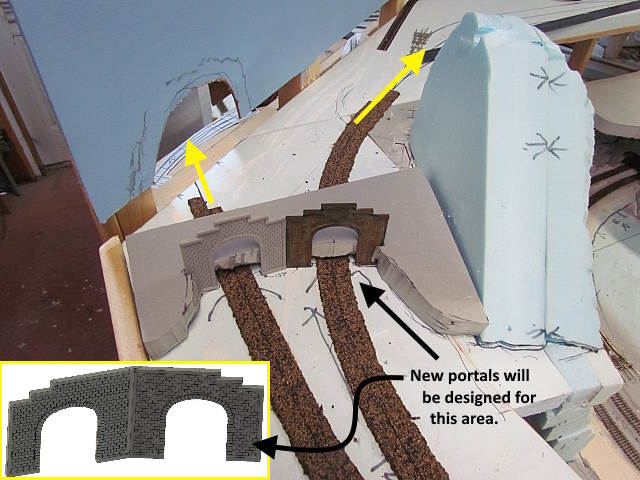
I used two separate tunnel portals to determine where the foam had to be cut on the near side above. A new portal will be designed that will print as one piece and the center top between the two portals will be change some. The new one will be the same dimension as above up to the stepped top.
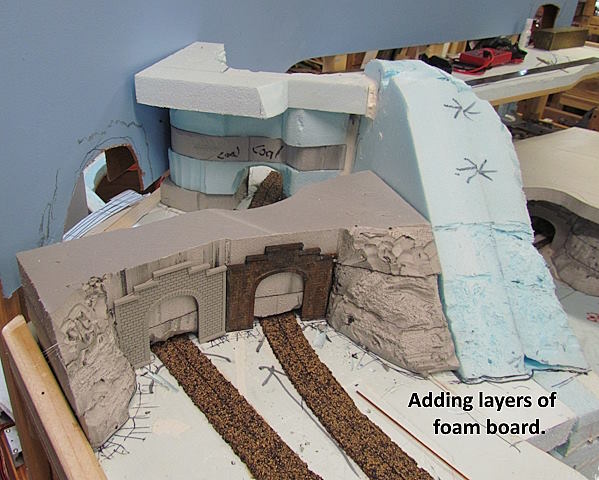
The same approach was taken for the other portal on this side of the backdrop. The center section for the tracks/train will be cut out after more layers of foam have been added. A little has been cut out to clear the cork roadbed at this point.
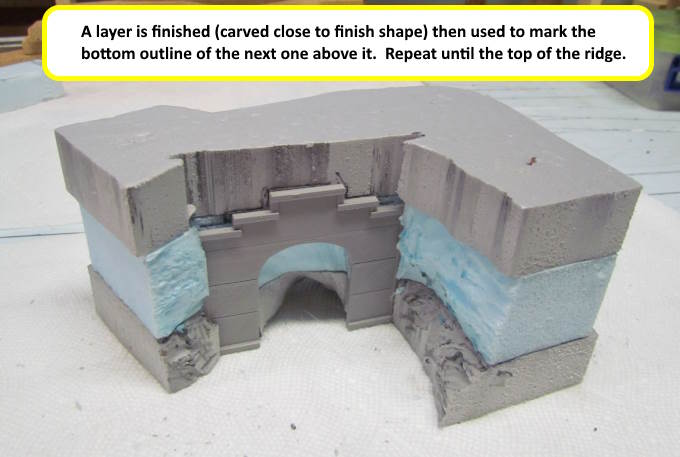
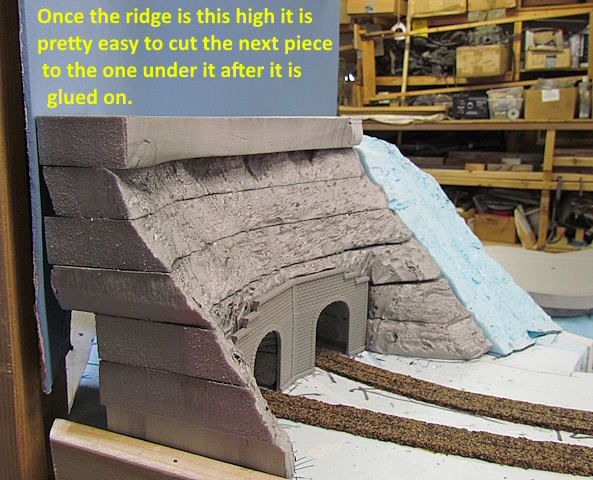
A layer is cut to close to what I want then the top of it is used to mark the bottom of the next layer so it can be cut out and then carved into for what is needed to get up to the next layer. This process is repeated over and over again. Above the next step would be to carve the relief into that top layer and then use it to mark out the bottom of the next piece of foam board. This goes pretty quickly and I normally glue the next layer to the one above it after it has been cut close to shape and then blend the joint between them after they are glued together.
The Loctite Power Grab holds well at this point, so don't have to wait overnight for the adhesive to set up. I'll drive three short lengths of small diameter welding wire through the top piece after gluing it into the ones below and that helps to keep the new piece from sliding around on the one below it.
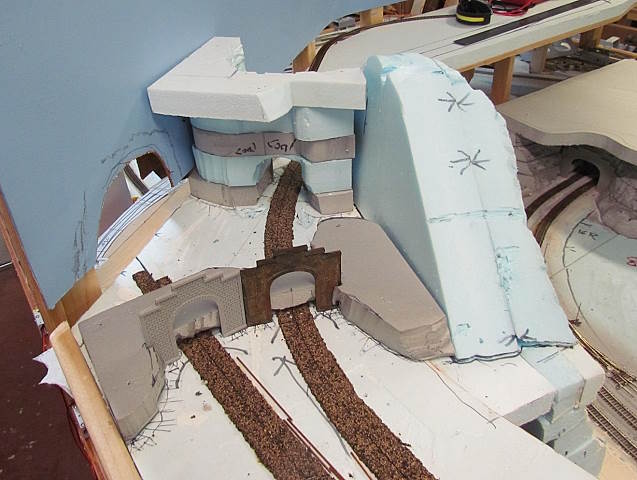
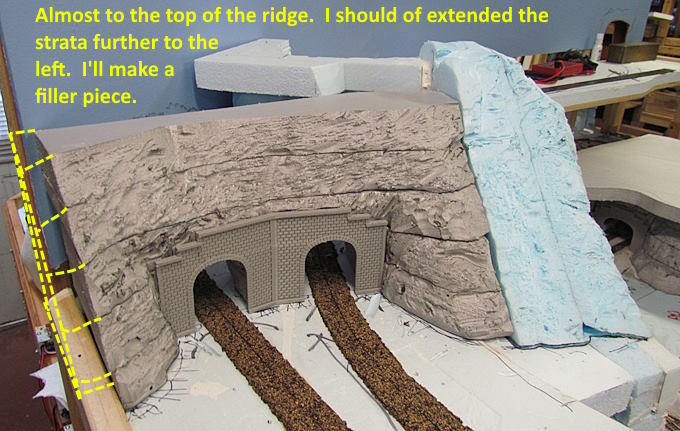
The far portal rock face only needs one more layer at this point and will be left until the near side is built up higher to see what is needed to pull them together at the top.
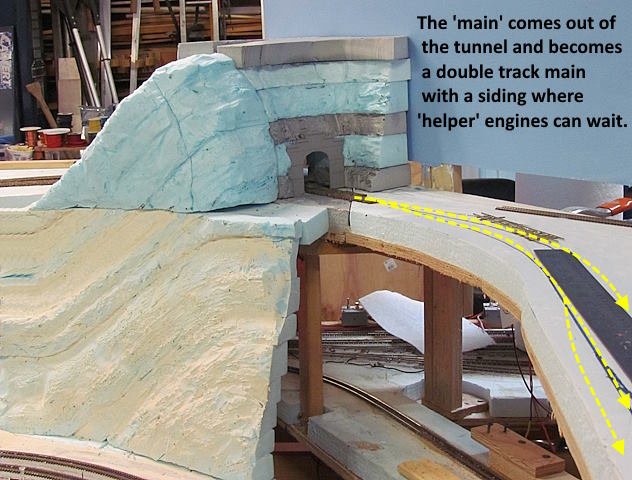
At the backdrop the rock face will start stair-stepping down and will end almost at the bottom of it.
.
.
.
.
.
.
.
.
.
.
To be continued.....
A link to this whole build ( HERE ).
=========================================
...........................On..............e.........Next Page If There Is One