.................................. Return to Sumner's Home Page....
Return to N Scale RR Main Menu........... Return to Building UP's Canyon Division Menu
=========================================
...............Previous Page.............................Next Page If There Is One
=========================================
…..............................................................--- Mesa Part 2 ---
=========================================
With the available space to work with being relatively small I can't replicate the geology of southeast Utah totally accurately but will try and represent it the best I can. We live between Moab, Ut and Monument Valley, Ut/AZ so are in canyon country but also have 11,000 foot mountains 12 miles north of town. The canyons here are 'red rock country' with no coal here above the red rock but south of Monument Valley and north of Moab there is coal in formations above the red rock sandstone that was laid down after the sandstone.
With that in mind I have 'red rock' close to coal seams as the coal mine needs coal. To do that I'm kind of representing what does happen when the red rock strata dips and the coal seam climbs and comes to the surface like on this side of the scene. On the other side it is in a horizontal seam close to the surface and the mine is extracting that coal.
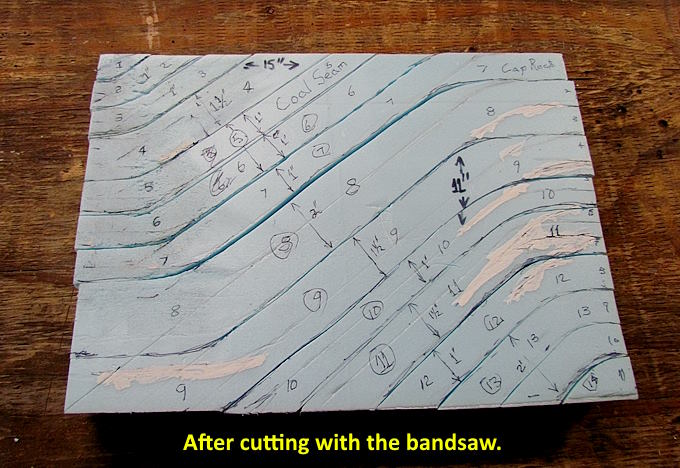
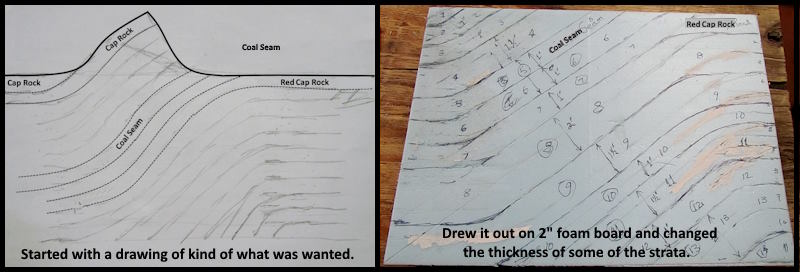
I made the drawing above to the left that represents what the cap rock will be on this side of the scene on a high mesa that the lower one will attach to. Cap rock to the right will be red rock and to the left more grayish in color. I laid the strata with the dip in it out on a piece of 2” foam board. I also changed the thickness of a couple strata layers to 1 1/2” and 2” vs. the 1” I've used mostly to this point as I have foam board available in this little town of 3700 in those thicknesses also (can't believe that some of you in large cities can only find 1”).
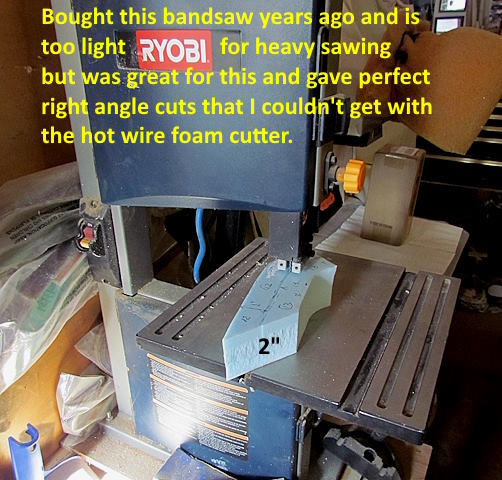
I've hardly used the band saw above that I bought years ago as it wasn't very good at cutting heavier work. I had a large band saw that I bought in the 70's from Montgomery ward that I continued to use but recently gave it to a young friend. I tried it on the foam and it is ideal for the foam and I'm sure I'll now use it more for that also as I continue on.
I thought about using one of the hot wire foam knives that would easily cut the foam but it is hard to get a perfect 90 degree cut to the edge using them in your hand and I needed that for the next step.
Above you can see how nice the cut pieces still lay together and the thin blade that I haven't liked in the past was perfect for not removing much material.
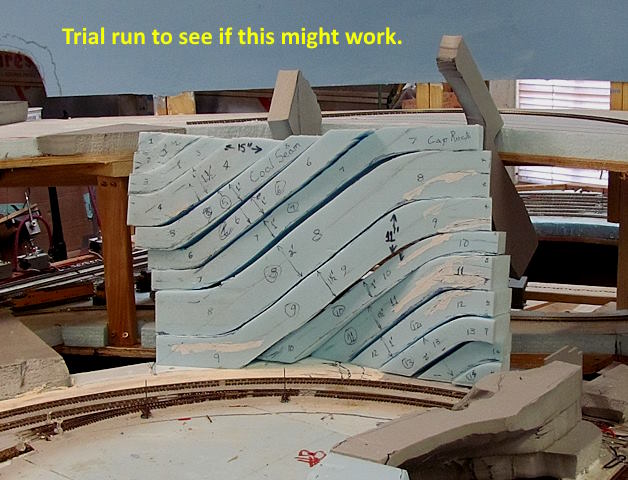
The pieces were stacked where I hoped to use them to get an idea if this might work.
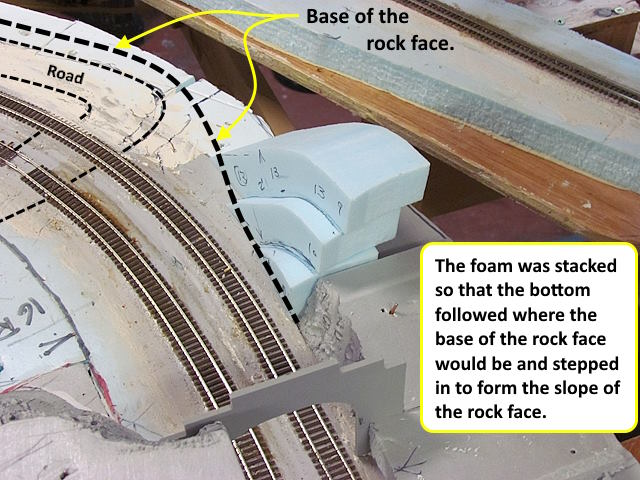
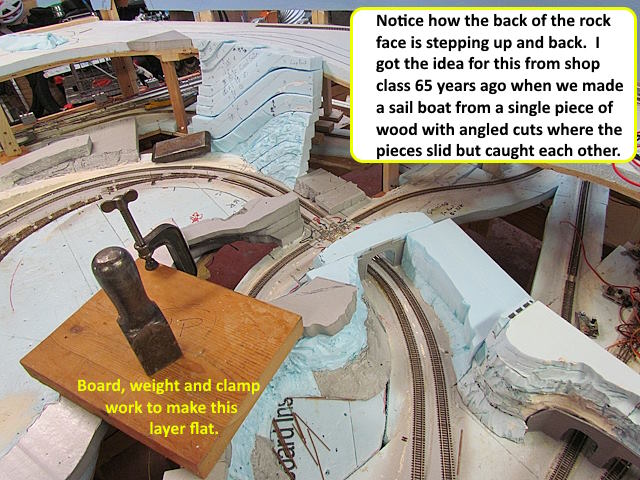
The reason for needing the 90 degree cuts was so that the pieces could be stacked and skewed to follow the curve needed in this area and to also create a sloping (not much) rock face. I used the 2” foam for the depth needed to step them as shown above an still have foam left to carve into.
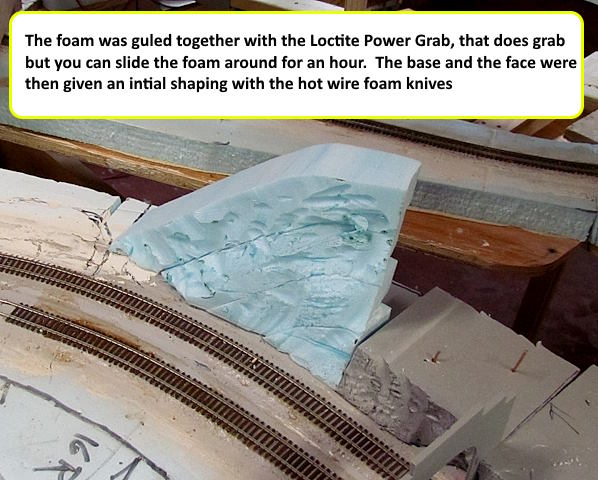
Love the Loctite Power Grab. Put a bead of it on one piece and press the other piece to it and it holds very well, thus the 'Power Grab'. You can still slide it with some force and you are suppose to be able to move it for up to an hour. I glued the second from the bottom to the bottom piece, carved it some. Then did the same to the next couple strata layers as shown above. This went quick.
I got the first 6 strata layers glued with an initial carving in less than an hour and decided to stop there so the adhesive could set up.
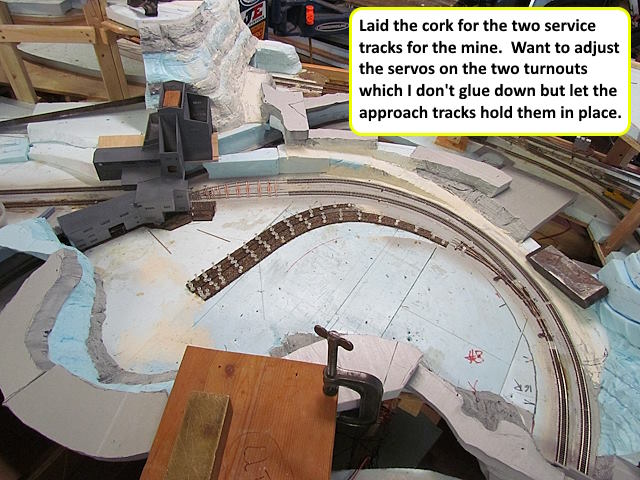
Gluing the cork down above was actually done first thin on this day and only took a few minutes. I want to get the track connected to the second of the two curved turnouts. I haven't been gluing my turnouts down or soldering them and the rail joiners to the the approach tracks. So far letting them 'float' has worked well with the servos used to move the throwbars. I do like to have the approach tracks attached though before taking a few minutes to adjust the throw distance of the throw bar via the $2.00 servo controllers. It is easy to adjust the throw so that there isn't excessive pressure on the turnout points.
I ran a couple engines over this part of the layout (YouTube coming) and want to be able to throw/test these two turnouts and yard tracks so got on this project. I'll put the spackling on hopefully today and lay the track tomorrow and wire it.
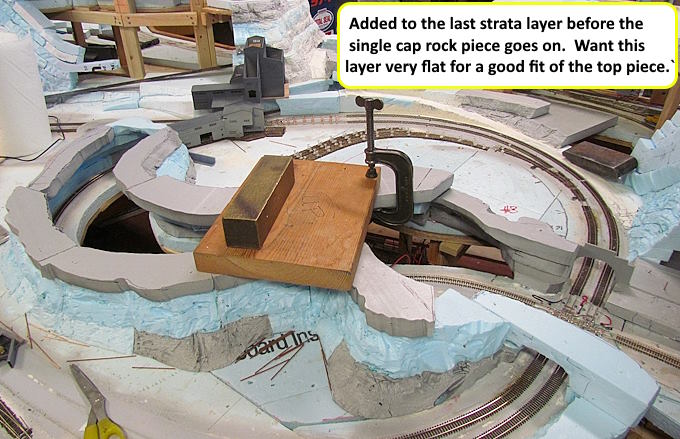
After setting the new rock face aside so the glue could setup I made a couple more pieces of the last layer of rock strata before the single piece of 'cap rock' goes on. After putting the Power Grab on I set the pieces in place and lay the flat board on them along with additional weight and if they aren't flat against the bottom of the board I use a clamp to pull them into position. Once the adhesive sets up then will be locked into place.
The next layer up will be a single removable layer so the track here can be serviced if needed. Hopefully it will be a nice fit and the seam won't be hardly noticeable.
To be continued.....
A link to this whole build ( HERE ).
=========================================
...........................On..............e.........Next Page If There Is One