.................................. Return to Sumner's Home Page....
Return to N Scale RR Main Menu........... Return to Building UP's Canyon Division Menu
=========================================
...............Previous Page.............................Next Page If There Is One
=========================================
…......................................... .--- Staging Wiring Pt. 1 ---
============================================
I wanted to be able to turn the track power off to the tracks in the staging. Even though the layout is DCC and you acquire the locos you want to run the decoders in them are still getting track power while they sit. Not a big deal but sometimes the sound locos will fire up the sound and I just want the locos sitting in staging to not be powered until I need them so took this extra step that didn't really add that much more to the wiring.
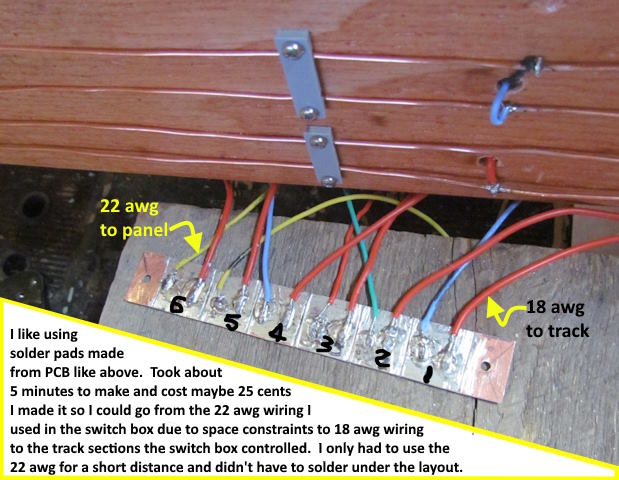
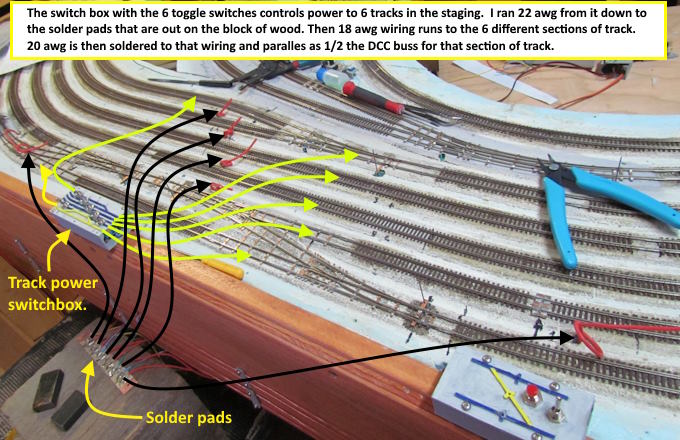
Instead of taking one rail of each section to the main buss on the layout's fascia I routed that rail to a small panel that has 6 toggle switches on indicator LEDs for each of the sections the power will be controlled on. I covered the panel in a previous post ( HERE ).
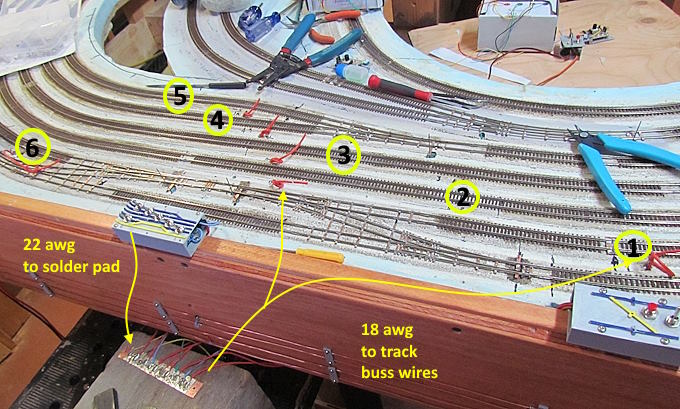
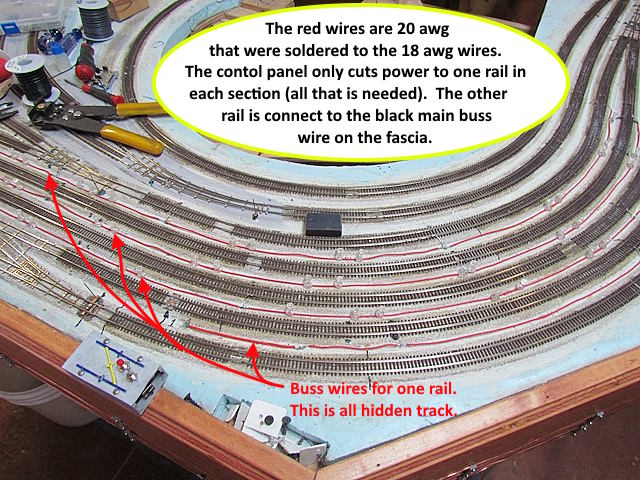
The panel is small and space limited inside so used a single 18 gauge wire from the buss to it but used some colored 22 gauge wire from it and didn't want to run the 22 gauge wire to far so ran it a short distance to a solder pad with 6 isolated pads on it. Then I was able to run 18 gauge to the start of a single 20 gauge wire buss that runs along the section of track that is being powered via the panel.
I was trying to limit any voltage drop in the wires but in reality probably could of run 22 gauge for the whole length as most of the time there will only be one loco at a time in one of these track sections. Possibly 3 if there is a consist stored there.
I didn't mount the solder pad shown above until the wires were soldered to it as shown.
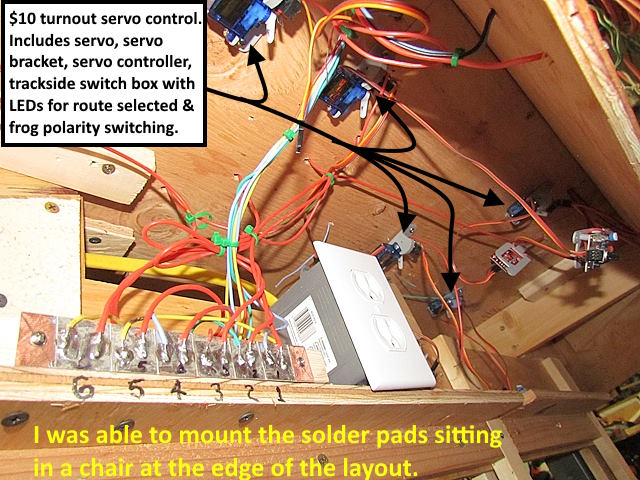
Then I was able to mount it with two screws while sitting on a roll-around chair I use at the edge of the layout. Above in the image I also bring attention to the servos that are being used for the turnouts. More about how you can have all the components needed for servo turnout control for about $10.00 ( HERE ).
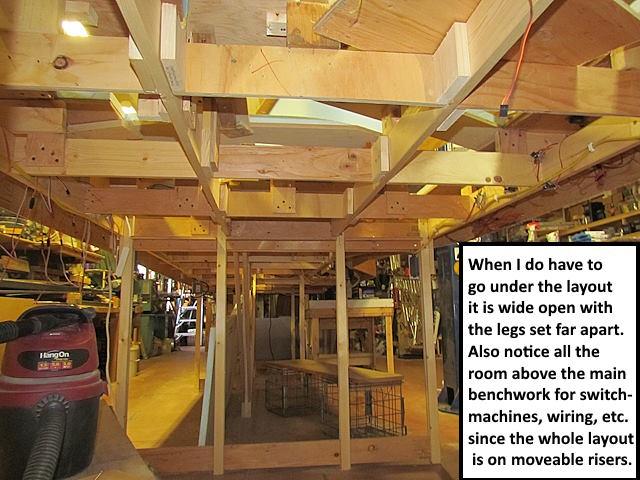
Also while I was taking pictures I took the one above to bring attention to the benefits of building a main benchwork that isn't attached directly to the layout but uses risers between the benchwork and the layout. This makes it easy to put switch machines, wiring and anything else that attaches to the bottom of the layout anywhere at any time since the risers can easily be moved if they prove to be in the way. More on building with risers ( HERE).
.
.
Above one can see how easy it is to wire the other rail to the buss on the side of the layout. Most of the time both wires are brought to the buss on the side as they are powered any time the power to the power district is turned on.
Drill a hole next to the rail. Push the wire down through the hole. Reach under and bring the wire to the fascia and through the hole there. Solder it to the buss. At the track rail pull the slack back out of the wire. Cut and strip it and solder it to the rail. Fast easy and no going under the layout!!
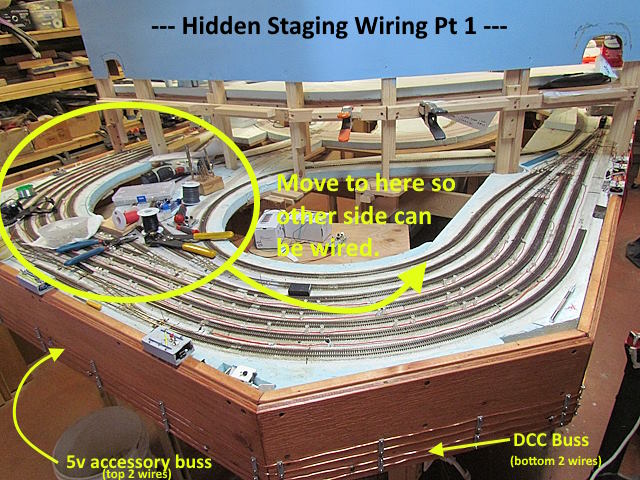
With the 5v buss and the DCC buss on the fascia on the side of the layout I hardly ever have to go under the layout to deal with wiring. This is big approaching 80 even though I'm in pretty good shape. I do have a special 'layout creeper' for the times I do that helps a lot but still not having to go under is better yet.
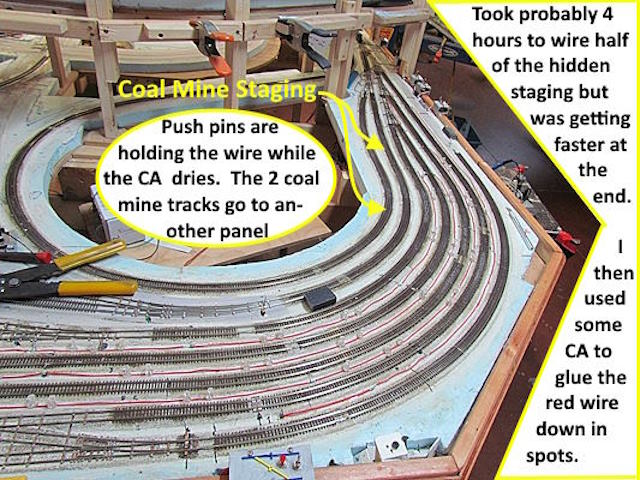
Since the wire is 'solid' and not stranded it stays in place well. I did put a drop or two of CA on it every 6-8 inches to also help with that. It won't be moving if I brush against it while reaching into this area if I have to .
Another partial day for this wiring and one to finish up the turnout control wiring and I'm about done here. I'll wire the two coal mine tracks to a control panel on the side of the layout where I'll be able to observe the coal mine complex and running the trains there better.
A link to this whole build ( HERE ).
=========================================
...........................On..............e.........Next Page If There Is One