.................................. Return to Sumner's Home Page....
Return to N Scale RR Main Menu........... Return to Building UP's Canyon Division Menu
=========================================
...............Previous Page.............................Next Page If There Is One
=========================================
… .--- Two Tunnel Portals to Staging Pt. 1 ---
============================================
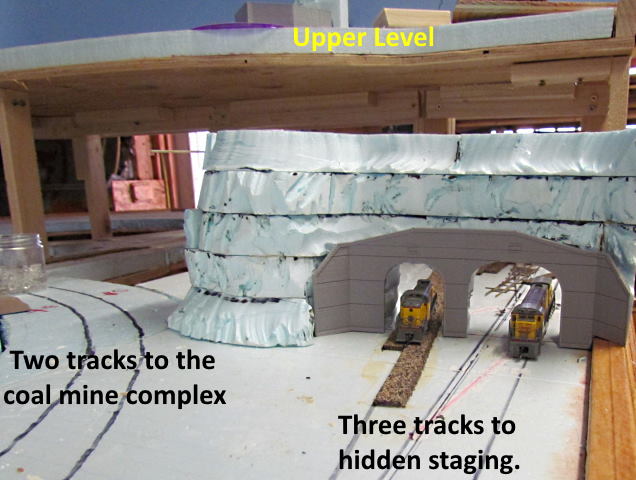
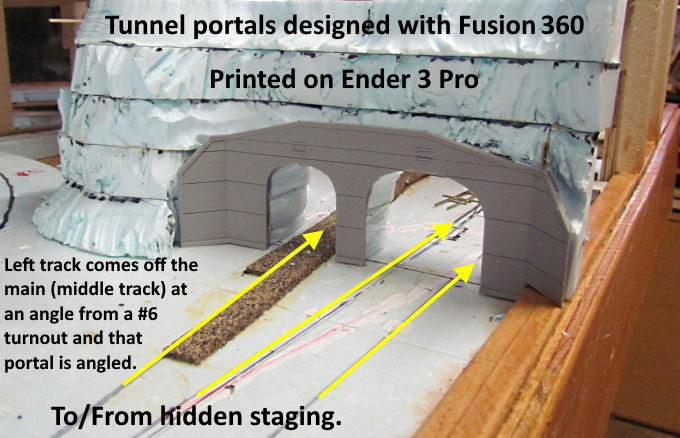
Before laying more cork past the staging yard I needed to finalize the tracks coming out off the hidden staging on the south side of the layout. There are three tracks there that go in or out of two tunnels there. One tunnel has the mainline tracks to the staging and the other is a single track that comes off the mainline at an angle and also goes to the hidden staging.
I used Fusion 360 to design the two portals along with some retaining walls. The portals were then printed on the Ender 3 Pro filament printer.
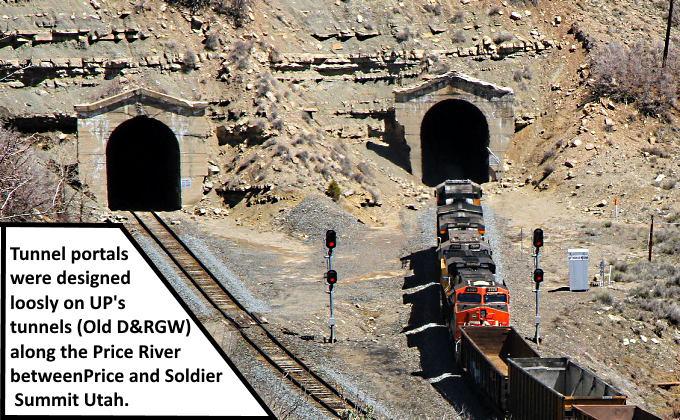
I designed the portals loosely based on portals I seen on UP's line that goes from Denver to Salt Lake City via Grand Junction, Co. There are a number of tunnels along the Price River as the railroad ascends to Soldier Summit. I'm not sure if there are any double track tunnels there are not.
I probably won't put these print files up unless someone wants them as the left portal is at an angle to the double track portal due to the track coming from a #6 turnout just out of the picture. I will put up print files for a single portal and double track portal that look like the ones above.
I also started cutting a rock face from the foam board as shown above. Still a lot more work to do on that but I think I have a start that I can work with down the road.
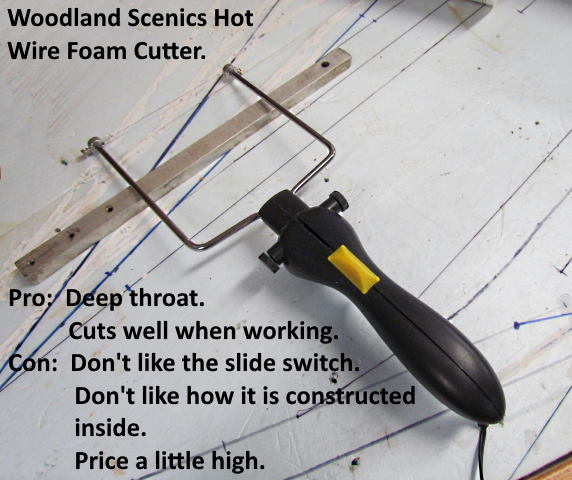
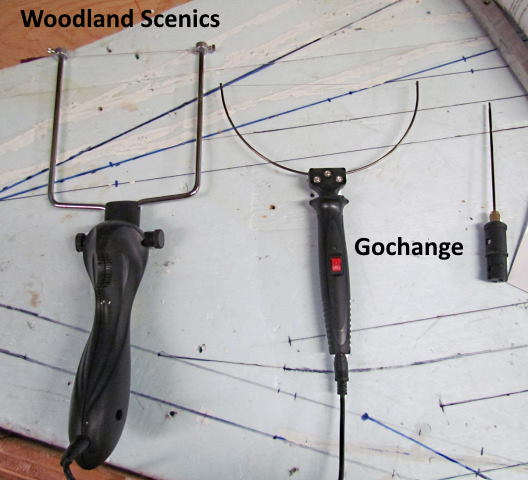
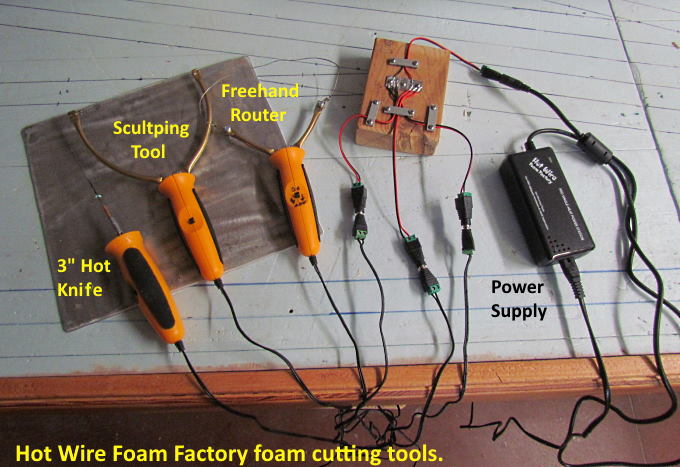
To do the rock work and after watching Dave at Thunder Mesa Studios doing rock work in foam I bought the Woodland Scenic how wire foam cutter above. I have mixed thoughts on it. The yellow slide switch on mine can be inconsistent but works most of the time I push it. Can't remember why but I had to take it apart and don't like the way it is constructed and would be hard to change the slide switch out for a different one (I was going to try doing that).
It does cut well and I like the deeper throat on it compared to the next one so if it works it probably is a good deal for someone especially if you don't see the need to cut a lot of foam. I'm going to have to cut a lot of it considering there is scenery that has to be made down both sides of the 24 foot long layout. It was $40.
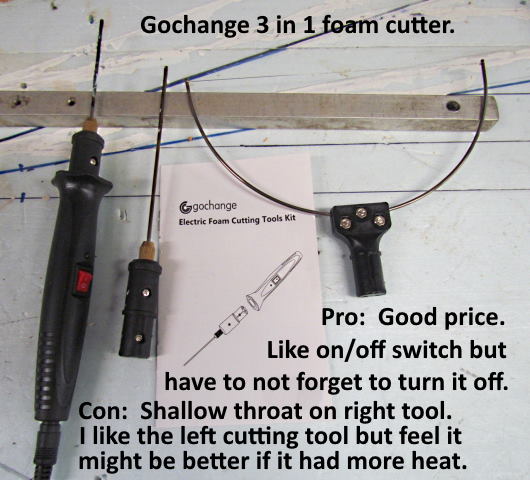
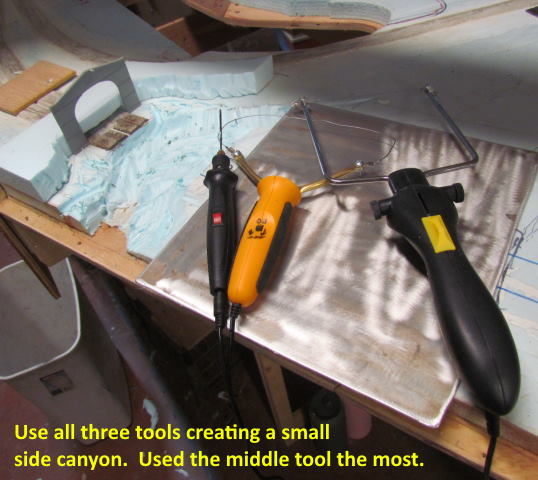
Venturing on I decided to invest $30 into the 3 in 1 kit from Gochange on Amazon and bought the tools above. I haven't used the right one much since I had the Woodland Scenics with the deeper throat. Mainly have used the tool on the left with the shorter hot knife. You can use any of the three on the handle to the left. The straight tool is nice for cutting into the foam to create features once you have it cut to a rough shape using the first knife. It works well.
The combination of the two above would probably have been fine if my layout was smaller but it isn't.
Researching tools I came across the Hot Wire Foam Factory sculpting tool shown above. It is unique in that the cutting wire is much heavier than on the two preceding tools where you stretch the wire taught between the two arms. You can shape the wire on this tool into about any shape you want and it will stay there and cut that profile in the foam.
So far I leave mine most of the time shaped as shown above. A gentle curve on the left side of the wire and more of a right angle on the right side. Using one side or the other and the angle of the tool you can sculpture a lot of different features into the foam. I love this cutter. It as right at $100 with the power supply. The power supply puts out a lot more current than the other cutters so heats fast and cuts fast. Needs the current in order to heat up the thicker wire also. The tool by itself is under $40 but you need a an adequate power supply to operated it. They have the kit with the items above with the fixed power supply that I've been more than happy with. You can pay more and get a kit that has their variable power supply if needed for your situation.
Since I now have the power supply I went ahead and ordered (don't have it as I write this) a tool that looks like the one above but has the thinner wire and a throat depth that I think is close to the WoodLand Scenics knife but also other features that I like. It was about $25. I also ordered a 3 inch straight knife like the one I've been using from Gochange. From what I can see it will cut faster with the more powerful power supply. It was $30. In hindsight I would of ordered these items from Hot Wire Foam Factory to begin with if I had know what I do now. If you are going to do a lot of foam work I'd look into them. They have different packages to choose from.
I'll go into more detail on the next page about using these tools.
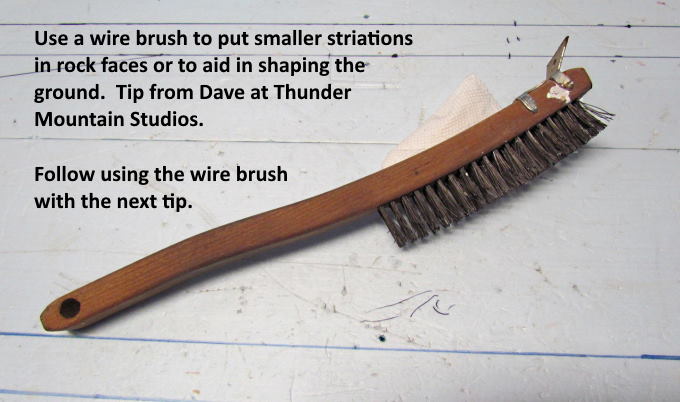
If you are going to do rock work check out Dave's YouTube Channel ( HERE ) he has a lot of good tips. One was to use a wire brush like above to create smaller striations in rock faces and you can use it to shape the ground and other features.
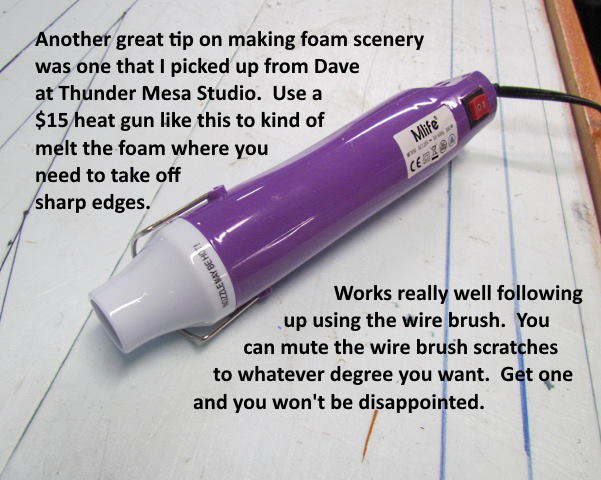
I like the effects you can achieve with the heat gun so glad I got it.
The Hot Wire Foam Factory 3” hot knife and sculpting tool came in that I'll use instead of the Woodland Scenics and Gochange tools. Tested them out and like how fast they heat and they work great.
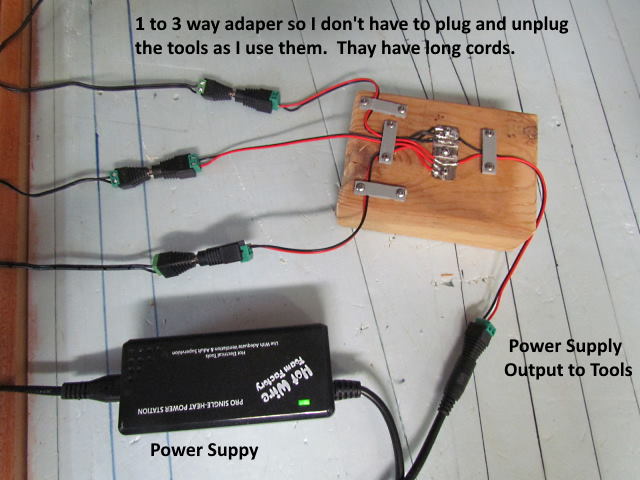
I didn't want to have to plug and unplug them from the power supply so made a little 1 to 3 adapter so I can have them all plugged in at the same time if I want. They have longer cords than the other tools I have so that is another bonus.
Another tip from his is to purchase an inexpensive heat gun like above. On the high heat it will melt the foam back if left in one spot long enough. Use it to round off sharp edges if needed. I will blow the foam away and soften the features you want to soften. Great tool to use..
I have a lot of rock work to create since I'm modeling the canyon and mountain terrain from where I live and I'm sure at some point I'll not want to see another piece of foam board but so far I'm enjoying this and the tools above are a good part of that.
If you came into the build here you can find the main index for the build ( HERE ).
=========================================
...........................On..............e.........Next Page If There Is One