.................................. Return to Sumner's Home Page....
Return to N Scale RR Main Menu........... Return to Building UP's Canyon Division Menu
=========================================
...............Previous Page.............................Next Page If There Is One
=========================================
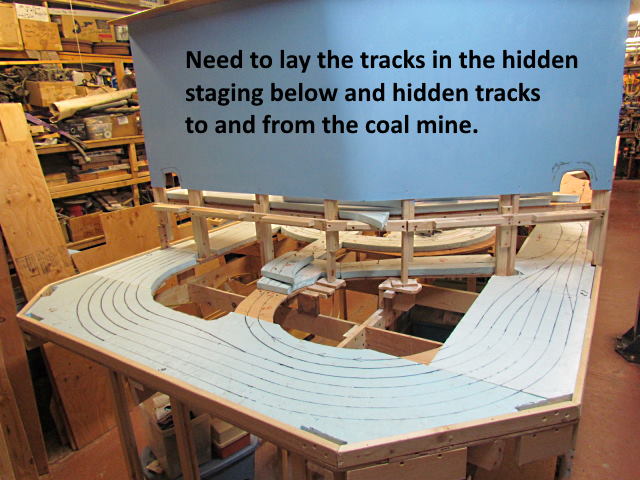
… …...........--- Hidden Coal & Staging Tracks Pt. 1 ---
============================================
Next step isn't fully defined at this point. I'd like to get the hidden track down going to the coal mine and for the hidden staging area so that I could run trains on it to make sure it is as bullet proof as possible. I'll still be able to get to it in the future but not as easy as now. It would also be best if I put down at least one perimeter track around the whole lower level of the layout so I can runt to and from the coal mine and hidden staging. Other alternative would be running as far as possible and then backing the train. Don't like this option for a number of reason.
The other logical step now would be to finish painting the backdrops with clouds, distant mountains and such. To paint them is either going to be a long reach or working by sitting on the layout as I've done at times. Problem is I need to build some of the scenery such as canyon walls and mountains that sits on the upper level and against the back drop. It could be removable at this point. I just need it there to be able to paint in the distant mountains.
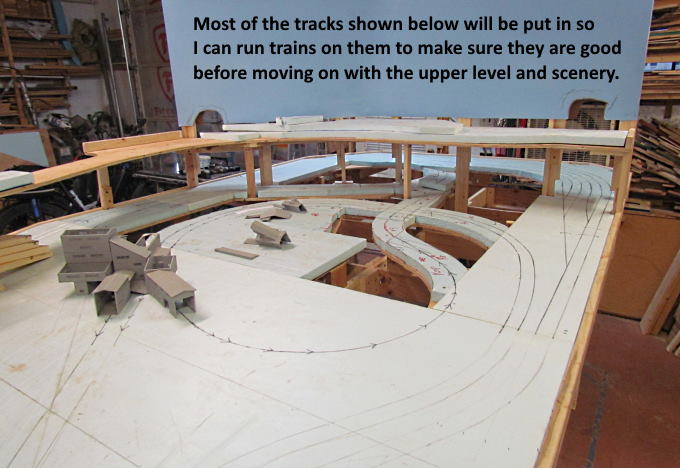
Plan now, I think, is to get the hidden track down, a perimeter track around the whole layout with some of it placed at the edge and not in a ways where it will ultimately be. I should be able to work over/around the perimeter track after getting it in and work on the upper level scenery and painting the backdrops. The main area that won't work well on is the tracks to and from the coal mine that are right where I need to sit to work on the scenery and painting of the end backdrop/divider on the side that faces the coal mine. The mine doesn't have to be there for this testing, only the tracks, so think I can make a platform out of some plywood I have that would sit a couple inches over those tracks for me to sit on and would be easily removable.
OK getting all of that down allowed me to picture it better myself. So onto laying roadbed and eventually track....
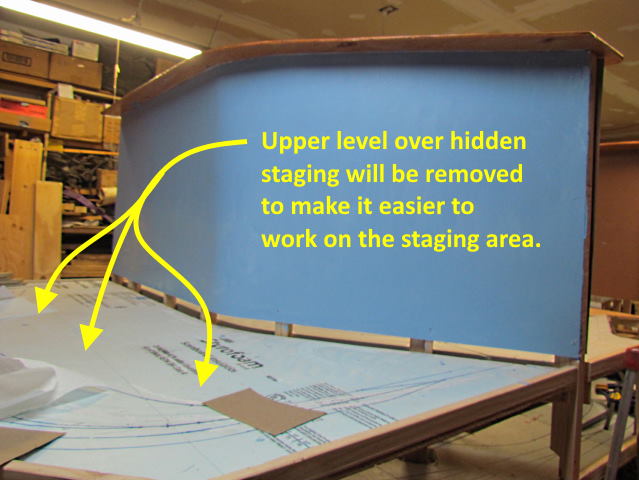
When I build the part above with the arrows going to it I attached it so that it would be easy to remove, at least with no trackwork on it.
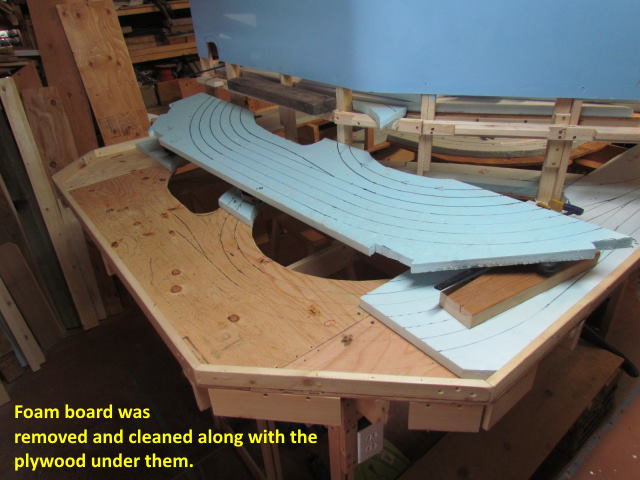
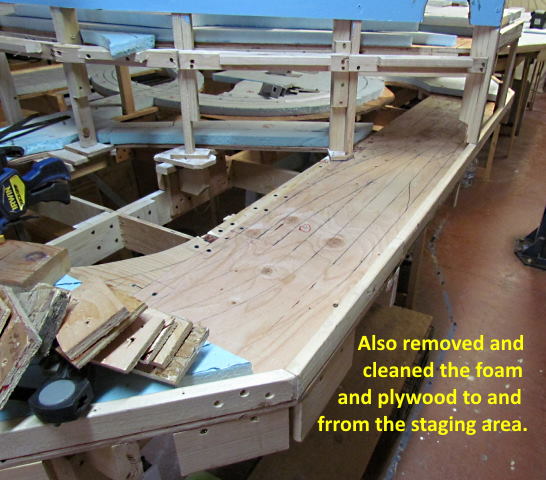
10 minutes later it was gone and the location of the hidden tracks to/from the coal mine and for staging were in view.
The tracks shown above are the ones that I'll build a work platform to sit over them while I work on the backdrop shown in the image. I'll probably try and finish that upper level and backdrop now. I'll lay the track and turnouts there. Wire them and try and finish the scenery there along with painting the backdrop with clouds and distant mountains. While I'm doing that I should be able to run trains over most of the track that will be place above.
To this point none of the 1 inch foam board has be glued down. I got all the pieces in place where I wanted them and then pulled one at a time back out and vacuumed the underside of it and the area where it was going.
I also did an initial cleaning of the areas where I would glue the foam board down in at this time. After the area was cleaned I replaced the foam.
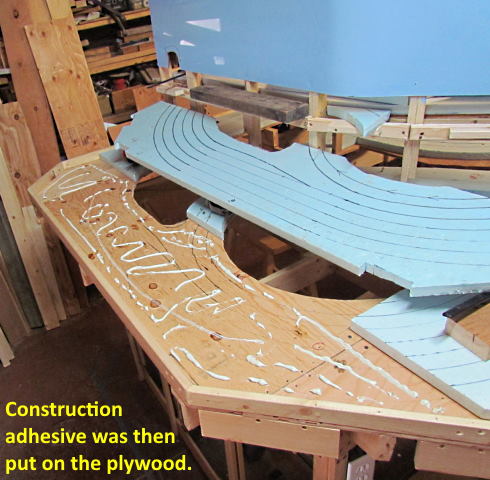
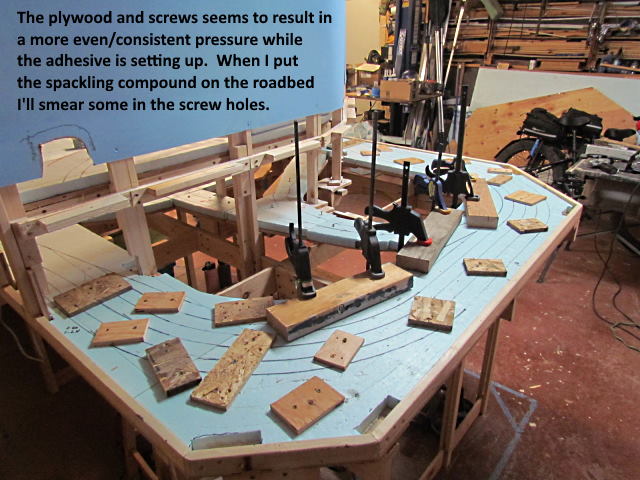
I used Liquid Nails next as an adhesive.
When I did my test layout ( HERE ) I used weight to hold the foam board down while the adhesive set up but went a different route here and plan on using it to hold the foam down while attaching it to the rest of the layout. I've got lots of scrap plywood around so took pieces and drilled two or three holes in them large enough that the 2 inch grabber screws wouldn't grab in them. Put them on the foam and screwed through the foam and into the plywood base. It is easy to apply a lot of pressure to the foam this way and I didn't get carried away. I like it as plywood can be positioned at the joint where two piece of foam meet and you are pulling them down together so they will be exactly the same height when the adhesive sets up.
The screw holes in the foam aren't large and will be easy to fill with spackling when I apply it to the cork roadbed.
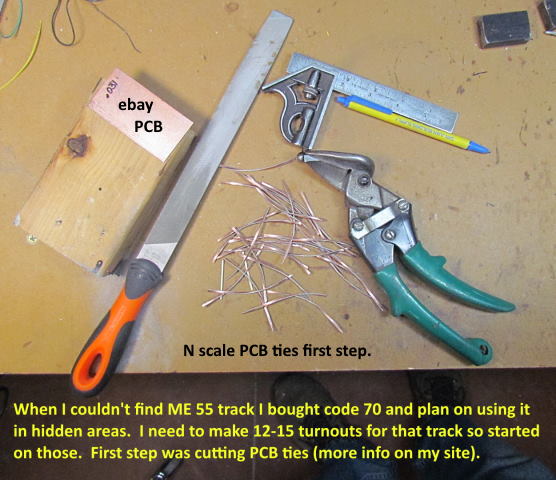
I need code 70 turnouts for the hidden track areas so started making them. I'm using ME code 55 for the visible areas but couldn't find enough of it for the hidden areas during COVID so bought some code 70 I found. I cut my own PCB ties as I find them easy to make, very inexpensive and can cut some any time I need them. You can find more about purchasing the material and how to cut and use it along with videos ( HERE ).
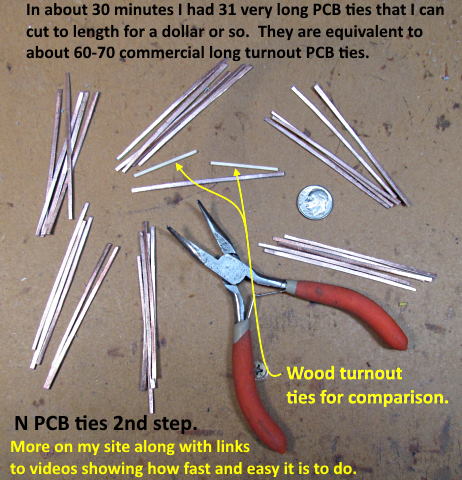
The ties twist when you cut them but are easy to straighten. Check at the bottom of the page ( HERE ) for the method and a video of how to do that. I like the flexibility of being able to make these ties extra long if you need them for a unique situation like what I ran into building a double crossover and a custom curved turnout to straight turnout recently.
If you came into the build here you can find the main index for the build ( HERE ).
=========================================
...........................On..............e.........Next Page If There Is One