.................................. Return to Sumner's Home Page....
Return to N Scale RR Main Menu........... Return to Building UP's Canyon Division Menu
=========================================
...............Previous Page.............................Next Page If There Is One
=========================================
…......................--- Elevator Section Part 3 ---
============================================
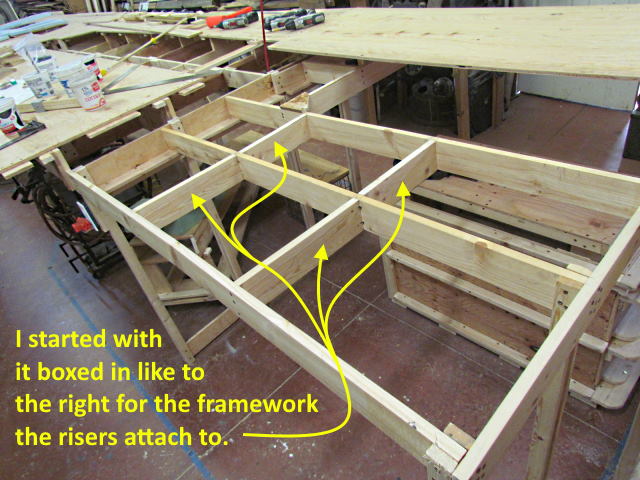
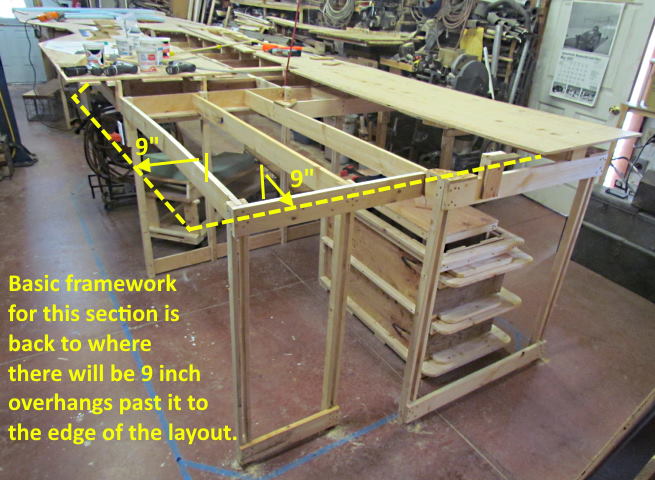
Framework for the last section is finished.
The framework in this section is a little different due to the track elevator being located in the section. There is less overhang by the elevator so that it can sit closer to the edge as only a single run-around-track needs to be at the layout edge.
.
.
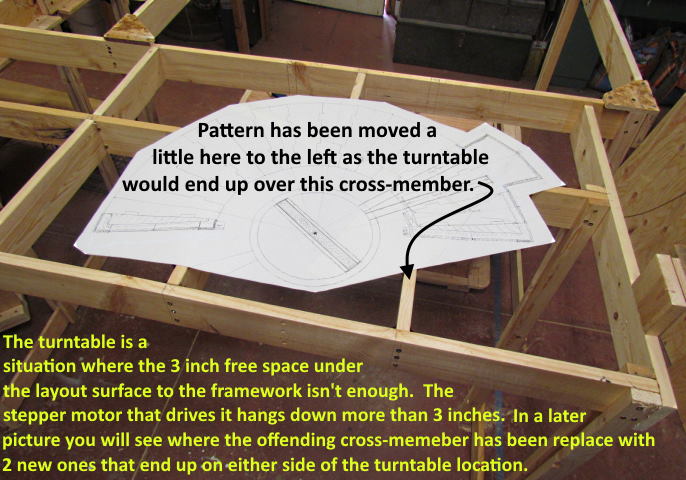
I'm glad I'd taken the time to make the Roundhouse/Turntable pattern. It allowed me to catch the framework cross-member clearance problem. It wasn't huge as I could of cut them out later from below and moved them but much easier now.
.
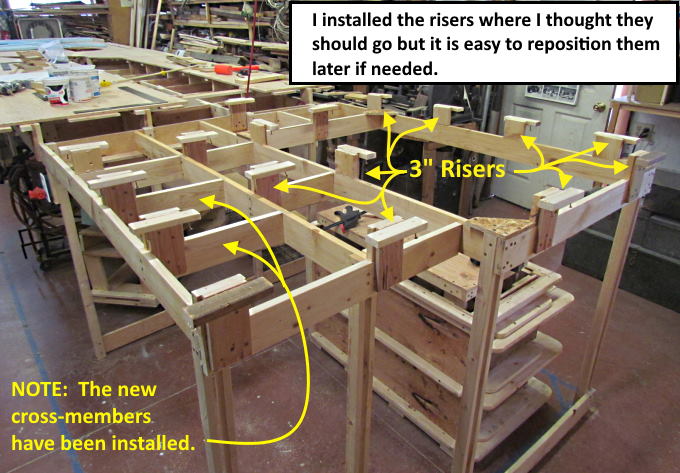
I've gone with this construction to have a 3 inch free zone below the layout about everywhere for switch machine clearance. Above I've placed the risers in enough locations to hold up the layout surface for now. Later if I need to move some as there is a switch machine in that area I only need to remove a couple screws I can get to from under the layout and move the riser a short ways to where it isn't in the way.
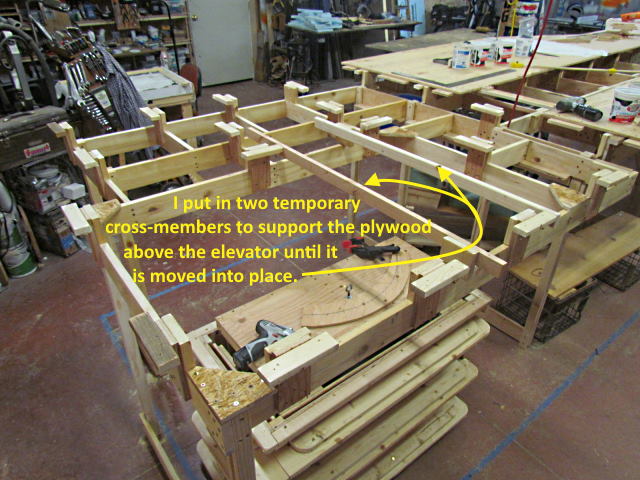
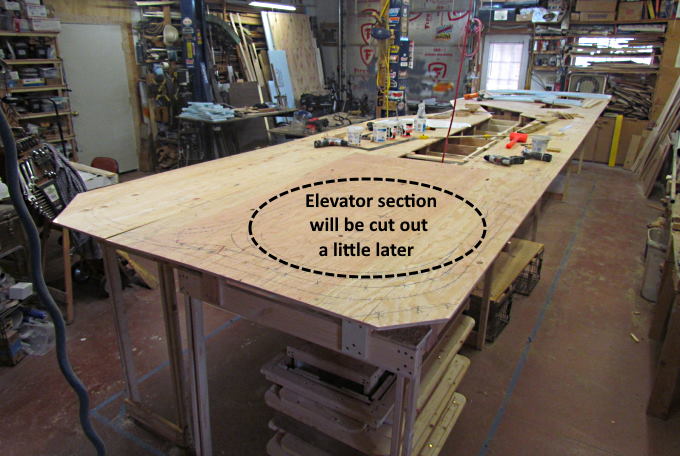
Some of the plywood in this area, the elevator track area, will be supported by the elevator once it is cut free from the plywood sheet in this area. I'm not going to make that cut until I've also laid out the upper level that attaches to the track elevator. For the time being I needed to support the plywood in that area so put in two long horizontal supports that can be removed from below later.
.
Time to start laying out the upper level especially where it will connect to the track elevator when it is in the upper position.
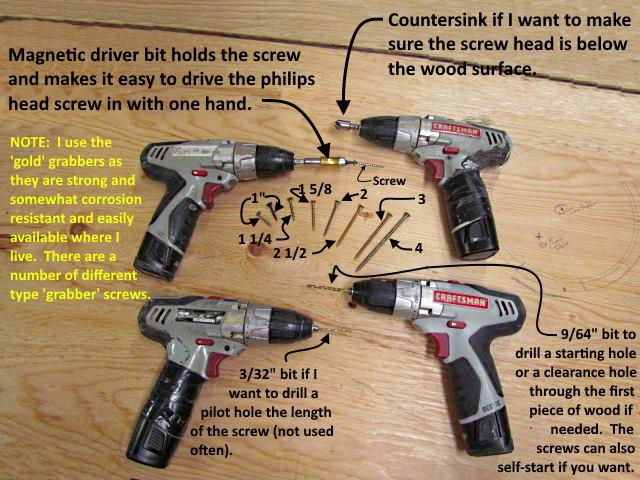
Thought I'd add a picture that hopefully explains the type of 'grabber' screws I'm using and the drills I use with them. I've built tons of stuff using them and love them and for what I've been doing and don't use old fashion wood screws anymore but I'm sure they still have there place in some instances.
The grabbers have a small diameter shank inside of the threads. Usually this means to prevent the wood from splitting you don't need to drill pilot holes like you would with most wood screws. If I'm using good lumber over 3/4” thick or plywood to lumber and the screws aren't close to each other I drive the screw in without a pilot hole or drill a shallow 9/6” hole just to make starting the screw easier.
The magnetic bit on the screw gun (drill with the bit in it) holds the screw. This is really handy and can really speed up construction. If you want to screw two boards together you don't need to clamp them together first in most instances. I'll hold the one board on the other with one hand where I want it. Then with my free hand I'll grab a drill and drill a pilot hole if I want one. Set the drill down and grab the screw gun with a screw on the bit and run it into the two boards. An easy and fast operation.
On to the upper level continued......
=========================================
...........................On..............e.........Next Page If There Is One