.................................. Return to Sumner's Home Page....
Return to N Scale RR Main Menu........ Return Turntable Menu
=========================================
..............Previous Page..............................Next Page If There Is One
=========================================
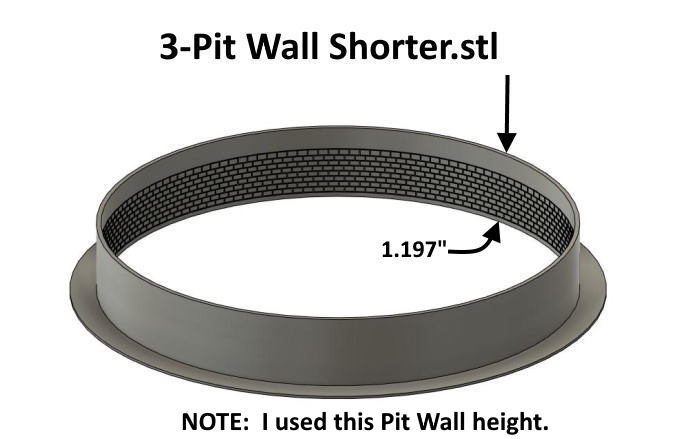
... --- N Scale Roundhouse Turntable Pit Wall ---
============================================
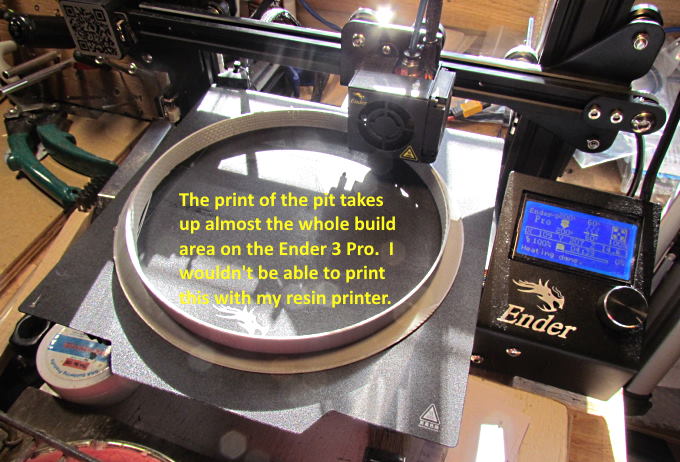
NOTE: If you are using Cura under 'Build Plate Adhesion' have it set to 'None' or you won't be able to slice it for an Ender 3. It will show that it is too large to print. I don't know about other printers.
=========================================
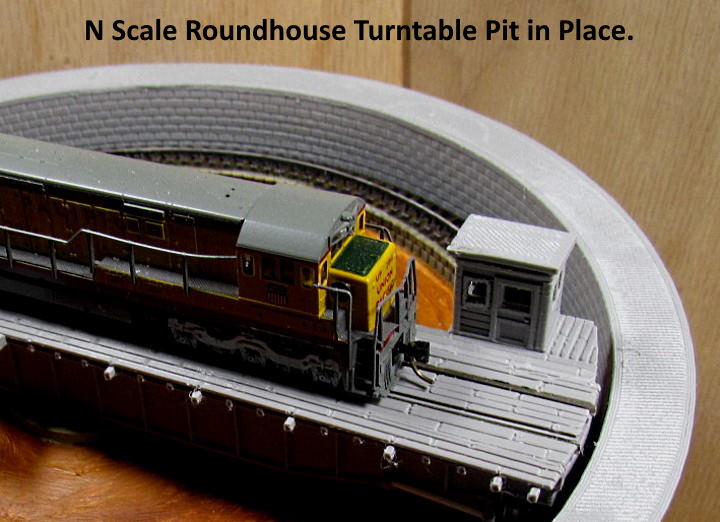
On this page the turntable pit walls are installed.
.
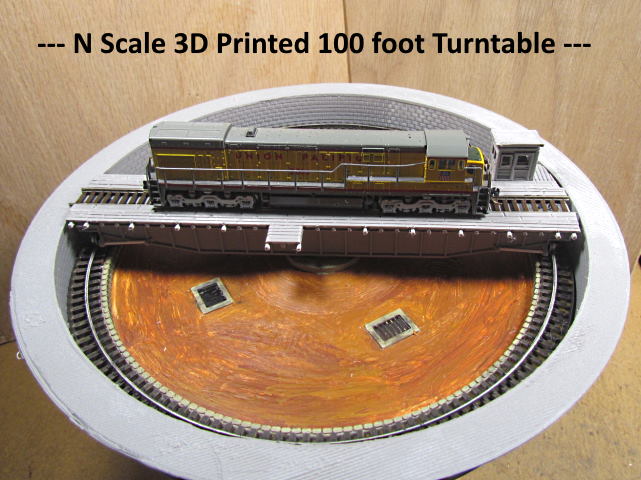
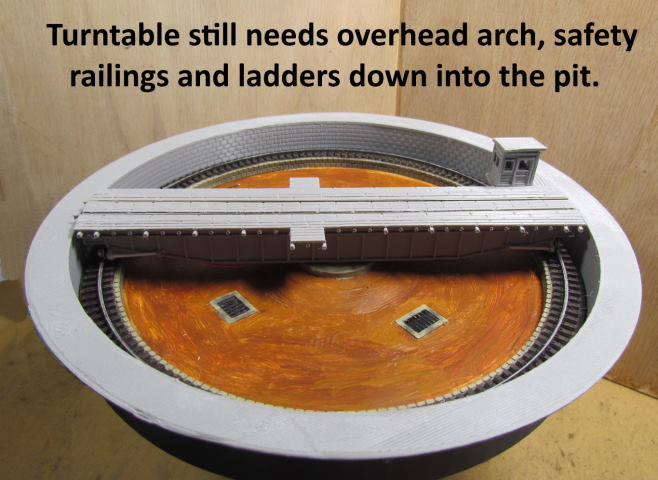
Finally things are looking like a turntable. A lot of hours of design work using Fusion 360 have gone into the project to get this far and more hours are still ahead as an overhead arch, guard rails and ladders still have to be designed. Also the pit build plate, pit floor, bridge track and now the pit wall are long prints using the Ender 3 Pro printer and documenting this is also pretty time consuming but I enjoy it.
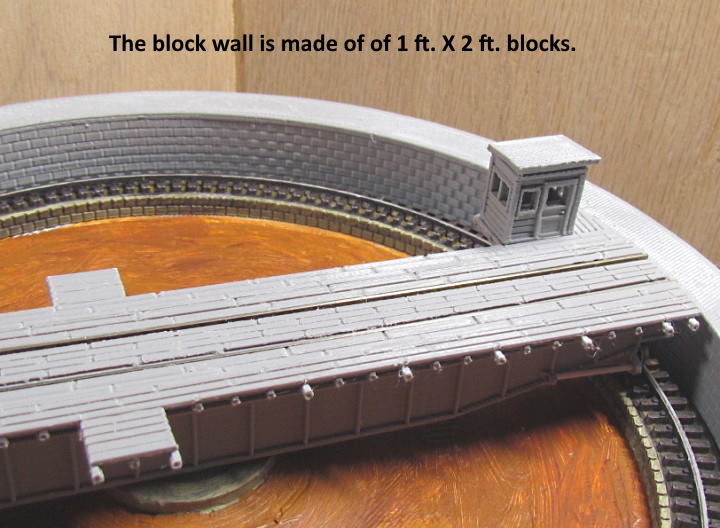
I saw a turntable with blocks for walls vs. the more common smooth sides and liked it so decided to more or less copy it and I'm happy with the results. The pit walls will be painted to match the short wall under the bridge track.
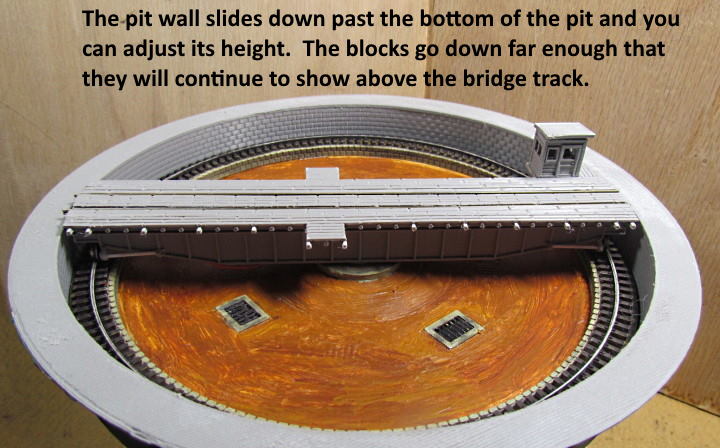
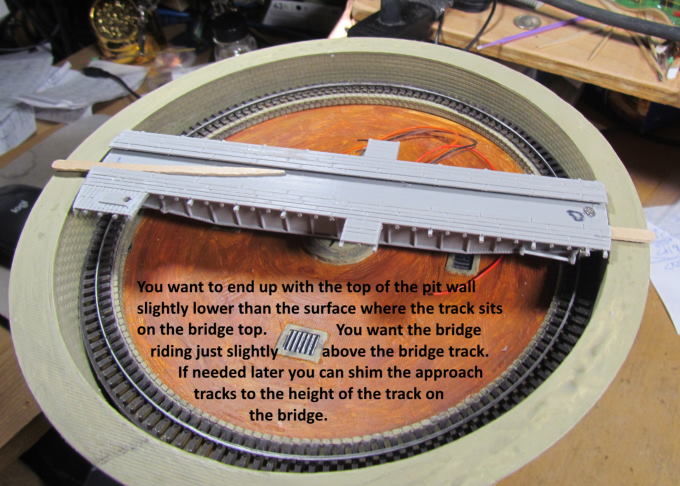
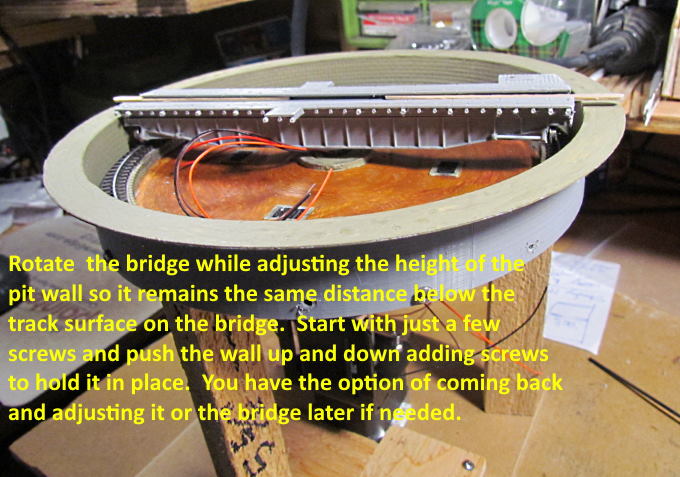
The pit wall was designed to slide down past the pit build plate/disc and the pit floor and the bridge track. I decided to make the lip of the wall that the approach tracks and roundhouse tracks will sit on slightly lower than the surface on the bridge where the bridge track sit. I figured it would be easiest to shim the approach tracks up slightly if needed. Since the pit can end up at any height I used the stir sticks on the bridge as indicators that helped me determine the final pit wall height.
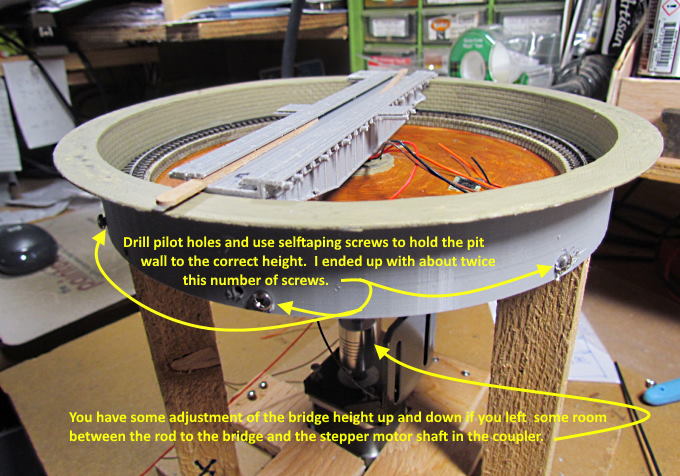
The pit wall is held to the desired height with #4 self-taping screws. I drilled pilot holes into the side of the wall and then screwed into the pit floor/bridge track area. I found that I needed two pilot hole sizes. One very small for the screw to screw into and a larger hole in the wall itself large enough for the #4 screw to pass though. If the wall hole is too small and the screw ends up screwing itself through the print filament it can cause the filament to split. If it does this it is out of sight but weakens the wall so make the wall hole large enough for the screw to pass though with adequate clearance.
If you left room between the rod to the bridge and the step motor shaft in the middle of the coupler you can still lower the bridge slightly if needed although it should be just barely above the bridge track at this point.
.
.
Next we will move onto printing and installing an overhead arch with lights and the wiring to them.
The print files for the bridge decking are on my thingiverse.com account ( HERE ).
You can find all the turntable files on my thingiverse.com account ( HERE ).
NOTE: I used the pit wall with the 1.197 height. I put the taller one there in case it might work better for someone.
=========================================
...........................On..............e.........Next Page If There Is One