.............................. Return to Sumner's Home Page....
Return to N Scale RR Main Menu.................. Return to Trackwork Menu
=========================================
...............Previous Page......................................Next Page If There Is One
=========================================
…..............................…--- Double Code 55 Crossing – Part 2 ---
=========================================
I'll finish the 'single track over double track crossing' on this page but most of it will be about how I'm building the 'thru track/guard rail' sections of the crossing.
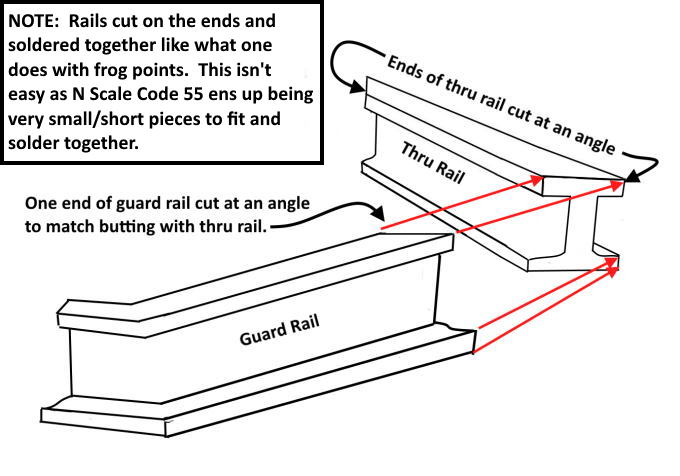
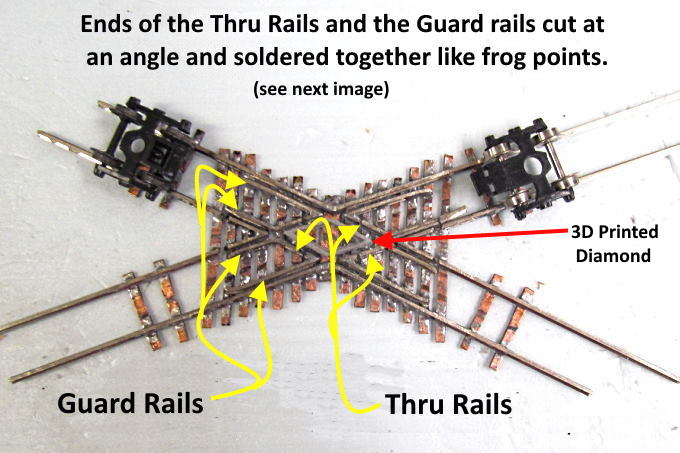
Basically the first crossing I build and the one in the next image I made the thru track and guard rail sections by soldering those pieces together using a miter joint. This proved to be difficult for me. Getting the length of the thru rail just right and then filing the angles was very time consuming and I didn't like the results.
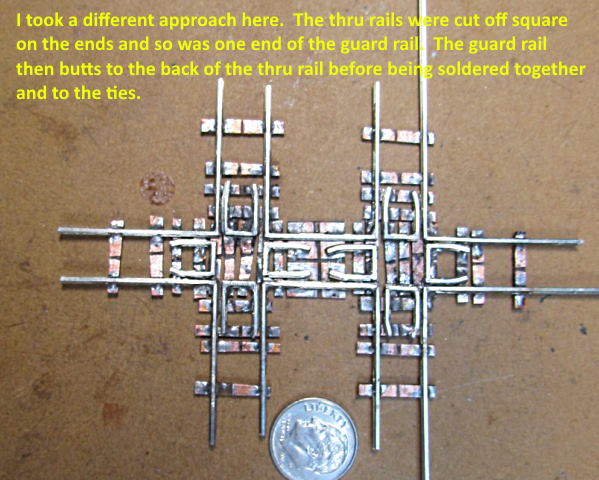
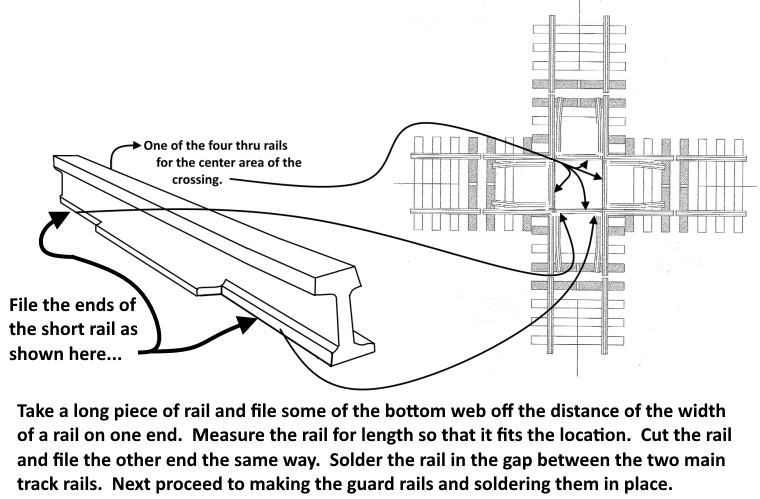
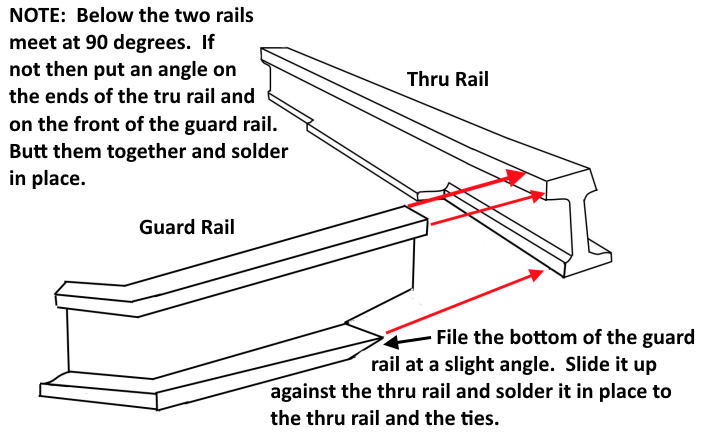
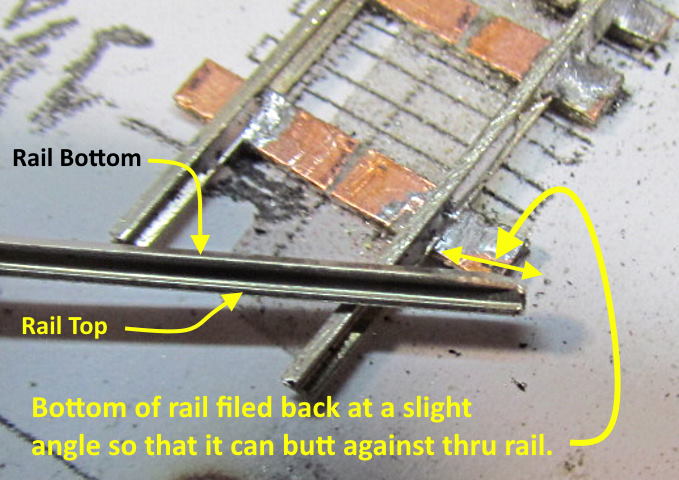
Below you will see that I'm now not using a miter joint but have gone to using a butt joint. In the case of this 90 degree crossing the angles on the cuts are at 90 degrees. For an angle different than 90 they will have to be angled. Still the thru rail is cut and angled to fit the space properly and soldered in. Next step is to cut the guard rail and angle it also and butt it up against the back of the thru rail. This angle doesn't need to be perfect. Angle it enough that you can put it in place and solder it to the thru rail and the ties and if you have a small gap at the back of the thru rail fill it with solder and file it down. It will look fine. More on all of this in the images below.
Trying it file and solder the thru rail and guard rails like frog points is slow and hard to do.
Above is the old way I was doing it. No more.
Now I'll move onto using a butt joint between the thru rail and the guard rails.
Clearance the back of the thru rail as shown above so you can slide the guard rail against it.
Don't worry if you file more than necessary. The rail is going to be soldered to the ties in that area so no problem.
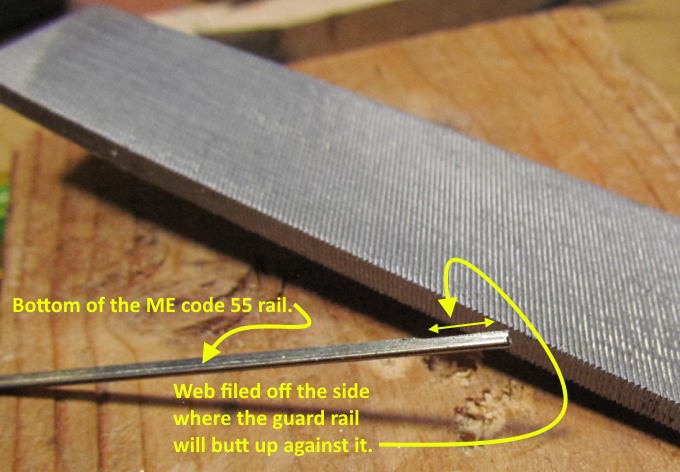
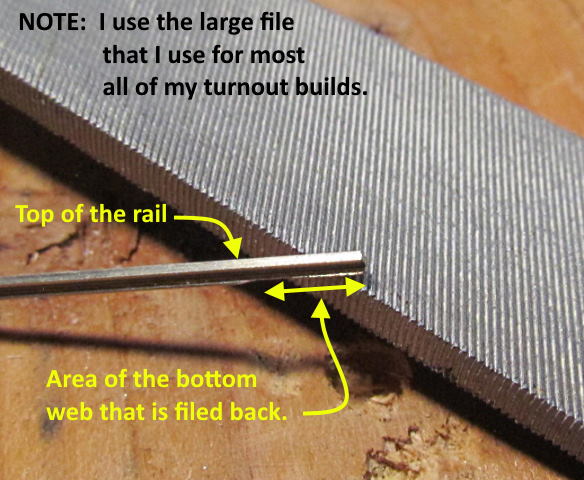
I use a large file for this. I bought one from Fast Tracks originally and a second similar one later. I use the file all the time building turnouts and for this crossing also. Looks big for the job but works much better than the small jeweler's saws I also have.
A few swipes of the file ....
…. on the bottom of the guard rail makes it easy to slide it against the thru rail. I file both the guard rail and thru rail on one end before cutting it to length. Then hold the rail with needle nose pliers and file the other end. This goes quickly as you aren't looking for a perfect fit.
You only are trying to clearance both rails so that you can slide the one into the back of the other one. If you take more than you need you will never see that you did once they are soldered together.
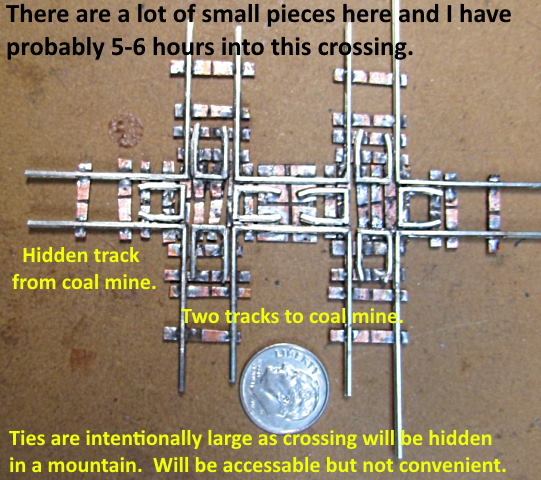
The work isn't perfect but seems to work fine with my test trucks and a short test car. These are way more time consuming than building a turnout but now that I've got it down a little better I won't put off building some more in the future. Saying that I still plan on building one more for the coal mine complex where the track that the train with the empties is on crosses the other double track and exits the loading area hidden by the building and mesa.
=========================================
...........................On..............e.........Next Page If There Is One