..................................... Return to Sumner's Home Page....
Return to N Scale RR Main Menu.................. Return to Trackwork Menu
=========================================
...............Previous Page......................................Next Page If There Is One
=========================================
….......................…--- 45 Degree N Scale Code 55 Crossing ---
=========================================
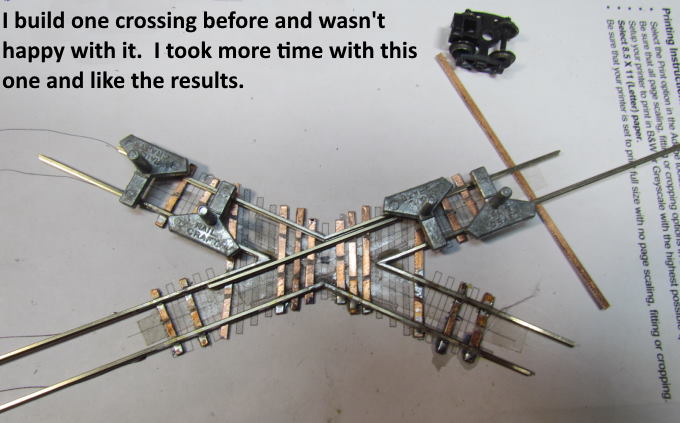
I need a minimum of 3 crossings for the layout and thought I'd take a break from other parts of the layout build and build the three of them. What follows is the easiest of them and for it I was able to use a Fast Track's template from there web site ( HERE ). A while back when I was making a number of turnouts for the layout I made another crossing ( HERE ) and never was very happy with it. Also I changed plans and don't need it. I've changed some of the building methods I used before on this crossing and on the next one I'll also post and I'm much happier with the end results. I'll try and share that here for anyone that is interested.
On a final note these take me a lot longer to build than a turnout. The basically have twice the number of frogs and the rails and guard rails in the center diamond area are quite a bit harder to construct than anything on a turnout. Don't be discouraged by that though as they also can be quite rewarding to build in the end (if they work).
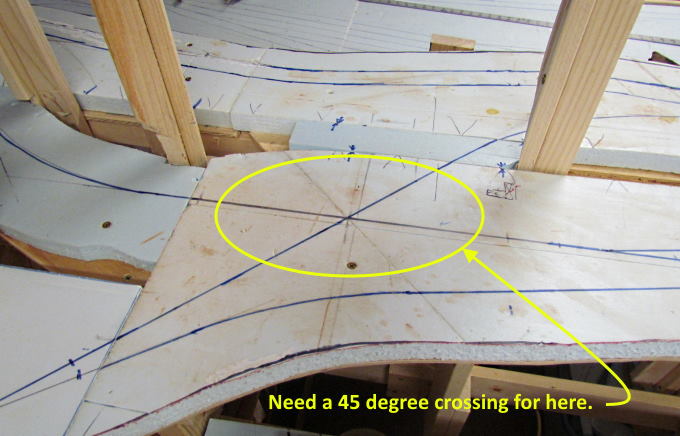
I needed a crossing in the area circled in yellow above. I had the tracks cross there at 45 degrees which meant I could use a printable paper template thanks to Fast Tracks (where I also buy rail and track building tools).
When I started building turnouts I bought PCB ties from Fast Tracks but now make my own as shown ( HERE ). If you don't want to take the time or want them all to look exactly the same I'd recommend buying ties from them. For me there is a cost savings (quite a bit) since I need a lot of turnouts (have built about 50 at this point and need more). Ties aren't exactly the same in the real world and mine aren't either but I'm good with that.
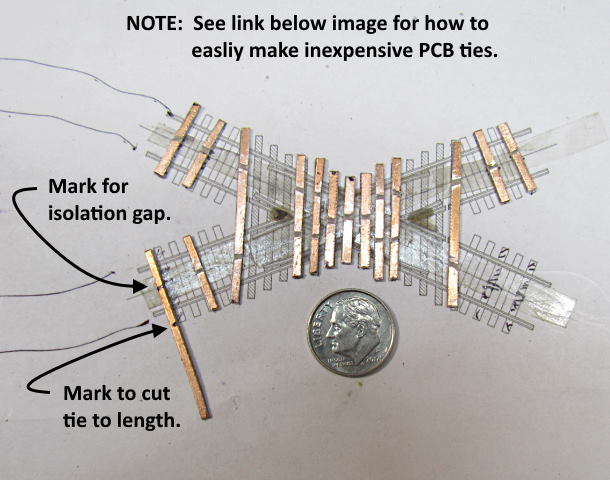
As shown above I take one of the long ties I made and use the template to mark the center and where I need to cut it to length. I'll get one more tie out of the one shown above.
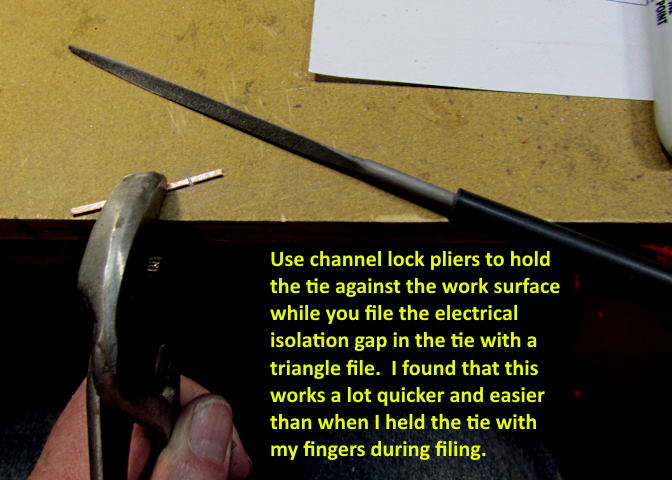
In the past I've used my fingers to hold the tie while filing away the electrical isolation gap in the tie. For this crossing I used channel lock pliers to hold the tie. I set the tie down on the edge of the work surface ( 1/2” plywood) and grab the tie with the pliers set to the right opening and hold it there while filing. I should of come up with this long ago as it makes it so much easier and faster with the tie being firmly held down while filing.
The notch doesn't bother me but the other day I saw where one person was using an oval shaped file. He still filed through the coating but the gap was wider and not so pronounced on the edges of the gap. Once painted it was less noticeable. I probably won't change unless I have a turnout or crossing in a place I want it to look the best that it can.
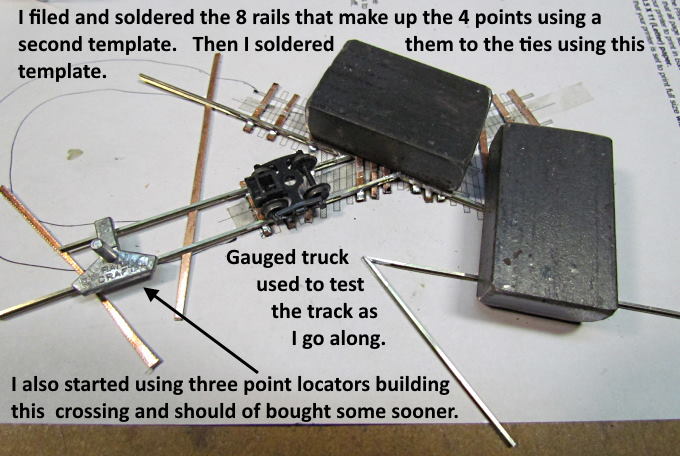
I file the rail and solder up the point rails on a separate paper template and then move them to the one with the ties on it. I hold the ties in place with clear double sided tape.
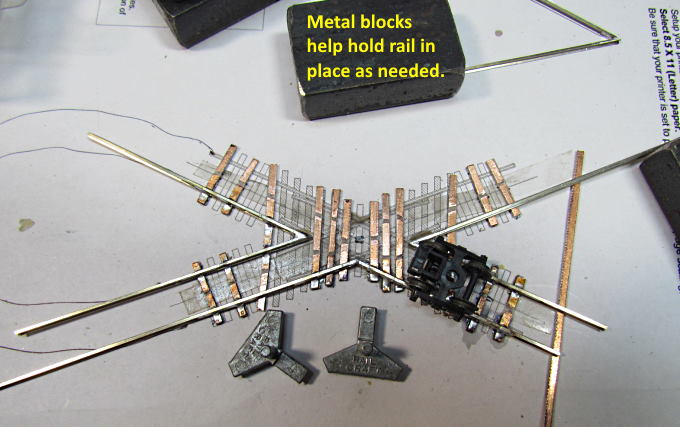
I have some small blocks of metal that are heavy enough to hold things in place when I need that.
I finally bought some of the three point track locators and they really help make the job go faster and also make it easier to align the rails. Should of bought these earlier also. I'm taking more time though to really try and get things aligned right from the beginning and it has paid off.
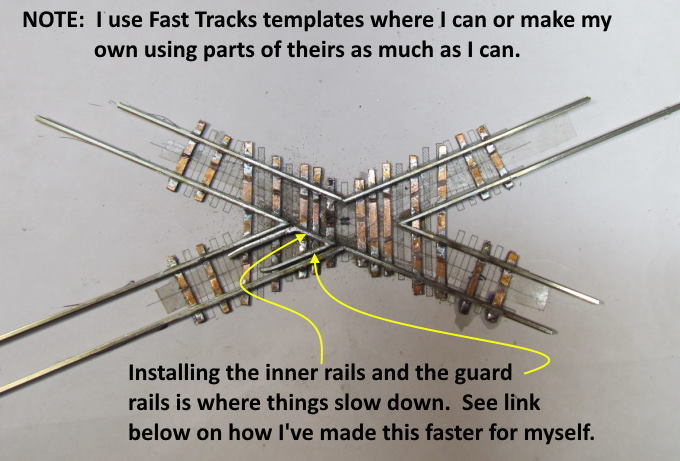
I find building the four sets of frogs to go pretty quickly. Cutting the four inner rails and the guard rails goes a lot slower for me. Late into this crossing and while building the next one I came up with a better plan and will post it ( HERE ). It still takes time to make these smaller parts of the crossing but not as much as before.
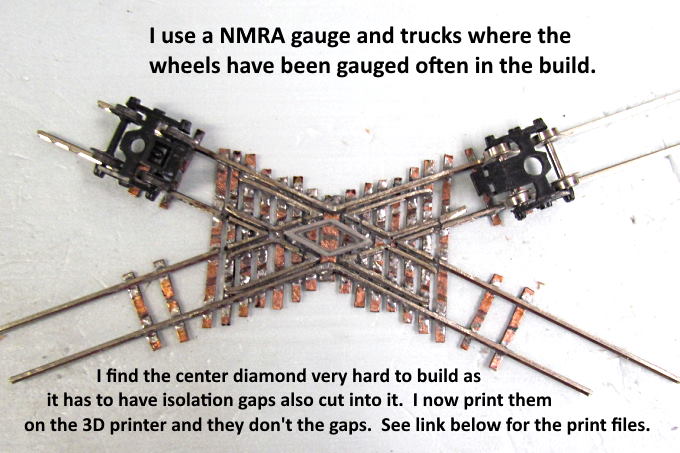
When trying to make the center diamond on the other crossing that I did and then also cut the electrical isolation gaps I finally gave up and designed some 3D printable ones as shown above in the center of the crossing. They don't conduct electricity so you don't have to cut gaps in them and once painted I think they look as good as or better than making them from rail and then having to cut noticeable gaps in them.
You can find more about them and links to the print files ( HERE ).
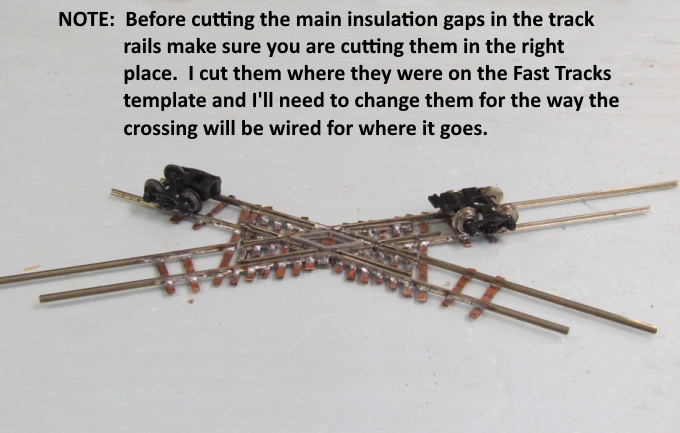
I put the isolation gaps in the rails according to where they were on the template. I should of waited as checking how this crossing will be placed on the layout I need to change them from the acute frogs to the obtuse frogs.
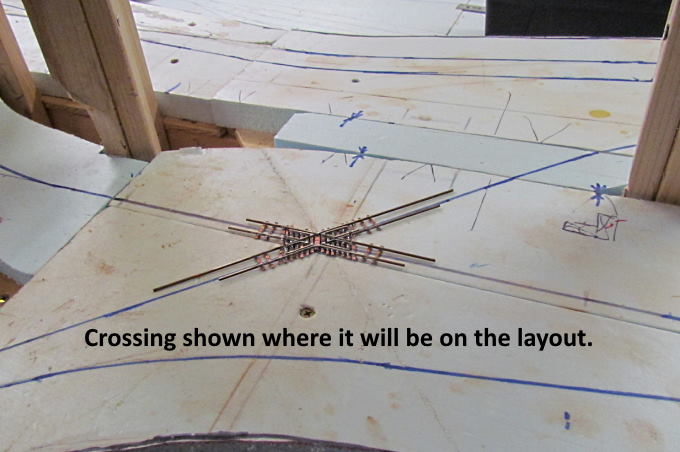
Here the crossing is shown in place minus the center diamond that hadn't been glued in at this point.
=========================================
...........................On..............e.........Next Page If There Is One