.................................. Return to Sumner's Home Page....
Return to N Scale RR Main Menu.............. Return to Trackwork Menu
=========================================
..............Previous Page..............................Next Page If There Is One
=========================================
.....--- N Scale Code 55 #6 Curved Turnout ---
.. --- Using Paper Pattern & Individual Ties ---
For my third turnout I decided to not use a Fast Tracks fixture as I didn't have one for a curved layout but they do have them. I wanted to try using a paper pattern that you can download from their site instead. Fast Tracks also makes QuickSticks ties for curved turnouts but I decided to go with the individual ties again since I had those on hand. I was happy with the results and will do more of these in the future as they add more flexibility to the track plan.
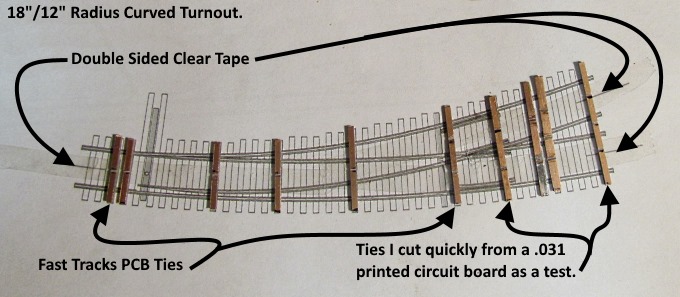
I printed a couple of patterns for a curved turnout with an 18” outer radius and a 12” inner radius. I plan on trying to stay with a minimum 18 inch radius for my mainline so this would work well in that situation.
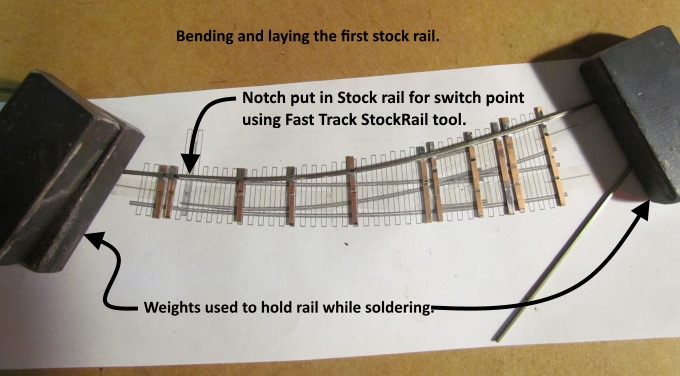
I tried to get the stock rail's curve to match the pattern as close as possible since there would be no fixture holding the rail. Instead I used the weights I had made to help hold it in place as I soldered the rail to the PCB ties. I started with one of the center ties and worked outwards. After soldering and without the weights on the rail I made sure it still matched the pattern as close as possible.
Often I can solder and hold the rail flush to the tie at the same time with a finger but sometimes that doesn't work so well. I'll then solder the rail to the tie. Then pick up the T-handle allen wrench and push down on the joint and reheat it until the solder flows. This then results in a good flush joint. If I need to slide the rail one way or the other to get the rail in gauge I'll use the wrench to push sideways and down at the same time to move the rail as I reheat the solder joint. You can get a set of these cheap at Harbor Freight. The one shown is also used to open and close the StockAid tool and the PointForm tool.
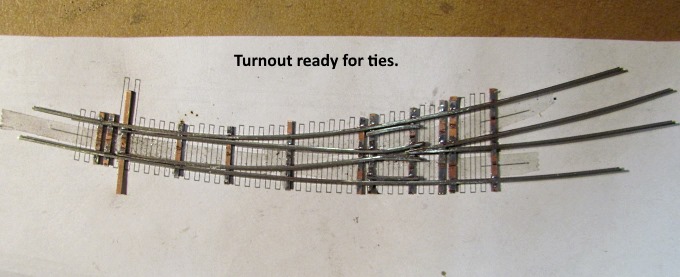
At this point the turnout is ready for ties. I had to spend more time moving the rails slightly to get things in gauge. I used a MNRA track gauge and a couple sets of trucks that I have checked the wheel spacing on carefully.
Using a Fast Tracks fixture makes this less of a problem as it holds the rails where they are suppose to be while soldering. The double sided tape holds the PCB ties pretty well but the rail is loose on top of them. Still you can sight down from above and get the rail pretty darn close to the pattern below it.
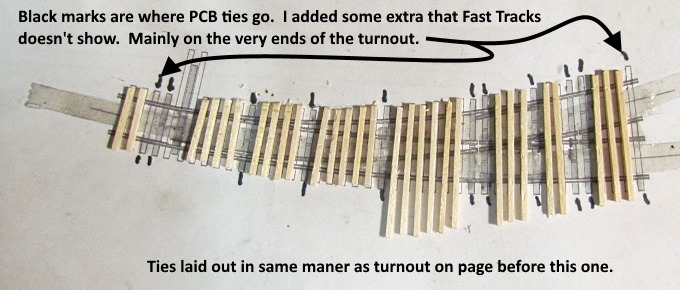
I marked the pattern where the PCB ties are and then removed the turnout from the pattern and laid down individual wood ties. I also add a few more PCB ties than what Fast Tracks shows on their patterns. I'm now doing this with the fixture made turnouts also. I like the added strength at the ends of the turnout.
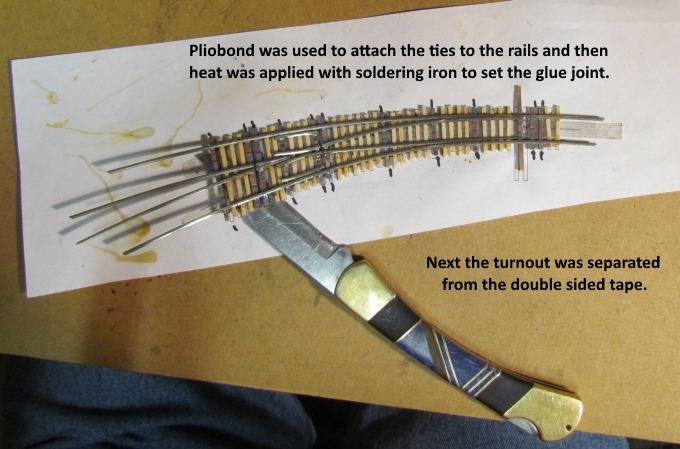
I used Pliobond to join the turnout to the ties in the same manner as I had done on previous turnouts and per Fast Tracks suggestions. I heat most of the joints with a solder iron shortly after gluing to help bond the joint. They also recommend doing this. The glue is like a contact cement and you apply it to both surfaces and wait a bit before bonding them.
It is a little tricky removing the turnout at this point from the double sided tape. I'll slide the knife blade between the tape and a PCB tie and gently pry the turnout away from the tape working back and forth while doing this and then also sliding the knife under the wood ties. Chances are some will come loose at one end or the other. You can usually reattach them by laying the turnout flat and heating the rail above the tie and it will rebond.
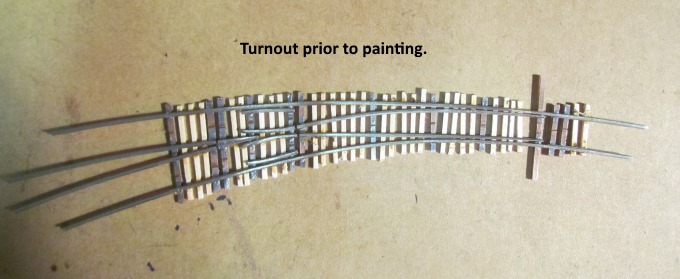
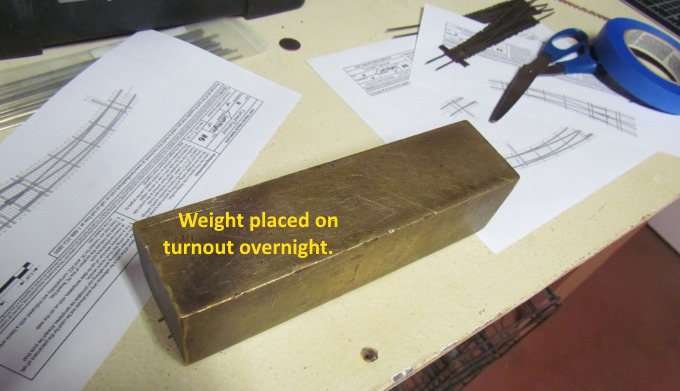
I took a picture of the turnout at this point and then ….
…. put a weight on it and let it set overnight to help with the Pliobond bond.
I then painted the turnout with the RUST-OLEUM Camouflage Earth Brown spray paint and wiped off the rail tops. I left some wood ties out by the throw bar and will add them later when I use the turnout and know which side of the throw bar will be used.
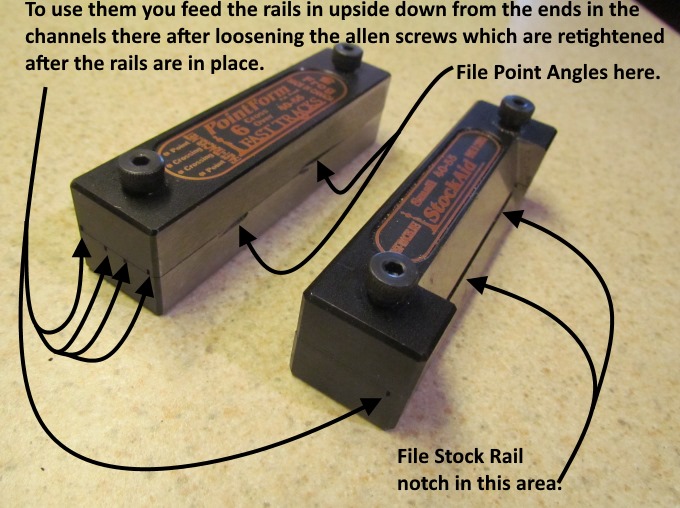
The PointForm tool and StockAid tool were again used to build this layout and even if you decide to make turnouts with out one of the Fast Tracks fixtures these two tools are almost must buys in my mind if you plan on building a lot of turnouts since they get the angles right and just make filing the points and notch in the stock rails so much easier and faster.
They are quick and easy to use.
I'm happy with the turnout and like the others running a truck or car through them is so smooth and it is pretty cool to see that you can build a nice looking and functional turnout from pieces of track and ties
=========================================
...........................On..............e.........Next Page If There Is One