.................................. Return to Sumner's Home Page....
Return to N Scale RR Main Menu.............. Return to Trackwork Menu
=========================================
..............Previous Page..............................Next Page If There Is One
=========================================
….......... --- 3D Printed Switch Machine --- Servo for Turnout Control ---
=========================================
I recently bought a Creality End 3 Pro printer (Mar 2020) and while looking on Thingiverse for items to print I found a really nice manual switch machine designed by Slepyhed whose project page is ( HERE ).
I printed one out and like it a bunch but haven's actually tried it on the layout at this point. I believe it will work fine. The way it is designed, it locks in the 'in & out' position. I did have one small problem that I'll address further down the page. Also it has no provisions for powering the frog so keep that in mind if it is something you need to do.
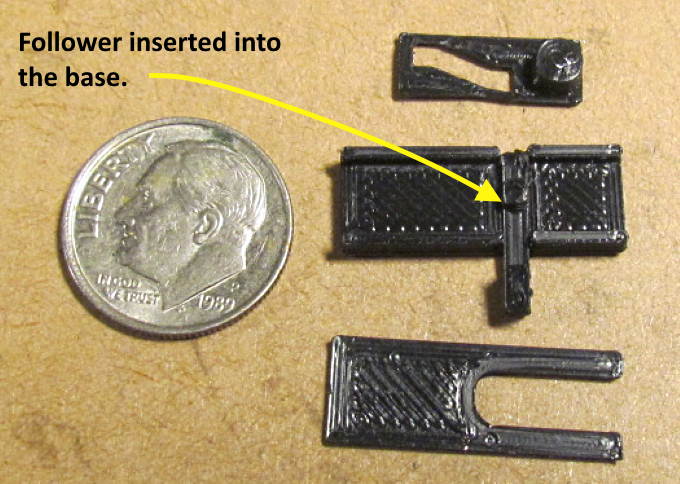
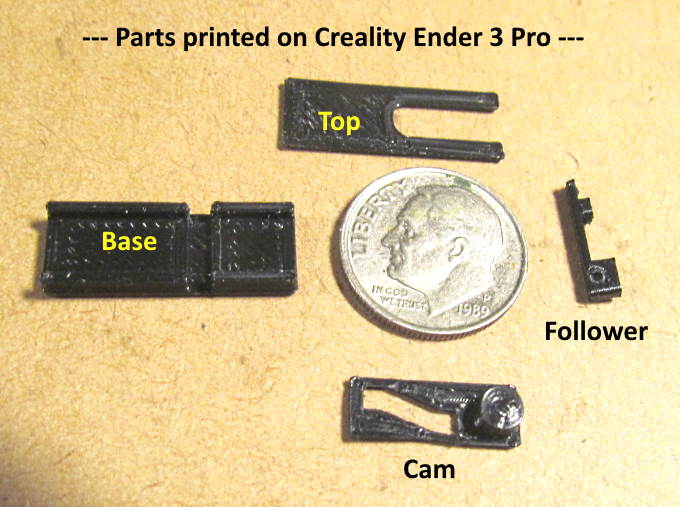
Above are the parts that make up the switch machine. This was about the second thing I printed with the printer. I've been impressed with the Ender 3 Pro, but have no previous experience with 3D printers.
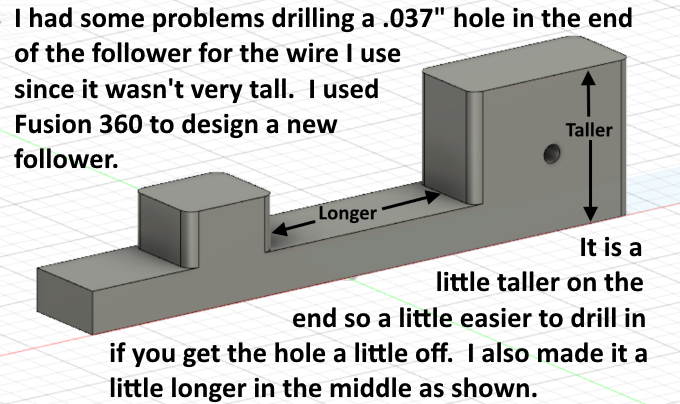
The 'follower' shown above I designed using Fusion 360 and is basically Slepyed's design, except taller where the hole is drilled through for the wire that runs to the throwbar. His is not as tall in that area and if you don't get the hole centered well it is easy to have the hole open to the bottom or top. I used a .037 inch bit for the wire I use. If you used smaller wire and drilled a smaller hole the problem would be less.
The follower slides back and forth in a slot in the base.
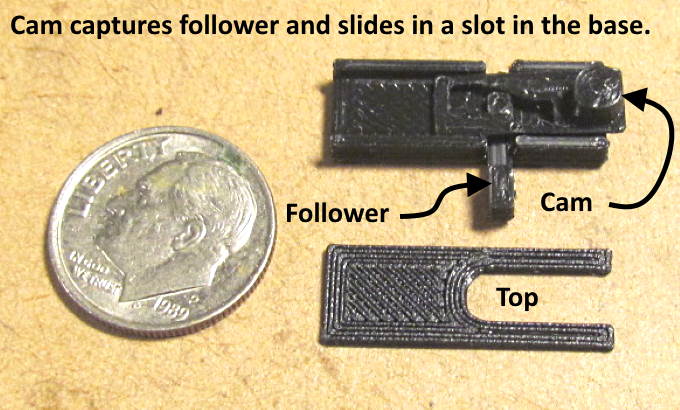
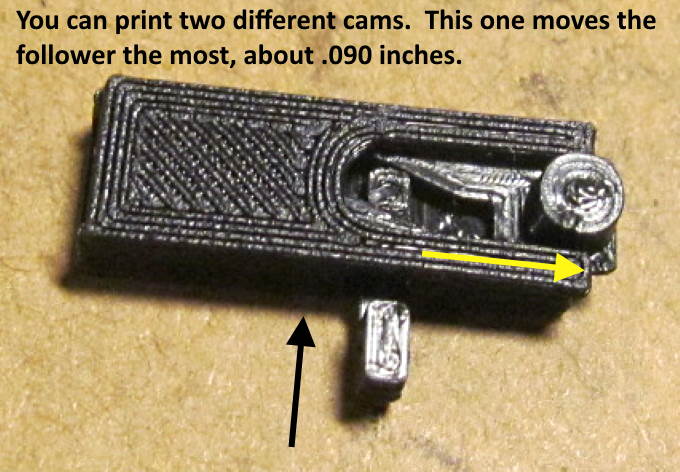
The cam captures the follower and as it slides back and forth it moves the follower in and out. Nice design and the switch points should be held firmly when thrown either way. You can print two different cams. The one shown moves the follower the most, about .090 inches. I didn't measure the throw for the other one but it is less.
You can put a “Z” bend in the wire to the turnout so that it will work when the throw is longer than needed and will also put a spring like pressure on the points.
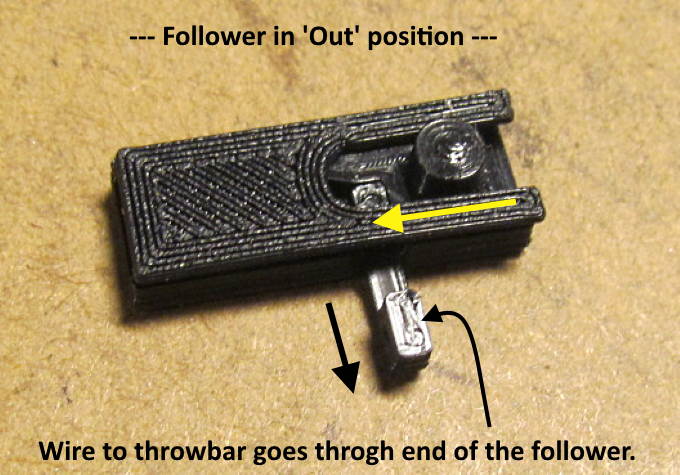
Above the cam has been slid to the left and that moves the follower out away from the switch body.
Above the switch machine has been thrown in the other direction.
As mentioned further above I modified the follower to make it easier to drill the hole as you have more room for error. I also made it a little longer in the middle section to keep the high part on the end from hitting the switch machine body when it was in the in position. Here is a link for the STL file for this modification ( CLICK HERE ).
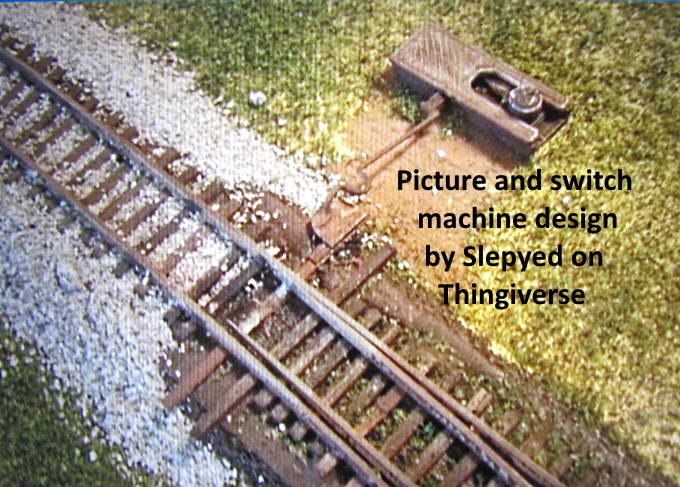
The picture above and the next one were taken and posted by Slepyed on his project page ( HERE ).
Above you can see the bend in the wire to help if the throw isn't exactly what is need.
He did a really nice job on this and I'll post pictures if I use these on my layout.
=========================================
...........................On..............e..........Next Page If There Is One