.................................. Return to Sumner's Home Page....
Return to N Scale RR Main Menu.............. Return to Trackwork Menu
=========================================
..............Previous Page..............................Next Page If There Is One
=========================================
--- Designing & Building a Custom N Scale Curved Turnout --- Servo for Turnout Control ---
=========================================
On another occasion I designed and built a curved turnout that I couldn't find a template online for. You can find that ( HERE ). This turnout build will be somewhat similar but different and I think I like it better than what I had done on the link above.
You have the option below to work off of a trackplan that you have on your computer that can be enlarged for the portion where the turnout is located or you could work off of a full size drawing that you did by anouther means. If this is the case skip down to “Part II” below.
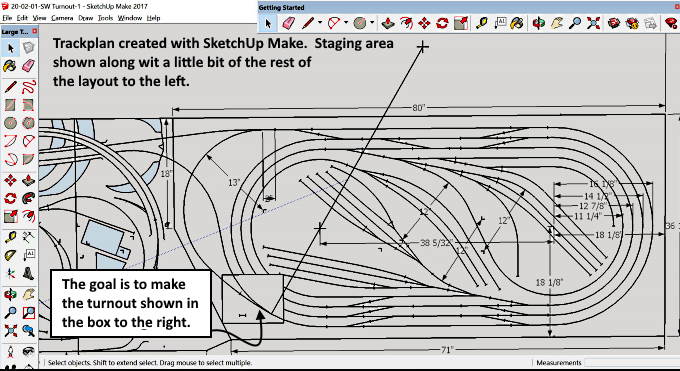
I am using the free CAD progam SketchUp Make to design the trackplan for my layout. I'm building the staging yard first to gain skills in building turnouts and track laying. Most of the turnouts in the staging yard or standard turnouts that you can find templates for and a number are #6's. I have a Fast Tracks fixture to speed building them since I have a lot of them and will have a lot more on the rest of the layout. Also along with the Fast Tracks fixture I have the PointForm and StockAid tools that go with it and will use them in this build to speed things up.
=============
Part I:
In Part I you will see how I took a turnout from my trackplan that was created with a CAD program and printed it out as a full size 1:1 drawing that will be used in Part II.
If you have a full size drawing showing the turnout's routes derived from a different means skip to Part II. For instance, if you have the the trackplan drawn full size on your layout, you could make a tracing of the turnout area and use it in part II.
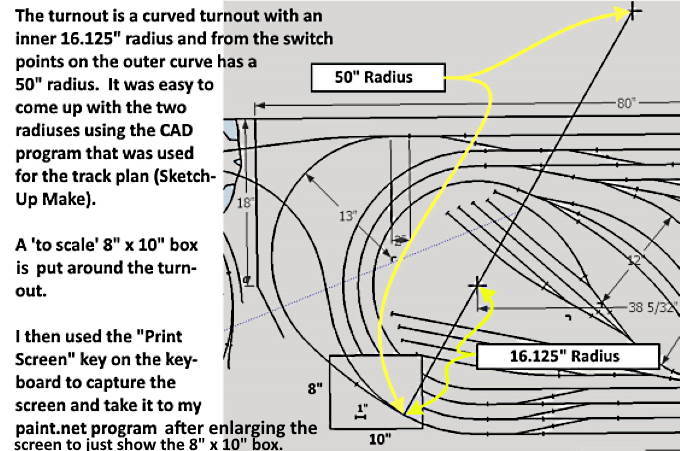
The turnout I needed to build is the one shown in the box above near the bottom left side of the trackplan. It is a curved turnout with a very slight turn on the through route and a sharper curve on the divergent route.
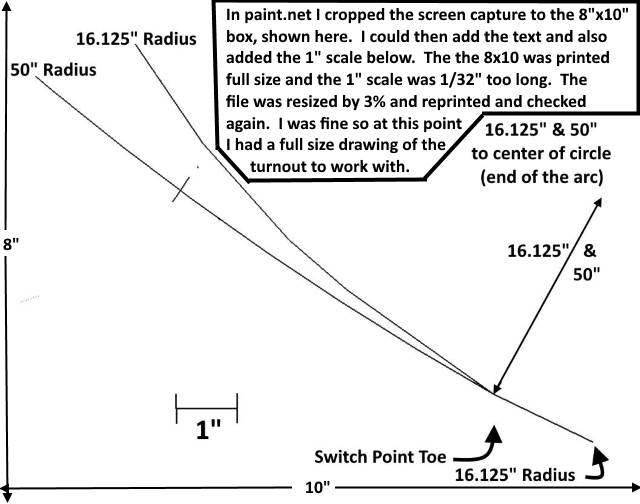
It was easy to use the CAD program to determine the two different radiuses of the turnout. A problem with SketchUp that I haven't found a solution to is printing a section of the drawing to full size. If I could do that I'd have full size drawing of the layout. To get around this I put an 8” x 10” box around the part of the layout I want printed full size. I choose that as it will print full size on a piece of 8 ½ x 11 printer paper. I also put a 1” scale mark inside the box so that after it is printed I can measure the scale and make sure it is 1 inch long. If it is then I have a 1 to 1 drawing.
Next and not shown is that I blow the box part of the drawing up to where the box fills most of the computer screen. At that point I then hit the “Print Screen” key on the keyboard and that captures the current screen. I then open paint.net which is a free image editing program you can download.
In paint.net you can crop the screen to just the box. You can then edit the drawing if you want as I did above. If you then print the box with paint.net and 'unclick' 'Fit Picture to Frame' it will print full size. Measure the 1” scale and if it is less or more you can goto 'canvas size' and change it a percentage point to where it is. Reprint the drawing and check the scale again. You can see more about that in the drawing above.
=============
Part II:
In Part II we will take a full size drawing of the turnout routes that was created as above or by a different means and use Fast Track templates to complete our template.
Here we do a major debarkment from the way I designed the other turnout. In that experience I drew in the stock rails and frog and almost all of the detail in SketchUp. In this case we will use Fast Tracks printable turnout templates to do most of that for us.
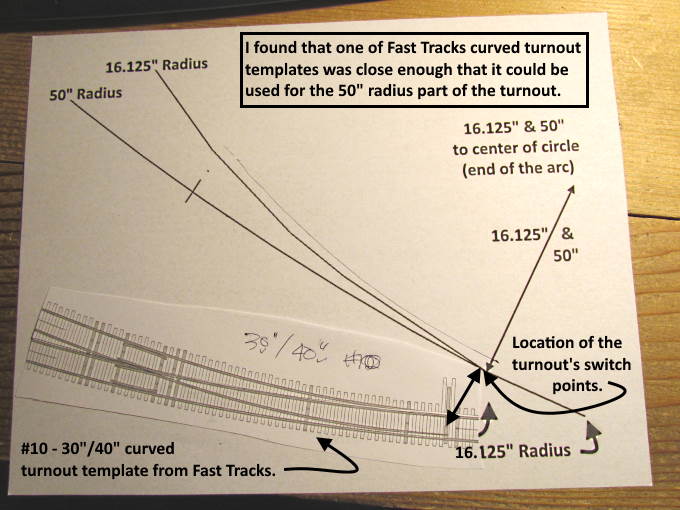
Look on Fast Tracks site for printable turnouts that have at least one of the routes with near to the same radius as what you are trying to achive. If you find one that has both routes with the desired radius you don't even need to be doing this. We are making a turnout template for an oddball combination.
The largest radius that I could find on their site was 40”. I printed it out and measured the 'scale mark' that Fast Tracks puts on their templates to make sure you are printing 1:1.
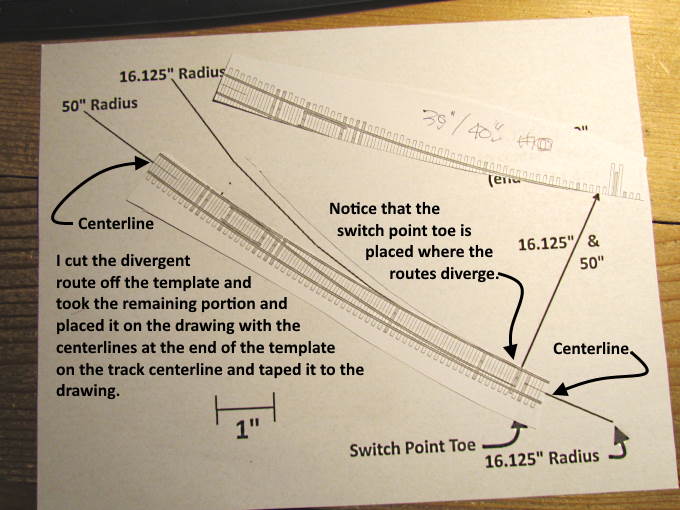
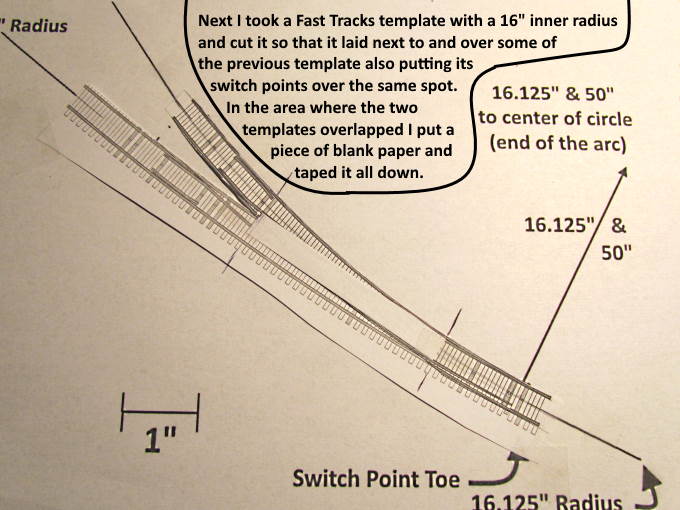
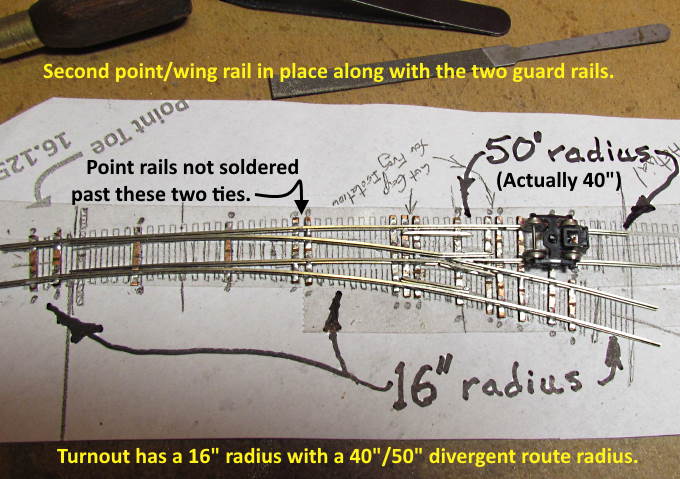
I laid it on my drawing and saw that it was a very close fit to the line that had a 50” radius so went with it. I also found one with a 16” radius which was close enough to work for my 16.125” radius for the route coming into the turnout and exiting on the inner divergent route.
It was quick and easy to cut both of the Fast Track templates and tape them to the drawing and create most of the template. I covered the center where they overlapped each other with a blank piece of paper as shown above.
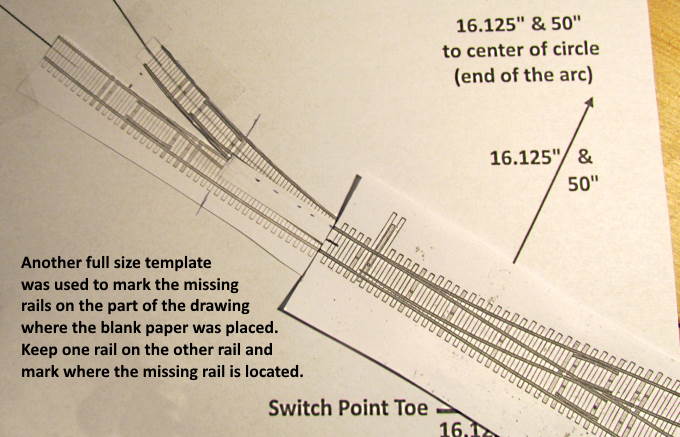
Next take another template and use it to make marks for the rails that we covered up with the blank paper.
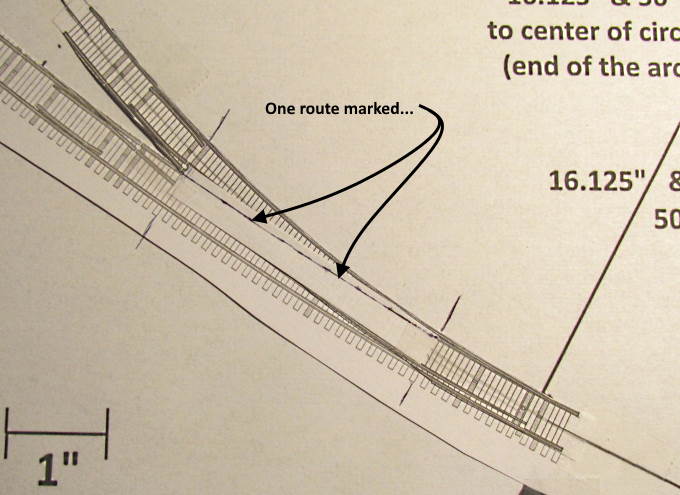
One route marked above.
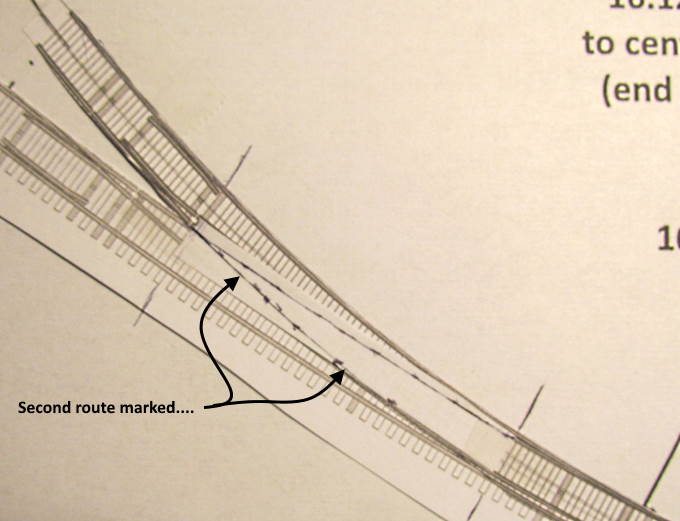
… and the second route marked.
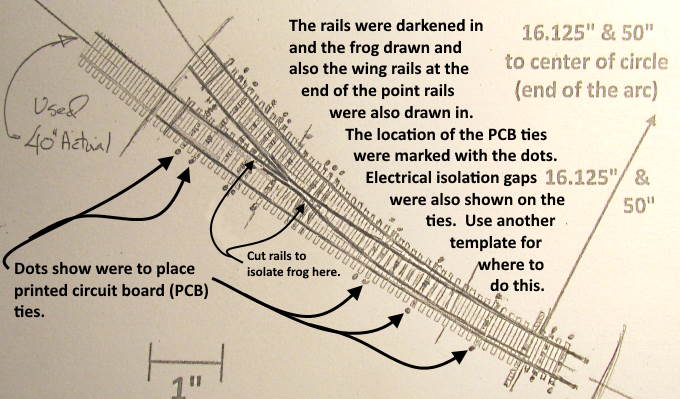
Darken the routes and draw in the frog and wing-rail detail. Print and make copies and measure the 1” scale mark to make sure they are the correct size as far as the distance between the rails and such.
=============
Part III:
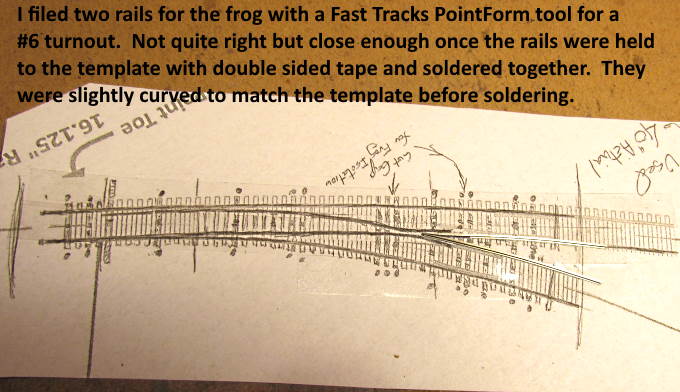
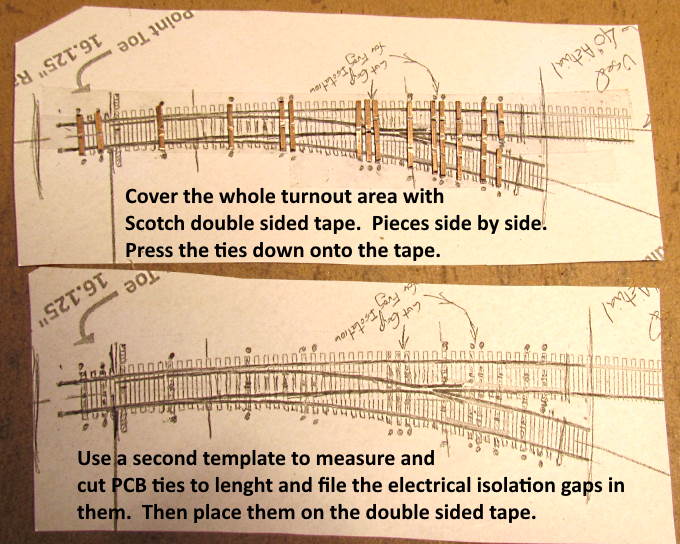
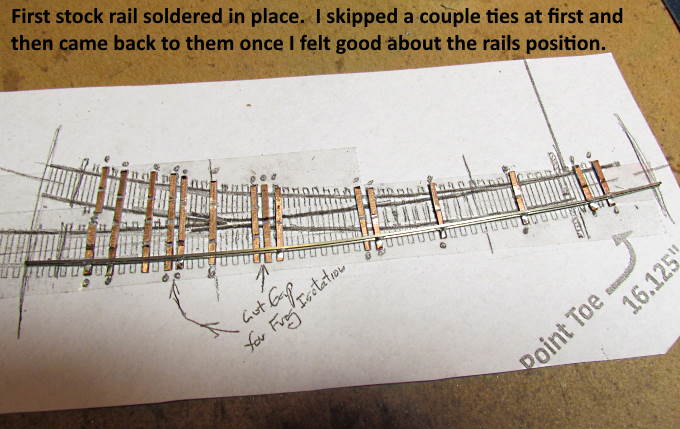
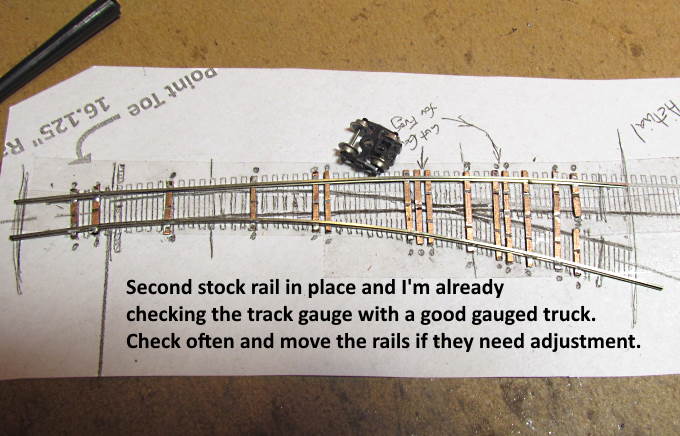
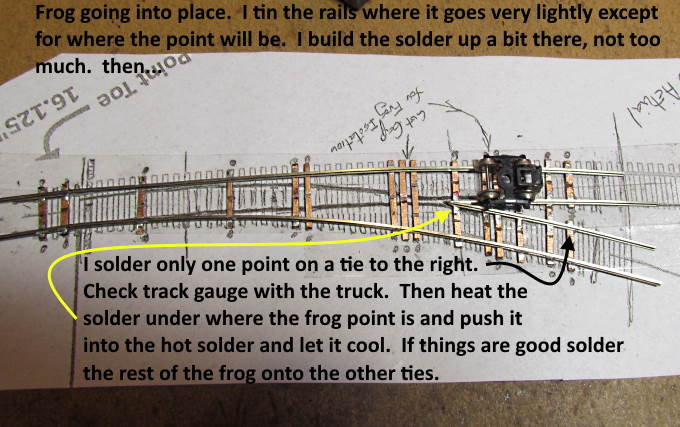
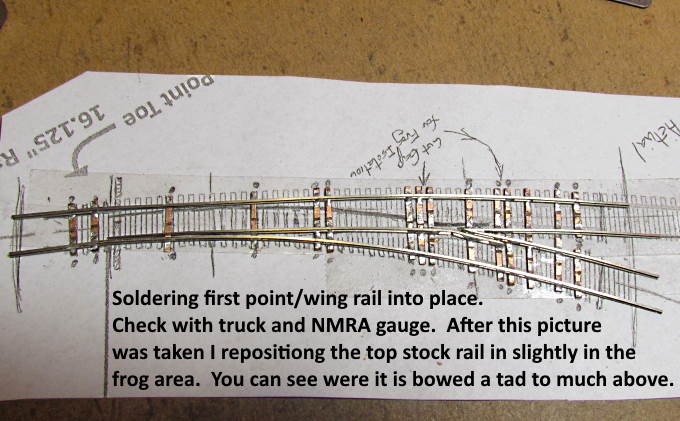
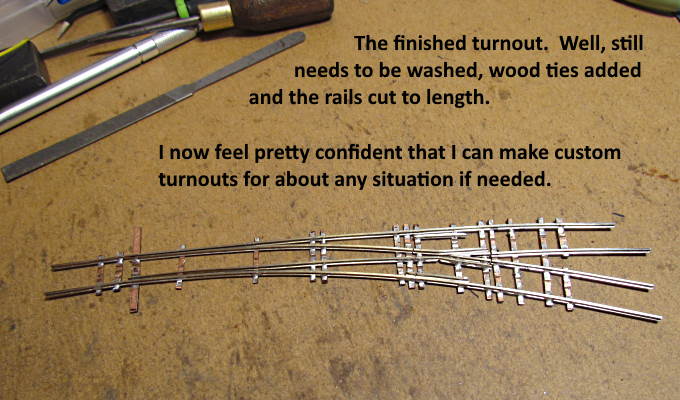
In this part I'll build the turnout using the template that was created above.
.
.
.
.
.
.
.
.
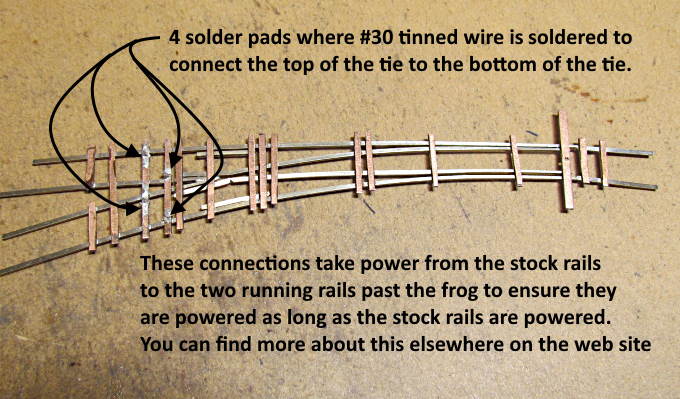
More about powering the two running rails past the frog ( HERE ).
.
=========================================
...........................On..............e..........Next Page If There Is One